User:LegoK9/Sandbox2: Difference between revisions
(→Grid) |
|||
| Line 145: | Line 145: | ||
!1 | !1 | ||
![[File:The Space Museum.jpg|100px]]<br>[[TV]]: ''[[The Space Museum (TV story)|The Space Museum]]'' | ![[File:The Space Museum.jpg|100px]]<br>[[TV]]: ''[[The Space Museum (TV story)|The Space Museum]]'' | ||
| | |||
| | |||
| | | | ||
| | | | ||
| Line 161: | Line 163: | ||
|[[File:Daughter of the Gods (audio story).jpg|100px]]<br>[[AUDIO]]: ''[[Daughter of the Gods (audio story)|Daughter of the Gods]]'' | |[[File:Daughter of the Gods (audio story).jpg|100px]]<br>[[AUDIO]]: ''[[Daughter of the Gods (audio story)|Daughter of the Gods]]'' | ||
! | ! | ||
| | |||
| | |||
| | | | ||
| | | | ||
| Line 177: | Line 181: | ||
|[[File:The Annihilators (audio story) 2nd edition.jpg|100px]]<br>[[AUDIO]]: ''[[The Annihilators (audio story)|The Annihilators]]'' | |[[File:The Annihilators (audio story) 2nd edition.jpg|100px]]<br>[[AUDIO]]: ''[[The Annihilators (audio story)|The Annihilators]]'' | ||
! | ! | ||
| | |||
| | |||
| | | | ||
| | | | ||
| Line 193: | Line 199: | ||
|[[File:Yearbook 92 Third Doctor Jo Four.jpg|100px]]<br>[[COMIC]]: ''[[Under Pressure (comic story)|Under Pressure]]'' | |[[File:Yearbook 92 Third Doctor Jo Four.jpg|100px]]<br>[[COMIC]]: ''[[Under Pressure (comic story)|Under Pressure]]'' | ||
! | ! | ||
| | |||
| | |||
| | | | ||
| | | | ||
| Line 206: | Line 214: | ||
|[[File:Divided Loyalties.jpg|100px]]<br>[[PROSE]]: ''[[Divided Loyalties (novel)|Divided Loyalties]]'' | |[[File:Divided Loyalties.jpg|100px]]<br>[[PROSE]]: ''[[Divided Loyalties (novel)|Divided Loyalties]]'' | ||
| | | | ||
| | |||
|[[File:File:Fourth Doctor and Fifth Doctor.jpg|100px]]<br>[[PROSE]]: ''[[Dead Man's Hand (comic story)|Dead Man's Hand]]'' | |||
! | |||
| | | | ||
| | | | ||
| | | | ||
| | | | ||
| Line 225: | Line 235: | ||
|[[File:PerisandthePisconParadox.jpg|100px]]<br>[[AUDIO]]: ''[[Peri and the Piscon Paradox (audio story)|Peri and the Piscon Paradox]]'' | |[[File:PerisandthePisconParadox.jpg|100px]]<br>[[AUDIO]]: ''[[Peri and the Piscon Paradox (audio story)|Peri and the Piscon Paradox]]'' | ||
![[File:Wrong Doctors cover.jpg|100px]]<br>[[AUDIO]]: ''[[The Wrong Doctors (audio story)|The Wrong Doctors]]'' | ![[File:Wrong Doctors cover.jpg|100px]]<br>[[AUDIO]]: ''[[The Wrong Doctors (audio story)|The Wrong Doctors]]'' | ||
| | |||
| | |||
| | | | ||
| | | | ||
| Line 241: | Line 253: | ||
|[[File:Six and Seven.jpg|100px]]<br>[[COMIC]]: ''[[Emperor of the Daleks! (comic story)|Emperor of the Daleks!]]'' | |[[File:Six and Seven.jpg|100px]]<br>[[COMIC]]: ''[[Emperor of the Daleks! (comic story)|Emperor of the Daleks!]]'' | ||
! | ! | ||
| | |||
| | |||
| | | | ||
| | | | ||
| Line 257: | Line 271: | ||
|[[File:BBC Script of the Film.jpg|100px]]<br>''[[The Script of the Film]]'' | |[[File:BBC Script of the Film.jpg|100px]]<br>''[[The Script of the Film]]'' | ||
! | ! | ||
| | |||
| | |||
| | | | ||
| | | | ||
| Line 273: | Line 289: | ||
|[[File:'Tales of the Dark Times' Episode 5.jpg|100px]]<br>[[COMIC]]: ''[[Tales of the Dark Times (comic story)|Tales of the Dark Times]]'' | |[[File:'Tales of the Dark Times' Episode 5.jpg|100px]]<br>[[COMIC]]: ''[[Tales of the Dark Times (comic story)|Tales of the Dark Times]]'' | ||
! | ! | ||
| | |||
| | |||
| | | | ||
| | | | ||
| Line 289: | Line 307: | ||
|Series 1-4 | |Series 1-4 | ||
! | ! | ||
| | |||
| | | | ||
| | | | ||
| Line 306: | Line 325: | ||
|[[File:10 & 11 to sleep....jpg|100px]]<br>[[COMIC]]: ''[[To Sleep, Perchance to Scream (comic story)|To Sleep, Perchance to Scream]]'' | |[[File:10 & 11 to sleep....jpg|100px]]<br>[[COMIC]]: ''[[To Sleep, Perchance to Scream (comic story)|To Sleep, Perchance to Scream]]'' | ||
! | ! | ||
| | |||
| | |||
| | | | ||
| | | | ||
| Line 313: | Line 334: | ||
| | | | ||
|[[File:The Lost Dimension part 6 cover B.jpeg|100px]]<br>[[TLD 6]] Cover B | |[[File:The Lost Dimension part 6 cover B.jpeg|100px]]<br>[[TLD 6]] Cover B | ||
| | |[[File:Past Doctors Petals.jpg|100px]]<br>[[COMIC]]: ''[[Petals (comic story)|Petals]]'' | ||
| | | | ||
|[[File:12D 3.02 Cover F.jpg|100px]]<br>[[12DY3 1]] WHOlanta Cover | |[[File:12D 3.02 Cover F.jpg|100px]]<br>[[12DY3 1]] WHOlanta Cover | ||
| Line 322: | Line 343: | ||
|[[File:Regeneration Impossible (audio story).jpg|100px]]<br>[[AUDIO]]: ''[[Regeneration Impossible (audio story)|Regeneration Impossible]]'' | |[[File:Regeneration Impossible (audio story).jpg|100px]]<br>[[AUDIO]]: ''[[Regeneration Impossible (audio story)|Regeneration Impossible]]'' | ||
! | ! | ||
| | |||
| | |||
| | | | ||
|- | |- | ||
| Line 338: | Line 361: | ||
|[[File:13D 12 Cover C.jpg|100px]]<br>[[13D 12]] Cover C | |[[File:13D 12 Cover C.jpg|100px]]<br>[[13D 12]] Cover C | ||
![[File:The Thirteenth Doctor contacts herselves.jpg|100px]]<br>[[TV]]: ''[[The Vanquishers (TV story)|The Vanquishers]]'' | ![[File:The Thirteenth Doctor contacts herselves.jpg|100px]]<br>[[TV]]: ''[[The Vanquishers (TV story)|The Vanquishers]]'' | ||
| | |||
| | |||
|- | |- | ||
!14 | !14 | ||
| Line 354: | Line 379: | ||
|[[File:The Regeneration Set.jpg|100px]]<br>The Regeneration Set | |[[File:The Regeneration Set.jpg|100px]]<br>The Regeneration Set | ||
! | ! | ||
| | |||
|- | |- | ||
!15 | !15 | ||
Revision as of 03:08, 10 March 2024
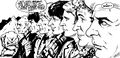
Three Doctors

Doctor Who Special (1973) illustration by Peter Brookes

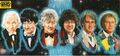
Four Doctors


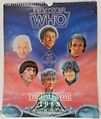
Five Doctors
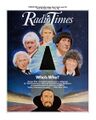
Radio Times The Five Doctors cover
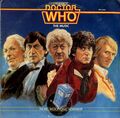
Doctor Who: The Music (1983)
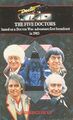
PROSE: The Five Doctors (1991)


.jpg)


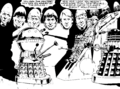
Six Doctors
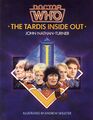
The TARDIS Inside Out (1985)
Poster by Alister Pearson (DWM 111, 1986)
1988 Doctor Who Calendar


Seven Doctors

25th anniversary poster (1988)
COMIC: Planet of the Dead (1988)
COMIC: Nemesis of the Daleks (1989)

Poster (DWM 148, 1989)

Poster by Alister Pearson (DWM 181, 1991)
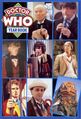
Doctor Who Yearbook 1992 (1991)
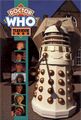
Doctor Who Yearbook 1993 (1992)
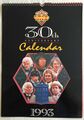
30th Anniversary Calendar (1992)
30th anniversary poster (1993)

Poster by Alister Pearson (DWM 200, 1993)

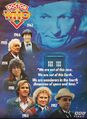
Doctor Who Yearbook 1994 (1993)
DWCC 14 (1993)

Doctor Who Yearbook 1996 (1995)
DWCC 27 (1994)
- The Doctors- 30 Years of Time Travel.jpg
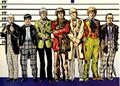
The Usual Suspects (DWM 277, 1999)


Eight Doctors
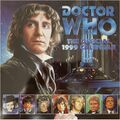
1999 Doctor Who Calendar


Nine Doctors
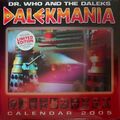
Dalekmania Calendar 2005 (2004)
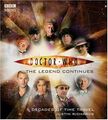
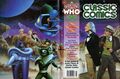
The Legend Continues (2005)


Ten Doctors


Eleven Doctors

POT 12 Cover RI

POT 12 Cover RE textless

50th anniversary wallpaper

50th anniversary wallpaper

10D 1 Hastings Cover (2014)
11D 1 Hastings Cover (2014)
Universes Beyond: Doctor Who (2023)


Twelve Doctors

10D 1 & 11D 2 Covers by Paul Hanley

12D 1 GameStop cover


Thirteen Doctors
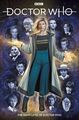
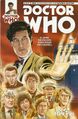
The Many Lives of Doctor Who Cover A
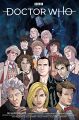
The Many Lives of Doctor Who Cover C
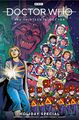
13DHS 2 Local Comic Shops Day Cover
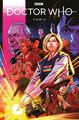
DW20 1 Doctor Who Comics Day Cover

Carolyn Edwards artwork


.jpg)


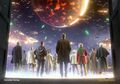
Fourteen Doctors

Promotional image

2024 Desk Calendar
.jpeg)

Fifteen Doctors

Promotional image
_3.jpg)

Grid

.jpg)

_2nd_edition.jpg)


.jpg)


.jpg)


.jpg)

.jpg)


.jpg)


- File:DWM 097.jpg
- File:DWM 116.jpg
- File:DWM issue407.jpg
- File:DalekEmpireprose-BFDE-Navbox.jpg
- File:DWM 448 at 500.jpg
- File:DWM 456.jpeg
- File:DWM 456.jpg
- File:DWM 448.jpg
- File:12 1 infinity.jpg
- File:The Target Storybook (anthology).jpg
- File:Daft Dimension 550.jpeg
- File:The Stuff of Nightmares (audio anthology).jpg
- File:The BBC Radio Episodes Collection 2022 CD cover.jpg
- File:Broken Memories (audio anthology).jpg
- File:6fiction1.jpg
- File:4fiction1.jpg
- File:Big Finish Insider vacation header.jpg
- File:Broken Memories textless cover.jpg
- File:Clive's Doctor Photographs 1.jpg
- File:Vworp Vworp 3 Cover B full.jpg
- File:VOR 180.jpg
- File:Broken Memories (audio anthology) New Cover.jpg
- File:The Stuff of Nightmares textless cover.jpg
- File:The BBC Radio Episodes Collection.jpg

11DY2 6 Cover A
.jpg)

.jpg)
.jpg)
.jpg)
_New_Cover.jpg)