The Keys of Marinus (TV story): Difference between revisions
Mini-mitch (talk | contribs) (→Cast) |
m (→Notes) |
||
| (327 intermediate revisions by 93 users not shown) | |||
| Line 1: | Line 1: | ||
{{title dab away}} | |||
{{real world}} | {{real world}} | ||
{{ | {{ImageLinkTV}} | ||
{{Infobox | {{Infobox Story SMW | ||
|image = keys title.jpg | |||
image=keys title.jpg | | |novelisation = Doctor Who and the Keys of Marinus (novelisation) | ||
novelisation=Doctor Who and the Keys of Marinus| | |series = [[Doctor Who television stories|''Doctor Who'' television stories]] | ||
series=[[Doctor Who television stories|''Doctor Who'' television stories]]| | |season number = Season 1 (Doctor Who 1963) | ||
season number= | |season serial number = 5 | ||
story number= 5| | |story number = 5 | ||
doctor= | |doctor = First Doctor | ||
companions= [[Susan | |companions = [[Susan Foreman|Susan]], [[Ian Chesterton|Ian]], [[Barbara Wright|Barbara]] | ||
enemy= | |featuring = | ||
|enemy = [[Yartek]] | |||
writer= | |setting = [[Marinus]] | ||
director= [[John Gorrie]] | | |writer = Terry Nation | ||
producer= [[Verity Lambert]] | | |director = [[John Gorrie]] | ||
broadcast date= | |producer = [[Verity Lambert]] | ||
|network= | |epcount = 6 | ||
format= 6x25-minute episodes | | |broadcast date = 11 April - 16 May 1964 | ||
production code= [[List of production codes|E]] | | |network = BBC tv, BBC1 | ||
prev= Marco Polo (TV story)| | |format = 6x25-minute episodes | ||
next= The Aztecs (TV story)}} | |serial production code = [[List of production codes|E]] | ||
'''''The Keys of Marinus''''' was the fifth | |prev = Marco Polo (TV story) | ||
|next = The Aztecs (TV story) | |||
|clip = Why can't you see it? - The Keys Of Marinus - Doctor Who - BBC | |||
|thwr = 11 | |||
|thwr2 = 102 | |||
}} | |||
'''''The Keys of Marinus''''' was the fifth serial of [[Season 1 (Doctor Who 1963)|season 1]] of ''[[Doctor Who]]''. | |||
It | It was notable for its structure, in that it was one of several "travelling" [[serial]]s. Like ''[[Marco Polo (TV story)|Marco Polo]]'' before it, and ''[[The Chase (TV story)|The Chase]]'', ''[[The Daleks' Master Plan (TV story)|The Daleks' Master Plan]]'' and ''[[The Infinite Quest (TV story)|The Infinite Quest]]'' that followed it, ''Keys'' had the main cast moving to a different setting in almost every episode. It was also the first of 35 six-parters in ''Doctor Who'' (including the revival series' 6-part story [[Series 13 (Doctor Who 2005)|''Flux'']]). | ||
It also introduced the [[Voord]], the first in a long line of deliberate, but generally unsuccessful, attempts to find an enemy as popular as the [[Dalek]]s. | |||
Like | The third episode, "The Screaming Jungle", was the subject of the programme's first serious charge of plagiarism. [[Robert Gould]] had complained to [[Donald Wilson]] that the notion of a story about plant life in the dominant evolutionary position on a planet had been something he'd outlined to [[script editor]] [[David Whitaker]]. Whitaker was obliged to write a memo to Wilson on [[26 March (production)|26 March]] [[1964 (production)|1964]], in which he offered a detailed defence against Gould's charge. Whitaker's successful defence rested on the statement that [[Terry Nation]] had independently arrived at the use of hostile vegetation in "The Screaming Jungle", and that Gould's idea was derivative of ''[[The Day of the Triffids]]'', anyway. ([[REF]]: ''[[Doctor Who The Handbook: The First Doctor]]'') | ||
Like most other ''Doctor Who'' stories of its era, ''The Keys of Marinus'' had to find a way to incapacitate the TARDIS to solve the "why not leave?" problem. However, Nation then created the [[travel dial]]s and so had to separate the characters from them as well in order to solve the same problem. | |||
== Synopsis == | == Synopsis == | ||
The TARDIS arrives on the [[planet]] [[Marinus]] on an island of glass surrounded by a sea of acid. The travellers are forced by the elderly Arbitan to retrieve four of the five operating keys to a machine called the [[Conscience of Marinus]] | [[The Doctor's TARDIS|The TARDIS]] arrives on the [[planet]] [[Marinus]] on an island of glass surrounded by a [[sea]] of [[acid]]. The travellers are forced by the elderly [[Arbitan]] to retrieve four of the five operating keys to a machine called the [[Conscience of Marinus]] - a machine capable of influencing all minds on the planet - of which he is the keeper. These have been hidden in different locations around the planet to prevent them falling into the hands of the evil [[Yartek]] and his [[Voord]] warriors, who plan to seize the machine and use its originally benevolent mind-influencing power for their own sinister purposes. | ||
== Plot == | == Plot == | ||
=== The Sea of Death (1) === | === The Sea of Death (1) === | ||
[[File:keys 101.jpg|thumb|left|On the glass beach, inspecting the glass submarine | [[File:keys 101.jpg|thumb|left|On the glass beach, inspecting the glass submarine]] | ||
The [[First Doctor]] and his companions, [[Barbara Wright]], [[Ian Chesterton]] and [[Susan Foreman|Susan]], land on an island and find the beach is made of glass and the sea of acid. The latter is demonstrated when Susan tries to paddle in a rock pool. Barbara accidentally knocks one of Susan's shoes, which were placed on one of the rocks around the pool, into the "water" where it dissolves. Susan returns to [[The Doctor's TARDIS|the TARDIS]] for a new pair and is followed by a mysterious creature in a rubber suit. While Susan is gone, the Doctor, Ian and Barbara discover four glass submarines, one of which holds an empty rubber suit with a rip in one leg; it seems that the creature who wore the suit perished in its journey when the acid got inside. When Susan gets to the TARDIS, she finds footprints. She follows them to a tower looming in the distance. As she looks around, the mysterious creature waits around a corner to strike at her. Just before this happens, the wall revolves and eliminates the creature. | |||
Finding Susan is not at the TARDIS, the others go to explore the tower. They decide to split up. The Doctor is brought inside the tower through the spinning walls, as are Ian and Barbara. Meanwhile, Susan finds another of the mysterious creatures which, on the point of attacking her, is stabbed by a mysterious, monk-like figure, who then leaves. The Doctor and Barbara find Susan soon afterwards. | |||
Ian discovers one of these creatures fighting with the robed man and pulls the creature off him. The creature is thrown back against a wall during the struggle, a hidden panel opens and the creature plunges down a shaft straight into a pool of acid deep beneath the building. The man introduces himself as Arbitan and he takes Ian to reunite with the others. | |||
For seven centuries it was absolute, radiating its power around the planet and eliminating even | Arbitan explains that the creatures are called [[Voord]]s and that he is Keeper of the Conscience of Marinus, a vast [[computer]] developed two millennia earlier as a justice machine which kept law and order across the entire planet. For seven centuries it was absolute, radiating its power around the planet and eliminating even evil thoughts. Then a Voord named [[Yartek]] worked out how to resist its impulses and corrupted the system. Arbitan explains that the Conscience has now been upgraded to control the Voord again and needs to be activated. Years earlier he saved it from Voord control by separating the five keys that regulate it. The five keys are in different locations — one is in his possession but the others are scattered over Marinus. He suggests that the Doctor and his companions find them, as all his friends and family have failed to return from the effort. | ||
The Doctor refuses and leaves for the TARDIS. When he gets there finds | The Doctor refuses and leaves for the TARDIS. When he gets there he finds a force field around it. Arbitan says he has been forced to cut the travellers off from the TARDIS so they will find the keys for him. The Doctor and his companions return to the tower to discover that they are to be moved around the island using pre-set [[travel dial]]s. As the four teleport away using the dials, Arbitan is overcome and stabbed to death by a Voord that has gained access to the tower. When the travellers reach their destination they discover Barbara, who teleported first, has vanished, leaving only her travel dial, which has blood on it... | ||
=== The Velvet Web (2) === | === The Velvet Web (2) === | ||
[[File:keys 202.jpg|thumb|[[Barbara Wright|Barbara]] confronts the rulers of [[Morphoton]], the [[Morpho]].]]The Doctor, Susan and Ian search for Barbara on the other side of a set of double doors. As they open them an alarm goes off, accompanied by a blinding light. When they stop they see Barbara reclining on a chaise, her every need attended to as if she were a queen. She explains that as she was transported, she panicked and tore at her travel dial, scratching her wrist; the dial then fell off. One of the inhabitants, [[Altos]], says that they are in the city of [[Morphoton]], an advanced and pacific society. He impresses the travellers with the luxuries, advances and aesthetics of the city. Initially sceptical, the Doctor and Ian are won over by the generous hospitality and beneficence that the people bestow upon them. In the night a young slave-girl [[Sabetha]] places a small disc on the heads of the sleeping travellers. While Barbara sleeps, her disc falls off. The powerful hypnotic pulse (the | [[File:keys 202.jpg|thumb|[[Barbara Wright|Barbara]] confronts the rulers of [[Morphoton]], the [[Morpho (species)|Morpho]].]] | ||
The Doctor, Susan and Ian search for Barbara on the other side of a set of double doors. As they open them an alarm goes off, accompanied by a blinding light. When they stop they see Barbara reclining on a chaise, her every need being attended to, as if she were a queen. She explains that as she was transported, she panicked and tore at her travel dial, scratching her wrist; the dial then fell off. One of the inhabitants, [[Altos (The Keys of Marinus)|Altos]], says that they are in the city of [[Morphoton]], an advanced and pacific society. He impresses the travellers with the luxuries, advances and aesthetics of the city. Initially sceptical, the Doctor and Ian are won over by the generous hospitality and beneficence that the people bestow upon them. In the night, a young slave-girl, [[Sabetha]], places a small disc on the heads of the sleeping travellers. While Barbara sleeps, her disc falls off. The powerful hypnotic pulse (the Mesmeron) has no effect on her. Morphoton is governed by four brain creatures with hideous eyes on stalks, which communicate through their life-support machines. The [[Morpho (species)|Brains of Morphoton]] use [[hypnosis]] to control the entire city. They have outgrown their bodies, and the entire [[human]] population of the city is now subject to their will. | |||
When Barbara awakes, she sees the truth: the city is a place of dirt and squalor. She disturbs her fellow travellers with her assessment, claiming that what appears luxurious is squalid. When Susan shows her new dress, | When Barbara awakes, she sees the truth: the city is a place of dirt and squalor. She disturbs her fellow travellers with her assessment, claiming that what appears luxurious is squalid. The Doctor and Ian offer her a drink of what they perceive as a goblet of fresh [[fruit juice]], but Barbara rejects it in disgust, seeing it for what it truly is; a dirty China [[mug]] full of stagnant [[water]]. When Susan shows her new dress, Barbara says it is just dirty rags. All this fuss attracting the attention of the guards, Barbara is taken from her friends but escapes from the clutches of Altos. She finds her way into the dungeons and meets with Sabetha. Barbara [[deduce]]s Sabetha is Arbitan's missing daughter; she is wearing one of the Keys of Marinus about her neck. | ||
Meanwhile the Doctor and Ian are taken to what appears to be a state-of-the-art laboratory, but is just an empty room and the so-called scientific instruments contained within are just old | Meanwhile, the Doctor and Ian are taken to what appears to be a state-of-the-art laboratory, but it is just an empty room and the so-called scientific instruments contained within are just old mugs and plates. Barbara tries to break Sabetha's conditioning but fails. Altos comes to take Sabetha away as per the Brains of Morphoton order and stops Barbara's escape. Sabetha knocks out Altos. Barbara leaves, promising Sabetha she will return for her. As Barbara prowls the corridors, she comes across Ian, whom she embraces. As they talk, she realises that the Brains of Morphoton now control him. They will punish Sabetha, make Susan take her place, put Ian to work, and make the Doctor work in the lab. Ian takes Barbara to the Brains of Morphoton, who order Ian to kill her. He begins to strangle Barbara, but she breaks free and smashes the control room and life support systems. The Brains die, and all the human subjects of the city are freed with their original memories returned. They start to destroy the city. Altos remembers he too was sent to the city by Arbitan, and he and Sabetha decide to join the Doctor and his friends on their quest. | ||
The six now split up. The Doctor goes ahead to find the final key in the city of [[Millennius]], while the others venture to find the second key in the next destination. Susan arrives first, wanting to avoid a long goodbye with her grandfather, but soon her ears are deafened by a growing screeching. | The six now split up. The Doctor goes ahead to find the final key in the city of [[Millennius]], while the others venture to find the second key in the next destination. Susan arrives first, wanting to avoid a long goodbye with her grandfather, but soon her ears are deafened by a growing screeching. | ||
=== The Screaming Jungle (3) === | === The Screaming Jungle (3) === | ||
[[File:keys 301.jpg|left|thumb|[[Barbara Wright|Barbara]] is captured by [[Darrius]]]]The next location for the five is a dangerous, screaming jungle, which has a particularly debilitating effect on Susan. In the jungle is an ancient temple. Ian finds an archway but it is overgrown with the copious flora. While Ian and | [[File:keys 301.jpg|left|thumb|[[Barbara Wright|Barbara]] is captured by [[Darrius]].]] | ||
The next location for the five is a dangerous, screaming jungle, which has a particularly debilitating effect on Susan. In the jungle is an ancient temple. Ian finds an archway but it is overgrown with the copious flora. While Ian, Sabetha and Altos look for another entry, the flora reaches out to grab Susan. Even though Ian instructed Barbara not to go into the temple, she finds that the flora can be moved easily. She walks down the passage where she finds a statue — which to her surprise has the key propped on the top. | |||
However when Barbara takes the key, the statue holds onto her and the wall reverses, trapping her. Her companions decide that if she were in real trouble she would use her | However, when Barbara takes the key, the statue holds onto her and the wall reverses, trapping her. Her companions decide that if she were in real trouble she would use her travel dial to escape, but Ian is sceptical and wants to ensure her safety. He tells the others to go on while he stays to rescue Barbara. As they go, Sabetha realises that the key is a fake; it is shorter than the other one. This gives Ian more reason to stay on. Once they are gone Ian replicates Barbara's movements and is likewise trapped. He finds Barbara in a large, [[Booby trap|booby-trapped]] hall. Barbara saves his life by shouting as a statue brings its axe down where he was standing. They find doors which need a metal bar to open. Ian finds a bar, but this is also a trap and brings prison walls down around him. Barbara is the victim of a trap when she walks through the doors that have magically opened and is trapped in a net as the dagger-filled roof lowers itself on her. | ||
In the temple is an aged and dying scientist, [[Darrius]]. He stops the roof to save Barbara. He | In the temple is an aged and dying scientist, [[Darrius]], who wears a robe similar to Arbitan's. He stops the roof to save Barbara. He suspects she may be a Voord. Doubtful she has been sent from Marinus, he takes her time dial to inspect. Ian, who has escaped from his prison, finds them just in time to save Darrius from a creeper. The weak, old man explains the traps of the temple are for the Voord; he too is a friend of Arbitan. Before dying, he tells Ian and Barbara the key is hidden in "D-E-3-O-2" and points to a door. Upon entering the next room, they find it is a laboratory. Their attention is drawn to a [[safe]] on one of the lab benches, which has letters and numbers on the dial. Ian thinks DE3O2 could be the combination and tries it, but the safe remains locked. He tries a second time, treating the "3" and "2" as the number of dial turns, but again the safe fails to open. Ian and Barbara come to the conclusion that Darrius may not have been referring to the safe at all, and search the room. As they do so, Ian finds Darrius's research on mutating flora with a growth accelerator and increasing the rate of nature. As night falls, the screaming of the jungle starts and tree branches enter the laboratory to destroy the equipment. Ian realises that the letters and numbers are chemical symbols. The two barely retrieve the key from a jar labelled DE3O2 before the vegetation overruns the room. Jumping to the next location, they find it bitterly, paralysingly cold. | ||
=== The Snows of Terror (4) === | === The Snows of Terror (4) === | ||
[[File:keys 401.jpg|right|thumb|[[Barbara Wright|Barbara]] is left alone with the dangerous [[Vasor]]]]Ian and Barbara | [[File:keys 401.jpg|right|thumb|[[Barbara Wright|Barbara]] is left alone with the dangerous [[Vasor]].]] | ||
Ian and Barbara have teleported to an icy wasteland. Unable to move in the crippling cold, they pass out. They wake to a suspicious trapper, [[Vasor]], who brought them back to his hut after Altos forced him to help save them. He also reveals that he saw two girls, who they work out are Susan and Sabetha, in a nearby cave but would not risk his life to save them. Ian offers to go and trades his dial for some of Vasor's furs. He gives him a lantern and a bag, leaving Barbara alone with Vasor. As she clears away dishes, she finds the chain that Sabetha was wearing, along with four travel dials, in a drawer. Vasor sees her looking and tells Barbara that he left the two girls to die, and that this is his plan for Ian, too. He then attacks Barbara. | |||
In the wastes Ian finds Altos, bound and abandoned. Altos tells him Vasor is to blame. | In the wastes, Ian finds Altos, bound and abandoned. Altos tells him Vasor is to blame. He inspects the bag Ian is carrying, revealing that it is full of raw meat. Vasor clearly hoped that it would attract the attention of the wolves. Ian throws the bag away and they return to the trapper's hut; confronting him before he can attack Barbara. They order him to reveal the stolen keys in his possession and take them to the caves where he abandoned Sabetha and Susan. Vasor refuses, claiming there are demons in the cave, but the two men force him. | ||
The two girls have searched the icy caves themselves and uncovered a block of ice connected to piping | The two girls have searched the icy caves themselves and have uncovered a block of ice connected to piping. It is protected by [[Ice Soldier]]s, seemingly statues. As they run from the statues, they meet their friends, who have crossed a rickety [[rope bridge]]. In revenge, Vasor unties one end of the bridge, trapping them on the other side. While Ian and Altos make a bridge of tree trunks to cross the chasm, they find the next key frozen in the block of ice. They remove the key by turning a dial on one of the pipes, which releases heat from a [[volcanic spring]]. This also revives the Ice Soldiers, who chase after the travellers to regain their key. Susan bravely crawls across the wobbly trunks over the chasm and reattaches the bridge. They flee to the trapper's cottage to retrieve their stolen dials. Before they use them, however, Vasor grabs Susan and forces the travellers to fight the soldiers. Vasor is killed by the Ice Soldiers as they break into his cabin and the travellers activate their travel dials. | ||
In the next location, Ian discovers the key in a display case, with a dead man lying on the floor nearby. Soon Ian himself is knocked out by a man who steals the key. Before he leaves, the man frames Ian for the murder of the mutilated body by placing the bludgeon in his hand. | In the next location, Ian discovers the key in a display case, with a dead man lying on the floor nearby. Soon Ian himself is knocked out by a man who steals the key. Before he leaves, the man frames Ian for the murder of the mutilated body by placing the bludgeon in his hand. | ||
=== Sentence of Death (5) === | === Sentence of Death (5) === | ||
[[File:keys 501.jpg|left|thumb|The [[First Doctor|Doctor]] defends [[Ian Chesterton|Ian]]]]When | [[File:keys 501.jpg|left|thumb|The [[First Doctor|Doctor]] defends [[Ian Chesterton|Ian]].]] | ||
When he wakes, Ian finds himself accused of the murder of [[Eprin]], a friend of Altos who discovered the key shortly before his death. With the key having disappeared, Ian is also accused of theft. In the city of Millennius, the legal system is "guilty until proven innocent". In other words: Ian is ''already'' guilty of the crimes of which he is accused, and the sentence will be death unless he is found to be innocent by the court of Millennius. It is up to the defence to prove Ian's innocence beyond reasonable doubt. The other travellers are reunited before Ian's trial, at which the Doctor returns and agrees to serve as defence counsel. He gets a postponement for two days while he gathers evidence and uses the time to work out what really happened to Eprin. He [[deduce]]s that the relief guard, [[Aydan]], is the one who attacked Ian and stole the key. | |||
During the trial the Doctor calls Sabetha as a witness. He tricks Aydan into confessing by claiming that one of the | To find evidence, Barbara and Susan go to the apartment of Aydan and talk to his wife, [[Kala (The Keys of Marinus)|Kala]], who gives away nothing. When Aydan returns home, he is angry with the women and, after nearly giving away that he stole the key, orders Barbara and Susan to leave. Outside in the corridor, they hear a loud slap and a scream of pain from Kala; Aydan has obviously hit her across the face. | ||
During the trial, the Doctor calls Sabetha as a witness. He tricks Aydan into confessing by claiming that one of the already recovered keys is the one that they found in Aydan's hiding place. Aydan confesses but is shot and killed by an unseen person before he can implicate anyone else. As the Doctor sums up, Barbara, Sabetha and Altos are taken out of the trial by [[Larn]]. They get a telephone call which Barbara answers. It is Susan, who says that the murderers have kidnapped her and they are going to kill her if the trio don't stop investigating... | |||
=== The Keys of Marinus (6) === | === The Keys of Marinus (6) === | ||
Altos, Barbara, and Sabetha decide not to tell the Doctor of Susan's disappearance and to visit Kala to see if she has any information on who might be connected to her husband's death and Susan's kidnapping. She says she can't help them and breaks down in tears | Altos, Barbara, and Sabetha decide not to tell the Doctor of Susan's disappearance and to visit Kala to see if she has any information on who might be connected to her husband's death and Susan's kidnapping. She says she can't help them and breaks down in tears but begins laughing when the trio leave. Susan is bound and gagged in another room. Kala takes a phone call from someone saying that Ian has been sentenced and Susan can be killed. The trio realise it must be Kala who has taken Susan hostage, as she had talked of the call they got from Susan without any of them having mentioned it during their visit. They return before Kala kills Susan, as she did her own husband with a hidden gun, and the plot is uncovered. Reunited with the Doctor, they learn that Kala has admitted her part in the crimes but has sworn that she was working with Ian. They must discover her true accomplice to prove Ian did not kill Eprin. Susan remembers that when Kala was on the phone; the man said he would pick up the key later that night. The Doctor and the officials of Millenius wait where the Doctor has deduced the key is being kept — in the mace used as evidence in court. The man trying to sneak it away is [[Eyesen]], the Court Prosecutor. Ian is freed and the trio return to Arbitan. | ||
[[File:keys 601.jpg|thumb|[[Yartek]] obtains the final key]] Altos and Sabetha have travelled ahead with all but the last key. They do not know that Arbitan has been killed and that Yartek now rules Marinus. Yartek has seized the first four keys and holds Altos and Sabetha prisoner, awaiting the fifth and final one. The Doctor and his companions arrive and fail to find Altos and Sabetha. They split up, Ian and Susan going to find Arbitan with the key and Barbara and the Doctor going to find Altos and Sabetha. | [[File:keys 601.jpg|thumb|[[Yartek]] (right) obtains the final key.]] | ||
Altos and Sabetha have travelled ahead with all but the last key. They do not know that Arbitan has been killed and that Yartek now rules Marinus. Yartek has seized the first four keys and holds Altos and Sabetha prisoner, awaiting the fifth and final one. Yartek attempts to coerce Altos into revealing the location of the last key, but he refuses to give in. Yartek then exploits Sabetha, with whom Altos is in love, threatening to kill her if he doesn't comply. Altos reveals that the last key is with the Doctor, much to Sabetha's despair. Yartek then imprisons both of them. The Doctor and his companions arrive and fail to find Altos and Sabetha. They split up, Ian and Susan going to find Arbitan with the key and Barbara and the Doctor going to find Altos and Sabetha. | |||
Ian and Susan find | Ian and Susan find someone who appears to be Arbitan, but his face is hidden beneath the hood of his cowled robe; he warns they must not come near him as he has a dreadful disfiguring disease caused by a power surge from the Conscience. However, this is actually a disguised Yartek. Ian gives "Arbitan" the key and goes to get the Doctor. He finds him releasing Altos and Sabetha, who tell them the Voords now reign on Marinus. Ian says he gave Yartek the false key from the Screaming Jungle. Although pleased, Sabetha and Altos warn the travellers that inserting the false key will cause the Conscience to explode. The travellers run. When Yartek places the false key into the Conscience, the machine duly explodes and he is killed along with the occupying Voords. The Doctor and his friends flee the tower with Altos and Sabetha before the growing blaze overtakes the ancient structure. | ||
With the Conscience destroyed, the people of Marinus must now find their own answers | With the Conscience destroyed, the people of Marinus must now find their own answers — which the Doctor believes is a good thing: man was not meant to be ruled by machines. The travellers say goodbye to Altos and Sabetha, who say they will start a new life together in Millennius. | ||
== Cast == | == Cast == | ||
* [[First Doctor| | * [[First Doctor|Dr. Who]] - [[William Hartnell]] | ||
* [[Ian Chesterton]] - [[William Russell]] | * [[Ian Chesterton]] - [[William Russell]] | ||
* [[Barbara Wright]] - [[Jacqueline Hill]] | * [[Barbara Wright]] - [[Jacqueline Hill]] | ||
* [[Susan Foreman]] - [[Carole Ann Ford]] | * [[Susan Foreman]] - [[Carole Ann Ford]] | ||
* [[Arbitan]] - [[George Coulouris]] | * [[Arbitan]] - [[George Coulouris]] | ||
* [[Voord]]s - [[Martin Cort]], [[Peter Stenson]], [[Gordon Wales]] | * [[Voord]]s - [[Martin Cort]], [[Peter Stenson]], [[Gordon Wales]] | ||
* [[Altos]] - [[Robin Phillips]] | * [[Altos (The Keys of Marinus)|Altos]] - [[Robin Phillips]] | ||
* [[Sabetha]] - [[Katherine Schofield]] | * [[Sabetha]] - [[Katherine Schofield|Katharine Schofield]] | ||
* Voice of [[Morpho]] - [[Heron Carvic]] | * Voice of [[Morpho (species)|Morpho]] - [[Heron Carvic]] | ||
* Warrior - [[Martin Cort]] | * [[Warrior (The Keys of Marinus)|Warrior]] - [[Martin Cort]] | ||
* [[Darrius]] - [[Edmund Warwick]] | * [[Darrius]] - [[Edmund Warwick]] | ||
* [[Vasor]] - [[Francis De Wolff]] | * [[Vasor]] - [[Francis De Wolff]] | ||
| Line 103: | Line 117: | ||
* [[Larn]] - [[Michael Allaby]] | * [[Larn]] - [[Michael Allaby]] | ||
* [[Senior judge (The Keys of Marinus)|Senior judge]] - [[Raf De La Torre]] | * [[Senior judge (The Keys of Marinus)|Senior judge]] - [[Raf De La Torre]] | ||
* First judge - [[Alan James]] | * [[First judge]] - [[Alan James]] | ||
* Second judge - [[Peter Stenson]] | * [[Second judge]] - [[Peter Stenson]] | ||
* [[Kala]] - [[Fiona Walker]] | * [[Kala (The Keys of Marinus)|Kala]] - [[Fiona Walker]] | ||
* [[Aydan]] - [[Martin Cort]] | * [[Aydan]] - [[Martin Cort]] | ||
* [[Eyesen]] - [[Donald Pickering]] | * [[Eyesen]] - [[Donald Pickering]] | ||
* Guard - [[Alan James]] | * [[Guard (The Keys of Marinus)|Guard]] - [[Alan James]] | ||
* [[Yartek]] - [[Stephen Dartnell]] | |||
=== Uncredited cast === | |||
* Double for [[Arbitan]] - [[John Berrbohm]] | |||
* Ladies in Waiting - [[Faith Hines]], [[Daphne Thomas]], [[Veronica Thornton]], [[Sharon Young]], [[Lynda Taylor]] | |||
* Idol - [[Bob Haddow]] | |||
* [[Eprin]] - [[Dougie Dean]] | |||
* Citizens of [[Millennius]] - [[Veronica Thornton]], [[Valerie Stanton]], [[David Kramer]], [[Adrian Drotsky]], [[Leslie Shannon]], [[Patricia Anne]], [[Billy Dean]], [[Tony Lambden]], [[Brian Bates]], [[Monique Lewis]], [[Heidi Lane]], [[Rosina Stewart]], [[Cecilia Johnson]], [[Jill Howard]], [[Yvonne Howard]], [[Tony Hennessey]], [[Johnny Crawford]], [[Leslie Wilkinson]], [[Desmond Cullum-Jones]], [[Perrin Lewis]] (all [[DWM 310]]) | |||
== Crew == | == Crew == | ||
* [[Associate Producer]] - [[Mervyn Pinfield]] | * [[Associate Producer]] - [[Mervyn Pinfield]] | ||
* [[Costumes]] - [[Daphne Dare]] | * [[Costumes]] - [[Daphne Dare]] (Credited in episode 6) | ||
* [[Designer (crew)|Designer]] - [[Raymond P. Cusick]] | |||
* [[Director (crew)|Director]] - [[John Gorrie]] | |||
* [[Incidental Music]] - [[Norman Kay]] | * [[Incidental Music]] - [[Norman Kay]] | ||
* [[Make-Up]] - [[Jill Summers]] | * [[Make-Up]] - [[Jill Summers]] (Credited in episode 6) | ||
* [[ | * [[Producer]] - [[Verity Lambert]] | ||
* [[ | * [[Story Editor]] - [[David Whitaker]] | ||
* [[ | * [[Doctor Who theme|Title Music]] - [[Ron Grainer]] with the [[BBC Radiophonic Workshop]] | ||
* [[Writer]] - [[Terry Nation]] | |||
* [[ | |||
== | === Uncredited crew === | ||
* [[Theme Arrangement]] - [[Delia Derbyshire]]<ref>[[INFO]]: "[[The Forest of Fear]]"</ref> | |||
* [[Grams operator|Grams Operator]] - [[Pat Heigham]] ([[INFO]]: ''The Keys of Marinus'') | |||
* [[Assistant Floor Manager]] - [[Timothy Combe]] ([[INFO]]: ''[[The Reign of Terror (TV story)|The Reign of Terror]]'') | |||
* [[Studio Lighting]] - [[Peter Murray]]<ref name="BBC Official Site">[http://www.bbc.co.uk/doctorwho/classic/episodeguide/keysofmarinus/detail.shtml BBC Official Site]</ref> | |||
* [[Studio Sound]] - [[Jack Brummitt]], [[Tony Milton]]<ref name="BBC Official Site"/> | |||
* [[Production Assistant]]s - [[David Conroy]], [[Penny Joy]]<ref name="BBC Official Site"/> | |||
== Worldbuilding == | |||
* The Doctor claims to have met [[Pyrrho]], the founder of scepticism. | * The Doctor claims to have met [[Pyrrho]], the founder of scepticism. | ||
* The Doctor eats a [[pomegranate]]. | * The Doctor eats what he thinks are [[chocolate truffle|truffles]] and sniffs a [[pomegranate]]. | ||
* Barbara eats [[grape]]s. | |||
== | == Notes == | ||
* All episodes exist as [[16mm telerecordings]]. | * All episodes exist as [[16mm telerecordings]]. | ||
* Negative film prints of all episodes were recovered from [[BBC Enterprises]] in | * The working title of this story was ''Planet Marinus''. | ||
* An | * Negative film prints of all episodes were recovered from [[BBC Enterprises]] in 1978. | ||
* Terry Nation wrote this story as a replacement to ''[[The Red Fort (TV story)|The Red Fort]]'', a story that was to be set during the [[Indian Mutiny]]. | * An {{w|Arabic language|Arabic}} print of "The Sea of Death" is held by the [[BBC]]. | ||
* William Hartnell does not appear in "The Screaming Jungle" | * [[Terry Nation]] wrote this story as a replacement to ''[[The Red Fort (TV story)|The Red Fort]]'', a story that was to be set during the [[Indian Mutiny]]. | ||
* This story contains a controversial scene in which it appears that [[Vasor]] attempts to rape Barbara. | * This is the first story to be written by a returning writer. | ||
* [[Darrius]] is never referred to by name | * [[Terry Nation]] developed more background in his script than was made explicit on-screen in the finished production. The Voord were alien invaders who took advantage of the people of Marinus, rendered vulnerable by the pacifying effects of the Conscience. The Conscience was then deactivated to allow the Marinians to fight the Voord, and over the centuries, the time they spent on Marinus meant that the Voord, too, could now be affected by the machine. Therefore, Arbitan dispatched agents to recover the keys which would reactivate the Conscience and allow him to finally defeat the invaders. | ||
* [[William Hartnell]] does not appear in the third and fourth episodes, "The Screaming Jungle" and "The Snows of Terror", as he was on holiday during the weeks they were recorded. Hartnell had been working non-stop from October to April on ''Doctor Who'' episodes and needed a well-deserved break. When he returns in "Sentence of Death" he is more energetic and refreshed. This was the first time the lead actor had been absent in this way; nonetheless, Hartnell receives an on-screen credit for these episodes, as per his contract. His co-stars also took time off for holiday during the production of upcoming stories. | |||
* Initially it was hoped that the Voords would catch on with young viewers in the same way the [[Dalek]]s had inspired [[Dalekmania]], with toys, books and other merchandise. This did not come to pass. | * This story contains a controversial scene in which it appears that [[Vasor]] attempts to [[rape]] Barbara — a sequence which, surprisingly, did not prevent the BBC Video release in 1999 from being granted a "U" certificate. | ||
* Although the Voords are the main villains of the story, they appear only in the first and last episodes. | * [[Darrius]] is never referred to by name in the on-screen dialogue of "The Screaming Jungle"; his name appears only on the closing credits. The character is also nameless in [[Philip Hinchcliffe]]'s [[Doctor Who and the Keys of Marinus (novelisation)|novelisation]], being referred to simply as "the old man". | ||
* Initially, it was hoped that the Voords would catch on with young viewers in the same way the [[Dalek]]s had inspired [[Dalekmania]], with toys, books and other merchandise. This did not come to pass. | |||
* "The Sea of Death" (the first episode of this story) begins the longest continuous streak of currently "watchable" (as opposed to simply listenable) episodes of ''Doctor Who'' from William Hartnell's tenure, with 44 episodes from here until "The Lion" (the first episode of ''[[The Crusade (TV story)|The Crusade]]'') inclusive, all either surviving or officially animated. This was the longest continuous streak of "watchable" episodes of all 60s ''Doctor Who'' until the release of the animated version of The Abominable Snowmen in 2022. | |||
* Although the Voords are the main villains of the story, they appear only in the first and last episodes, "The Sea of Death" and "The Keys of Marinus". The Voords would remain one of the most mysterious of the Doctor's adversaries, as little is revealed about them on-screen. However, the comic story ''[[The World Shapers (comic story)|The World Shapers]]'' and the audio story ''[[Domain of the Voord (audio story)|Domain of the Voord]]'' would expand greatly on both their origins, present culture, and possible [[Cyberman|fate]]. | |||
* This is the first story to feature a model TARDIS materialisation. | * This is the first story to feature a model TARDIS materialisation. | ||
* Small parts of the original film negative for this story were damaged. For the 2009 DVD release, computer imagery was used to restore these scenes. An example of this is in episode | * Small parts of the original film negative for this story were damaged. For the 2009 DVD release, computer imagery was used to restore these scenes. An example of this is in the second episode, "The Velvet Web", when Barbara sees Altos in the "real world" (at 0:12:24 on the DVD); according to the text commentary, the first few seconds of the scene had to be recreated via computers to bypass the damaged part of the negative. The fourth episode, "The Snows of Terror", used an off-air soundtrack recording and a short piece of recycled footage to recreate a short piece of dialogue lost from the master negative; on the DVD, this occurs at 0:14:08. | ||
* Between episodes | * Between the second and third episodes, "The Velvet Web" and "The Screaming Jungle", the BBC launched [[BBC Two]], a second network. "The Screaming Jungle" was, therefore, the first episode to be aired under the branding [[BBC1]]. | ||
* The basic format of the story | * The second episode, "The Velvet Web", is the first to have the episode title displayed over the background of the opening sequence, something which would recur on and off during the rest of the black-and-white era, especially during the Troughton years, and would become regular as soon as the programme switched to colour production in 1970. | ||
* In episode | * The basic format of the story — six separate storylines connected by a quest to retrieve a series of items — was later reused for the season-long [[Key to Time]] story arc of [[Season 16 (Doctor Who 1963)|season 16]]. | ||
* In the fifth episode, "Sentence of Death", the Doctor is heard to stumble over the phrase, "I can't prove at this very moment", saying initially, "I can't ''improve'' at this very moment." Although [[William Hartnell]] was notorious for stumbling over dialogue (which, due to time and budget restrictions preventing retakes, was often left in the broadcasts), this isn't one of those occasions. According to the DVD trivia track, [[Terry Nation]] wrote this stumble into the script intentionally, which Hartnell delivered accurately. | |||
* This is one of the stories selected to be shown as part of [[BSB's Doctor Who Weekend]] in September 1990. | * This is one of the stories selected to be shown as part of [[BSB's Doctor Who Weekend]] in September 1990. | ||
* This is one of only two televised ''Doctor Who'' stories by Terry Nation not to feature the Daleks. The other | * This is one of only two televised ''Doctor Who'' stories by [[Terry Nation]] not to feature the Daleks. The other is ''[[The Android Invasion (TV story)|The Android Invasion]]'', which aired more than a decade later. | ||
* [[ | * It is never stated when this story is set, although the ''[[Doctor Who Magazine]]'' comic, ''[[The World Shapers (comic story)|The World Shapers]]'', seems to date this to around 5000000 BC. | ||
* [[ | * In the original script, it was revealed that the reason the Doctor and Susan had been on Earth in 1963 at the start of ''[[An Unearthly Child (TV story)|An Unearthly Child]]'' was because the Doctor had visited the British Broadcasting Corporation to get help repairing the colour scanner in the TARDIS, which was showing only black-and-white images. He had been in such a bad mood upon his return to the TARDIS because the BBC had been "infernally secretive"! | ||
* [[ | * Originally, the Doctor accompanied Susan and Sabetha during the quest, and his ring would have been found in Vasor's hut along with the travel dials and Conscience keys. | ||
* Altos originally appeared only in the second episode, "The Velvet Web", but his role was expanded to compensate for [[William Hartnell]]'s absence. | |||
* Director [[John Gorrie]] was officially a member of the BBC's Plays department but was hired by [[Verity Lambert]] while he was on loan to the Serials department. He was reluctant to work on ''Doctor Who'' because he didn't like or understand science-fiction but Lambert insisted he was to do it. | |||
* According to [[Jonathan Sothcott]] on the DVD commentary for ''[[Dr. Who and the Daleks (theatrical film)|Dr. Who and the Daleks]]'', [[Milton Subotsky]] considered adapting this serial into another movie. | |||
* [[John Gorrie]] recalled in the DVD commentary that he cast [[Fiona Walker]] in this serial after he received a letter from her saying "I am an actress, I am a good actress, I am too good an actress not to be working so I hope you can do something about this". He found her letter amusing and thus offered her the role of Kala. | |||
* [[Terry Nation]] used many existing words for location and character names in the story: Marinus originated from the Latin word ''marinus'', meaning "of the sea"; Morphoton is based on Morpheus, the Greek god of dreams; Millennius came from the term ''millennium'', for a thousand years; and Arbitan is based on the Latin word ''Arbiter'', meaning a judge. | |||
* Even though [[John Gorrie]] was unhappy with the quality of the scripts, he agreed to direct the serial to advance his career. | |||
* [[Carole Ann Ford]] was displeased with the portrayal of Susan in the story, as she felt that she was written like a child - describing her character as "pathetic". | |||
* [[John Gorrie]] immediately thought of [[George Coulouris]] for Arbitan while reading the script, and was delighted when he accepted the part, describing Coulouris as his "hero". | |||
* [[John Gorrie]] cast [[Henley Thomas]] as Tarron, as the two were old friends who had previously worked together. | |||
* [[John Gorrie]] felt that his friend [[Robin Phillips]]' handsome looks fit the role of Altos accurately. | |||
* [[John Gorrie]] wanted the character of Sabetha to resemble a princess and selected former drama student [[Katharine Schofield]]. | |||
* Nineteen new sound effects were recorded for the serial by [[Brian Hodgson]] of the [[BBC Radiophonic Workshop]], including the sounds of the Conscience of Marinus and the clocks in Millennius. | |||
* Designer [[Daphne Dare]] based the design of the Voord on a rubber wetsuit, while the heads were created using vulcanised rubber by prop builders Jack and John Lovell. | |||
* The submersible props and the Conscience machine were designed by [[Shawcraft Models]]. | |||
* [[Raymond Cusick]] used leftover fibreglass to complete the design of the Conscience machine, as the budget was running low. | |||
* The moving vegetation in the third episode, "The Screaming Jungle", was constructed by Design and Display Ltd. | |||
* Jablite polystyrene was used to stimulate snow in the third and fourth episodes, "The Screaming Jungle" and "The Snows of Terror". | |||
* The tank-top worn by Susan in the serial was knitted by [[Carole Ann Ford]]'s mother. | |||
* For the shots of the wolves in the fourth episode, "The Snows of Terror", the BBC purchased 14 feet of film from the 1957 Russian thriller ''Seryy razboynik (The Grey Robber)'' from distributor Sovexport. | |||
* [[John Gorrie]] found the recording days difficult, due to the complexity of the show and the small size of the studio. | |||
* [[Carole Ann Ford]] recalled that the cast could "have a few more giggles" during rehearsals, as [[William Hartnell]]'s tendency to forget lines was time-consuming. | |||
* Starting with The Sea of Death, the credits changed from being left-aligned to the centre. | |||
* [[John Gorrie]] was originally just going to play a "splash" sound to signal that one of the Voords had fallen into an acid pit in the first story, but [[Raymond Cusick]] persuaded him that it wouldn't be clear enough what happened, and that there needed to be an actual effects shot. After seeing the less-than-convincing result, however, Cusick admitted that he should have left well enough alone. | |||
=== Influences === | |||
* Courtroom dramas. | |||
* 1930s serials. | |||
* Quest epics. | |||
* Celtic myth. | |||
* The ''[[Fireball XL5]]'' episode "The Hypnotic Sphere". | |||
* The Labours of [[Hercules]]. | |||
=== Ratings === | === Ratings === | ||
* The Sea of Death - 9.9 million viewers | * "The Sea of Death" - 9.9 million viewers | ||
* The Velvet Web - 9.4 million viewers | * "The Velvet Web" - 9.4 million viewers | ||
* The Screaming Jungle - 9.9 million viewers | * "The Screaming Jungle" - 9.9 million viewers | ||
* The Snows of Terror - 10.4 million viewers | * "The Snows of Terror" - 10.4 million viewers | ||
* Sentence of Death - 7.9 million viewers | * "Sentence of Death" - 7.9 million viewers | ||
* The Keys of Marinus - 6.9 million viewers | * "The Keys of Marinus" - 6.9 million viewers | ||
=== Myths === | === Myths === | ||
* Yartek's race is known as the Voord. ''(Although they are referred to as | * Yartek's race is known only as the Voord. ''(Although they are referred to as "Voord" in some of the dialogue, the term most often used is "Voords" and this is the name that appears in the closing credits)''. | ||
* The original ending was that Ian gave Yartek the proper key, but the machine took control of Yartek and all the Voords and made them good. ''(There is no evidence to support this)'' | |||
=== Filming locations === | === Filming locations === | ||
| Line 174: | Line 232: | ||
=== Production errors === | === Production errors === | ||
{{discontinuity}} | {{discontinuity}} | ||
* | * When Barbara first uses the wrist transporter in [[The Sea of Death]], Ian takes a step towards her and his left hand disappears when it goes behind the black split-screen effect. | ||
* When | * When a Voord falls through the pyramid revolving wall in "The Sea of Death", a stagehand can be seen briefly on the other side. | ||
* After the Doctor goes into the pyramid, | * After the Doctor goes into the pyramid, Ian’s leg appears on the lower right side of the screen just before the shot ends. This is because both consecutive scenes used the exact same section of wall, and William Russell’s arrival for his and Barbara’s scene came before the director switched camera. | ||
* The model used in place of | * In "The Sea of Death" when Barbara and Ian are talking about where the Doctor has gone, the faint shadow of the boom mic is visible on the wall behind Barbara. | ||
* The model used in place of a Voord falling to its doom into a pool of acid deep beneath the pyramid turns sideways as it falls, revealing that it is no more than a two-dimensional cardboard cut-out. | |||
* When Ian is first inside the pyramid, someone stumbles through the background. | * When Ian is first inside the pyramid, someone stumbles through the background. | ||
* While walking around the TARDIS force field in | * While walking around the TARDIS force field in "The Sea of Death", Susan can be seen walking in front of Ian and into the barrier with no ill-effects. | ||
* In | * In "The Velvet Web", while Susan is sleeping, a camera can be seen casting a shadow on her. | ||
* In "The Velvet Web", as the group are about to sleep in Morphoton, a boom microphone appears at the top of the shot; William Russell can clearly be seen glancing at it briefly. | |||
* In | * There is a camera wobble and audible thud as the camera bumps into the set while carrying out a tracking shot during the scene in "The Screaming Jungle" where Darrius is dying. | ||
* There is a camera wobble and audible thud as the camera bumps into the set while carrying out a tracking shot during the scene in | * Ian's extra weight on the rope bridge in "The Snows of Terror" causes the "cave wall" scenery, to which it is tethered, to bend. | ||
* Ian's extra weight on the rope bridge causes the "cave wall" scenery, to which it is tethered, to bend. | * In "The Snows of Terror", as the group enters the chamber with the key in the ice-block, the Ice Soldier to the left of the shot has his eyes open. He blinks several times before finally closing his eyes after everyone enters the room. | ||
* In | * In the final episode, "The Keys of Marinus", the Voord escorting Sabetha trips over his flippered feet and nearly pulls a sliding door off its track. | ||
* In episode | * The icicles are made of polystyrene — this is revealed by the unpainted end of one of the icicles that Ian uses to construct a bridge. | ||
* The icicles are made of polystyrene | * After the Doctor dematerialises from Arbitan's control room in "The Sea of Death", the shadow of his elbow remains on the wall next to the black drape. | ||
* After the Doctor dematerialises from Arbitan's control room in | * An inlay shot against a black background is used to create the appearance of teleportation. This technique is revealed by the appearance of the characters' shadows against a pillar after they have "teleported" — the shadows also reveal the actors scurrying off the set afterwards. | ||
* An inlay shot against a black background is used to create the appearance of teleportation. This technique is revealed by the appearance of the characters' shadows against a pillar after they have "teleported" | * Near the end of "The Sea of Death", when Arbitan is stabbed by a Voord, a small, almost-transparent triangle is visible whenever the Voord passes between the camera and Arbitan. | ||
* In "The Keys of Marinus", [[Stephen Dartnell]]'s (Yartek) eyes and mouth can be seen in a close-up of him while he's talking to Sabetha. | |||
* The model shot indicating the return to the island in "The Keys of Marinus" is clearly the exact same shot that opened the story, as the TARDIS is not visible on the beach. | |||
* When the Doctor is caught by a spinning wall trap outside the pyramid in "The Sea of Death", the hand of a stagehand is briefly visible on the left side of the wall as the trap activates. | |||
== Continuity == | == Continuity == | ||
* | * Ian is still wearing the costume given to him by [[Marco Polo]] in [[China|Cathay]] in [[1289]]. ([[TV]]: ''[[Marco Polo (TV story)|Marco Polo]]'') | ||
* The Doctor, Ian, Barbara and Susan once again encountered the Voord on [[Hydra (planet)|Hydra]] more than a century later. ([[AUDIO]]: ''[[Domain of the Voord (audio story)|Domain of the Voord]]'') | |||
* The Doctor also encountered the Voord on [[Kandalinga]] several million years later. ([[PROSE]]: ''[[The Fishmen of Kandalinga (short story)|The Fishmen of Kandalinga]]'') | |||
* | |||
== Home video and audio releases == | == Home video and audio releases == | ||
=== DVD | === DVD release === | ||
The DVD was released on | The DVD was released on [[21 September (releases)|21 September]] [[2009 (releases)|2009]] in the UK, with North American release occurring in [[January (releases)|January]] [[2010 (releases)|2010]]. As the first three stories are only available at present in ''[[The Beginning (DVD box set)|The Beginning]]'' box set, and ''[[Marco Polo (TV story)|Marco Polo]]'' remains a lost story, ''The Keys of Marinus'' stands as the earliest ''Doctor Who'' story currently available on its own. | ||
==== Special Features ==== | |||
* [[The Sets of Marinus]] - | * Commentary by [[William Russell]] ([[Ian Chesterton|Ian]]), [[Carole Ann Ford]] ([[Susan Foreman|Susan]]), [[John Gorrie]] (Director) and [[Raymond Cusick]] (Designer), moderated by [[Clayton Hickman]] | ||
* ''[[The Sets of Marinus (documentary)|The Sets of Marinus]]'' - Designer Raymond Cusick recalls his work on ''The Keys of Marinus'' | |||
* Cadet Sweets: {{'}}''[[Doctor Who and the Daleks (short story)|Doctor Who and the Daleks]]''{{'}} - Scans of the entire set of the [[Cadet Sweets]] cards, which features a mini ''[[Doctor Who]]'' story involving the [[Dalek]]s and the [[Voord]] (DVD/ROM - PC/Mac) | |||
* ''[[Radio Times]]'' Billings - Articles and listings from this story's original 1964 transmission (DVD-ROM - PC/Mac) | |||
* Production Information Subtitles | |||
* Photo Gallery | * Photo Gallery | ||
* | * Coming Soon Trailer - ''[[Dalek War (box set)|Dalek War]]'' | ||
* [[Easter Egg]]: 8 mm behind the scenes footage of [[Patrick Heigham]] and [[Jack Brummitt]]. To access this hidden feature, press left at Special Features in the PDF Materials section of the Special Features menu to illuminate the ''Doctor Who'' logo. | |||
* | |||
Rear Credits: | Rear Credits: | ||
| Line 226: | Line 280: | ||
Notes: | Notes: | ||
* Editing for DVD release completed by [[Doctor Who Restoration Team]]. | * Editing for the DVD release was completed by the [[Doctor Who Restoration Team]]. | ||
* The cover of the Region 2 version contains a spelling error that states "contains orginal black and white footage". | |||
<gallery hideaddbutton="true" > | <gallery position="center" captionalign="center" hideaddbutton="true"> | ||
File:Bbcdvd-thekeysofmarinus.jpg|Region 2 UK cover | File:Bbcdvd-thekeysofmarinus.jpg|Region 2 UK cover | ||
File:The Keys of Marinus DVD Australian cover.jpg|Region 4 Australian cover | File:The Keys of Marinus DVD Australian cover.jpg|Region 4 Australian cover | ||
| Line 234: | Line 289: | ||
</gallery> | </gallery> | ||
=== | === BritBox availability === | ||
This story | This story is available for streaming through [[BritBox]] ([[US]]) as part of Season 1 of ''Classic Doctor Who''. | ||
::[[UK]] Release: [[March]] [[1999]] / [[US]] Release: [[July]] | === VHS release === | ||
This story was released as ''Doctor Who: The Keys of Marinus''. | |||
::[[UK]] Release: [[March (releases)|March]] [[1999 (releases)|1999]] / [[US]] Release: [[July (releases)|July]] 1999 | |||
::PAL - [[BBC Video]] BBCV6671 (2 tapes) | ::PAL - [[BBC Video]] BBCV6671 (2 tapes) | ||
::NTSC - [[CBS/FOX Video]] 14263 (2 tapes) | ::NTSC - [[CBS/FOX Video]] 14263 (2 tapes) | ||
::NTSC - [[Warner Video]] E1383 (2 tapes) | ::NTSC - [[Warner Video]] E1383 (2 tapes) | ||
* Editing for VHS release completed by [[Doctor Who Restoration Team]]. | * Editing for the VHS release was completed by the [[Doctor Who Restoration Team]]. | ||
<gallery hideaddbutton="true" > | <gallery position="center" captionalign="center" hideaddbutton="true"> | ||
File:Keys of Marinus VHS UK cover.jpg|VHS | File:Keys of Marinus VHS UK cover.jpg|UK VHS cover | ||
File:The Keys of marinus australian vhs.jpg|Australian VHS cover | |||
File:The Keys of Marinus US VHS.jpg|US VHS cover | |||
</gallery> | </gallery> | ||
== Footnotes == | |||
{{reflist}} | |||
== External links == | == External links == | ||
* {{bbcepguideclassic|keysofmarinus/|The Keys of Marinus}} | * {{bbcepguideclassic|keysofmarinus/|The Keys of Marinus}} | ||
* {{dwrefguide|who_e.htm|The Keys of Marinus}} | * {{radiotimes|2008-10-04/the-keys-of-marinus|The Keys of Marinus}} | ||
* {{briefhistory| | {{dwcast}} | ||
{{dwrefguide|who_e.htm|The Keys of Marinus}} | |||
* {{briefhistory|serials/e.html|The Keys of Marinus}} | |||
* [http://www.eofftv.com/episodes/d/doctor_who/1st_doctor/keys_of_marinus_main.htm Encyclopaedia of Fantastic Film and Television] | * [http://www.eofftv.com/episodes/d/doctor_who/1st_doctor/keys_of_marinus_main.htm Encyclopaedia of Fantastic Film and Television] | ||
{{DWTV}} | {{DWTV}} | ||
{{Voord stories}} | |||
{{TitleSort}} | |||
[[Category:Doctor Who (1963) television stories]] | [[Category:Doctor Who (1963) television stories]] | ||
[[Category:1964 television stories]] | [[Category:1964 television stories]] | ||
[[Category:Season 1 stories]] | [[Category:Season 1 stories]] | ||
[[Category:Voord stories]] | [[Category:Voord stories]] | ||
[[Category: | [[Category:Six part serials]] | ||
[[cs:Marinuské klíče (TV příběh)]] | |||
[[cy:The Keys of Marinus (stori deledu)]] | |||
[[de:005 - The Keys of Marinus]] | |||
[[es:The Keys of Marinus]] | |||
[[fr:The Keys of Marinus (TV)]] | |||
[[he:המפתחות של מארינוס (סיפור טלוויזיה)]] | |||
[[pt:The Keys of Marinus]] | |||
[[ru:Ключи Маринуса]] | |||
Latest revision as of 18:28, 25 June 2024
The Keys of Marinus was the fifth serial of season 1 of Doctor Who.
It was notable for its structure, in that it was one of several "travelling" serials. Like Marco Polo before it, and The Chase, The Daleks' Master Plan and The Infinite Quest that followed it, Keys had the main cast moving to a different setting in almost every episode. It was also the first of 35 six-parters in Doctor Who (including the revival series' 6-part story Flux).
It also introduced the Voord, the first in a long line of deliberate, but generally unsuccessful, attempts to find an enemy as popular as the Daleks.
The third episode, "The Screaming Jungle", was the subject of the programme's first serious charge of plagiarism. Robert Gould had complained to Donald Wilson that the notion of a story about plant life in the dominant evolutionary position on a planet had been something he'd outlined to script editor David Whitaker. Whitaker was obliged to write a memo to Wilson on 26 March 1964, in which he offered a detailed defence against Gould's charge. Whitaker's successful defence rested on the statement that Terry Nation had independently arrived at the use of hostile vegetation in "The Screaming Jungle", and that Gould's idea was derivative of The Day of the Triffids, anyway. (REF: Doctor Who The Handbook: The First Doctor)
Like most other Doctor Who stories of its era, The Keys of Marinus had to find a way to incapacitate the TARDIS to solve the "why not leave?" problem. However, Nation then created the travel dials and so had to separate the characters from them as well in order to solve the same problem.
Synopsis[[edit] | [edit source]]
The TARDIS arrives on the planet Marinus on an island of glass surrounded by a sea of acid. The travellers are forced by the elderly Arbitan to retrieve four of the five operating keys to a machine called the Conscience of Marinus - a machine capable of influencing all minds on the planet - of which he is the keeper. These have been hidden in different locations around the planet to prevent them falling into the hands of the evil Yartek and his Voord warriors, who plan to seize the machine and use its originally benevolent mind-influencing power for their own sinister purposes.
Plot[[edit] | [edit source]]
The Sea of Death (1)[[edit] | [edit source]]

The First Doctor and his companions, Barbara Wright, Ian Chesterton and Susan, land on an island and find the beach is made of glass and the sea of acid. The latter is demonstrated when Susan tries to paddle in a rock pool. Barbara accidentally knocks one of Susan's shoes, which were placed on one of the rocks around the pool, into the "water" where it dissolves. Susan returns to the TARDIS for a new pair and is followed by a mysterious creature in a rubber suit. While Susan is gone, the Doctor, Ian and Barbara discover four glass submarines, one of which holds an empty rubber suit with a rip in one leg; it seems that the creature who wore the suit perished in its journey when the acid got inside. When Susan gets to the TARDIS, she finds footprints. She follows them to a tower looming in the distance. As she looks around, the mysterious creature waits around a corner to strike at her. Just before this happens, the wall revolves and eliminates the creature.
Finding Susan is not at the TARDIS, the others go to explore the tower. They decide to split up. The Doctor is brought inside the tower through the spinning walls, as are Ian and Barbara. Meanwhile, Susan finds another of the mysterious creatures which, on the point of attacking her, is stabbed by a mysterious, monk-like figure, who then leaves. The Doctor and Barbara find Susan soon afterwards.
Ian discovers one of these creatures fighting with the robed man and pulls the creature off him. The creature is thrown back against a wall during the struggle, a hidden panel opens and the creature plunges down a shaft straight into a pool of acid deep beneath the building. The man introduces himself as Arbitan and he takes Ian to reunite with the others.
Arbitan explains that the creatures are called Voords and that he is Keeper of the Conscience of Marinus, a vast computer developed two millennia earlier as a justice machine which kept law and order across the entire planet. For seven centuries it was absolute, radiating its power around the planet and eliminating even evil thoughts. Then a Voord named Yartek worked out how to resist its impulses and corrupted the system. Arbitan explains that the Conscience has now been upgraded to control the Voord again and needs to be activated. Years earlier he saved it from Voord control by separating the five keys that regulate it. The five keys are in different locations — one is in his possession but the others are scattered over Marinus. He suggests that the Doctor and his companions find them, as all his friends and family have failed to return from the effort.
The Doctor refuses and leaves for the TARDIS. When he gets there he finds a force field around it. Arbitan says he has been forced to cut the travellers off from the TARDIS so they will find the keys for him. The Doctor and his companions return to the tower to discover that they are to be moved around the island using pre-set travel dials. As the four teleport away using the dials, Arbitan is overcome and stabbed to death by a Voord that has gained access to the tower. When the travellers reach their destination they discover Barbara, who teleported first, has vanished, leaving only her travel dial, which has blood on it...
The Velvet Web (2)[[edit] | [edit source]]

The Doctor, Susan and Ian search for Barbara on the other side of a set of double doors. As they open them an alarm goes off, accompanied by a blinding light. When they stop they see Barbara reclining on a chaise, her every need being attended to, as if she were a queen. She explains that as she was transported, she panicked and tore at her travel dial, scratching her wrist; the dial then fell off. One of the inhabitants, Altos, says that they are in the city of Morphoton, an advanced and pacific society. He impresses the travellers with the luxuries, advances and aesthetics of the city. Initially sceptical, the Doctor and Ian are won over by the generous hospitality and beneficence that the people bestow upon them. In the night, a young slave-girl, Sabetha, places a small disc on the heads of the sleeping travellers. While Barbara sleeps, her disc falls off. The powerful hypnotic pulse (the Mesmeron) has no effect on her. Morphoton is governed by four brain creatures with hideous eyes on stalks, which communicate through their life-support machines. The Brains of Morphoton use hypnosis to control the entire city. They have outgrown their bodies, and the entire human population of the city is now subject to their will.
When Barbara awakes, she sees the truth: the city is a place of dirt and squalor. She disturbs her fellow travellers with her assessment, claiming that what appears luxurious is squalid. The Doctor and Ian offer her a drink of what they perceive as a goblet of fresh fruit juice, but Barbara rejects it in disgust, seeing it for what it truly is; a dirty China mug full of stagnant water. When Susan shows her new dress, Barbara says it is just dirty rags. All this fuss attracting the attention of the guards, Barbara is taken from her friends but escapes from the clutches of Altos. She finds her way into the dungeons and meets with Sabetha. Barbara deduces Sabetha is Arbitan's missing daughter; she is wearing one of the Keys of Marinus about her neck.
Meanwhile, the Doctor and Ian are taken to what appears to be a state-of-the-art laboratory, but it is just an empty room and the so-called scientific instruments contained within are just old mugs and plates. Barbara tries to break Sabetha's conditioning but fails. Altos comes to take Sabetha away as per the Brains of Morphoton order and stops Barbara's escape. Sabetha knocks out Altos. Barbara leaves, promising Sabetha she will return for her. As Barbara prowls the corridors, she comes across Ian, whom she embraces. As they talk, she realises that the Brains of Morphoton now control him. They will punish Sabetha, make Susan take her place, put Ian to work, and make the Doctor work in the lab. Ian takes Barbara to the Brains of Morphoton, who order Ian to kill her. He begins to strangle Barbara, but she breaks free and smashes the control room and life support systems. The Brains die, and all the human subjects of the city are freed with their original memories returned. They start to destroy the city. Altos remembers he too was sent to the city by Arbitan, and he and Sabetha decide to join the Doctor and his friends on their quest.
The six now split up. The Doctor goes ahead to find the final key in the city of Millennius, while the others venture to find the second key in the next destination. Susan arrives first, wanting to avoid a long goodbye with her grandfather, but soon her ears are deafened by a growing screeching.
The Screaming Jungle (3)[[edit] | [edit source]]

The next location for the five is a dangerous, screaming jungle, which has a particularly debilitating effect on Susan. In the jungle is an ancient temple. Ian finds an archway but it is overgrown with the copious flora. While Ian, Sabetha and Altos look for another entry, the flora reaches out to grab Susan. Even though Ian instructed Barbara not to go into the temple, she finds that the flora can be moved easily. She walks down the passage where she finds a statue — which to her surprise has the key propped on the top.
However, when Barbara takes the key, the statue holds onto her and the wall reverses, trapping her. Her companions decide that if she were in real trouble she would use her travel dial to escape, but Ian is sceptical and wants to ensure her safety. He tells the others to go on while he stays to rescue Barbara. As they go, Sabetha realises that the key is a fake; it is shorter than the other one. This gives Ian more reason to stay on. Once they are gone Ian replicates Barbara's movements and is likewise trapped. He finds Barbara in a large, booby-trapped hall. Barbara saves his life by shouting as a statue brings its axe down where he was standing. They find doors which need a metal bar to open. Ian finds a bar, but this is also a trap and brings prison walls down around him. Barbara is the victim of a trap when she walks through the doors that have magically opened and is trapped in a net as the dagger-filled roof lowers itself on her.
In the temple is an aged and dying scientist, Darrius, who wears a robe similar to Arbitan's. He stops the roof to save Barbara. He suspects she may be a Voord. Doubtful she has been sent from Marinus, he takes her time dial to inspect. Ian, who has escaped from his prison, finds them just in time to save Darrius from a creeper. The weak, old man explains the traps of the temple are for the Voord; he too is a friend of Arbitan. Before dying, he tells Ian and Barbara the key is hidden in "D-E-3-O-2" and points to a door. Upon entering the next room, they find it is a laboratory. Their attention is drawn to a safe on one of the lab benches, which has letters and numbers on the dial. Ian thinks DE3O2 could be the combination and tries it, but the safe remains locked. He tries a second time, treating the "3" and "2" as the number of dial turns, but again the safe fails to open. Ian and Barbara come to the conclusion that Darrius may not have been referring to the safe at all, and search the room. As they do so, Ian finds Darrius's research on mutating flora with a growth accelerator and increasing the rate of nature. As night falls, the screaming of the jungle starts and tree branches enter the laboratory to destroy the equipment. Ian realises that the letters and numbers are chemical symbols. The two barely retrieve the key from a jar labelled DE3O2 before the vegetation overruns the room. Jumping to the next location, they find it bitterly, paralysingly cold.
The Snows of Terror (4)[[edit] | [edit source]]

Ian and Barbara have teleported to an icy wasteland. Unable to move in the crippling cold, they pass out. They wake to a suspicious trapper, Vasor, who brought them back to his hut after Altos forced him to help save them. He also reveals that he saw two girls, who they work out are Susan and Sabetha, in a nearby cave but would not risk his life to save them. Ian offers to go and trades his dial for some of Vasor's furs. He gives him a lantern and a bag, leaving Barbara alone with Vasor. As she clears away dishes, she finds the chain that Sabetha was wearing, along with four travel dials, in a drawer. Vasor sees her looking and tells Barbara that he left the two girls to die, and that this is his plan for Ian, too. He then attacks Barbara.
In the wastes, Ian finds Altos, bound and abandoned. Altos tells him Vasor is to blame. He inspects the bag Ian is carrying, revealing that it is full of raw meat. Vasor clearly hoped that it would attract the attention of the wolves. Ian throws the bag away and they return to the trapper's hut; confronting him before he can attack Barbara. They order him to reveal the stolen keys in his possession and take them to the caves where he abandoned Sabetha and Susan. Vasor refuses, claiming there are demons in the cave, but the two men force him.
The two girls have searched the icy caves themselves and have uncovered a block of ice connected to piping. It is protected by Ice Soldiers, seemingly statues. As they run from the statues, they meet their friends, who have crossed a rickety rope bridge. In revenge, Vasor unties one end of the bridge, trapping them on the other side. While Ian and Altos make a bridge of tree trunks to cross the chasm, they find the next key frozen in the block of ice. They remove the key by turning a dial on one of the pipes, which releases heat from a volcanic spring. This also revives the Ice Soldiers, who chase after the travellers to regain their key. Susan bravely crawls across the wobbly trunks over the chasm and reattaches the bridge. They flee to the trapper's cottage to retrieve their stolen dials. Before they use them, however, Vasor grabs Susan and forces the travellers to fight the soldiers. Vasor is killed by the Ice Soldiers as they break into his cabin and the travellers activate their travel dials.
In the next location, Ian discovers the key in a display case, with a dead man lying on the floor nearby. Soon Ian himself is knocked out by a man who steals the key. Before he leaves, the man frames Ian for the murder of the mutilated body by placing the bludgeon in his hand.
Sentence of Death (5)[[edit] | [edit source]]

When he wakes, Ian finds himself accused of the murder of Eprin, a friend of Altos who discovered the key shortly before his death. With the key having disappeared, Ian is also accused of theft. In the city of Millennius, the legal system is "guilty until proven innocent". In other words: Ian is already guilty of the crimes of which he is accused, and the sentence will be death unless he is found to be innocent by the court of Millennius. It is up to the defence to prove Ian's innocence beyond reasonable doubt. The other travellers are reunited before Ian's trial, at which the Doctor returns and agrees to serve as defence counsel. He gets a postponement for two days while he gathers evidence and uses the time to work out what really happened to Eprin. He deduces that the relief guard, Aydan, is the one who attacked Ian and stole the key.
To find evidence, Barbara and Susan go to the apartment of Aydan and talk to his wife, Kala, who gives away nothing. When Aydan returns home, he is angry with the women and, after nearly giving away that he stole the key, orders Barbara and Susan to leave. Outside in the corridor, they hear a loud slap and a scream of pain from Kala; Aydan has obviously hit her across the face.
During the trial, the Doctor calls Sabetha as a witness. He tricks Aydan into confessing by claiming that one of the already recovered keys is the one that they found in Aydan's hiding place. Aydan confesses but is shot and killed by an unseen person before he can implicate anyone else. As the Doctor sums up, Barbara, Sabetha and Altos are taken out of the trial by Larn. They get a telephone call which Barbara answers. It is Susan, who says that the murderers have kidnapped her and they are going to kill her if the trio don't stop investigating...
The Keys of Marinus (6)[[edit] | [edit source]]
Altos, Barbara, and Sabetha decide not to tell the Doctor of Susan's disappearance and to visit Kala to see if she has any information on who might be connected to her husband's death and Susan's kidnapping. She says she can't help them and breaks down in tears but begins laughing when the trio leave. Susan is bound and gagged in another room. Kala takes a phone call from someone saying that Ian has been sentenced and Susan can be killed. The trio realise it must be Kala who has taken Susan hostage, as she had talked of the call they got from Susan without any of them having mentioned it during their visit. They return before Kala kills Susan, as she did her own husband with a hidden gun, and the plot is uncovered. Reunited with the Doctor, they learn that Kala has admitted her part in the crimes but has sworn that she was working with Ian. They must discover her true accomplice to prove Ian did not kill Eprin. Susan remembers that when Kala was on the phone; the man said he would pick up the key later that night. The Doctor and the officials of Millenius wait where the Doctor has deduced the key is being kept — in the mace used as evidence in court. The man trying to sneak it away is Eyesen, the Court Prosecutor. Ian is freed and the trio return to Arbitan.

Altos and Sabetha have travelled ahead with all but the last key. They do not know that Arbitan has been killed and that Yartek now rules Marinus. Yartek has seized the first four keys and holds Altos and Sabetha prisoner, awaiting the fifth and final one. Yartek attempts to coerce Altos into revealing the location of the last key, but he refuses to give in. Yartek then exploits Sabetha, with whom Altos is in love, threatening to kill her if he doesn't comply. Altos reveals that the last key is with the Doctor, much to Sabetha's despair. Yartek then imprisons both of them. The Doctor and his companions arrive and fail to find Altos and Sabetha. They split up, Ian and Susan going to find Arbitan with the key and Barbara and the Doctor going to find Altos and Sabetha.
Ian and Susan find someone who appears to be Arbitan, but his face is hidden beneath the hood of his cowled robe; he warns they must not come near him as he has a dreadful disfiguring disease caused by a power surge from the Conscience. However, this is actually a disguised Yartek. Ian gives "Arbitan" the key and goes to get the Doctor. He finds him releasing Altos and Sabetha, who tell them the Voords now reign on Marinus. Ian says he gave Yartek the false key from the Screaming Jungle. Although pleased, Sabetha and Altos warn the travellers that inserting the false key will cause the Conscience to explode. The travellers run. When Yartek places the false key into the Conscience, the machine duly explodes and he is killed along with the occupying Voords. The Doctor and his friends flee the tower with Altos and Sabetha before the growing blaze overtakes the ancient structure.
With the Conscience destroyed, the people of Marinus must now find their own answers — which the Doctor believes is a good thing: man was not meant to be ruled by machines. The travellers say goodbye to Altos and Sabetha, who say they will start a new life together in Millennius.
Cast[[edit] | [edit source]]
- Dr. Who - William Hartnell
- Ian Chesterton - William Russell
- Barbara Wright - Jacqueline Hill
- Susan Foreman - Carole Ann Ford
- Arbitan - George Coulouris
- Voords - Martin Cort, Peter Stenson, Gordon Wales
- Altos - Robin Phillips
- Sabetha - Katharine Schofield
- Voice of Morpho - Heron Carvic
- Warrior - Martin Cort
- Darrius - Edmund Warwick
- Vasor - Francis De Wolff
- Ice Soldiers - Michael Allaby, Alan James, Peter Stenson, Anthony Verner
- Tarron - Henley Thomas
- Larn - Michael Allaby
- Senior judge - Raf De La Torre
- First judge - Alan James
- Second judge - Peter Stenson
- Kala - Fiona Walker
- Aydan - Martin Cort
- Eyesen - Donald Pickering
- Guard - Alan James
- Yartek - Stephen Dartnell
Uncredited cast[[edit] | [edit source]]
- Double for Arbitan - John Berrbohm
- Ladies in Waiting - Faith Hines, Daphne Thomas, Veronica Thornton, Sharon Young, Lynda Taylor
- Idol - Bob Haddow
- Eprin - Dougie Dean
- Citizens of Millennius - Veronica Thornton, Valerie Stanton, David Kramer, Adrian Drotsky, Leslie Shannon, Patricia Anne, Billy Dean, Tony Lambden, Brian Bates, Monique Lewis, Heidi Lane, Rosina Stewart, Cecilia Johnson, Jill Howard, Yvonne Howard, Tony Hennessey, Johnny Crawford, Leslie Wilkinson, Desmond Cullum-Jones, Perrin Lewis (all DWM 310)
Crew[[edit] | [edit source]]
- Associate Producer - Mervyn Pinfield
- Costumes - Daphne Dare (Credited in episode 6)
- Designer - Raymond P. Cusick
- Director - John Gorrie
- Incidental Music - Norman Kay
- Make-Up - Jill Summers (Credited in episode 6)
- Producer - Verity Lambert
- Story Editor - David Whitaker
- Title Music - Ron Grainer with the BBC Radiophonic Workshop
- Writer - Terry Nation
Uncredited crew[[edit] | [edit source]]
- Theme Arrangement - Delia Derbyshire[1]
- Grams Operator - Pat Heigham (INFO: The Keys of Marinus)
- Assistant Floor Manager - Timothy Combe (INFO: The Reign of Terror)
- Studio Lighting - Peter Murray[2]
- Studio Sound - Jack Brummitt, Tony Milton[2]
- Production Assistants - David Conroy, Penny Joy[2]
Worldbuilding[[edit] | [edit source]]
- The Doctor claims to have met Pyrrho, the founder of scepticism.
- The Doctor eats what he thinks are truffles and sniffs a pomegranate.
- Barbara eats grapes.
Notes[[edit] | [edit source]]
- All episodes exist as 16mm telerecordings.
- The working title of this story was Planet Marinus.
- Negative film prints of all episodes were recovered from BBC Enterprises in 1978.
- An Arabic print of "The Sea of Death" is held by the BBC.
- Terry Nation wrote this story as a replacement to The Red Fort, a story that was to be set during the Indian Mutiny.
- This is the first story to be written by a returning writer.
- Terry Nation developed more background in his script than was made explicit on-screen in the finished production. The Voord were alien invaders who took advantage of the people of Marinus, rendered vulnerable by the pacifying effects of the Conscience. The Conscience was then deactivated to allow the Marinians to fight the Voord, and over the centuries, the time they spent on Marinus meant that the Voord, too, could now be affected by the machine. Therefore, Arbitan dispatched agents to recover the keys which would reactivate the Conscience and allow him to finally defeat the invaders.
- William Hartnell does not appear in the third and fourth episodes, "The Screaming Jungle" and "The Snows of Terror", as he was on holiday during the weeks they were recorded. Hartnell had been working non-stop from October to April on Doctor Who episodes and needed a well-deserved break. When he returns in "Sentence of Death" he is more energetic and refreshed. This was the first time the lead actor had been absent in this way; nonetheless, Hartnell receives an on-screen credit for these episodes, as per his contract. His co-stars also took time off for holiday during the production of upcoming stories.
- This story contains a controversial scene in which it appears that Vasor attempts to rape Barbara — a sequence which, surprisingly, did not prevent the BBC Video release in 1999 from being granted a "U" certificate.
- Darrius is never referred to by name in the on-screen dialogue of "The Screaming Jungle"; his name appears only on the closing credits. The character is also nameless in Philip Hinchcliffe's novelisation, being referred to simply as "the old man".
- Initially, it was hoped that the Voords would catch on with young viewers in the same way the Daleks had inspired Dalekmania, with toys, books and other merchandise. This did not come to pass.
- "The Sea of Death" (the first episode of this story) begins the longest continuous streak of currently "watchable" (as opposed to simply listenable) episodes of Doctor Who from William Hartnell's tenure, with 44 episodes from here until "The Lion" (the first episode of The Crusade) inclusive, all either surviving or officially animated. This was the longest continuous streak of "watchable" episodes of all 60s Doctor Who until the release of the animated version of The Abominable Snowmen in 2022.
- Although the Voords are the main villains of the story, they appear only in the first and last episodes, "The Sea of Death" and "The Keys of Marinus". The Voords would remain one of the most mysterious of the Doctor's adversaries, as little is revealed about them on-screen. However, the comic story The World Shapers and the audio story Domain of the Voord would expand greatly on both their origins, present culture, and possible fate.
- This is the first story to feature a model TARDIS materialisation.
- Small parts of the original film negative for this story were damaged. For the 2009 DVD release, computer imagery was used to restore these scenes. An example of this is in the second episode, "The Velvet Web", when Barbara sees Altos in the "real world" (at 0:12:24 on the DVD); according to the text commentary, the first few seconds of the scene had to be recreated via computers to bypass the damaged part of the negative. The fourth episode, "The Snows of Terror", used an off-air soundtrack recording and a short piece of recycled footage to recreate a short piece of dialogue lost from the master negative; on the DVD, this occurs at 0:14:08.
- Between the second and third episodes, "The Velvet Web" and "The Screaming Jungle", the BBC launched BBC Two, a second network. "The Screaming Jungle" was, therefore, the first episode to be aired under the branding BBC1.
- The second episode, "The Velvet Web", is the first to have the episode title displayed over the background of the opening sequence, something which would recur on and off during the rest of the black-and-white era, especially during the Troughton years, and would become regular as soon as the programme switched to colour production in 1970.
- The basic format of the story — six separate storylines connected by a quest to retrieve a series of items — was later reused for the season-long Key to Time story arc of season 16.
- In the fifth episode, "Sentence of Death", the Doctor is heard to stumble over the phrase, "I can't prove at this very moment", saying initially, "I can't improve at this very moment." Although William Hartnell was notorious for stumbling over dialogue (which, due to time and budget restrictions preventing retakes, was often left in the broadcasts), this isn't one of those occasions. According to the DVD trivia track, Terry Nation wrote this stumble into the script intentionally, which Hartnell delivered accurately.
- This is one of the stories selected to be shown as part of BSB's Doctor Who Weekend in September 1990.
- This is one of only two televised Doctor Who stories by Terry Nation not to feature the Daleks. The other is The Android Invasion, which aired more than a decade later.
- It is never stated when this story is set, although the Doctor Who Magazine comic, The World Shapers, seems to date this to around 5000000 BC.
- In the original script, it was revealed that the reason the Doctor and Susan had been on Earth in 1963 at the start of An Unearthly Child was because the Doctor had visited the British Broadcasting Corporation to get help repairing the colour scanner in the TARDIS, which was showing only black-and-white images. He had been in such a bad mood upon his return to the TARDIS because the BBC had been "infernally secretive"!
- Originally, the Doctor accompanied Susan and Sabetha during the quest, and his ring would have been found in Vasor's hut along with the travel dials and Conscience keys.
- Altos originally appeared only in the second episode, "The Velvet Web", but his role was expanded to compensate for William Hartnell's absence.
- Director John Gorrie was officially a member of the BBC's Plays department but was hired by Verity Lambert while he was on loan to the Serials department. He was reluctant to work on Doctor Who because he didn't like or understand science-fiction but Lambert insisted he was to do it.
- According to Jonathan Sothcott on the DVD commentary for Dr. Who and the Daleks, Milton Subotsky considered adapting this serial into another movie.
- John Gorrie recalled in the DVD commentary that he cast Fiona Walker in this serial after he received a letter from her saying "I am an actress, I am a good actress, I am too good an actress not to be working so I hope you can do something about this". He found her letter amusing and thus offered her the role of Kala.
- Terry Nation used many existing words for location and character names in the story: Marinus originated from the Latin word marinus, meaning "of the sea"; Morphoton is based on Morpheus, the Greek god of dreams; Millennius came from the term millennium, for a thousand years; and Arbitan is based on the Latin word Arbiter, meaning a judge.
- Even though John Gorrie was unhappy with the quality of the scripts, he agreed to direct the serial to advance his career.
- Carole Ann Ford was displeased with the portrayal of Susan in the story, as she felt that she was written like a child - describing her character as "pathetic".
- John Gorrie immediately thought of George Coulouris for Arbitan while reading the script, and was delighted when he accepted the part, describing Coulouris as his "hero".
- John Gorrie cast Henley Thomas as Tarron, as the two were old friends who had previously worked together.
- John Gorrie felt that his friend Robin Phillips' handsome looks fit the role of Altos accurately.
- John Gorrie wanted the character of Sabetha to resemble a princess and selected former drama student Katharine Schofield.
- Nineteen new sound effects were recorded for the serial by Brian Hodgson of the BBC Radiophonic Workshop, including the sounds of the Conscience of Marinus and the clocks in Millennius.
- Designer Daphne Dare based the design of the Voord on a rubber wetsuit, while the heads were created using vulcanised rubber by prop builders Jack and John Lovell.
- The submersible props and the Conscience machine were designed by Shawcraft Models.
- Raymond Cusick used leftover fibreglass to complete the design of the Conscience machine, as the budget was running low.
- The moving vegetation in the third episode, "The Screaming Jungle", was constructed by Design and Display Ltd.
- Jablite polystyrene was used to stimulate snow in the third and fourth episodes, "The Screaming Jungle" and "The Snows of Terror".
- The tank-top worn by Susan in the serial was knitted by Carole Ann Ford's mother.
- For the shots of the wolves in the fourth episode, "The Snows of Terror", the BBC purchased 14 feet of film from the 1957 Russian thriller Seryy razboynik (The Grey Robber) from distributor Sovexport.
- John Gorrie found the recording days difficult, due to the complexity of the show and the small size of the studio.
- Carole Ann Ford recalled that the cast could "have a few more giggles" during rehearsals, as William Hartnell's tendency to forget lines was time-consuming.
- Starting with The Sea of Death, the credits changed from being left-aligned to the centre.
- John Gorrie was originally just going to play a "splash" sound to signal that one of the Voords had fallen into an acid pit in the first story, but Raymond Cusick persuaded him that it wouldn't be clear enough what happened, and that there needed to be an actual effects shot. After seeing the less-than-convincing result, however, Cusick admitted that he should have left well enough alone.
Influences[[edit] | [edit source]]
- Courtroom dramas.
- 1930s serials.
- Quest epics.
- Celtic myth.
- The Fireball XL5 episode "The Hypnotic Sphere".
- The Labours of Hercules.
Ratings[[edit] | [edit source]]
- "The Sea of Death" - 9.9 million viewers
- "The Velvet Web" - 9.4 million viewers
- "The Screaming Jungle" - 9.9 million viewers
- "The Snows of Terror" - 10.4 million viewers
- "Sentence of Death" - 7.9 million viewers
- "The Keys of Marinus" - 6.9 million viewers
Myths[[edit] | [edit source]]
- Yartek's race is known only as the Voord. (Although they are referred to as "Voord" in some of the dialogue, the term most often used is "Voords" and this is the name that appears in the closing credits).
- The original ending was that Ian gave Yartek the proper key, but the machine took control of Yartek and all the Voords and made them good. (There is no evidence to support this)
Filming locations[[edit] | [edit source]]
Production errors[[edit] | [edit source]]
- When Barbara first uses the wrist transporter in The Sea of Death, Ian takes a step towards her and his left hand disappears when it goes behind the black split-screen effect.
- When a Voord falls through the pyramid revolving wall in "The Sea of Death", a stagehand can be seen briefly on the other side.
- After the Doctor goes into the pyramid, Ian’s leg appears on the lower right side of the screen just before the shot ends. This is because both consecutive scenes used the exact same section of wall, and William Russell’s arrival for his and Barbara’s scene came before the director switched camera.
- In "The Sea of Death" when Barbara and Ian are talking about where the Doctor has gone, the faint shadow of the boom mic is visible on the wall behind Barbara.
- The model used in place of a Voord falling to its doom into a pool of acid deep beneath the pyramid turns sideways as it falls, revealing that it is no more than a two-dimensional cardboard cut-out.
- When Ian is first inside the pyramid, someone stumbles through the background.
- While walking around the TARDIS force field in "The Sea of Death", Susan can be seen walking in front of Ian and into the barrier with no ill-effects.
- In "The Velvet Web", while Susan is sleeping, a camera can be seen casting a shadow on her.
- In "The Velvet Web", as the group are about to sleep in Morphoton, a boom microphone appears at the top of the shot; William Russell can clearly be seen glancing at it briefly.
- There is a camera wobble and audible thud as the camera bumps into the set while carrying out a tracking shot during the scene in "The Screaming Jungle" where Darrius is dying.
- Ian's extra weight on the rope bridge in "The Snows of Terror" causes the "cave wall" scenery, to which it is tethered, to bend.
- In "The Snows of Terror", as the group enters the chamber with the key in the ice-block, the Ice Soldier to the left of the shot has his eyes open. He blinks several times before finally closing his eyes after everyone enters the room.
- In the final episode, "The Keys of Marinus", the Voord escorting Sabetha trips over his flippered feet and nearly pulls a sliding door off its track.
- The icicles are made of polystyrene — this is revealed by the unpainted end of one of the icicles that Ian uses to construct a bridge.
- After the Doctor dematerialises from Arbitan's control room in "The Sea of Death", the shadow of his elbow remains on the wall next to the black drape.
- An inlay shot against a black background is used to create the appearance of teleportation. This technique is revealed by the appearance of the characters' shadows against a pillar after they have "teleported" — the shadows also reveal the actors scurrying off the set afterwards.
- Near the end of "The Sea of Death", when Arbitan is stabbed by a Voord, a small, almost-transparent triangle is visible whenever the Voord passes between the camera and Arbitan.
- In "The Keys of Marinus", Stephen Dartnell's (Yartek) eyes and mouth can be seen in a close-up of him while he's talking to Sabetha.
- The model shot indicating the return to the island in "The Keys of Marinus" is clearly the exact same shot that opened the story, as the TARDIS is not visible on the beach.
- When the Doctor is caught by a spinning wall trap outside the pyramid in "The Sea of Death", the hand of a stagehand is briefly visible on the left side of the wall as the trap activates.
Continuity[[edit] | [edit source]]
- Ian is still wearing the costume given to him by Marco Polo in Cathay in 1289. (TV: Marco Polo)
- The Doctor, Ian, Barbara and Susan once again encountered the Voord on Hydra more than a century later. (AUDIO: Domain of the Voord)
- The Doctor also encountered the Voord on Kandalinga several million years later. (PROSE: The Fishmen of Kandalinga)
Home video and audio releases[[edit] | [edit source]]
DVD release[[edit] | [edit source]]
The DVD was released on 21 September 2009 in the UK, with North American release occurring in January 2010. As the first three stories are only available at present in The Beginning box set, and Marco Polo remains a lost story, The Keys of Marinus stands as the earliest Doctor Who story currently available on its own.
Special Features[[edit] | [edit source]]
- Commentary by William Russell (Ian), Carole Ann Ford (Susan), John Gorrie (Director) and Raymond Cusick (Designer), moderated by Clayton Hickman
- The Sets of Marinus - Designer Raymond Cusick recalls his work on The Keys of Marinus
- Cadet Sweets: 'Doctor Who and the Daleks' - Scans of the entire set of the Cadet Sweets cards, which features a mini Doctor Who story involving the Daleks and the Voord (DVD/ROM - PC/Mac)
- Radio Times Billings - Articles and listings from this story's original 1964 transmission (DVD-ROM - PC/Mac)
- Production Information Subtitles
- Photo Gallery
- Coming Soon Trailer - Dalek War
- Easter Egg: 8 mm behind the scenes footage of Patrick Heigham and Jack Brummitt. To access this hidden feature, press left at Special Features in the PDF Materials section of the Special Features menu to illuminate the Doctor Who logo.
Rear Credits:
- Starring William Hartnell with William Russell, Jacqueline Hill and Carole Ann Ford
- Written by Terry Nation
- Directed by John Gorrie
- Produced by Verity Lambert
- Incidental Music by Norman Kay
Notes:
- Editing for the DVD release was completed by the Doctor Who Restoration Team.
- The cover of the Region 2 version contains a spelling error that states "contains orginal black and white footage".
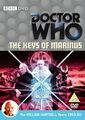
Region 2 UK cover
Region 4 Australian cover

Region 1 US cover


BritBox availability[[edit] | [edit source]]
This story is available for streaming through BritBox (US) as part of Season 1 of Classic Doctor Who.
VHS release[[edit] | [edit source]]
This story was released as Doctor Who: The Keys of Marinus.
- UK Release: March 1999 / US Release: July 1999
- PAL - BBC Video BBCV6671 (2 tapes)
- NTSC - CBS/FOX Video 14263 (2 tapes)
- NTSC - Warner Video E1383 (2 tapes)
- Editing for the VHS release was completed by the Doctor Who Restoration Team.
UK VHS cover
Australian VHS cover
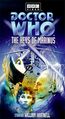
US VHS cover


Footnotes[[edit] | [edit source]]
External links[[edit] | [edit source]]
- The Keys of Marinus at the BBC's official site
- The Keys of Marinus at RadioTimes
- The Keys of Marinus at BroaDWcast
- The Keys of Marinus at the Doctor Who Reference Guide
- The Keys of Marinus at Shannon Sullivan's A Brief History of Time (Travel)
- Encyclopaedia of Fantastic Film and Television
| ||||||||||||||||||||