The Sontaran Experiment (TV story): Difference between revisions
Gingerfool (talk | contribs) mNo edit summary |
|||
| (385 intermediate revisions by more than 100 users not shown) | |||
| Line 1: | Line 1: | ||
{{Infobox | {{title dab away}} | ||
{{real world}} | |||
image= | {{ImageLinkTV}} | ||
series=[[Doctor Who | {{Infobox Story SMW | ||
number= 77 | | |image = Styre and Sarah.jpg | ||
doctor= | |series=[[Doctor Who television stories|''Doctor Who'' television stories]] | ||
companions= [[Sarah Jane Smith]], [[Harry Sullivan]] | | |season number= Season 12 (Doctor Who 1963) | ||
enemy= Field | |season serial number = 3 | ||
|story number= 77 | |||
writer= | |doctor = Fourth Doctor | ||
director= | |companions= [[Sarah Jane Smith|Sarah]], [[Harry Sullivan|Harry]] | ||
producer= [[Philip Hinchcliffe]]| | |enemy= [[Field Major]] [[Styre]] | ||
broadcast date= | |setting= [[Earth]], [[16087]] | ||
format= | |writer= Bob Baker, Dave Martin | ||
production code= [[List of production codes|4B]]| | |director= [[Rodney Bennett]] | ||
|producer= [[Philip Hinchcliffe]] | |||
|novelisation= Doctor Who and the Sontaran Experiment (novelisation) | |||
|epcount = 2 | |||
|broadcast date= 22 February - 1 March 1975 | |||
|network = BBC1 | |||
|format= 2x25-minute episodes | |||
|serial production code= [[List of production codes|4B]] | |||
|prev= The Ark in Space (TV story) | |||
|next= Genesis of the Daleks (TV story) | |||
|made prev = Robot (TV story) | |||
|made next = The Ark in Space (TV story) | |||
|script = The Scripts: Tom Baker 1974/5 | |||
|thwr=249 | |||
}} | |||
'''''The Sontaran Experiment''''' was the third serial of [[Season 12 (Doctor Who 1963)|season 12]] of ''[[Doctor Who]]''. Shot entirely on location, it was the shortest story of the 1970s, with only two episodes. An outdoor shoot, all scenes were unusually recorded on videotape rather than film. | |||
[[Script editor]] [[Robert Holmes]] was not a fan of six-part stories, believing that they were padded, so for season twelve, he decided to have one four-part story and one two-part story. With [[Christopher Langley]]'s "''Space Station''" already in the works, he looked to Baker and Martin to fill the gap. As an outline, Holmes asked them to set it on [[Earth]] and bring back the [[Sontaran]]s. This would help them capitalise on the costly ship interior and Sontaran costume used in ''[[The Time Warrior (TV story)|The Time Warrior]]''. | |||
Baker and Martin were commissioned to write the script on [[23 May (production)|23 May]] and asked to deliver episode one shortly after, on [[5 June (production)|5 June]]. Part two was in by [[6 July (production)|6 July]] and Holmes re-wrote it extensively, removing a sub-plot in which [[Vural]] was revealed to be a victim of mind-control. Despite Holmes' earlier intentions, a new Sontaran costume was made for [[Kevin Lindsay]]. | |||
During filming, [[Tom Baker]] slipped and broke his collarbone. Believing the injury to be more serious, [[producer]] [[Philip Hinchcliffe]] had [[designer (crew)|designer]] [[Roger Murray-Leach]] drive Baker to the nearest hospital. Worried that he might have to recast his new star, Hinchcliffe was relieved when the injury turned out to be much less serious than first thought, with Baker able and willing to continue filming the next day. The scarf the Doctor wore covered Baker's neck brace, but [[fight arranger]] [[Terry Walsh]] did end up doubling for Baker in several shots. ([[INFO]]: ''The Sontaran Experiment'') | |||
This story started a very short story arc of the Doctor, Sarah and Harry trying to return to Nerva to get back to [[The Doctor's TARDIS|the TARDIS]], but being interrupted. They would return in ''[[Revenge of the Cybermen (TV story)|Revenge of the Cybermen]]'', albeit hundreds of years prior to when they had originally arrived. | |||
[[ | |||
== Synopsis == | |||
Arriving on a seemingly deserted Earth, the Doctor, Sarah and Harry soon discover a crew of shipwrecked astronauts from a distant Earth colony. Lured there by a fake distress call, the astronauts are being experimented on by the deadly Sontarans in preparation of a full-scale invasion of the planet. Can the Doctor defeat Sontaran Field-Major Styre and save the world? | |||
== Plot == | |||
=== Part 1 === | |||
The [[Fourth Doctor]] and his companions [[Sarah Jane Smith]] and [[Harry Sullivan]] [[transmat]] down from [[Nerva Beacon|Space Station Nerva]] to a field on the now-healed [[Earth]]. The Doctor starts fixing the circle of transmat refractors with [[The Doctor's sonic screwdriver|his sonic screwdriver]] while the others wander off to explore. | |||
[[File:Repairing the circle.jpg|thumb|left|"What you're actually saying is: you're busy and you'd like us to push off."]] | |||
As they walk across the plain, Sarah hears a sound and sees movement on the top of a hill. Harry dismisses it. Two men in spacesuits, [[Erak]] and [[Zake]], are observing the Doctor through the crosshairs of their rifles. Erak leaves Zake to watch the Doctor while he reports the presence of the Doctor to another man in a spacesuit, [[Krans]], who is tending a campfire. Meanwhile, Harry slips on the edge of a hole and tumbles into it. He is stuck, unable to climb out. Sarah observes that the edge of the hole had been covered deliberately. Harry has no choice but to stay put as Sarah goes to fetch the Doctor. | |||
Zake's observation of the [[Time Lord]] is interrupted by a strange floating [[Styre's robot|robot]] that bears down on him. Zake flees, the robot pursuing him over the edge of a cliff, where he falls to his death. The Doctor finds Zake's body when Erak and Krans arrive. Thinking the Doctor has killed Zake, they stun him with their rifles before he can explain. As they carry the unconscious Doctor away, they are watched by yet another spaceman, [[Roth]]. | |||
Sarah gets back to the circle to find the Doctor gone, his screwdriver abandoned. When Sarah returns to the hole, Harry is nowhere to be seen. Something had started throwing rocks down at Harry and, in scrambling for cover, he found a way out of the hole, climbing through some rocks to the hills beyond. Sarah is about to climb down into the hole to look for Harry when Roth grabs her from behind, hiding her as the drone floats past. Once the danger is gone, Roth introduces himself to Sarah. It was he who covered the edge of the hole, trying to trap the drone. He tells Sarah that the robot serves an alien who lives among the rocks, an alien who has tortured him and killed two of his crew. Roth is obviously traumatised by his experiences. He vows he will not be captured again. When Sarah tells him about her friends, he informs her that the Doctor has been taken to the campsite. | |||
[[File:Erak_krans_doctor.jpg|thumb|right|Erak and Krans interrogate the Doctor.]] | |||
At the campsite, Erak and Krans interrogate the Doctor, demanding to know what he has done to their crewmates. When the Doctor explains that he came down from Space Station Nerva, the spacemen (now joined by their leader, [[Vural]]) greet that news with great scepticism. Nerva, the lost colony of mankind, is a mere legend, like [[Atlantis]]. The spacemen are from one of the colonies, [[GalSec]]. The Doctor suddenly spots an odd looking button on Vural's suit, identifying it as non-human technology. The button is actually a remote camera. Somewhere else, everything is being observed by something with a grey, heavy, four-fingered hand. | |||
Roth | Roth brings Sarah near the campsite but refuses to approach; he tells Sarah he saw Vural go to the rocks and the alien let Vural go. The GalSec men tell the Doctor that a GalSec freighter had gone missing. Detecting a distress signal from the supposedly uninhabited Earth, they came to investigate, but their ship was vaporised when they emerged, leaving nine of them stranded. The surviving crew began to vanish one by one. The Doctor offers to fix the transmat refractors and beam them all to Nerva, where they can contact another GalSec ship, but Vural says that they are not taking orders from the "Old People". While the Nervans did nothing but sleep, the rest of mankind had spread across the galaxy and built an empire. At this point, Roth appears. While the three spacemen chase him, Sarah sneaks out from the rocks and frees the Doctor. | ||
Roth loses the others and meets up with Sarah and the Doctor. Sarah tells the Doctor about the robot, and the Doctor examines some residue on the ground, evidence of a [[terullian]] drive, except there is no terullian in this galaxy. The Doctor reasons that there must be some way out of the hole that Harry fell in, but as he climbs down, he too slips and falls to the bottom, losing consciousness. At that moment, the robot returns and snares Roth and Sarah with cables. | |||
Harry has made it to the hills, where he spots a man-sized metal sphere among the rocks. As he watches, the robot arrives with Roth and Sarah in tow. The sphere's door opens and to Sarah's horror, out steps a [[Sontaran]] warrior. | |||
=== Part 2 === | |||
[[File:Fluid deprivation.jpg|thumb|left|Styre examines the results of Experiment 5: Fluid deprivation]] | |||
When Sarah expresses her disbelief, the Sontaran tells her he is [[Field Major]] [[Styre]] of the Sontaran [[G3 Military Assessment Survey]], identical to [[Linx|the other Sontaran clone]] she encountered, but not the same. Roth cries out that he will not be tortured again and makes a break for it, only for Styre to shoot him down. Roth had already been tested, so he was of no further use to Styre. Sarah, however, is far more interesting. | |||
The three spacemen find the Doctor down the hole, but as they force him to climb out at gunpoint, the drone arrives and snares the trio. The Doctor goes back to the bottom of the hole. He finds the same exit that Harry used. Harry, in the meantime, finds [[Prisoner (The Sontaran Experiment)|another human]] chained to the side of the rocks, severely [[Dehydration|dehydrated]]. | |||
Nearby, Styre has Sarah tied up to the rocks as well and has placed a device on her forehead. He seals her in with a [[force field]]. Styre goes to his transmitter station and reports to his Marshal. The Marshal is impatient for the intelligence report, but Styre tells him that some inconsistencies have arisen that he has to clear up before he submits it. Styre proceeds to subject Sarah to Experiment 7: resistance to fear. The device on her head begins to give Sarah [[hallucination]]s, and she starts to panic. The Doctor, however, has reached her and uses [[The Doctor's sonic screwdriver|the sonic screwdriver]] to breach the force field. When he rips off the device on her forehead, she gives a scream and falls unconscious. The Doctor, enraged, attacks Styre, but the Sontaran easily fends him off. Styre shoots him when he runs, the Doctor collapsing in a heap. | |||
Harry finds Sarah, unconscious, and the Doctor's apparently lifeless body. The chained-up spaceman has also died of thirst and Styre records the result of Experiment 5: human resistance to fluid deprivation. Harry prepares to attack Styre from behind but is dragged back by the Doctor. Styre's shot had hit a piece of scrap metal the Doctor had taken from Nerva, saving his life. The Doctor tells Harry to look after Sarah while he discovers Styre's mission. | |||
The | The robot brings the three remaining spacemen to Styre's ship, where it turns out that Vural had tried to make a deal with Styre in exchange for his own life. However, Styre intends to experiment on Vural anyway, this time to determine the human ribcage's resistance to pressure and muscular strength. He forces Erak and Krans to hold a gravity bar above Vural's body, making it progressively heavier until it is all they can do to keep it from crushing Vural. Styre stops the experiment temporarily to go make another report and the Doctor eavesdrops on it. | ||
The Doctor confronts Styre, lying to him that his experiments are useless: the spacemen are the | The Doctor sneaks away again and meets Sarah and Harry. He tells them that Earth's galaxy has somehow become strategically important in the Sontarans' never-ending war against the [[Rutan]]s. Styre's experiments are to determine the physical limitations of humans, following which a Sontaran fleet will invade. The Doctor hatches a plan: he will distract Styre by challenging him to single combat. After a while, Styre will tire and return to his ship to recharge his energy. While the Doctor fights Styre, Harry will go to Styre's ship and remove a key component. | ||
[[File:Sontaran and prisoners TSE.jpg|thumb|Styre's experiment is disrupted when the Doctor challenges him.]] | |||
The Doctor confronts Styre, lying to him that his experiments are useless: the spacemen are the humans' "slave class", the weakest of them all. The Doctor, on the other hand, is representative of the warrior class. Styre accepts the Doctor's challenge. While the two fight, Sarah and Harry free the three spacemen, then Harry climbs towards Styre's ship to carry out the Doctor's instructions. Styre nearly gains the upper hand, but Vural attacks him, saving the Doctor at the cost of his life. Styre reaches his limits and heads back to his ship. As the time travellers back away from Styre's ship, the Sontaran staggers out in pain, shrivelling and deflating like a balloon before exploding. | |||
The Doctor makes his way to Styre's transmitter | The Doctor explains that the device Harry removed sabotaged the energiser, so the energy fed on Styre instead of the other way around. The Doctor makes his way to Styre's transmitter. He tells the Marshal that not only has Styre's intelligence mission failed, but that the invasion plans are in their hands. If the Sontaran fleet moves across the buffer zone, it will be destroyed. The Marshal swears revenge and terminates the signal. | ||
Erak and Krans thank the Doctor | Erak and Krans thank the Doctor but decide to wait on Earth for the Nervans rather than transmat up to the station. As they watch, Sarah, Harry and the Doctor vanish. | ||
==Cast== | == Cast == | ||
*[[Fourth Doctor| | * [[Fourth Doctor|Doctor Who]] - [[Tom Baker]] | ||
*[[Sarah Jane Smith]] - [[Elisabeth Sladen]] | * [[Sarah Jane Smith]] - [[Elisabeth Sladen]] | ||
*[[Harry Sullivan]] - [[Ian Marter]] | * [[Harry Sullivan]] - [[Ian Marter]] | ||
*[[Vural]] - [[Donald Douglas]] | * [[Vural]] - [[Donald Douglas]] | ||
*[[Krans]] - [[Glyn Jones]] | * [[Krans]] - [[Glyn Jones]] | ||
*[[Erak]] - [[Peter Walshe]] | * [[Erak]] - [[Peter Walshe]] | ||
*[[Styre]] | * [[Styre]] and [[Marshal (The Sontaran Experiment)|the Marshal]] - [[Kevin Lindsay]] | ||
*[[Roth]] - [[Peter Rutherford]] | * [[Roth]] - [[Peter Rutherford (actor)|Peter Rutherford]] | ||
*[[Zake]] - [[Terry Walsh]] | * [[Zake]] - [[Terry Walsh]] | ||
*[[Prisoner]] - [[Brian Ellis]] | * [[Prisoner (The Sontaran Experiment)|Prisoner]] - [[Brian Ellis]] | ||
==Crew== | == Crew == | ||
*[[Writer]]s - [[Bob Baker]] and [[Dave Martin]] | * [[Writer]]s - [[Bob Baker]] and [[Dave Martin]] | ||
*[[Assistant | * [[Production Assistant]] - [[Marion McDougall]] | ||
*[[ | * [[Production Unit Manager]] - [[George Gallaccio]] | ||
*[[ | * [[Doctor Who theme|Title Music]] - [[Ron Grainer]] & [[BBC Radiophonic Workshop]] | ||
*[[ | * [[Title sequence|Title Sequence]] - [[Bernard Lodge]] | ||
*[[Incidental Music]] - [[Dudley Simpson]] | * [[Incidental Music]] - [[Dudley Simpson]] | ||
*[[ | * [[Special sounds|Special Sound]] - [[Dick Mills]] | ||
*[[ | * [[Visual effects designer|Visual Effects Designers]] - [[John Friedlander]], [[Tony Oxley]] | ||
*[[ | * [[Costume designer|Costume Designer]] - [[Barbara Kidd]] | ||
*[[ | * [[Make-up|Make up]] - [[Sylvia James]] | ||
*[[ | * [[O.B. lighting|Lighting]] - [[Tommy Thomas]] | ||
*[[ | * [[O.B. sound|Sound]] - [[Vic Godrich]] | ||
*[[ | * [[Script Editor]] - [[Robert Holmes]] | ||
*[[ | * [[Designer (crew)|Designer]] - [[Roger Murray-Leach]] | ||
*[[ | * [[Producer]] - [[Philip Hinchcliffe]] | ||
*[[ | * [[Director (crew)|Director]] - [[Rodney Bennett]] | ||
*[[ | * [[Fight Arranger]] - [[Terry Walsh]] | ||
== | === Uncredited crew === | ||
The | * [[Assistant floor manager|Assistant Floor Manager]] - [[Russ Karel]] ([[INFO]]: ''The Sontaran Experiment'') | ||
* [[Vision mixer|Vision Mixer]] - [[Mary Kellehar]] ([[INFO]]: ''The Sontaran Experiment'') | |||
* [[Visual effects assistant|Visual Effects Assistant]] - [[Peter Pegrum]] ([[INFO]]: ''The Sontaran Experiment'') | |||
* [[Make-up assistant|Make-Up Assistant]] - [[Martha Livesey]] ([[INFO]]: ''The Sontaran Experiment'') | |||
* [[Engineering manager|Engineering Manager]] - [[George Jakins]] ([[INFO]]: ''The Sontaran Experiment'') | |||
* [[Props supervisor|Props Supervisor]] - [[Harry Randall (crew)|Harry Randall]] ([[INFO]]: ''The Sontaran Experiment'') | |||
* [[Design assistant|Design Assistant]] - [[Sheelagh Lawson]] ([[INFO]]: ''The Sontaran Experiment'') | |||
* [[Location facilities assistant|Location Facilities Assistant]] - [[Jennie Betts|Jenny Betts]] ([[INFO]]: ''The Sontaran Experiment'') | |||
* [[Props]] - [[Dick Carey]] ([[INFO]]: ''The Sontaran Experiment'') | |||
* [[Costume assistant|Costume Assistant]] - [[Richard Winter]] ([[INFO]]: ''The Sontaran Experiment'') | |||
* [[Props buyer|Props Buyer]] - [[Ivan Rodgers]] ([[INFO]]: ''The Sontaran Experiment'') | |||
* [[Scenic props buyer|Scenic Props Buyer]] - [[David Privett]] ([[INFO]]: ''The Sontaran Experiment'') | |||
== | == Worldbuilding == | ||
=== Cultural references from the real world === | |||
* | * Harry says he feels "a bit like a [[Morse code|Morse]] message" after the broken teleportation from Nerva. | ||
* | * Styre calls the Doctor a "[[Worm (insult)|worm]]". | ||
=== The Doctor === | |||
* The Doctor says that he is fascinated by [[time]] and all sorts of [[clock]]s, such as [[atomic clock]]s, wall [[quartz clock]]s and [[grandfather clock]]s, calling himself both a [[horologist]] and [[chronometrist]]. | |||
=== | === The Doctor's items === | ||
* | * The Doctor mentions his [[Five Hundred Year Diary]]. | ||
=== | === Earth locations === | ||
*The | * The Doctor references [[Waterloo]] and [[Trafalgar Square|Trafalgar Square.]] | ||
=== | === Sontarans === | ||
* | * Styre's programme was ordered by the [[Grand Strategic Council]]. | ||
== | === Styre's experiments === | ||
* | * Experiment 4 discovers that immersion in the fluid [[water|H2O]] produces [[asphyxiation]]. | ||
* Experiment 7 concerns resistance to [[fear]]: Sarah is caused to hallucinate a [[snake]], [[rock]]s closing in on her, and [[sludge]] creeping up her legs. | |||
* | * Experiment 8 requires Krans and Erak to keep a [[gravity bar]] from crushing Vural. | ||
== | === Technology === | ||
* The piece of metal which saves the Doctor's life was a [[synestic lock]]s from Nerva's shuttle, which he removed and pocketed while on Nerva. | |||
== Story notes == | |||
* This serial immediately follows the events of the previous serial, ''[[The Ark in Space (TV story)|The Ark in Space]]''. | |||
* The working title for this story was ''The Destructors''. ([[REF]]: ''[[The Fourth Doctor Handbook]]'') | |||
* Although the serial was the third to feature Baker, it was actually the second shot, hence the out-of-sequence production code. | |||
* This was only the second serial in the history of ''Doctor Who'' (the first being 1970's ''[[Spearhead from Space (TV story)|Spearhead from Space]]'') to be shot entirely on location, in this case on [[Dartmoor]]. However, unlike ''Spearhead from Space'' and the location material for other serials, the production was mounted entirely on videotape using an Outside Broadcast unit, rather than on film, as was more usual for the time. | |||
* During shooting, [[Tom Baker]] broke his collarbone. However, because part of his costume was [[The Doctor's scarf|a large scarf]], he could conceal the neck brace he had to wear following the injury. For action scenes, he was doubled by regular stunt performer [[Terry Walsh]], shot from several face-concealing angles. | |||
* This was the first two-part serial to be broadcast since 1965's ''[[The Rescue (TV story)|The Rescue]]'' and the last until 1982's ''[[Black Orchid (TV story)|Black Orchid]]''. | |||
* [[Kevin Lindsay]] is credited as "Styre" for part one. For part two, he is billed as "Styre and the Marshal" on-screen and as "Styre/The Marshal" in ''Radio Times''. | |||
* This was the first story to contain no interior (i.e. studio) scenes. | |||
* [[Glyn Jones]], who played the astronaut [[Krans]], wrote the [[First Doctor]] serial ''[[The Space Museum (TV story)|The Space Museum]]'', making him one of five individuals to have both written for and acted in ''Doctor Who'' (the others being [[Victor Pemberton]], [[Derrick Sherwin]], [[Mark Gatiss]], and [[Toby Whithouse]]). | |||
* [[Kevin Lindsay]] makes his last ''Doctor Who'' appearances, playing Styre and his superior, the Marshal — who appears only on a video screen. He died not long afterwards as a result of a long-standing heart condition. | |||
* The GalSec astronauts were mostly played by [[South Africa]]n actors who used their native accents. [[Bob Baker]] and [[Dave Martin]] were interested in how language evolves with cultural cross-pollination and believed the cultural and racial mix of South Africa was an indication of how language might sound in the future. | |||
* This is one of only eleven televised stories in the history of ''Doctor Who'' not to feature the TARDIS at all, along with ''[[Mission to the Unknown (TV story)|Mission to the Unknown]]'', ''[[Doctor Who and the Silurians (TV story)|Doctor Who and the Silurians]]'', ''[[The Mind of Evil (TV story)|The Mind of Evil]]'', ''[[The Dæmons (TV story)|The Dæmons]]'', ''[[The Sea Devils (TV story)|The Sea Devils]]'', ''[[Genesis of the Daleks (TV story)|Genesis of the Daleks]]'', ''[[Midnight (TV story)|Midnight]]'', ''[[The Lie of the Land (TV story)|The Lie of the Land]],'' ''[[The Woman Who Fell to Earth (TV story)|The Woman Who Fell to Earth]]'' and ''[[Ascension of the Cybermen (TV story)|Ascension of the Cybermen]]''. | |||
* [[Bob Baker]] and [[Dave Martin]] wanted to incorporate some relics of human civilisation which would imply that the story was actually set where London had once stood — for instance, by having the top of Nelson's column poking up out of the ground in homage to ''[[Planet of the Apes]]''. Much of the action of their scripts was set in the ruins of an old priory, and so many of Styre's torture devices were medieval in nature. | |||
* [[Robert Holmes]] rewrote episode two extensively, in the process removing a subplot in which it would have been revealed that Styre was controlling Vural's mind. | |||
* [[Bob Baker]] and [[Dave Martin]] were unhappy with the title, as it spoiled the identity of the villain. | |||
* [[Robert Holmes]] gave [[Bob Baker]] and [[Dave Martin]] a three-hour brief on Sontaran culture, including their [[sex]] lives. All they wanted to know was that "he was a squat, froggy thing". | |||
* [[Rodney Bennett]] claimed that he suggested the Doctor always had junk and bits of string in his pockets, as well as the [[yo-yo]]. | |||
* Filming on Dartmoor was hampered by nonstop rain and the crew had to drag heavy cameras around. | |||
* Sarah is the only female character in this story. | |||
* Styre was referred to as "Weam Styre" in the script. | |||
* [[Bob Baker]] and [[Dave Martin]] were inspired by stories of [[Nazi]] scientists using concentration camp prisoners as test subjects during [[World War II|World War Two]], and the nature of some of Styre's experiments was drawn directly from these reports. | |||
* Styre's robot had originally been developed for another potential storyline. At one stage, the writers envisaged the automaton as being able to move so fast as to become effectively invisible. | |||
* Originally, the GalSec astronauts operated from a makeshift shelter, while Styre used a ruined priory, complete with dungeons, as his base of operations. Instead, the story would be completely set in natural environments. Some medieval aspects of Styre's experiments were eliminated as a result. | |||
* Production unit manager [[George Gallaccio]] suggested that the serial be shot on videotape as opposed to film in order to expedite the editing process. | |||
* Styre's robot was originally envisaged as a [[CSO|chroma key]] creation. The switch to videotape meant that it had to be a practical prop. | |||
* [[Barry Letts]] joined the shoot in Dartmoor. Although he had now formally left the series, he was still in the process of transitioning to new projects, so he decided to make himself available to provide guidance. | |||
*''' | === Ratings === | ||
[[ | * Part one - 11 million viewers | ||
[[ | * Part two - 10.5 million viewers | ||
=== Filming locations === | |||
* The entire serial was filmed over seven days at [[Dartmoor]] National Park in [[Devon]]. | |||
* The major location was Hound Tor, Manaton, Dartmoor. | |||
=== Production errors === | |||
{{discontinuity}} | |||
* During the fight, Styre's head is knocked sideways. When Styre touches his suit, his head wobbles. | |||
* A crew member can be heard briefly from off-screen giving the cue to drop rocks in the trap that Harry falls into. | |||
* There is a shot around 15:30 in part one where the robot turns its head around, and the crewmembers are reflected off the shiny metal. | |||
* Sarah calls Styre and Linx "identical" — despite the fact they clearly have different designs. ''Though a different prosthetic was used for their faces, Styre and Linx were played by the same actor, Kevin Lindsay'' | |||
== Continuity == | |||
* This serial forms part of a continuous series of adventures for [[the Doctor's TARDIS|the TARDIS]] crew, beginning from the end of ''[[Robot (TV story)|Robot]]'' and continuing through to ''[[Terror of the Zygons (TV story)|Terror of the Zygons]]'', although [[PROSE]]: ''[[A Device of Death (novel)|A Device of Death]]'' takes place in a possible gap between ''[[Genesis of the Daleks (TV story)|Genesis of the Daleks]]'' and ''[[Revenge of the Cybermen (TV story)|Revenge of the Cybermen]]'', and [[PROSE]]: ''[[Wolfsbane (novel)|Wolfsbane]]'' is set in another such gap between ''Revenge of the Cybermen'' and ''Terror of the Zygons''. | |||
* The Sontarans are firmly established as a clone race, evidenced by Sarah at first thinking that Styre is [[Linx]]. ([[TV]]: ''[[The Time Warrior (TV story)|The Time Warrior]]'') | |||
* Decades later from her perspective, Sarah Jane will recall her encounter with the Sontarans in the far future when she confronts [[Kaagh]] in her [[2009|present day]], assuring him that the [[Sontaran Empire]] and their [[Rutan-Sontaran War|war]] with the [[Rutan]]s will continue for at least ten thousand years. ([[TV]]: ''[[The Last Sontaran (TV story)|The Last Sontaran]]'') | |||
== DVD, video and other releases == | |||
=== DVD releases === | |||
This story was released as ''Doctor Who: The Sontaran Experiment'' (Special Value Edition) - one of the few occasions in which a two-episode story has been released by itself. | |||
Released: | Released: | ||
*Region 2 - [[ | * Region 2 - [[9 October (releases)|9 October]] [[2006 (releases)|2006]] | ||
*Region 4 - [[ | * Region 4 - [[7 December (releases)|7 December]] 2006 | ||
*Region 1 - [[ | * Region 1 - [[6 March (releases)|6 March]] [[2007 (releases)|2007]] | ||
Contents: | Contents: | ||
* Commentary by [[Elisabeth Sladen]] ([[Sarah Jane Smith]]), [[Philip Hinchcliffe]] (Producer) and [[Bob Baker]] (Writer) | |||
* | * ''[[Built for War: The Sontaran Story (documentary)|Built for War]]'' - The genesis and development of the [[Sontaran]] race through the history of the series, as told by some of the actors and production team involved. This specially produced documentary includes contributions from [[Terrance Dicks]], Elisabeth Sladen, [[Anthony Read]], [[Colin Baker]], [[Nicola Bryant]], Bob Baker, [[Eric Saward]] and [[Stuart Fell]] | ||
* Photo Gallery | |||
* Production Subtitles | |||
Notes: | |||
* Editing for the DVD release was completed by the [[Doctor Who Restoration Team]]. | |||
<gallery position="center" captionalign="center" hideaddbutton="true"> | |||
File:Sontaran_exp_region2.jpg|Region 2 UK cover | |||
File:The Sontaran Experiment DVD R4 Australian cover.jpg|Region 4 Australian cover | |||
File:The sontaran experiment.jpg|Region 1 US cover | |||
</gallery> | |||
==== Boxset release ==== | |||
This story was released in the ''[[Bred for War]]'' DVD boxset on [[5 May (releases)|5 May]] (Region 2) and [[8 July (releases)|8 July]] (Region 4) alongside all the classic series Sontaran stories. The DVD is the same as the one sold separately. In [[2018 (releases)|2018]] the story was released as part of a Doctor Who Season 12 bluray box set. The initial box set released in the UK included deluxe package and collector pictures, while the US release was release in normal packages with no cards. | |||
<gallery position="center" captionalign="center" hideaddbutton="true"> | |||
File:Bred for War.jpg|Region 2 UK cover | |||
Bred for War The Sontaran Collection.jpg|Region 4 cover | |||
</gallery> | |||
=== VHS releases === | |||
This story was released in | This story was released in [[October (releases)|October]] [[1991 (releases)|1991]] as a double video, together with ''[[Genesis of the Daleks (TV story)|Genesis of the Daleks]]''. | ||
== | <gallery position="center" captionalign="center" hideaddbutton="true"> | ||
File:The Sontaran Experiment-The Genesis of the Daleks VHS Australian cover.jpg|Australian VHS cover | |||
File:The Sontaran Experiment-The Genesis of the Daleks VHS US cover.jpg|US VHS cover | |||
Bbcvideo-777-uk-med.jpg|United Kingdom VHS cover | |||
</gallery> | |||
== | === Digital releases === | ||
* | * The story is available for streaming in Canada and the US through BritBox or Amazon Instant Video in the UK. | ||
== External links == | |||
* {{bbcepguideclassic|sontaranexperiment/|The Sontaran Experiment}} | |||
* {{radiotimes|2010-06-06/the-sontaran-experiment|The Sontaran Experiment}} | |||
{{dwcast}} | |||
{{dwrefguide|who_4b.htm|The Sontaran Experiment}} | |||
* {{briefhistory|serials/4b.html|The Sontaran Experiment}} | |||
* {{locguide|sontaranexperiment|The Sontaran Experiment}} | |||
{{DWTV}} | |||
{{Sontaran stories}} | {{Sontaran stories}} | ||
{{TitleSort}} | |||
[[Category:Doctor Who (1963) television stories]] | |||
[[Category:Sontaran television stories]] | |||
[[Category:Season 12 stories]] | |||
[[Category:Stories set in 16087]] | |||
[[Category:Two part serials]] | |||
[[Category:Television stories set on Earth]] | |||
[[ | [[cy:The Sontaran Experiment (stori deledu)]] | ||
[[ | [[de:077 - The Sontaran Experiment]] | ||
[[ | [[es:The Sontaran Experiment]] | ||
[[ | [[fr:The Sontaran Experiment (TV)]] | ||
[[ | [[he:ניסוי הסונטארן (סיפור טלוויזיה)]] | ||
[[ru:Эксперимент сонтаранца]] | |||
Latest revision as of 10:32, 4 September 2024
The Sontaran Experiment was the third serial of season 12 of Doctor Who. Shot entirely on location, it was the shortest story of the 1970s, with only two episodes. An outdoor shoot, all scenes were unusually recorded on videotape rather than film.
Script editor Robert Holmes was not a fan of six-part stories, believing that they were padded, so for season twelve, he decided to have one four-part story and one two-part story. With Christopher Langley's "Space Station" already in the works, he looked to Baker and Martin to fill the gap. As an outline, Holmes asked them to set it on Earth and bring back the Sontarans. This would help them capitalise on the costly ship interior and Sontaran costume used in The Time Warrior.
Baker and Martin were commissioned to write the script on 23 May and asked to deliver episode one shortly after, on 5 June. Part two was in by 6 July and Holmes re-wrote it extensively, removing a sub-plot in which Vural was revealed to be a victim of mind-control. Despite Holmes' earlier intentions, a new Sontaran costume was made for Kevin Lindsay.
During filming, Tom Baker slipped and broke his collarbone. Believing the injury to be more serious, producer Philip Hinchcliffe had designer Roger Murray-Leach drive Baker to the nearest hospital. Worried that he might have to recast his new star, Hinchcliffe was relieved when the injury turned out to be much less serious than first thought, with Baker able and willing to continue filming the next day. The scarf the Doctor wore covered Baker's neck brace, but fight arranger Terry Walsh did end up doubling for Baker in several shots. (INFO: The Sontaran Experiment)
This story started a very short story arc of the Doctor, Sarah and Harry trying to return to Nerva to get back to the TARDIS, but being interrupted. They would return in Revenge of the Cybermen, albeit hundreds of years prior to when they had originally arrived.
Synopsis[[edit] | [edit source]]
Arriving on a seemingly deserted Earth, the Doctor, Sarah and Harry soon discover a crew of shipwrecked astronauts from a distant Earth colony. Lured there by a fake distress call, the astronauts are being experimented on by the deadly Sontarans in preparation of a full-scale invasion of the planet. Can the Doctor defeat Sontaran Field-Major Styre and save the world?
Plot[[edit] | [edit source]]
Part 1[[edit] | [edit source]]
The Fourth Doctor and his companions Sarah Jane Smith and Harry Sullivan transmat down from Space Station Nerva to a field on the now-healed Earth. The Doctor starts fixing the circle of transmat refractors with his sonic screwdriver while the others wander off to explore.

As they walk across the plain, Sarah hears a sound and sees movement on the top of a hill. Harry dismisses it. Two men in spacesuits, Erak and Zake, are observing the Doctor through the crosshairs of their rifles. Erak leaves Zake to watch the Doctor while he reports the presence of the Doctor to another man in a spacesuit, Krans, who is tending a campfire. Meanwhile, Harry slips on the edge of a hole and tumbles into it. He is stuck, unable to climb out. Sarah observes that the edge of the hole had been covered deliberately. Harry has no choice but to stay put as Sarah goes to fetch the Doctor.
Zake's observation of the Time Lord is interrupted by a strange floating robot that bears down on him. Zake flees, the robot pursuing him over the edge of a cliff, where he falls to his death. The Doctor finds Zake's body when Erak and Krans arrive. Thinking the Doctor has killed Zake, they stun him with their rifles before he can explain. As they carry the unconscious Doctor away, they are watched by yet another spaceman, Roth.
Sarah gets back to the circle to find the Doctor gone, his screwdriver abandoned. When Sarah returns to the hole, Harry is nowhere to be seen. Something had started throwing rocks down at Harry and, in scrambling for cover, he found a way out of the hole, climbing through some rocks to the hills beyond. Sarah is about to climb down into the hole to look for Harry when Roth grabs her from behind, hiding her as the drone floats past. Once the danger is gone, Roth introduces himself to Sarah. It was he who covered the edge of the hole, trying to trap the drone. He tells Sarah that the robot serves an alien who lives among the rocks, an alien who has tortured him and killed two of his crew. Roth is obviously traumatised by his experiences. He vows he will not be captured again. When Sarah tells him about her friends, he informs her that the Doctor has been taken to the campsite.

At the campsite, Erak and Krans interrogate the Doctor, demanding to know what he has done to their crewmates. When the Doctor explains that he came down from Space Station Nerva, the spacemen (now joined by their leader, Vural) greet that news with great scepticism. Nerva, the lost colony of mankind, is a mere legend, like Atlantis. The spacemen are from one of the colonies, GalSec. The Doctor suddenly spots an odd looking button on Vural's suit, identifying it as non-human technology. The button is actually a remote camera. Somewhere else, everything is being observed by something with a grey, heavy, four-fingered hand.
Roth brings Sarah near the campsite but refuses to approach; he tells Sarah he saw Vural go to the rocks and the alien let Vural go. The GalSec men tell the Doctor that a GalSec freighter had gone missing. Detecting a distress signal from the supposedly uninhabited Earth, they came to investigate, but their ship was vaporised when they emerged, leaving nine of them stranded. The surviving crew began to vanish one by one. The Doctor offers to fix the transmat refractors and beam them all to Nerva, where they can contact another GalSec ship, but Vural says that they are not taking orders from the "Old People". While the Nervans did nothing but sleep, the rest of mankind had spread across the galaxy and built an empire. At this point, Roth appears. While the three spacemen chase him, Sarah sneaks out from the rocks and frees the Doctor.
Roth loses the others and meets up with Sarah and the Doctor. Sarah tells the Doctor about the robot, and the Doctor examines some residue on the ground, evidence of a terullian drive, except there is no terullian in this galaxy. The Doctor reasons that there must be some way out of the hole that Harry fell in, but as he climbs down, he too slips and falls to the bottom, losing consciousness. At that moment, the robot returns and snares Roth and Sarah with cables.
Harry has made it to the hills, where he spots a man-sized metal sphere among the rocks. As he watches, the robot arrives with Roth and Sarah in tow. The sphere's door opens and to Sarah's horror, out steps a Sontaran warrior.
Part 2[[edit] | [edit source]]

When Sarah expresses her disbelief, the Sontaran tells her he is Field Major Styre of the Sontaran G3 Military Assessment Survey, identical to the other Sontaran clone she encountered, but not the same. Roth cries out that he will not be tortured again and makes a break for it, only for Styre to shoot him down. Roth had already been tested, so he was of no further use to Styre. Sarah, however, is far more interesting.
The three spacemen find the Doctor down the hole, but as they force him to climb out at gunpoint, the drone arrives and snares the trio. The Doctor goes back to the bottom of the hole. He finds the same exit that Harry used. Harry, in the meantime, finds another human chained to the side of the rocks, severely dehydrated.
Nearby, Styre has Sarah tied up to the rocks as well and has placed a device on her forehead. He seals her in with a force field. Styre goes to his transmitter station and reports to his Marshal. The Marshal is impatient for the intelligence report, but Styre tells him that some inconsistencies have arisen that he has to clear up before he submits it. Styre proceeds to subject Sarah to Experiment 7: resistance to fear. The device on her head begins to give Sarah hallucinations, and she starts to panic. The Doctor, however, has reached her and uses the sonic screwdriver to breach the force field. When he rips off the device on her forehead, she gives a scream and falls unconscious. The Doctor, enraged, attacks Styre, but the Sontaran easily fends him off. Styre shoots him when he runs, the Doctor collapsing in a heap.
Harry finds Sarah, unconscious, and the Doctor's apparently lifeless body. The chained-up spaceman has also died of thirst and Styre records the result of Experiment 5: human resistance to fluid deprivation. Harry prepares to attack Styre from behind but is dragged back by the Doctor. Styre's shot had hit a piece of scrap metal the Doctor had taken from Nerva, saving his life. The Doctor tells Harry to look after Sarah while he discovers Styre's mission.
The robot brings the three remaining spacemen to Styre's ship, where it turns out that Vural had tried to make a deal with Styre in exchange for his own life. However, Styre intends to experiment on Vural anyway, this time to determine the human ribcage's resistance to pressure and muscular strength. He forces Erak and Krans to hold a gravity bar above Vural's body, making it progressively heavier until it is all they can do to keep it from crushing Vural. Styre stops the experiment temporarily to go make another report and the Doctor eavesdrops on it.
The Doctor sneaks away again and meets Sarah and Harry. He tells them that Earth's galaxy has somehow become strategically important in the Sontarans' never-ending war against the Rutans. Styre's experiments are to determine the physical limitations of humans, following which a Sontaran fleet will invade. The Doctor hatches a plan: he will distract Styre by challenging him to single combat. After a while, Styre will tire and return to his ship to recharge his energy. While the Doctor fights Styre, Harry will go to Styre's ship and remove a key component.

The Doctor confronts Styre, lying to him that his experiments are useless: the spacemen are the humans' "slave class", the weakest of them all. The Doctor, on the other hand, is representative of the warrior class. Styre accepts the Doctor's challenge. While the two fight, Sarah and Harry free the three spacemen, then Harry climbs towards Styre's ship to carry out the Doctor's instructions. Styre nearly gains the upper hand, but Vural attacks him, saving the Doctor at the cost of his life. Styre reaches his limits and heads back to his ship. As the time travellers back away from Styre's ship, the Sontaran staggers out in pain, shrivelling and deflating like a balloon before exploding.
The Doctor explains that the device Harry removed sabotaged the energiser, so the energy fed on Styre instead of the other way around. The Doctor makes his way to Styre's transmitter. He tells the Marshal that not only has Styre's intelligence mission failed, but that the invasion plans are in their hands. If the Sontaran fleet moves across the buffer zone, it will be destroyed. The Marshal swears revenge and terminates the signal.
Erak and Krans thank the Doctor but decide to wait on Earth for the Nervans rather than transmat up to the station. As they watch, Sarah, Harry and the Doctor vanish.
Cast[[edit] | [edit source]]
- Doctor Who - Tom Baker
- Sarah Jane Smith - Elisabeth Sladen
- Harry Sullivan - Ian Marter
- Vural - Donald Douglas
- Krans - Glyn Jones
- Erak - Peter Walshe
- Styre and the Marshal - Kevin Lindsay
- Roth - Peter Rutherford
- Zake - Terry Walsh
- Prisoner - Brian Ellis
Crew[[edit] | [edit source]]
- Writers - Bob Baker and Dave Martin
- Production Assistant - Marion McDougall
- Production Unit Manager - George Gallaccio
- Title Music - Ron Grainer & BBC Radiophonic Workshop
- Title Sequence - Bernard Lodge
- Incidental Music - Dudley Simpson
- Special Sound - Dick Mills
- Visual Effects Designers - John Friedlander, Tony Oxley
- Costume Designer - Barbara Kidd
- Make up - Sylvia James
- Lighting - Tommy Thomas
- Sound - Vic Godrich
- Script Editor - Robert Holmes
- Designer - Roger Murray-Leach
- Producer - Philip Hinchcliffe
- Director - Rodney Bennett
- Fight Arranger - Terry Walsh
Uncredited crew[[edit] | [edit source]]
- Assistant Floor Manager - Russ Karel (INFO: The Sontaran Experiment)
- Vision Mixer - Mary Kellehar (INFO: The Sontaran Experiment)
- Visual Effects Assistant - Peter Pegrum (INFO: The Sontaran Experiment)
- Make-Up Assistant - Martha Livesey (INFO: The Sontaran Experiment)
- Engineering Manager - George Jakins (INFO: The Sontaran Experiment)
- Props Supervisor - Harry Randall (INFO: The Sontaran Experiment)
- Design Assistant - Sheelagh Lawson (INFO: The Sontaran Experiment)
- Location Facilities Assistant - Jenny Betts (INFO: The Sontaran Experiment)
- Props - Dick Carey (INFO: The Sontaran Experiment)
- Costume Assistant - Richard Winter (INFO: The Sontaran Experiment)
- Props Buyer - Ivan Rodgers (INFO: The Sontaran Experiment)
- Scenic Props Buyer - David Privett (INFO: The Sontaran Experiment)
Worldbuilding[[edit] | [edit source]]
Cultural references from the real world[[edit] | [edit source]]
- Harry says he feels "a bit like a Morse message" after the broken teleportation from Nerva.
- Styre calls the Doctor a "worm".
The Doctor[[edit] | [edit source]]
- The Doctor says that he is fascinated by time and all sorts of clocks, such as atomic clocks, wall quartz clocks and grandfather clocks, calling himself both a horologist and chronometrist.
The Doctor's items[[edit] | [edit source]]
- The Doctor mentions his Five Hundred Year Diary.
Earth locations[[edit] | [edit source]]
- The Doctor references Waterloo and Trafalgar Square.
Sontarans[[edit] | [edit source]]
- Styre's programme was ordered by the Grand Strategic Council.
Styre's experiments[[edit] | [edit source]]
- Experiment 4 discovers that immersion in the fluid H2O produces asphyxiation.
- Experiment 7 concerns resistance to fear: Sarah is caused to hallucinate a snake, rocks closing in on her, and sludge creeping up her legs.
- Experiment 8 requires Krans and Erak to keep a gravity bar from crushing Vural.
Technology[[edit] | [edit source]]
- The piece of metal which saves the Doctor's life was a synestic locks from Nerva's shuttle, which he removed and pocketed while on Nerva.
Story notes[[edit] | [edit source]]
- This serial immediately follows the events of the previous serial, The Ark in Space.
- The working title for this story was The Destructors. (REF: The Fourth Doctor Handbook)
- Although the serial was the third to feature Baker, it was actually the second shot, hence the out-of-sequence production code.
- This was only the second serial in the history of Doctor Who (the first being 1970's Spearhead from Space) to be shot entirely on location, in this case on Dartmoor. However, unlike Spearhead from Space and the location material for other serials, the production was mounted entirely on videotape using an Outside Broadcast unit, rather than on film, as was more usual for the time.
- During shooting, Tom Baker broke his collarbone. However, because part of his costume was a large scarf, he could conceal the neck brace he had to wear following the injury. For action scenes, he was doubled by regular stunt performer Terry Walsh, shot from several face-concealing angles.
- This was the first two-part serial to be broadcast since 1965's The Rescue and the last until 1982's Black Orchid.
- Kevin Lindsay is credited as "Styre" for part one. For part two, he is billed as "Styre and the Marshal" on-screen and as "Styre/The Marshal" in Radio Times.
- This was the first story to contain no interior (i.e. studio) scenes.
- Glyn Jones, who played the astronaut Krans, wrote the First Doctor serial The Space Museum, making him one of five individuals to have both written for and acted in Doctor Who (the others being Victor Pemberton, Derrick Sherwin, Mark Gatiss, and Toby Whithouse).
- Kevin Lindsay makes his last Doctor Who appearances, playing Styre and his superior, the Marshal — who appears only on a video screen. He died not long afterwards as a result of a long-standing heart condition.
- The GalSec astronauts were mostly played by South African actors who used their native accents. Bob Baker and Dave Martin were interested in how language evolves with cultural cross-pollination and believed the cultural and racial mix of South Africa was an indication of how language might sound in the future.
- This is one of only eleven televised stories in the history of Doctor Who not to feature the TARDIS at all, along with Mission to the Unknown, Doctor Who and the Silurians, The Mind of Evil, The Dæmons, The Sea Devils, Genesis of the Daleks, Midnight, The Lie of the Land, The Woman Who Fell to Earth and Ascension of the Cybermen.
- Bob Baker and Dave Martin wanted to incorporate some relics of human civilisation which would imply that the story was actually set where London had once stood — for instance, by having the top of Nelson's column poking up out of the ground in homage to Planet of the Apes. Much of the action of their scripts was set in the ruins of an old priory, and so many of Styre's torture devices were medieval in nature.
- Robert Holmes rewrote episode two extensively, in the process removing a subplot in which it would have been revealed that Styre was controlling Vural's mind.
- Bob Baker and Dave Martin were unhappy with the title, as it spoiled the identity of the villain.
- Robert Holmes gave Bob Baker and Dave Martin a three-hour brief on Sontaran culture, including their sex lives. All they wanted to know was that "he was a squat, froggy thing".
- Rodney Bennett claimed that he suggested the Doctor always had junk and bits of string in his pockets, as well as the yo-yo.
- Filming on Dartmoor was hampered by nonstop rain and the crew had to drag heavy cameras around.
- Sarah is the only female character in this story.
- Styre was referred to as "Weam Styre" in the script.
- Bob Baker and Dave Martin were inspired by stories of Nazi scientists using concentration camp prisoners as test subjects during World War Two, and the nature of some of Styre's experiments was drawn directly from these reports.
- Styre's robot had originally been developed for another potential storyline. At one stage, the writers envisaged the automaton as being able to move so fast as to become effectively invisible.
- Originally, the GalSec astronauts operated from a makeshift shelter, while Styre used a ruined priory, complete with dungeons, as his base of operations. Instead, the story would be completely set in natural environments. Some medieval aspects of Styre's experiments were eliminated as a result.
- Production unit manager George Gallaccio suggested that the serial be shot on videotape as opposed to film in order to expedite the editing process.
- Styre's robot was originally envisaged as a chroma key creation. The switch to videotape meant that it had to be a practical prop.
- Barry Letts joined the shoot in Dartmoor. Although he had now formally left the series, he was still in the process of transitioning to new projects, so he decided to make himself available to provide guidance.
Ratings[[edit] | [edit source]]
- Part one - 11 million viewers
- Part two - 10.5 million viewers
Filming locations[[edit] | [edit source]]
- The entire serial was filmed over seven days at Dartmoor National Park in Devon.
- The major location was Hound Tor, Manaton, Dartmoor.
Production errors[[edit] | [edit source]]
- During the fight, Styre's head is knocked sideways. When Styre touches his suit, his head wobbles.
- A crew member can be heard briefly from off-screen giving the cue to drop rocks in the trap that Harry falls into.
- There is a shot around 15:30 in part one where the robot turns its head around, and the crewmembers are reflected off the shiny metal.
- Sarah calls Styre and Linx "identical" — despite the fact they clearly have different designs. Though a different prosthetic was used for their faces, Styre and Linx were played by the same actor, Kevin Lindsay
Continuity[[edit] | [edit source]]
- This serial forms part of a continuous series of adventures for the TARDIS crew, beginning from the end of Robot and continuing through to Terror of the Zygons, although PROSE: A Device of Death takes place in a possible gap between Genesis of the Daleks and Revenge of the Cybermen, and PROSE: Wolfsbane is set in another such gap between Revenge of the Cybermen and Terror of the Zygons.
- The Sontarans are firmly established as a clone race, evidenced by Sarah at first thinking that Styre is Linx. (TV: The Time Warrior)
- Decades later from her perspective, Sarah Jane will recall her encounter with the Sontarans in the far future when she confronts Kaagh in her present day, assuring him that the Sontaran Empire and their war with the Rutans will continue for at least ten thousand years. (TV: The Last Sontaran)
DVD, video and other releases[[edit] | [edit source]]
DVD releases[[edit] | [edit source]]
This story was released as Doctor Who: The Sontaran Experiment (Special Value Edition) - one of the few occasions in which a two-episode story has been released by itself.
Released:
- Region 2 - 9 October 2006
- Region 4 - 7 December 2006
- Region 1 - 6 March 2007
Contents:
- Commentary by Elisabeth Sladen (Sarah Jane Smith), Philip Hinchcliffe (Producer) and Bob Baker (Writer)
- Built for War - The genesis and development of the Sontaran race through the history of the series, as told by some of the actors and production team involved. This specially produced documentary includes contributions from Terrance Dicks, Elisabeth Sladen, Anthony Read, Colin Baker, Nicola Bryant, Bob Baker, Eric Saward and Stuart Fell
- Photo Gallery
- Production Subtitles
Notes:
- Editing for the DVD release was completed by the Doctor Who Restoration Team.
Region 2 UK cover
Region 4 Australian cover

Region 1 US cover


Boxset release[[edit] | [edit source]]
This story was released in the Bred for War DVD boxset on 5 May (Region 2) and 8 July (Region 4) alongside all the classic series Sontaran stories. The DVD is the same as the one sold separately. In 2018 the story was released as part of a Doctor Who Season 12 bluray box set. The initial box set released in the UK included deluxe package and collector pictures, while the US release was release in normal packages with no cards.
Region 2 UK cover
Region 4 cover


VHS releases[[edit] | [edit source]]
This story was released in October 1991 as a double video, together with Genesis of the Daleks.
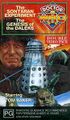
Australian VHS cover
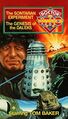
US VHS cover
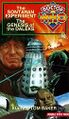
United Kingdom VHS cover


Digital releases[[edit] | [edit source]]
- The story is available for streaming in Canada and the US through BritBox or Amazon Instant Video in the UK.
External links[[edit] | [edit source]]
- The Sontaran Experiment at the BBC's official site
- The Sontaran Experiment at RadioTimes
- The Sontaran Experiment at BroaDWcast
- The Sontaran Experiment at the Doctor Who Reference Guide
- The Sontaran Experiment at Shannon Sullivan's A Brief History of Time (Travel)
- The Sontaran Experiment at The Locations Guide
| ||||||||||||||||||||||||||||