Past Lives (audio story): Difference between revisions
(→Notes) Tag: 2017 source edit |
(Added cover gallery) Tags: Mobile edit Mobile web edit |
||
| (57 intermediate revisions by 17 users not shown) | |||
| Line 1: | Line 1: | ||
{{title dab away}} | {{title dab away}} | ||
{{real world}} | {{real world}} | ||
{{Infobox Story | {{Infobox Story SMW | ||
|image = <gallery> | |image = <gallery> | ||
Once and Future Past Lives.jpg|Standard | Once and Future Past Lives.jpg|Standard | ||
Past Lives Alt.jpg|Standard Alt | |||
Past Lives Limited.jpg|Limited | Past Lives Limited.jpg|Limited | ||
</gallery> | </gallery> | ||
| Line 13: | Line 14: | ||
|featuring2 = Kate Stewart | |featuring2 = Kate Stewart | ||
|featuring3 = Petronella Osgood | |featuring3 = Petronella Osgood | ||
| | |featuring4 = The Monk (The Black Hole){{!}}the Monk | ||
|setting = [[ | |featuring5 = First Doctor | ||
|writer = | |featuring6 = Second Doctor | ||
|featuring7 = Third Doctor | |||
|featuring8 = Fifth Doctor | |||
|featuring9 = Sixth Doctor | |||
|featuring10 = Seventh Doctor | |||
|enemy = [[Galavaunt]] | |||
|setting = [[England]], [[2010]] | |||
|writer = Robert Valentine | |||
|director = [[Helen Goldwyn]] | |director = [[Helen Goldwyn]] | ||
|producer = [[David Richardson]] | |producer = [[David Richardson]] | ||
| Line 23: | Line 31: | ||
|epcount = 1 | |epcount = 1 | ||
|publisher = Big Finish Productions | |publisher = Big Finish Productions | ||
|release date = | |release date = 3 May 2023 | ||
|format = 1 CD<br/>Download<br/>1st of 8 stories | |format = 1 CD<br/>Download<br/>1st of 8 stories | ||
|production code = BFPDW60OAFCD01 | |production code = BFPDW60OAFCD01 | ||
|isbn = ISBN 978-1-80240-076-2 (physical)<br>ISBN 978-1-80240-077-9 (digital) | |isbn = ISBN 978-1-80240-076-2 (physical)<br>ISBN 978-1-80240-077-9 (digital) | ||
|trailer = Doctor Who - Once and Future- Past Lives | |||
|series = ''[[Once and Future]]'' | |series = ''[[Once and Future]]'' | ||
|next = The Artist at the End of Time (audio story) | |next = The Artist at the End of Time (audio story) | ||
}} | }} | ||
'''''{{StoryTitle}}''''' was the first story in the ''[[Once and Future]]'' audio series, produced by [[Big Finish Productions]]. It was written by [[Robert Valentine]] and featured [[Tom Baker]] as the [[Fourth Doctor]], [[Sadie Miller]] as [[Sarah Jane Smith]], [[Jemma Redgrave]] as [[Kate Stewart]], [[Ingrid Oliver]] as [[Petronella Osgood]] and [[Rufus Hound]] as {{Hound | '''''{{StoryTitle}}''''' was the first story in the ''[[Once and Future]]'' audio series, produced by [[Big Finish Productions]] in celebration of the [[List of anniversaries|60th Anniversary]] of ''[[Doctor Who]]''. | ||
It was written by [[Robert Valentine]] and featured [[Tom Baker]] as the [[Fourth Doctor]], [[Sadie Miller]] as [[Sarah Jane Smith]], [[Jemma Redgrave]] as [[Kate Stewart]], [[Ingrid Oliver]] as [[Petronella Osgood]] and [[Rufus Hound]] as {{Hound}}. | |||
== Publisher's summary == | == Publisher's summary == | ||
The [[Time War]]. [[The Doctor]] has been injured and brought to a [[Time Lord]] [[field hospital]]. His body glows with energy, but this is no regeneration into a future form – instead, the Doctor's past faces begin to appear as he flits haphazardly between incarnations... | The [[Last Great Time War|Time War]]. [[War Doctor|The Doctor]] has been injured and brought to a [[Time Lord]] [[field hospital]]. His body glows with energy, but this is no regeneration into a future form – instead, the Doctor's past faces begin to appear as he flits haphazardly between incarnations... | ||
Staggering to [[The Doctor's TARDIS|his TARDIS]], the Doctor sets out to solve the mystery of his '[[degeneration]]'. Who has done this to him? How? And why? From the [[Earth]] to the stars, across an array of familiar times and places, he follows clues to retrace his steps, encountering old friends and enemies along the way. Tumbling through his lives, the Doctor must stop his degeneration before he loses himself completely... | Staggering to [[The Doctor's TARDIS|his TARDIS]], the Doctor sets out to solve the mystery of his '[[degeneration]]'. Who has done this to him? How? And why? From the [[Earth]] to the stars, across an array of familiar times and places, he follows clues to retrace his steps, encountering old friends and enemies along the way. Tumbling through his lives, the Doctor must stop his degeneration before he loses himself completely... | ||
| Line 42: | Line 53: | ||
== Plot == | == Plot == | ||
''to | During the [[Last Great Time War|Time War]], the [[War Doctor]] is brought to a field hospital, having been shot by some weapon. Before the medics can get any information out of him, the Doctor [[Retro-regeneration|degenerates]] through his past [[incarnation]]s and runs to [[the Doctor's TARDIS|the TARDIS]], where he finds himself stabilising into [[Fourth Doctor|his fourth incarnation]] in part due to the ship's calming influence. He also notes that the degeneration is affecting the TARDIS as well, with the temporal safeguards tying it to the war having weakened, enabling him to leave the war completely. | ||
As the only thing he can remember about what happened is that [[The Monk (The Black Hole)|the Monk]] is involved, the Doctor uses a [[temporal iterator]] to trace him to an [[island]] off the coast of [[Scotland]] in the [[20th century]] and follows him to [[22nd century]] [[Hong Kong]], where the Monk exchanges [[diamond]]s for a [[smart black omnivariable decryptor]] before sedating him and running off. After meeting with [[Galavaunt|Mr Mallory]] at [[Glastonbury Tor]], the Monk kidnaps [[Sarah Jane Smith|Sarah]] from [[Aberdeen]]. | |||
The Doctor follows the Monk to [[London]] in early [[2010]], but detects a [[cloaking device]] above [[Glastonbury]] which [[Kate Stewart|Kate]] and [[Petronella Osgood|Osgood]] are also aware of and goes to investigate, meeting the two of them in the [[Tower of London]] just before [[Agravain|a Hyreth]] chasing them dies of old age. They head down to the [[Black Archive]] to collect the [[Hyreth]]'s energy source, the [[Magna Gral]], and discover that the Monk has used the decryptor to break in with Sarah, who has fought the Hyreth in the past, to find the device. The Monk explains that he has had [[nanobomb]]s put into his [[blood]] by a client before taking the Magna Gral to his TARDIS, frying the Doctor's temporal iterator before dematerialising. | |||
Osgood reveals that she has been completing an iterator that the [[Third Doctor]] worked on during his [[exile]] and they use it to trace the Monk to [[Glastonbury]] where Mr Mallory, who is actually the Hyreth Galavaunt, takes the Monk and the Magna Gral to his warship to awaken his people. The Doctor materialises aboard and orders Kate and Osgood to guard the TARDIS whilst he and Sarah go to speak with the Monk, but they ignore him and confront Galavaunt as he attempts to use the Magna Gral, which succeeds only in giving the Hyreth enough life to reach their natural end and [[death|die]]. Galavaunt mourns his people and surrenders himself and [[Baravoar]] to [[UNIT]], who intend to place him in a care home for aliens. | |||
The Doctor neutralises the Monk's nanobombs and learns that the Time War is in the Monk's personal [[future]], meaning he has no knowledge of the degeneration weapon and can only suggest that he visit [[Jenny (The Doctor's Daughter)|his daughter]] to find a way to delay the weapon's effects with sympathetic [[DNA]]. The Doctor tasks the Monk with returning Sarah to her own time. Unfortunately for the Doctor, his temporary stability comes to an end, as the degeneration begins to change his appearance once again. Wondering which way the degeneration will go, he says goodbye to Sarah, Kate and Osgood. He departs in his TARDIS, promising to continue to remember that UNIT is there for him. | |||
== Cast == | == Cast == | ||
* [[Fourth Doctor|The Doctor]] - [[Tom Baker]] | * [[Fourth Doctor|The Fourth Doctor]] - [[Tom Baker]] | ||
* [[Sarah Jane Smith]] - [[Sadie Miller]] | * [[Sarah Jane Smith]] - [[Sadie Miller]] | ||
* [[Kate Stewart]] - [[Jemma Redgrave]] | * [[Kate Stewart]] - [[Jemma Redgrave]] | ||
* [[Petronella Osgood|Osgood]] - [[Ingrid Oliver]] | * [[Petronella Osgood|Osgood]] - [[Ingrid Oliver]] | ||
* [[The Monk (The Black Hole)|The Monk]] - [[Rufus Hound]] | * [[The Monk (The Black Hole)|The Monk]] - [[Rufus Hound]] | ||
* [["Mr Mallory" | * [[Galavaunt|"Mr Mallory" / Galavaunt]] / [[Baravoar]] - [[Ewan Bailey]] | ||
* [[Field Surgeon]] / [[Black Market Merchant]] - [[Dan Starkey]] | * [[Field Surgeon (Past Lives)|Field Surgeon]] / [[Black Market Merchant (Past Lives)|Merchant]] - [[Dan Starkey]] | ||
* [[First Doctor]] - [[Stephen Noonan]] | * [[The First Doctor]] - [[Stephen Noonan]] | ||
* [[Second Doctor]] - [[Michael Troughton]] | * [[The Second Doctor]] - [[Michael Troughton]] | ||
* [[Third Doctor]] - [[Tim Treloar]] | * [[The Third Doctor]] - [[Tim Treloar]] | ||
* [[Fifth Doctor]] - [[Peter Davison]] | * [[The Fifth Doctor]] - [[Peter Davison]] | ||
* [[Sixth Doctor]] - [[Colin Baker]] | * [[The Sixth Doctor]] - [[Colin Baker]] | ||
* [[Seventh Doctor]] - [[Sylvester McCoy]] | * [[The Seventh Doctor]] - [[Sylvester McCoy]] | ||
== Crew == | |||
== | * Senior Producer - [[John Ainsworth]] | ||
''to | * Cover Art - [[Lee Johnson]] | ||
* Director - [[Helen Goldwyn]] | |||
* Executive Producers - [[Jason Haigh-Ellery]] and [[Nicholas Briggs]] | |||
* Music and Sound Design - [[Howard Carter (composer)|Howard Carter]] | |||
* Producer - [[David Richardson]] | |||
* Script Editor - [[Matt Fitton]] | |||
* Writer - [[Robert Valentine]] | |||
== Worldbuilding == | |||
* Whilst degenerating, the Third Doctor refers to the [[Robot Yeti|Yeti]] and [[Cyberman|Cybermen]]. | |||
* The Monk mocks the [[chameleon circuit]] of [[the Doctor's TARDIS]]. | |||
* The Monk has a [[sonic skeleton key]]. | |||
* The Monk gains access to the [[Black Archive]], where [[The Monk's TARDIS|his TARDIS]] is disguised as a guard hut. | |||
* Among the items in the Black Archive are [[Sontaran]] grenades, [[Bannermen|Bannerman]] assault rifles, an [[Auton]] wrist gun and a damaged [[control sphere]]. | |||
* The [[Magna Gral]] resembles [[coprolite]]. | |||
* The Doctor mistakenly refers to Kate as "[[Alistair Gordon Lethbridge-Stewart|Brigadier]]". | |||
* The Hyreth are old enemies of the Doctor and Sarah, who previously defeated them alongside Brigadier Lethbridge-Stewart. | |||
== Notes == | == Notes == | ||
* The story | * The working title for this story was ''Once and Future'' before it became the title for the [[Once and Future|overall story arc]]. ([[BFX]]: ''Past Lives'') | ||
* The story does not specify which Doctor is [[Retro-regeneration|degenerating]]. However, the TARDIS hum in the pre-titles, the [[TARDIS control room|console room]] seen in the video trailer, and the absence of [[Paul McGann]] during the degeneration sequence, suggest it may be the [[Eighth Doctor]]. It was later revealed that it was actually the [[War Doctor]] who was hit with the degeneration weapon. ([[AUDIO]]: ''[[The Union (audio story)|The Union]]'') | |||
** The video trailer also depicts the Doctors clothing and the TARDIS console room retaining their appearances after the Doctor stabilizes into his fourth incarnation, though the audio suggests the console room has reverted to the appearance that the Fourth Doctor had used, and further installments imply that the Doctor's clothes have been regenerating with their body. | |||
* The story recreates [[Sarah Jane Smith|Sarah]]'s departure scene from ''[[The Hand of Fear (TV story)|The Hand of Fear]]''. | |||
* This story depicts the Doctor's first chronological visit to the [[Black Archive]]. | |||
* Robert Valentine states that the story is set before ''[[The Day of the Doctor (TV story)|The Day of the Doctor]]'' from Kate and Osgood's perspective. ([[BFX]]: ''Past Lives'') | |||
* The story was recorded remotely on [[2 February (production)|2 February]] [[2021 (production)|2021]]. | |||
== Continuity == | == Continuity == | ||
* Sarah had just left the Fourth Doctor moments earlier when she confronts the Monk. ([[TV]]: ''[[The Hand of Fear (TV story)|The Hand of Fear]]'') | |||
* The Monk has put the money he had stolen into a Swiss bank account. ([[TV]]: [[The Time Meddler (TV story)|''The Time Meddler'']]) | |||
* Sarah has met the Monk before. ([[AUDIO]]: [[How to Win Planets and Influence People (audio story)|''How to Win Planets and Influence People'']]) | |||
* The Doctor admires the celery on Osgood's jacket. ([[TV]]: ''[[Castrovalva (TV story)|Castrovalva]]'', et al) | |||
* The Monk is aware that the Doctor will have [[Jenny (The Doctor's Daughter)|a daughter]], much to the Doctor and Sarah's surprise. ([[TV]]: ''[[The Doctor's Daughter (TV story)|The Doctor's Daughter]]'') | |||
* The Monk uses the alias Thelonious like one of his [[The Monk (The Book of Kells)|other incarnations]]. ([[AUDIO]]: ''[[The Book of Kells (audio story)|The Book of Kells]]'') | |||
* Kate plans to visit [[Cromer]]. ([[TV]]: ''[[The Three Doctors (TV story)|The Three Doctors]]'') | |||
* The First Doctor's attempts to refuse to degenerate is similar to his attempts to refuse to regenerate in [[TV]]: [[Twice Upon a Time (TV story)|''Twice Upon a Time'']]. | |||
* The Monk is not aware of the Time War, and suggests that it is in his future. ([[AUDIO]]: [[Divorced, Beheaded, Regenerated (audio story)|''Divorced, Beheaded, Regenerated'']]) | |||
== Cover gallery == | |||
<gallery position="center" captionalign="center" hideaddbutton="true"> | |||
Once and Future Past Lives.jpg|Standard Edition cover | |||
Past Lives Alt.jpg|Standard Edition alternate cover | |||
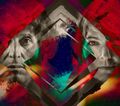
Once and Future Past Lives textless.jpg|Standard Edition textless cover | |||
Past Lives Limited.jpg|Limited Edition cover | |||
Past Lives Limited textless.jpg|Limited Edition textless cover | |||
Past Lives Limited (without Special Edition title).jpg|Limited Edition old cover without ''Special Edition'' title | |||
</gallery> | |||
== External links == | == External links == | ||
| Line 83: | Line 143: | ||
[[Category:UNIT audio stories]] | [[Category:UNIT audio stories]] | ||
[[Category:The Monk audio stories]] | [[Category:The Monk audio stories]] | ||
[[Category:One part audio stories]] | |||
[[Category:Stories set in 2010]] | |||
Latest revision as of 13:52, 13 May 2024
Past Lives was the first story in the Once and Future audio series, produced by Big Finish Productions in celebration of the 60th Anniversary of Doctor Who.
It was written by Robert Valentine and featured Tom Baker as the Fourth Doctor, Sadie Miller as Sarah Jane Smith, Jemma Redgrave as Kate Stewart, Ingrid Oliver as Petronella Osgood and Rufus Hound as the Monk.
Publisher's summary[[edit] | [edit source]]
The Time War. The Doctor has been injured and brought to a Time Lord field hospital. His body glows with energy, but this is no regeneration into a future form – instead, the Doctor's past faces begin to appear as he flits haphazardly between incarnations...
Staggering to his TARDIS, the Doctor sets out to solve the mystery of his 'degeneration'. Who has done this to him? How? And why? From the Earth to the stars, across an array of familiar times and places, he follows clues to retrace his steps, encountering old friends and enemies along the way. Tumbling through his lives, the Doctor must stop his degeneration before he loses himself completely...
Settling as his Fourth incarnation, the Doctor goes in search of the Monk, with a vague memory that he had something to do with his 'degeneration'.
On Earth, the Monk is meddling, bringing Sarah Jane Smith to the future UNIT HQ to steal a device for an alien race. The Doctor must help Kate Stewart and Osgood foil an invasion before he can confront the Monk about what he knows…
Plot[[edit] | [edit source]]
During the Time War, the War Doctor is brought to a field hospital, having been shot by some weapon. Before the medics can get any information out of him, the Doctor degenerates through his past incarnations and runs to the TARDIS, where he finds himself stabilising into his fourth incarnation in part due to the ship's calming influence. He also notes that the degeneration is affecting the TARDIS as well, with the temporal safeguards tying it to the war having weakened, enabling him to leave the war completely.
As the only thing he can remember about what happened is that the Monk is involved, the Doctor uses a temporal iterator to trace him to an island off the coast of Scotland in the 20th century and follows him to 22nd century Hong Kong, where the Monk exchanges diamonds for a smart black omnivariable decryptor before sedating him and running off. After meeting with Mr Mallory at Glastonbury Tor, the Monk kidnaps Sarah from Aberdeen.
The Doctor follows the Monk to London in early 2010, but detects a cloaking device above Glastonbury which Kate and Osgood are also aware of and goes to investigate, meeting the two of them in the Tower of London just before a Hyreth chasing them dies of old age. They head down to the Black Archive to collect the Hyreth's energy source, the Magna Gral, and discover that the Monk has used the decryptor to break in with Sarah, who has fought the Hyreth in the past, to find the device. The Monk explains that he has had nanobombs put into his blood by a client before taking the Magna Gral to his TARDIS, frying the Doctor's temporal iterator before dematerialising.
Osgood reveals that she has been completing an iterator that the Third Doctor worked on during his exile and they use it to trace the Monk to Glastonbury where Mr Mallory, who is actually the Hyreth Galavaunt, takes the Monk and the Magna Gral to his warship to awaken his people. The Doctor materialises aboard and orders Kate and Osgood to guard the TARDIS whilst he and Sarah go to speak with the Monk, but they ignore him and confront Galavaunt as he attempts to use the Magna Gral, which succeeds only in giving the Hyreth enough life to reach their natural end and die. Galavaunt mourns his people and surrenders himself and Baravoar to UNIT, who intend to place him in a care home for aliens.
The Doctor neutralises the Monk's nanobombs and learns that the Time War is in the Monk's personal future, meaning he has no knowledge of the degeneration weapon and can only suggest that he visit his daughter to find a way to delay the weapon's effects with sympathetic DNA. The Doctor tasks the Monk with returning Sarah to her own time. Unfortunately for the Doctor, his temporary stability comes to an end, as the degeneration begins to change his appearance once again. Wondering which way the degeneration will go, he says goodbye to Sarah, Kate and Osgood. He departs in his TARDIS, promising to continue to remember that UNIT is there for him.
Cast[[edit] | [edit source]]
- The Fourth Doctor - Tom Baker
- Sarah Jane Smith - Sadie Miller
- Kate Stewart - Jemma Redgrave
- Osgood - Ingrid Oliver
- The Monk - Rufus Hound
- "Mr Mallory" / Galavaunt / Baravoar - Ewan Bailey
- Field Surgeon / Merchant - Dan Starkey
- The First Doctor - Stephen Noonan
- The Second Doctor - Michael Troughton
- The Third Doctor - Tim Treloar
- The Fifth Doctor - Peter Davison
- The Sixth Doctor - Colin Baker
- The Seventh Doctor - Sylvester McCoy
Crew[[edit] | [edit source]]
- Senior Producer - John Ainsworth
- Cover Art - Lee Johnson
- Director - Helen Goldwyn
- Executive Producers - Jason Haigh-Ellery and Nicholas Briggs
- Music and Sound Design - Howard Carter
- Producer - David Richardson
- Script Editor - Matt Fitton
- Writer - Robert Valentine
Worldbuilding[[edit] | [edit source]]
- Whilst degenerating, the Third Doctor refers to the Yeti and Cybermen.
- The Monk mocks the chameleon circuit of the Doctor's TARDIS.
- The Monk has a sonic skeleton key.
- The Monk gains access to the Black Archive, where his TARDIS is disguised as a guard hut.
- Among the items in the Black Archive are Sontaran grenades, Bannerman assault rifles, an Auton wrist gun and a damaged control sphere.
- The Magna Gral resembles coprolite.
- The Doctor mistakenly refers to Kate as "Brigadier".
- The Hyreth are old enemies of the Doctor and Sarah, who previously defeated them alongside Brigadier Lethbridge-Stewart.
Notes[[edit] | [edit source]]
- The working title for this story was Once and Future before it became the title for the overall story arc. (BFX: Past Lives)
- The story does not specify which Doctor is degenerating. However, the TARDIS hum in the pre-titles, the console room seen in the video trailer, and the absence of Paul McGann during the degeneration sequence, suggest it may be the Eighth Doctor. It was later revealed that it was actually the War Doctor who was hit with the degeneration weapon. (AUDIO: The Union)
- The video trailer also depicts the Doctors clothing and the TARDIS console room retaining their appearances after the Doctor stabilizes into his fourth incarnation, though the audio suggests the console room has reverted to the appearance that the Fourth Doctor had used, and further installments imply that the Doctor's clothes have been regenerating with their body.
- The story recreates Sarah's departure scene from The Hand of Fear.
- This story depicts the Doctor's first chronological visit to the Black Archive.
- Robert Valentine states that the story is set before The Day of the Doctor from Kate and Osgood's perspective. (BFX: Past Lives)
- The story was recorded remotely on 2 February 2021.
Continuity[[edit] | [edit source]]
- Sarah had just left the Fourth Doctor moments earlier when she confronts the Monk. (TV: The Hand of Fear)
- The Monk has put the money he had stolen into a Swiss bank account. (TV: The Time Meddler)
- Sarah has met the Monk before. (AUDIO: How to Win Planets and Influence People)
- The Doctor admires the celery on Osgood's jacket. (TV: Castrovalva, et al)
- The Monk is aware that the Doctor will have a daughter, much to the Doctor and Sarah's surprise. (TV: The Doctor's Daughter)
- The Monk uses the alias Thelonious like one of his other incarnations. (AUDIO: The Book of Kells)
- Kate plans to visit Cromer. (TV: The Three Doctors)
- The First Doctor's attempts to refuse to degenerate is similar to his attempts to refuse to regenerate in TV: Twice Upon a Time.
- The Monk is not aware of the Time War, and suggests that it is in his future. (AUDIO: Divorced, Beheaded, Regenerated)
Cover gallery[[edit] | [edit source]]
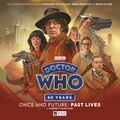
Standard Edition cover
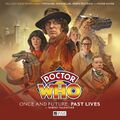
Standard Edition alternate cover

Standard Edition textless cover
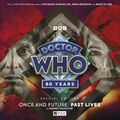
Limited Edition cover
Limited Edition textless cover

Limited Edition old cover without Special Edition title


.jpg)
External links[[edit] | [edit source]]
- Official Past Lives page at bigfinish.com
| |||||
| ||||||||||||||||||||||||||||||||||||||||||||