TARDIS (video game): Difference between revisions
No edit summary |
|||
| (157 intermediate revisions by 49 users not shown) | |||
| Line 1: | Line 1: | ||
{{title dab away}} | |||
{{real world}} | {{real world}} | ||
{{ | {{ImageLinkVideoGame}} | ||
{{Infobox Story SMW | |||
{{Infobox | |image = TAGTARDISPromo.jpg | ||
|image = | |series = [[The Adventure Games]] | ||
|series = [[ | |||
|series number = 3 | |series number = 3 | ||
|doctor = | |doctor = Eleventh Doctor | ||
|companions = [[Amy Pond]] | |companions = [[Amy Pond|Amy]] | ||
|enemy = [[The Entity (TARDIS)|The Entity]] | |enemy = [[The Entity (TARDIS)|The Entity]] | ||
|setting = | |setting = [[The Doctor's TARDIS]] | ||
|developer = Sumo Digital | |developer = Sumo Digital | ||
|publisher = BBC Wales Interactive | |publisher = BBC Wales Interactive | ||
|writer = [[James Moran]] | |director = Sean Millard | ||
|platform = | |writer = James Moran, Phil Ford, Sean Millard | ||
|genre = | |contributors = {{il|[[James Moran]] (script & story)|[[Phil Ford]] (story)|Sean Millard (story)}} | ||
|release date = | |music = [[Murray Gold]] | ||
|platform = PC, Mac | |||
|genre = Adventure | |||
|release date = 27 August 2010 | |||
|prev = Blood of the Cybermen (video game) | |||
|next = Shadows of the Vashta Nerada (video game) | |||
|trailer = Doctor Who The Adventure Games - Tardis trailer | |||
}} | }} | ||
'''''TARDIS''''' | '''''TARDIS''''' was the third episode of the video game ''[[Doctor Who: The Adventure Games]]''. The player had the ability to play as the [[Eleventh Doctor]] and [[Amy Pond]]. | ||
Set mostly inside [[the Doctor's TARDIS|the TARDIS]], it gave players a chance to explore the ship in a way not previously offered by any other ''Doctor Who'' video game before it. Nevertheless, it was by far the shortest of the five episodes of ''The Adventure Games''. It was also the only episode not written by [[Phil Ford]], though he received a story credit. Instead, writing chores were handled by [[James Moran]]. | |||
== Synopsis == | == Synopsis == | ||
With [[ | With [[the TARDIS]] caught in a time riptide, it's up to [[Amy Pond|Amy]] to save the day or leave the [[Eleventh Doctor]] trapped in the void forever. Meanwhile, [[the Entity (TARDIS)|a dangerous entity]] is roaming the TARDIS corridors and it hasn't been fed for a very long time... | ||
== Plot == | == Plot == | ||
The Doctor and Amy are inside the TARDIS, discussing where they should go next for a more peaceful outing | The Doctor and Amy are inside the TARDIS, discussing where they should go next for a more peaceful outing - which Amy cynically declares nearly impossible, considering the Doctor's long track record of holidays failing miserably. However, the TARDIS suddenly enters a "space riptide", and the Doctor is launched through the doors, out into space. After the TARDIS steadies itself, Amy looks outside and sees the Doctor hovering, still conscious and surrounded by a number of strange blue worms, a short distance away. | ||
Through sign language, he manages to tell Amy that he is slowly suffocating, and she can save him by resetting the TARDIS | [[File:Entity escapes (TARDIS).jpg|thumb|left|The Entity escapes.]] | ||
Through sign language, he manages to tell Amy that he is slowly suffocating, and she can save him by resetting the TARDIS air shell by using the red levers. Amy does so and the Doctor uses an [[earpiece]] to properly contact her through the [[TARDIS scanner|scanner]], telling her to use the tractor beam to retrieve him. The console needs an outside power source for that, so the Doctor sends Amy to his drawing room to retrieve a power source for the beam. Searching through the many knick-knacks in the Doctor's drawing room, Amy is, at first, unsuccessful in finding anything useful for powering the tractor beam. Another riptide strikes the TARDIS, and the interior shaking causes one of the clocks to move, revealing a safe. Amy finds {{Simm}}'s [[laser screwdriver]] inside, but accidentally knocks over a glass vase next to it. Thinking she can just replace it and blaming the Doctor for her own mistake, Amy hurries back to the control room. Unbeknownst to her, a orange glow escapes the shattered pieces of vase and follows quickly after... | |||
After informing the Doctor via the scanner that she has found the laser screwdriver, the Doctor instructs her to insert it in the console. Doing so activates the tractor beam and the Doctor is pulled back into the TARDIS. | |||
The Doctor explains that the blue worms that had been pestering him are known as [[Chronomite]]s, somewhat harmless parasites, but they can make you "very itchy". Unfortunately, the Entity, an old enemy of the Doctor that survives by draining years from others, has arrived in the control room. The presence of the Entity, along with another space riptide, causes the TARDIS to send Amy away. | |||
Amy is now in a future TARDIS with the Entity. Realising that Amy is in the TARDIS 1,000 years into the future, the Doctor sets about scavenging parts from the present TARDIS in order to create a tachyon feedback loop which will reunite Amy with him. The Doctor manages to scavenge three items from his drawing room; his [[biodata module]] [[fob watch]], an [[Oscillator]] from the distress beacon he picked up in the [[GSO Arctic Drilling Station]] and the [[Kontron crystal]] used to make a chronal blocker on [[Skaro]]; using these, the Doctor is able to successfully make the feedback loop. | |||
In the future TARDIS, the Entity begins attacking Amy, feeding on her time. A time-activated recording of the Doctor appears on the scanner, telling Amy that she needs to answer some trivia questions in order to prove that she's herself; then she can access and use the tachyon feedback loop to get back to her proper timeline. Amy answers the questions correctly and completes the loop on her end, allowing the Doctor to pull her back into the present TARDIS. | |||
The Doctor | Once the pair are reunited, the Doctor threatens the Entity - telling it to either restore Amy's time or be imprisoned again (permanently) after it has finished her off. The Entity retreats into another vase that the Doctor takes out, and the Doctor proposes a deal: he will release the Entity into the timestream, where it can feed off of the limitless supply of Chronomites - but only if it restores Amy's time. The Entity finds this to be acceptable and gives Amy her time back; the Doctor then releases it from the TARDIS to fulfil his side of the bargain. Amy tells the Doctor that he forgot to mention that the Chronomites cause itchiness, but the Doctor simply says that he forgot (possibly meaning that he wished to punish the Entity for its past deeds). | ||
The Doctor performs some checks on the central console, then sets course for [[Poseidon 8]], built in [[London]]'s previous location, following the great flood of the [[23rd century]]. Exiting the TARDIS, Amy is amazed by the underwater base that they have materialised inside. However, her amazement is quickly replaced by fear, as the pair notice a [[Zaralok|gigantic alien shark]] attacking the base and heading towards them.... | |||
== Cast == | == Cast == | ||
| Line 43: | Line 53: | ||
* [[The Entity (TARDIS)|The Entity]] - [[Sarah Douglas]] | * [[The Entity (TARDIS)|The Entity]] - [[Sarah Douglas]] | ||
== | == Crew == | ||
* The TARDIS has a drawing room, sun room and a lift. | * [[Writer]] - [[James Moran]] | ||
* Things seen in the | * Story - James Moran, [[Phil Ford]], [[Sean Millard]] | ||
* Voice [[Director (crew)|Director]]s - [[Gary Russell]], [[Charles Cecil]] | |||
* [[Executive producer|Executive Producers]] - [[Pat Phelan]], [[Steven Moffat]], [[Piers Wenger]], [[Beth Willis]] | |||
* Executive Producers, Interactive - [[Anwen Aspden]], Charles Cecil | |||
* [[Interactive producer|Interactive Producer]] - [[Richard Jenkins]] | |||
* [[Senior producer|Senior Producer]] - [[Mat Fidell]] | |||
* [[Sound editor|Sound Editor]] - [[Matthew Cox]] (as Matt Cox) | |||
* Sound and [[music editor|Music Editor]] - Pat Phelan | |||
* [[Quality insurer|Quality Insurer]] - [[Tom Barker]] | |||
* [[Programming lead|Programming Lead]] - [[James Sutherland]] | |||
* [[Programmer (crew)|Programmer]] - [[Phil Woods]], [[Carl Dixon]], [[Dan Mallinson]], [[Henry Durrant]], [[Sean Davies]], [[Tom Sedden]] | |||
* Design and Scripting - [[Nana Nielsen]], [[Mike Welsh]], [[Sarah Cook]] | |||
* [[Concept artist|Concepts]]/[[Storyboard artist|Storyboards]] - [[Richard Jordon]] | |||
* [[Art lead|Art Lead]] - [[Michael Hirst]] (as Mick Hirst) | |||
* [[3D artist|Artists]] - [[Chris Pepper]], [[John Hackleton]] | |||
* [[Animation lead|Animation Lead]] - [[Ian Dreary]] | |||
* [[Animator]]s - [[Lee Taylor]], [[Phil Hanks]], [[Stephen Thomas]] (as Steve Thomas), [[Shruti Rao]], [[Simon Wottage]], [[Robin Butler]], [[Simon Bradley]] | |||
* [[Graphic design lead|Graphic Design Lead]] - [[Chantal Beaumont]] | |||
* [[Creative director|Creative Director]] - Sean Millard | |||
* Core Tech Manager - [[Stephen Robinson]] | |||
* Amy and the Doctor are both bad at charades. | * Studio Head - [[Paul Porter]] | ||
* King Kong and | * European VP - [[Carl Cavers]] | ||
* [[Casting director|Casting Director]] - [[Andy Pryor]] | |||
* [[Incidental music|Original music]] by [[Murray Gold]] | |||
== Collectables == | |||
:''Please note that this section [[Tardis:Spoiler policy|contains spoilers]] for the locations of collectables within the game. Please skip this section if you don't want to know this information.'' | |||
=== Facts === | |||
{| class="wikitable" | |||
|- | |||
! scope="col" style="width:20%;" | Fact | |||
! scope="col" style="width:30%;" | Location | |||
! scope="col" style="width:30%;" | Image | |||
|- | |||
| [[Dalek eyestalk|Dalek Eye Stalk]] | |||
| [[TARDIS (video game)#Act one|Act one]]/[[TARDIS (video game)#Act two|Act two]]/[[TARDIS (video game)#Act three|Act three]]:<br>In the TARDIS drawing room, on first bookcase on the left upon entering. Interact with the Dalek eyestalk. | |||
| [[File:Dalek Eye Stalk fact (TARDIS).jpg|thumb|center]] | |||
|- | |||
| [[Book of the Weeping Angels|Book of Weeping Angels]] | |||
| [[TARDIS (video game)#Act one|Act one]]/[[TARDIS (video game)#Act two|Act two]]/[[TARDIS (video game)#Act three|Act three]]:<br>In the TARDIS drawing room, on first bookcase on the left upon entering. Interact with the Book of the Weeping Angels. | |||
| [[File:Book of Weeping Angels fact (TARDIS).jpg|thumb|center]] | |||
|- | |||
| [[The Doctor's recorder|Recorder]] | |||
| [[TARDIS (video game)#Act one|Act one]]/[[TARDIS (video game)#Act two|Act two]]/[[TARDIS (video game)#Act three|Act three]]:<br>In the TARDIS drawing room, on first bookcase on the left upon entering. Interact with the Doctor's recorder. | |||
| [[File:Recorder fact (TARDIS).jpg|thumb|center]] | |||
|- | |||
| [[Chronon Blocker]] | |||
| [[TARDIS (video game)#Act one|Act one]]/[[TARDIS (video game)#Act two|Act two]]/[[TARDIS (video game)#Act three|Act three]]:<br>In the TARDIS drawing room, on first bookcase on the left upon entering. Interact with the Chronon Blocker. | |||
| [[File:Chronon Blocker fact (TARDIS).jpg|thumb|center]] | |||
|- | |||
| [[Map]] of [[Medieval]] [[Venice]] | |||
| [[TARDIS (video game)#Act one|Act one]]/[[TARDIS (video game)#Act two|Act two]]/[[TARDIS (video game)#Act three|Act three]]:<br>In the TARDIS drawing room, on second bookcase on the left upon entering. Interact with the rolled up map. | |||
| [[File:Map of Medieval Venice fact (TARDIS).jpg|thumb|center]] | |||
|- | |||
| [[Elizabeth X|Liz Ten]]'s Facemask | |||
| [[TARDIS (video game)#Act one|Act one]]/[[TARDIS (video game)#Act two|Act two]]/[[TARDIS (video game)#Act three|Act three]]:<br>In the TARDIS drawing room, on second bookcase on the left upon entering. Interact with the ornate mask. | |||
| [[File:Liz Ten's Facemask fact (TARDIS).jpg|thumb|center]] | |||
|- | |||
| [[Distress call|Distress Beacon]] | |||
| [[TARDIS (video game)#Act one|Act one]]:<br>In the TARDIS drawing room, on second bookcase on the left upon entering. Interact with the distress beacon. | |||
| [[File:Distress Beacon fact (TARDIS).jpg|thumb|center]] | |||
|- | |||
| [[Translation sphere|Ood Translator]] | |||
| [[TARDIS (video game)#Act one|Act one]]/[[TARDIS (video game)#Act two|Act two]]/[[TARDIS (video game)#Act three|Act three]]:<br>In the TARDIS drawing room, on second bookcase on the left upon entering. Interact with the Ood translation sphere. | |||
| [[File:Ood Translator fact (TARDIS).jpg|thumb|center]] | |||
|- | |||
| [[Cyberman|Cyberman Chestpiece]] | |||
| [[TARDIS (video game)#Act one|Act one]]/[[TARDIS (video game)#Act two|Act two]]/[[TARDIS (video game)#Act three|Act three]]:<br>In the TARDIS drawing room, to the left of the fireplace. Interact with the Cyberman chestpiece. | |||
| [[File:Cyberman Chestpiece fact (TARDIS).jpg|thumb|center]] | |||
|- | |||
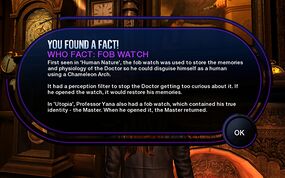
| [[Biodata module|Fob Watch]] | |||
| [[TARDIS (video game)#Act one|Act one]]:<br>In the TARDIS drawing room, on the mantlepiece. Interact with the fob watch. | |||
| [[File:Fob Watch fact (TARDIS).jpg|thumb|center]] | |||
|- | |||
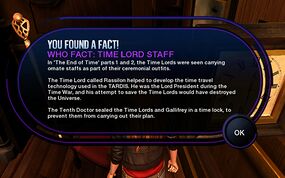
| [[Time Lord]] [[Staff]] | |||
| [[TARDIS (video game)#Act one|Act one]]/[[TARDIS (video game)#Act two|Act two]]/[[TARDIS (video game)#Act three|Act three]]:<br>In the TARDIS drawing room, to the right of the fireplace. Interact with the staff. | |||
| [[File:Time Lord Staff fact (TARDIS).jpg|thumb|center]] | |||
|- | |||
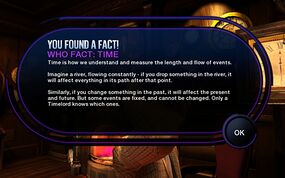
| [[Time]] | |||
| [[TARDIS (video game)#Act one|Act one]]/[[TARDIS (video game)#Act two|Act two]]/[[TARDIS (video game)#Act three|Act three]]:<br>In the TARDIS drawing room, on the wall in the far right corner. Interact with the clock from behind which Amy takes the laser screwdriver. | |||
| [[File:Time fact (TARDIS).jpg|thumb|center]] | |||
|- | |||
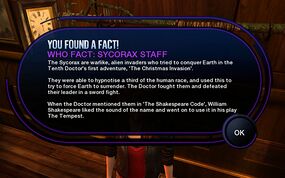
| [[Staff of Helkaac-ak-ac|Sycorax Staff]] | |||
| [[TARDIS (video game)#Act one|Act one]]/[[TARDIS (video game)#Act two|Act two]]/[[TARDIS (video game)#Act three|Act three]]:<br>In the TARDIS drawing room, on the wall in the far right corner. Interact with the Sycorax staff. | |||
| [[File:Sycorax Staff fact (TARDIS).jpg|thumb|center]] | |||
|- | |||
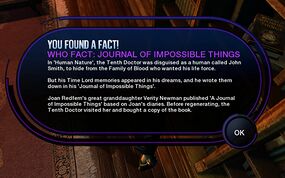
| [[A Journal of Impossible Things (The End of Time)|Journal of Impossible Things]] | |||
| [[TARDIS (video game)#Act one|Act one]]/[[TARDIS (video game)#Act two|Act two]]/[[TARDIS (video game)#Act three|Act three]]:<br>In the TARDIS drawing room, at the far end of the bookcase on the right upon entering. Interact with the Journal of Impossible Things. | |||
| [[File:Journal of Impossible Things fact (TARDIS).jpg|thumb|center]] | |||
|- | |||
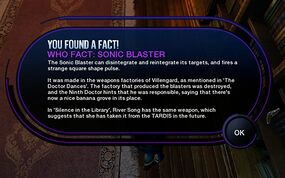
| [[Sonic blaster|Sonic Blaster]] | |||
| [[TARDIS (video game)#Act one|Act one]]/[[TARDIS (video game)#Act two|Act two]]/[[TARDIS (video game)#Act three|Act three]]:<br>In the TARDIS drawing room, in the middle of the bookcase on the right upon entering. Interact with the sonic blaster. | |||
| [[File:Sonic Blaster fact (TARDIS).jpg|thumb|center]] | |||
|- | |||
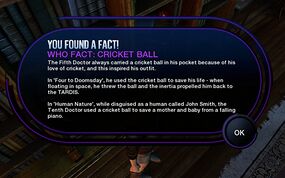
| [[Cricket ball|Cricket Ball]] | |||
| [[TARDIS (video game)#Act one|Act one]]/[[TARDIS (video game)#Act two|Act two]]/[[TARDIS (video game)#Act three|Act three]]:<br>In the TARDIS drawing room, at the near end of the bookcase on the right upon entering. Interact with the cricket ball. | |||
| [[File:Cricket Ball fact (TARDIS).jpg|thumb|center]] | |||
|- | |||
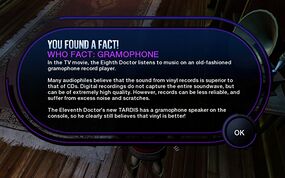
| [[Gramophone]] | |||
| [[TARDIS (video game)#Act one|Act one]]/[[TARDIS (video game)#Act two|Act two]]/[[TARDIS (video game)#Act three|Act three]]:<br>In the TARDIS drawing room, in the near right corner. Interact with the gramophone. | |||
| [[File:Gramophone fact (TARDIS).jpg|thumb|center]] | |||
|- | |||
| [[The Doctor's scarf|The Fourth Doctor's Scarf]] | |||
| [[TARDIS (video game)#Act one|Act one]]/[[TARDIS (video game)#Act two|Act two]]/[[TARDIS (video game)#Act three|Act three]]:<br>In the TARDIS drawing room, in the near right corner on the coat stand. Interact with the scarf. | |||
| [[File:The Fourth Doctor's Scarf fact (TARDIS).jpg|thumb|center]] | |||
|- | |||
|} | |||
=== Cards === | |||
{| class="wikitable" | |||
|- | |||
! scope="col" style="width:20%;" | Card | |||
! scope="col" style="width:30%;" | Location | |||
! scope="col" style="width:30%;" | Image | |||
|- | |||
| The [[First Doctor]] | |||
| [[TARDIS (video game)#Act one|Act one]]:<br>In the TARDIS control room, right of the main door, under the stairs. | |||
| [[File:First Doctor card (TARDIS).jpg|thumb|center]] | |||
|- | |||
| [[Saxon Master|The Master]] | |||
| [[TARDIS (video game)#Act one|Act one]]:<br>In the TARDIS control room, along the wall to the left of the main door, in one of the roundels. | |||
| [[File:The Master card (TARDIS).jpg|thumb|center]] | |||
|- | |||
| [[Liquorice]] | |||
| [[TARDIS (video game)#Act one|Act one]]:<br>In the TARDIS control room, on the lower deck, at the bottom of the stairs. | |||
| [[File:Liquorice card (TARDIS).jpg|thumb|center]] | |||
|- | |||
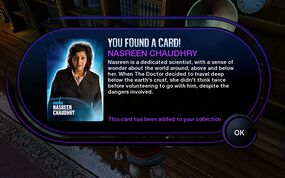
| [[Nasreen Chaudhry]] | |||
| [[TARDIS (video game)#Act one|Act one]]:<br>In the TARDIS drawing room, on the right upon entering, under the gramophone. | |||
| [[File:Nasreen Chaudhry card (TARDIS).jpg|thumb|center]] | |||
|- | |||
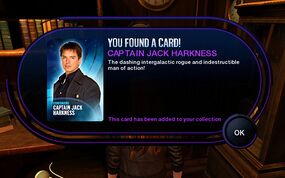
| [[Jack Harkness|Captain Jack Harkness]] | |||
| [[TARDIS (video game)#Act one|Act one]]:<br>In the TARDIS drawing room, in the far left corner of the room, between the bookcase and the clock. | |||
| [[File:Captain Jack Harkness card (TARDIS).jpg|thumb|center]] | |||
|- | |||
|} | |||
== Worldbuilding == | |||
* The TARDIS has a [[TARDIS drawing room|drawing room]], [[TARDIS sun room|sun room]] and a [[lift]]. | |||
* Things seen in the drawing room include: | |||
** Lots of [[clock]]s | |||
** [[The Doctor's scarf|The Fourth Doctor's scarf]] | |||
** A [[cricket ball]] | |||
** {{Simm|c}}'s [[laser screwdriver]] | |||
** A [[Dalek]] [[Eyepiece|eye stalk]] | |||
** A [[Cyberman#Cybermen found in the Arctic|Cyberman]] chest plate | |||
** {{Jacobi|c}}'s [[fob watch]] | |||
** An [[Ood]] [[translation sphere]] | |||
** A [[Time Lord]] staff | |||
** ''[[A Journal of Impossible Things (The End of Time)|A Journal of Impossible Things]]'' | |||
** A [[sonic blaster]] | |||
** A [[Sycorax]] staff | |||
** The [[Chronon]] [[:Chronon Blocker|blocker]] | |||
** A [[recorder]] | |||
** [[Elizabeth X]]'s mask | |||
** The [[Book of the Weeping Angels]] | |||
** A [[gramophone]] | |||
** A map of Medieval [[Venice]] | |||
** A [[distress beacon]] | |||
** A painting based on Jan Adam Kruseman's painting of Adriaan van der Hoop, however the painting has longer, darker hair and appears to be holding an object resembling the Master's [[laser screwdriver]]. | |||
* Amy and the Doctor are both bad at [[charades]]. | |||
* [[King Kong]] and [[Tarzan]] are mentioned. | |||
* The [[Cloister bell]] is heard. | * The [[Cloister bell]] is heard. | ||
== Story notes == | == Story notes == | ||
* The story continues in [[GAME]]: ''[[Shadows of the Vashta Nerada]]''. | |||
* The story continues in [[ | * The day before ''TARDIS'' was released to download, a story (in script form) was posted on the Doctor Who website called ''[[Wish You Were Here (WEB short story)|Wish You Were Here]]'', acting as a prelude to ''TARDIS''. | ||
* The day before ''TARDIS'' was released to download, a story was posted on the Doctor Who website called ''[[Wish You Were Here ( | |||
* This is the first story to actually teach the viewer/player how to fly the TARDIS and what everything on the console actually does. | * This is the first story to actually teach the viewer/player how to fly the TARDIS and what everything on the console actually does. | ||
* A 'Who Fact' about Cybermen states the [[Eighth Doctor|Eighth]] and [[Ninth Doctor]] | * A 'Who Fact' about Cybermen states the [[Eighth Doctor|Eighth]] and [[Ninth Doctor]]s never encountered them. However, it does note that there are some adventures "which we never get to see", and indeed it is clearly only covering TV stories. The Eighth Doctor encountered the Cybermen in [[COMIC]]: ''[[The Flood (comic story)|The Flood]]'', [[AUDIO]]: ''[[Sword of Orion (audio story)|Sword of Orion]]'', ''[[The Girl Who Never Was (audio story)|The Girl Who Never Was]]'', and ''[[Human Resources (audio story)|Human Resources]]''. The Ninth Doctor, though not shown to have met any living Cybermen in any medium at the time ''TARDIS'' was released, per se, did at the very least, come across the head from a Cyberman among [[Henry Van Statten]]'s collection of rare alien artefacts in [[TV]]: ''[[Dalek (TV story)|Dalek]]''. He was later seen to encounter the Cybermen in [[COMIC]]: ''[[Supremacy of the Cybermen (comic story)|Supremacy of the Cybermen]]'', albeit in an [[alternate timeline]], [[COMIC]]: ''[[The Bidding War (comic story)|The Bidding War]]'', [[AUDIO]]: ''[[Monsters in Metropolis (audio story)|Monsters in Metropolis]]'', [[AUDIO]]: ''[[Way of the Burryman (audio story)|Way of the Burryman]]'', and [[AUDIO]]: ''[[The Forth Generation (audio story)|The Forth Generation]]''. | ||
=== Promotion === | === Promotion === | ||
'' | * In a video posted on the BBC ''Doctor Who'' website, [[Karen Gillan]] promoted the game and announced the alien was called the Entity. | ||
=== Production errors === | === Production errors === | ||
{{Discontinuity}} | {{Discontinuity}} | ||
* The Doctor says "press red," but Amy pulls two red levers. | * The Doctor says "press red," but Amy ''pulls'' two red levers. | ||
* The promotional image shows the front TARDIS doors, but does not show the "St John's Ambulance" sticker on the right-side door. | * The promotional image shows the front TARDIS doors, but does not show the "St John's Ambulance" sticker on the right-side door which the Eleventh Doctor's Tardis displayed after its self-repair (in ''[[The Eleventh Hour (TV story)|The Eleventh Hour]]''). | ||
== Continuity == | == Continuity == | ||
* Items from | * Items from previous games appear, such as the Dalek Eyestalk, Chronon Blocker, Distress Beacon and a [[Cyberman#Cybermen found in the Arctic|Cyberman chestplate]]. ([[GAME]]: ''[[City of the Daleks (video game)|City of the Daleks]]'', ''[[Blood of the Cybermen (video game)|Blood of the Cybermen]]'') | ||
* The scene where the Entity breaks out of its small prison is very similar to the scene in the [[Doctor Who ( | * The scene where the Entity breaks out of its small prison is very similar to the scene in the [[Doctor Who (TV story)|TV movie]] where {{Tipple}} does the same. ([[TV]]: ''[[Doctor Who (TV story)|Doctor Who]]'') | ||
* The laser screwdriver is attached to the console. ([[ | * The laser screwdriver is attached to the console. ([[TV]]: ''[[Last of the Time Lords (TV story)|Last of the Time Lords]]'') | ||
* Amy uses the zigzag plotter. ([[ | * Amy uses the zigzag plotter. ([[TV]]: ''[[The Lodger (TV story)|The Lodger]]'') | ||
* The Doctor and Amy both notice that he is rambling. ([[ | * The Doctor and Amy both notice that he is rambling. ([[TV]]: ''[[The Vampires of Venice (TV story)|The Vampires of Venice]]'') | ||
* The Doctor refers to the TARDIS as a female again. ([[ | * The Doctor refers to the TARDIS as a female again. ([[TV]]: ''[[Rise of the Cybermen (TV story)|Rise of the Cybermen]]'', et al) | ||
* The Doctor refers to bad things happening at Brighton Beach, and Paris. ([[ | * The Doctor refers to bad things happening at Brighton Beach, and Paris. ([[TV]]: ''[[The Leisure Hive (TV story)|The Leisure Hive]]'', ''[[City of Death (TV story)|City of Death]]'') | ||
* The Doctor has a Gramophone in the Drawing Room. ([[ | * The Doctor has a Gramophone in the Drawing Room. ([[TV]]: ''[[Doctor Who (TV story)|Doctor Who]]'') | ||
* The Entity is stored in a flask, much like [[Fenric]]. ([[ | * The Entity is stored in a flask, much like [[Fenric]]. ([[TV]]: ''[[The Curse of Fenric (TV story)|The Curse of Fenric]]'') | ||
* Though the Eighth Doctor is mentioned to never face the Daleks on-screen, his debut story features the sound of them shouting, "Exterminate!" at the Master's execution. ([[TV]]: ''[[Doctor Who (TV story)|Doctor Who]]'') In his only other screen appearance,''[[The Night of the Doctor (TV story)|The Night of the Doctor]]'', he crashes on [[Karn]], leading to his regeneration, while fleeing the [[Last Great Time War|Time War]] between the Time Lords and Daleks. | |||
** He would also personally encounter the Daleks. ([[PROSE]]: ''[[War of the Daleks (novel)|War of the Daleks]]'', ''[[Legacy of the Daleks (novel)|Legacy of the Daleks]];'' [[AUDIO]]: ''[[The Time of the Daleks (audio story)|The Time of the Daleks]]'', [[AUDIO]]: ''[[Terror Firma (audio story)|Terror Firma]]'', [[AUDIO]]: ''[[Blood of the Daleks (audio story)|Blood of the Daleks]]'' and [[AUDIO]]: ''[[X and the Daleks (audio story)|X and the Daleks]]''. | |||
* ''''' | *Amy blames the Doctor for her own mistake; before seeing she released the Entity. She previously doubted the Docotr about the Ironside Daleks; only to help forge the [[New Dalek Paradigm]]. ([[TV]]: ''[[Victory of the Daleks (TV story)|Victory of the Daleks]]'') She is yet to endanger many more. One example be when she acted with prejudice to the [[Eleventh Doctor (Ganger)|Ganger Doctor]], viewing him as a monster rather than a valid continuation of her best friend, until she saw how wrong she was about him and how she was the monster. ([[TV]]: ''[[The Almost People (TV story)|The Almost People]]'') She also acted on jealousy; prejudicing [[Christina de Souza]] and almost causing the extinction of the [[Ashayan]] race, ([[COMIC]]: ''[[The Eye of Ashaya (comic story)|The Eye of Ashaya]]'') and also prejudicing [[Siren (The Curse of the Black Spot)|the Siren]] and almost getting [[Rory Williams]] killed. ([[TV]]: ''[[The Curse of the Black Spot (TV story)|The Curse of the Black Spot]]'') | ||
* ''''' | {{DWVG}} | ||
{{TitleSort}} | |||
[[Category:Stories set in London]] | [[Category:Stories set in London]] | ||
[[Category:Stories set in the 23rd century]] | [[Category:Stories set in the 23rd century]] | ||
[[Category:Doctor Who Adventure Games]] | [[Category:Doctor Who Adventure Games]] | ||
[[Category:Stories set entirely in the TARDIS]] | [[Category:Stories set entirely in the TARDIS]] | ||
[[Category: | [[Category:2010 video games]] | ||
[[Category:Video games that use Murray Gold's 3rd main theme]] | |||
Latest revision as of 21:09, 25 July 2024
TARDIS was the third episode of the video game Doctor Who: The Adventure Games. The player had the ability to play as the Eleventh Doctor and Amy Pond.
Set mostly inside the TARDIS, it gave players a chance to explore the ship in a way not previously offered by any other Doctor Who video game before it. Nevertheless, it was by far the shortest of the five episodes of The Adventure Games. It was also the only episode not written by Phil Ford, though he received a story credit. Instead, writing chores were handled by James Moran.
Synopsis[[edit] | [edit source]]
With the TARDIS caught in a time riptide, it's up to Amy to save the day or leave the Eleventh Doctor trapped in the void forever. Meanwhile, a dangerous entity is roaming the TARDIS corridors and it hasn't been fed for a very long time...
Plot[[edit] | [edit source]]
The Doctor and Amy are inside the TARDIS, discussing where they should go next for a more peaceful outing - which Amy cynically declares nearly impossible, considering the Doctor's long track record of holidays failing miserably. However, the TARDIS suddenly enters a "space riptide", and the Doctor is launched through the doors, out into space. After the TARDIS steadies itself, Amy looks outside and sees the Doctor hovering, still conscious and surrounded by a number of strange blue worms, a short distance away.
Through sign language, he manages to tell Amy that he is slowly suffocating, and she can save him by resetting the TARDIS air shell by using the red levers. Amy does so and the Doctor uses an earpiece to properly contact her through the scanner, telling her to use the tractor beam to retrieve him. The console needs an outside power source for that, so the Doctor sends Amy to his drawing room to retrieve a power source for the beam. Searching through the many knick-knacks in the Doctor's drawing room, Amy is, at first, unsuccessful in finding anything useful for powering the tractor beam. Another riptide strikes the TARDIS, and the interior shaking causes one of the clocks to move, revealing a safe. Amy finds the Saxon Master's laser screwdriver inside, but accidentally knocks over a glass vase next to it. Thinking she can just replace it and blaming the Doctor for her own mistake, Amy hurries back to the control room. Unbeknownst to her, a orange glow escapes the shattered pieces of vase and follows quickly after...
After informing the Doctor via the scanner that she has found the laser screwdriver, the Doctor instructs her to insert it in the console. Doing so activates the tractor beam and the Doctor is pulled back into the TARDIS.
The Doctor explains that the blue worms that had been pestering him are known as Chronomites, somewhat harmless parasites, but they can make you "very itchy". Unfortunately, the Entity, an old enemy of the Doctor that survives by draining years from others, has arrived in the control room. The presence of the Entity, along with another space riptide, causes the TARDIS to send Amy away.
Amy is now in a future TARDIS with the Entity. Realising that Amy is in the TARDIS 1,000 years into the future, the Doctor sets about scavenging parts from the present TARDIS in order to create a tachyon feedback loop which will reunite Amy with him. The Doctor manages to scavenge three items from his drawing room; his biodata module fob watch, an Oscillator from the distress beacon he picked up in the GSO Arctic Drilling Station and the Kontron crystal used to make a chronal blocker on Skaro; using these, the Doctor is able to successfully make the feedback loop.
In the future TARDIS, the Entity begins attacking Amy, feeding on her time. A time-activated recording of the Doctor appears on the scanner, telling Amy that she needs to answer some trivia questions in order to prove that she's herself; then she can access and use the tachyon feedback loop to get back to her proper timeline. Amy answers the questions correctly and completes the loop on her end, allowing the Doctor to pull her back into the present TARDIS.
Once the pair are reunited, the Doctor threatens the Entity - telling it to either restore Amy's time or be imprisoned again (permanently) after it has finished her off. The Entity retreats into another vase that the Doctor takes out, and the Doctor proposes a deal: he will release the Entity into the timestream, where it can feed off of the limitless supply of Chronomites - but only if it restores Amy's time. The Entity finds this to be acceptable and gives Amy her time back; the Doctor then releases it from the TARDIS to fulfil his side of the bargain. Amy tells the Doctor that he forgot to mention that the Chronomites cause itchiness, but the Doctor simply says that he forgot (possibly meaning that he wished to punish the Entity for its past deeds).
The Doctor performs some checks on the central console, then sets course for Poseidon 8, built in London's previous location, following the great flood of the 23rd century. Exiting the TARDIS, Amy is amazed by the underwater base that they have materialised inside. However, her amazement is quickly replaced by fear, as the pair notice a gigantic alien shark attacking the base and heading towards them....
Cast[[edit] | [edit source]]
Crew[[edit] | [edit source]]
- Writer - James Moran
- Story - James Moran, Phil Ford, Sean Millard
- Voice Directors - Gary Russell, Charles Cecil
- Executive Producers - Pat Phelan, Steven Moffat, Piers Wenger, Beth Willis
- Executive Producers, Interactive - Anwen Aspden, Charles Cecil
- Interactive Producer - Richard Jenkins
- Senior Producer - Mat Fidell
- Sound Editor - Matthew Cox (as Matt Cox)
- Sound and Music Editor - Pat Phelan
- Quality Insurer - Tom Barker
- Programming Lead - James Sutherland
- Programmer - Phil Woods, Carl Dixon, Dan Mallinson, Henry Durrant, Sean Davies, Tom Sedden
- Design and Scripting - Nana Nielsen, Mike Welsh, Sarah Cook
- Concepts/Storyboards - Richard Jordon
- Art Lead - Michael Hirst (as Mick Hirst)
- Artists - Chris Pepper, John Hackleton
- Animation Lead - Ian Dreary
- Animators - Lee Taylor, Phil Hanks, Stephen Thomas (as Steve Thomas), Shruti Rao, Simon Wottage, Robin Butler, Simon Bradley
- Graphic Design Lead - Chantal Beaumont
- Creative Director - Sean Millard
- Core Tech Manager - Stephen Robinson
- Studio Head - Paul Porter
- European VP - Carl Cavers
- Casting Director - Andy Pryor
- Original music by Murray Gold
Collectables[[edit] | [edit source]]
- Please note that this section contains spoilers for the locations of collectables within the game. Please skip this section if you don't want to know this information.
Facts[[edit] | [edit source]]
| Fact | Location | Image |
|---|---|---|
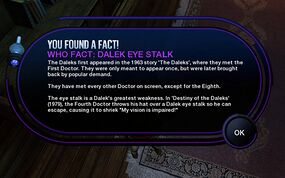
| Dalek Eye Stalk | Act one/Act two/Act three: In the TARDIS drawing room, on first bookcase on the left upon entering. Interact with the Dalek eyestalk. |
|
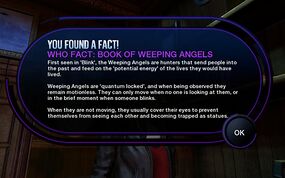
| Book of Weeping Angels | Act one/Act two/Act three: In the TARDIS drawing room, on first bookcase on the left upon entering. Interact with the Book of the Weeping Angels. |
|
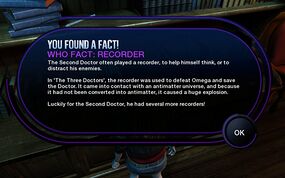
| Recorder | Act one/Act two/Act three: In the TARDIS drawing room, on first bookcase on the left upon entering. Interact with the Doctor's recorder. |
|
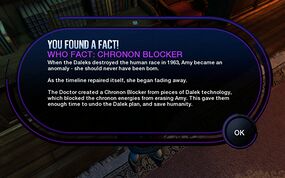
| Chronon Blocker | Act one/Act two/Act three: In the TARDIS drawing room, on first bookcase on the left upon entering. Interact with the Chronon Blocker. |
|
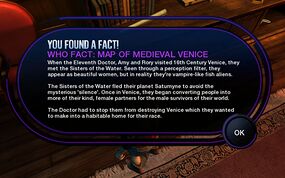
| Map of Medieval Venice | Act one/Act two/Act three: In the TARDIS drawing room, on second bookcase on the left upon entering. Interact with the rolled up map. |
|
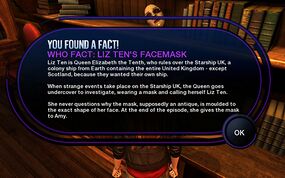
| Liz Ten's Facemask | Act one/Act two/Act three: In the TARDIS drawing room, on second bookcase on the left upon entering. Interact with the ornate mask. |
|
| Distress Beacon | Act one: In the TARDIS drawing room, on second bookcase on the left upon entering. Interact with the distress beacon. |
|
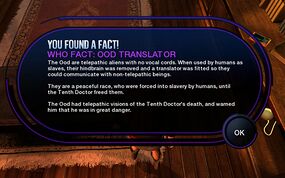
| Ood Translator | Act one/Act two/Act three: In the TARDIS drawing room, on second bookcase on the left upon entering. Interact with the Ood translation sphere. |
|
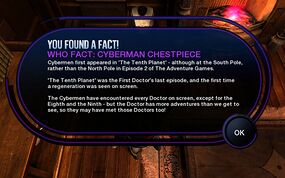
| Cyberman Chestpiece | Act one/Act two/Act three: In the TARDIS drawing room, to the left of the fireplace. Interact with the Cyberman chestpiece. |
|
| Fob Watch | Act one: In the TARDIS drawing room, on the mantlepiece. Interact with the fob watch. |
|
| Time Lord Staff | Act one/Act two/Act three: In the TARDIS drawing room, to the right of the fireplace. Interact with the staff. |
|
| Time | Act one/Act two/Act three: In the TARDIS drawing room, on the wall in the far right corner. Interact with the clock from behind which Amy takes the laser screwdriver. |
|
| Sycorax Staff | Act one/Act two/Act three: In the TARDIS drawing room, on the wall in the far right corner. Interact with the Sycorax staff. |
|
| Journal of Impossible Things | Act one/Act two/Act three: In the TARDIS drawing room, at the far end of the bookcase on the right upon entering. Interact with the Journal of Impossible Things. |
|
| Sonic Blaster | Act one/Act two/Act three: In the TARDIS drawing room, in the middle of the bookcase on the right upon entering. Interact with the sonic blaster. |
|
| Cricket Ball | Act one/Act two/Act three: In the TARDIS drawing room, at the near end of the bookcase on the right upon entering. Interact with the cricket ball. |
|
| Gramophone | Act one/Act two/Act three: In the TARDIS drawing room, in the near right corner. Interact with the gramophone. |
|
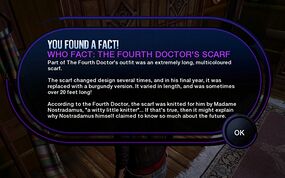
| The Fourth Doctor's Scarf | Act one/Act two/Act three: In the TARDIS drawing room, in the near right corner on the coat stand. Interact with the scarf. |
Cards[[edit] | [edit source]]
| Card | Location | Image |
|---|---|---|
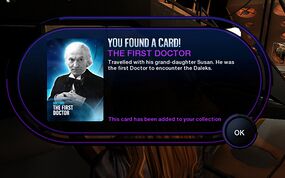
| The First Doctor | Act one: In the TARDIS control room, right of the main door, under the stairs. |
|
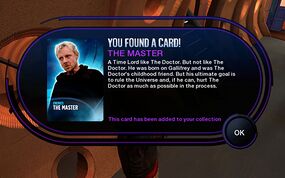
| The Master | Act one: In the TARDIS control room, along the wall to the left of the main door, in one of the roundels. |
|
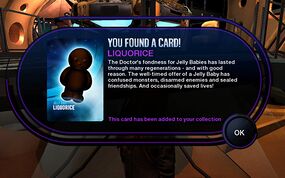
| Liquorice | Act one: In the TARDIS control room, on the lower deck, at the bottom of the stairs. |
|
| Nasreen Chaudhry | Act one: In the TARDIS drawing room, on the right upon entering, under the gramophone. |
|
| Captain Jack Harkness | Act one: In the TARDIS drawing room, in the far left corner of the room, between the bookcase and the clock. |
Worldbuilding[[edit] | [edit source]]
- The TARDIS has a drawing room, sun room and a lift.
- Things seen in the drawing room include:
- Lots of clocks
- The Fourth Doctor's scarf
- A cricket ball
- The Saxon Master's laser screwdriver
- A Dalek eye stalk
- A Cyberman chest plate
- The War Master's fob watch
- An Ood translation sphere
- A Time Lord staff
- A Journal of Impossible Things
- A sonic blaster
- A Sycorax staff
- The Chronon blocker
- A recorder
- Elizabeth X's mask
- The Book of the Weeping Angels
- A gramophone
- A map of Medieval Venice
- A distress beacon
- A painting based on Jan Adam Kruseman's painting of Adriaan van der Hoop, however the painting has longer, darker hair and appears to be holding an object resembling the Master's laser screwdriver.
- Amy and the Doctor are both bad at charades.
- King Kong and Tarzan are mentioned.
- The Cloister bell is heard.
Story notes[[edit] | [edit source]]
- The story continues in GAME: Shadows of the Vashta Nerada.
- The day before TARDIS was released to download, a story (in script form) was posted on the Doctor Who website called Wish You Were Here, acting as a prelude to TARDIS.
- This is the first story to actually teach the viewer/player how to fly the TARDIS and what everything on the console actually does.
- A 'Who Fact' about Cybermen states the Eighth and Ninth Doctors never encountered them. However, it does note that there are some adventures "which we never get to see", and indeed it is clearly only covering TV stories. The Eighth Doctor encountered the Cybermen in COMIC: The Flood, AUDIO: Sword of Orion, The Girl Who Never Was, and Human Resources. The Ninth Doctor, though not shown to have met any living Cybermen in any medium at the time TARDIS was released, per se, did at the very least, come across the head from a Cyberman among Henry Van Statten's collection of rare alien artefacts in TV: Dalek. He was later seen to encounter the Cybermen in COMIC: Supremacy of the Cybermen, albeit in an alternate timeline, COMIC: The Bidding War, AUDIO: Monsters in Metropolis, AUDIO: Way of the Burryman, and AUDIO: The Forth Generation.
Promotion[[edit] | [edit source]]
- In a video posted on the BBC Doctor Who website, Karen Gillan promoted the game and announced the alien was called the Entity.
Production errors[[edit] | [edit source]]
- The Doctor says "press red," but Amy pulls two red levers.
- The promotional image shows the front TARDIS doors, but does not show the "St John's Ambulance" sticker on the right-side door which the Eleventh Doctor's Tardis displayed after its self-repair (in The Eleventh Hour).
Continuity[[edit] | [edit source]]
- Items from previous games appear, such as the Dalek Eyestalk, Chronon Blocker, Distress Beacon and a Cyberman chestplate. (GAME: City of the Daleks, Blood of the Cybermen)
- The scene where the Entity breaks out of its small prison is very similar to the scene in the TV movie where the Old Master does the same. (TV: Doctor Who)
- The laser screwdriver is attached to the console. (TV: Last of the Time Lords)
- Amy uses the zigzag plotter. (TV: The Lodger)
- The Doctor and Amy both notice that he is rambling. (TV: The Vampires of Venice)
- The Doctor refers to the TARDIS as a female again. (TV: Rise of the Cybermen, et al)
- The Doctor refers to bad things happening at Brighton Beach, and Paris. (TV: The Leisure Hive, City of Death)
- The Doctor has a Gramophone in the Drawing Room. (TV: Doctor Who)
- The Entity is stored in a flask, much like Fenric. (TV: The Curse of Fenric)
- Though the Eighth Doctor is mentioned to never face the Daleks on-screen, his debut story features the sound of them shouting, "Exterminate!" at the Master's execution. (TV: Doctor Who) In his only other screen appearance,The Night of the Doctor, he crashes on Karn, leading to his regeneration, while fleeing the Time War between the Time Lords and Daleks.
- He would also personally encounter the Daleks. (PROSE: War of the Daleks, Legacy of the Daleks; AUDIO: The Time of the Daleks, AUDIO: Terror Firma, AUDIO: Blood of the Daleks and AUDIO: X and the Daleks.
- Amy blames the Doctor for her own mistake; before seeing she released the Entity. She previously doubted the Docotr about the Ironside Daleks; only to help forge the New Dalek Paradigm. (TV: Victory of the Daleks) She is yet to endanger many more. One example be when she acted with prejudice to the Ganger Doctor, viewing him as a monster rather than a valid continuation of her best friend, until she saw how wrong she was about him and how she was the monster. (TV: The Almost People) She also acted on jealousy; prejudicing Christina de Souza and almost causing the extinction of the Ashayan race, (COMIC: The Eye of Ashaya) and also prejudicing the Siren and almost getting Rory Williams killed. (TV: The Curse of the Black Spot)
| ||||||||||||||||||||||||||||||||||||||||||||||||

