Planet of Evil (TV story): Difference between revisions
m (enforcing T:CLEAN CODE) |
|||
| Line 3: | Line 3: | ||
{{Infobox ClassicTV| | {{Infobox ClassicTV| | ||
story name= Planet of Evil| | story name= Planet of Evil| | ||
image= [[ | image= [[File:St--4h33.jpg|250px]]| | ||
series=[[Doctor Who]] - [[List of Doctor Who television stories|TV Stories]] | | series=[[Doctor Who]] - [[List of Doctor Who television stories|TV Stories]] | | ||
number= [[Season 13]]| | number= [[Season 13]]| | ||
| Line 21: | Line 21: | ||
'''''Planet of Evil''''' was the second story of [[Season 13]] of ''[[Doctor Who]]''. | '''''Planet of Evil''''' was the second story of [[Season 13]] of ''[[Doctor Who]]''. | ||
==Synopsis== | == Synopsis == | ||
The TARDIS picks up a distress call and the Doctor and Sarah arrive on the planet [[Zeta Minor]]. There they discover that a [[Morestran]] geological expedition has fallen prey to an unseen killer and only the leader, Professor Sorenson, remains alive. | The TARDIS picks up a distress call and the Doctor and Sarah arrive on the planet [[Zeta Minor]]. There they discover that a [[Morestran]] geological expedition has fallen prey to an unseen killer and only the leader, Professor Sorenson, remains alive. | ||
A military mission from Morestra has also arrived to investigate. The culprit is revealed to be a creature from a universe of antimatter, retaliating for the removal by Sorenson of some antimatter samples from around the pit that acts as an interface between the two universes. | A military mission from Morestra has also arrived to investigate. The culprit is revealed to be a creature from a universe of antimatter, retaliating for the removal by Sorenson of some antimatter samples from around the pit that acts as an interface between the two universes. | ||
| Line 31: | Line 31: | ||
The Doctor finds the original Sorenson, takes him back to the planet in the TARDIS and throws both him and his samples into the pit, fulfilling a bargain he earlier made with the antimatter creature. Sorenson reappears unharmed and the Doctor returns him to the Morestran ship, which is now freed of the planet's influence. | The Doctor finds the original Sorenson, takes him back to the planet in the TARDIS and throws both him and his samples into the pit, fulfilling a bargain he earlier made with the antimatter creature. Sorenson reappears unharmed and the Doctor returns him to the Morestran ship, which is now freed of the planet's influence. | ||
==Plot== | == Plot == | ||
===Episode 1=== | === Episode 1 === | ||
On a dark and distant [[planet]], a spaceman named [[Braun]] steps out of a small base unit and plants a sign in the nearby jungle floor indicating a name and date of death. Unearthly howls echo from the jungle around him, and he points a rifle warily at his surroundings before returning to the base. Meanwhile, elsewhere on the planet, another spaceman, [[Baldwin]] finds some crystals near a pit, handing them over to Professor [[Sorenson]]. | On a dark and distant [[planet]], a spaceman named [[Braun]] steps out of a small base unit and plants a sign in the nearby jungle floor indicating a name and date of death. Unearthly howls echo from the jungle around him, and he points a rifle warily at his surroundings before returning to the base. Meanwhile, elsewhere on the planet, another spaceman, [[Baldwin]] finds some crystals near a pit, handing them over to Professor [[Sorenson]]. | ||
| Line 39: | Line 39: | ||
In the [[the Doctor's TARDIS|TARDIS]], [[Sarah Jane Smith|Sarah]] wants to know what is wrong: the [[Fourth Doctor|Doctor]] had promised her they would be back in [[London]] five minutes before they [[Terror of the Zygons|left Loch Ness]]. The Doctor eventually admits that they have emerged from the [[time vortex]] 30,000 years too late. The TARDIS receives Baldwin's distress call, and the Doctor lands the ship. They emerge in the jungle, the Doctor tracking the signal with a small device. Suddenly, Sarah seems transfixed by a strange sound and stares straight ahead at something unseen, but the feeling soon passes. | In the [[the Doctor's TARDIS|TARDIS]], [[Sarah Jane Smith|Sarah]] wants to know what is wrong: the [[Fourth Doctor|Doctor]] had promised her they would be back in [[London]] five minutes before they [[Terror of the Zygons|left Loch Ness]]. The Doctor eventually admits that they have emerged from the [[time vortex]] 30,000 years too late. The TARDIS receives Baldwin's distress call, and the Doctor lands the ship. They emerge in the jungle, the Doctor tracking the signal with a small device. Suddenly, Sarah seems transfixed by a strange sound and stares straight ahead at something unseen, but the feeling soon passes. | ||
A probe ship approaches [[Zeta Minor]], the last planet in the known universe. The ship's Controller, [[Salamar]], assigns [[Vishinsky]], the most experienced crewmember, to lead the landing party. The ship has barely enough fuel to make the return journey | A probe ship approaches [[Zeta Minor]], the last planet in the known universe. The ship's Controller, [[Salamar]], assigns [[Vishinsky]], the most experienced crewmember, to lead the landing party. The ship has barely enough fuel to make the return journey — they do not have power for a scan before sending the party down to locate Sorenson and his team. | ||
The Doctor and Sarah reach the base. They discover Braun's almost mummified body on the ground. The base unit's interior is dark, and the Doctor surmises that they are some months too late. Sarah goes back to the TARDIS to get his spectromixer so he can fix their position, while the Doctor tries to restore the base's power. When Sarah leaves, the Doctor discovers Baldwin's body, in the same mummified state. | The Doctor and Sarah reach the base. They discover Braun's almost mummified body on the ground. The base unit's interior is dark, and the Doctor surmises that they are some months too late. Sarah goes back to the TARDIS to get his spectromixer so he can fix their position, while the Doctor tries to restore the base's power. When Sarah leaves, the Doctor discovers Baldwin's body, in the same mummified state. | ||
| Line 53: | Line 53: | ||
However, the Doctor and Sarah are escaping through the window of the store room they are being kept in, whose magnetic locks are weak due to the power loss. The moment they step out, they encounter a semi-transparent, monstrous figure, its outlines glowing red, reaching out for them. | However, the Doctor and Sarah are escaping through the window of the store room they are being kept in, whose magnetic locks are weak due to the power loss. The moment they step out, they encounter a semi-transparent, monstrous figure, its outlines glowing red, reaching out for them. | ||
===Episode 2=== | === Episode 2 === | ||
One of the guards, [[O'Hara]], fires at the creature, but it grabs him and he vanishes, screaming, only for his body to reappear, drained and mummified like the others. The Doctor is not sure what the creature is, but tells Sarah that he has a very unpleasant theory. [[Ponti]], who heard O'Hara's screams, informs and Salamar that the base in under attack, and they find the two time travellers missing. The Morestrans fire at them as they run away into the jungle. | One of the guards, [[O'Hara]], fires at the creature, but it grabs him and he vanishes, screaming, only for his body to reappear, drained and mummified like the others. The Doctor is not sure what the creature is, but tells Sarah that he has a very unpleasant theory. [[Ponti]], who heard O'Hara's screams, informs and Salamar that the base in under attack, and they find the two time travellers missing. The Morestrans fire at them as they run away into the jungle. | ||
Dawn breaks on Zeta Minor, and the creature does not seem to like daylight. Vishinsky launches the occuloid tracker, a flying drone with a camera eye, to search the jungle for the fugitives. Meanwhile, Sorenson confirms that O'Hara died the same way as the other members of his expedition, through total dehydration | Dawn breaks on Zeta Minor, and the creature does not seem to like daylight. Vishinsky launches the occuloid tracker, a flying drone with a camera eye, to search the jungle for the fugitives. Meanwhile, Sorenson confirms that O'Hara died the same way as the other members of his expedition, through total dehydration — a kind of rapid freeze drying. Sorenson brushes off the deaths as irrelevant. His mission to Zeta Minor was to find a new source of energy to replace Morestra's dying sun, and he has succeeded. Sorenson demands that his mineral samples be taken aboard and they leave the planet immediately. However, Salamar says that alien forces must be sought out and eliminated. | ||
The tracker finds the Doctor and Sarah near the pit in Sector 5, a dark pool without any reflections. A capture party arrives, led by Ponti, but as they search the two roughly, Ponti falls into the pit with a cry. The Doctor warns the rest back, telling them they are tampering with the balance of nature on the planet and it may already be too late. At the base, Sorenson gets De Haan to help load his canisters of refined ore onto the ship. Sorensen excitedly notes that six pounds of which could produce heat equal to the output of their sun for three centuries; full scale exploitation of Zeta Minor would provide perpetual energy. | The tracker finds the Doctor and Sarah near the pit in Sector 5, a dark pool without any reflections. A capture party arrives, led by Ponti, but as they search the two roughly, Ponti falls into the pit with a cry. The Doctor warns the rest back, telling them they are tampering with the balance of nature on the planet and it may already be too late. At the base, Sorenson gets De Haan to help load his canisters of refined ore onto the ship. Sorensen excitedly notes that six pounds of which could produce heat equal to the output of their sun for three centuries; full scale exploitation of Zeta Minor would provide perpetual energy. | ||
| Line 66: | Line 66: | ||
The Doctor tries to reason with Sorenson: as long as the ore is aboard, the creature will return, and they will be trapped here. If they jettison the canisters, and make their intention to leave empty handed clear, they will be allowed to take off. The Doctor offers to communicate that intention to the creature. Salamar agrees to let him go alone, but launches the tracker to observe him. When the Doctor reaches the pit, the creature rises, engulfing the [[Time Lord]]. He falls into the pool... | The Doctor tries to reason with Sorenson: as long as the ore is aboard, the creature will return, and they will be trapped here. If they jettison the canisters, and make their intention to leave empty handed clear, they will be allowed to take off. The Doctor offers to communicate that intention to the creature. Salamar agrees to let him go alone, but launches the tracker to observe him. When the Doctor reaches the pit, the creature rises, engulfing the [[Time Lord]]. He falls into the pool... | ||
===Episode 3=== | === Episode 3 === | ||
The Doctor seemingly dead, Sorenson asks Salamar to take off, but Salamar wants the ore samples removed first. As the two men argue, Sarah slips out of the ship into the jungle. As [[De Haan]] and [[Morelli]] start to transfer the canisters off, Sorenson sneaks into the quarantine area and takes one away. | The Doctor seemingly dead, Sorenson asks Salamar to take off, but Salamar wants the ore samples removed first. As the two men argue, Sarah slips out of the ship into the jungle. As [[De Haan]] and [[Morelli]] start to transfer the canisters off, Sorenson sneaks into the quarantine area and takes one away. | ||
| Line 81: | Line 81: | ||
The Doctor and Sarah are strapped to the ejector trays. Vishinsky protests that they have no evidence to execute them like this, and refuses to obey Salamar's order. In the struggle between the two men, however, the ejection lever is thrown... | The Doctor and Sarah are strapped to the ejector trays. Vishinsky protests that they have no evidence to execute them like this, and refuses to obey Salamar's order. In the struggle between the two men, however, the ejection lever is thrown... | ||
===Episode 4=== | === Episode 4 === | ||
Reig, a crewman on the command deck cries for help over the ship's intercom as he is attacked. Salamar and his men rush out of the sickbay, allowing Vishinsky to reverse the ejector control before he too leaves. They find Reig dead in the same way. Salamar still rants that the Doctor caused this but Vishinsky snaps back that they were with them when Reig's death took place. Vishinsky gives the order for a red alert; he is relieving Salamar of command. | Reig, a crewman on the command deck cries for help over the ship's intercom as he is attacked. Salamar and his men rush out of the sickbay, allowing Vishinsky to reverse the ejector control before he too leaves. They find Reig dead in the same way. Salamar still rants that the Doctor caused this but Vishinsky snaps back that they were with them when Reig's death took place. Vishinsky gives the order for a red alert; he is relieving Salamar of command. | ||
Sarah helps the Doctor out of the ejector trays, and tells him about what she felt before De Haan was killed. When the Doctor finds out she was with Sorenson when that happened, he realises that the professor has been infected with antimatter, his brain cells being destroyed and descending to a brutish mental level, creating Anti-Man. He tells Sarah to pass the message to the command deck to seal the hatches and keep Anti-Man isolated. | Sarah helps the Doctor out of the ejector trays, and tells him about what she felt before De Haan was killed. When the Doctor finds out she was with Sorenson when that happened, he realises that the professor has been infected with antimatter, his brain cells being destroyed and descending to a brutish mental level, creating Anti-Man. He tells Sarah to pass the message to the command deck to seal the hatches and keep Anti-Man isolated. | ||
As the Doctor goes deeper into the ship, the section hatchways close. He uses the [[sonic screwdriver]] to enter Sorensen's quarters, finding the canister of antimatter ore. He also finds the bottle of Sorenson's solution, and finds that the liquid reacts with the antimatter. Sorenson, normal once again, enters the room. The Doctor tells him that the solution | As the Doctor goes deeper into the ship, the section hatchways close. He uses the [[sonic screwdriver]] to enter Sorensen's quarters, finding the canister of antimatter ore. He also finds the bottle of Sorenson's solution, and finds that the liquid reacts with the antimatter. Sorenson, normal once again, enters the room. The Doctor tells him that the solution — an oral vaccine Sorenson believes that will protect him against antiquark penetration — did protect him for a time. However, it set up a cycle of chemical change, hybridising his tissues to the point where the next change could be the last. He reminds Sorenson that as scientists, they buy their privilege to experiment at the cost of total responsibility. He hands Sorenson the canister; he knows what he must do. | ||
On the command deck, Salamar has taken the ship's neutron accelerator. He intends to expose Sorensen to its radiation, even if it means killing them both in the process. Raving, he forces Vishinsky to open the hatch at gunpoint, and goes off to hunt Sorenson down. In the meantime, Sorenson is proceeding to the ejection chamber, intending to jettison himself and the antimatter. Unfortunately, he transforms into Anti-Man again before he can throw the lever. | On the command deck, Salamar has taken the ship's neutron accelerator. He intends to expose Sorensen to its radiation, even if it means killing them both in the process. Raving, he forces Vishinsky to open the hatch at gunpoint, and goes off to hunt Sorenson down. In the meantime, Sorenson is proceeding to the ejection chamber, intending to jettison himself and the antimatter. Unfortunately, he transforms into Anti-Man again before he can throw the lever. | ||
| Line 100: | Line 100: | ||
The Doctor returns to the ship for Sarah, but before they leave, the Doctor tells the still-suggestible Sorenson that he abandoned his antiquark research for a source of energy derived from the kinetic forces of planetary movement. Sarah hugs Vishinsky good-bye. The Doctor notes they have an appointment in London, and they're already 30,000 years late... | The Doctor returns to the ship for Sarah, but before they leave, the Doctor tells the still-suggestible Sorenson that he abandoned his antiquark research for a source of energy derived from the kinetic forces of planetary movement. Sarah hugs Vishinsky good-bye. The Doctor notes they have an appointment in London, and they're already 30,000 years late... | ||
==Cast== | == Cast == | ||
*[[Fourth Doctor|The Doctor]] - [[Tom Baker]] | * [[Fourth Doctor|The Doctor]] - [[Tom Baker]] | ||
*[[Sarah Jane Smith]] - [[Elisabeth Sladen]] | * [[Sarah Jane Smith]] - [[Elisabeth Sladen]] | ||
*[[Vishinsky]] - [[Ewen Solon]] | * [[Vishinsky]] - [[Ewen Solon]] | ||
*[[Sorenson]] - [[Frederick Jaeger]] | * [[Sorenson]] - [[Frederick Jaeger]] | ||
*[[Salamar]] - [[Prentis Hancock]] | * [[Salamar]] - [[Prentis Hancock]] | ||
*[[Morelli]] - [[Michael Wisher]] | * [[Morelli]] - [[Michael Wisher]] | ||
*[[De Haan]] - [[Graham Weston]] | * [[De Haan]] - [[Graham Weston]] | ||
*[[Ponti]] - [[Louis Mahoney]] | * [[Ponti]] - [[Louis Mahoney]] | ||
*[[Braun]] - [[Terence Brook]] | * [[Braun]] - [[Terence Brook]] | ||
*[[Baldwin]] - [[Tony McEwan]] | * [[Baldwin]] - [[Tony McEwan]] | ||
*[[O'Hara]] - [[Haydn Wood]] | * [[O'Hara]] - [[Haydn Wood]] | ||
*[[Reig]] - [[Melvyn Bedford]] | * [[Reig]] - [[Melvyn Bedford]] | ||
==Crew== | == Crew == | ||
*[[Writer]] - [[Louis Marks]] | * [[Writer]] - [[Louis Marks]] | ||
*[[Director]] - [[David Maloney]] | * [[Director]] - [[David Maloney]] | ||
*[[Designer (crew)|Designer]] - [[Roger Murray-Leach]] | * [[Designer (crew)|Designer]] - [[Roger Murray-Leach]] | ||
*[[Producer]] - [[Philip Hinchcliffe]] | * [[Producer]] - [[Philip Hinchcliffe]] | ||
*[[Script Editor]] - [[Robert Holmes]] | * [[Script Editor]] - [[Robert Holmes]] | ||
*[[Assistant Floor Manager]] - [[Karilyn Collier]] | * [[Assistant Floor Manager]] - [[Karilyn Collier]] | ||
*[[Costumes]] - [[Andrew Rose]] | * [[Costumes]] - [[Andrew Rose]] | ||
*[[Film Cameraman]] - [[Stan Speel]], [[Kenneth McMillan]] | * [[Film Cameraman]] - [[Stan Speel]], [[Kenneth McMillan]] | ||
*[[Film Editor]] - [[M A C Adams]] | * [[Film Editor]] - [[M A C Adams]] | ||
*[[Incidental Music]] - [[Dudley Simpson]] | * [[Incidental Music]] - [[Dudley Simpson]] | ||
*[[Make-Up]] - [[Jenny Shircore]] | * [[Make-Up]] - [[Jenny Shircore]] | ||
*[[Production Assistant]] - [[Malachy Shaw Jones]] | * [[Production Assistant]] - [[Malachy Shaw Jones]] | ||
*[[Production Unit Manager]] - [[Janet Radenkovic]] | * [[Production Unit Manager]] - [[Janet Radenkovic]] | ||
*[[Special Sounds]] - [[Peter Howell]] | * [[Special Sounds]] - [[Peter Howell]] | ||
*[[Studio Lighting]] - [[Brian Clemett]] | * [[Studio Lighting]] - [[Brian Clemett]] | ||
*[[Studio Sound]] - [[Tony Millier]], [[Brendan Shaw]] | * [[Studio Sound]] - [[Tony Millier]], [[Brendan Shaw]] | ||
*[[Theme Arrangement]] - [[Delia Derbyshire]] | * [[Theme Arrangement]] - [[Delia Derbyshire]] | ||
*[[Doctor Who theme|Title Music]] - [[Ron Grainer]] | * [[Doctor Who theme|Title Music]] - [[Ron Grainer]] | ||
*[[Visual Effects]] - [[Dave Havard]] | * [[Visual Effects]] - [[Dave Havard]] | ||
==References== | == References == | ||
===[[:Category:Astronomical objects|Astronomical objects]]=== | === [[:Category:Astronomical objects|Astronomical objects]] === | ||
*[[Zeta Minor]] is beyond [[Cygnus A]]. | * [[Zeta Minor]] is beyond [[Cygnus A]]. | ||
===[[:Category:The Doctor|The Doctor]]=== | === [[:Category:The Doctor|The Doctor]] === | ||
*The Doctor tells Sarah Jane he met [[William Shakespeare]]. He said the man was charming but a "dreadful actor". The Doctor will [[The Shakespeare Code|see Shakespeare again]] in his [[Tenth Doctor|Tenth Incarnation]]. | * The Doctor tells Sarah Jane he met [[William Shakespeare]]. He said the man was charming but a "dreadful actor". The Doctor will [[The Shakespeare Code|see Shakespeare again]] in his [[Tenth Doctor|Tenth Incarnation]]. | ||
===[[:Category:The Doctor's items|The Doctor's items]]=== | === [[:Category:The Doctor's items|The Doctor's items]] === | ||
*The Doctor sends Sarah back to the TARDIS to get his [[spectrum mixer]], which he can use to fix their spatial position via the position of the [[star]]s | * The Doctor sends Sarah back to the TARDIS to get his [[spectrum mixer]], which he can use to fix their spatial position via the position of the [[star]]s | ||
===[[:Category:Technology|Technology]]=== | === [[:Category:Technology|Technology]] === | ||
*The Morestrans use an [[Oculoid tracking android]] to track individuals. | * The Morestrans use an [[Oculoid tracking android]] to track individuals. | ||
===[[:Category:Transport technology|Transport technology]]=== | === [[:Category:Transport technology|Transport technology]] === | ||
*Morestran technology is advanced enough to allow the TARDIS to be [[transmat|transposed]] back to their ship | * Morestran technology is advanced enough to allow the TARDIS to be [[transmat|transposed]] back to their ship | ||
==Story notes== | == Story notes == | ||
*From a certain point of view, this is the first story of the [[Philip Hinchcliffe]] era. The stories of Hinchcliffe's first year — which from a production standpoint included every story from ''[[The Ark in Space]]'' to ''[[Terror of the Zygons]]'' — were commissioned by [[Barry Letts]] and [[Terrance Dicks]]. | * From a certain point of view, this is the first story of the [[Philip Hinchcliffe]] era. The stories of Hinchcliffe's first year — which from a production standpoint included every story from ''[[The Ark in Space]]'' to ''[[Terror of the Zygons]]'' — were commissioned by [[Barry Letts]] and [[Terrance Dicks]]. | ||
*Philip Hinchcliffe has remarked that he approached [[Roger Murray-Leach]] to find out what sort of landscape he could do best in a studio. Murray-Leach remarked that he could "always do a good jungle." Despite the jungle setting of this serial, the shoot was entirely studio bound, and Leach was forced to build an intricately detailed jungle set. The [[BBC]] was so impressed with it that they kept photographs of it for several years as an example of excellent set design. | * Philip Hinchcliffe has remarked that he approached [[Roger Murray-Leach]] to find out what sort of landscape he could do best in a studio. Murray-Leach remarked that he could "always do a good jungle." Despite the jungle setting of this serial, the shoot was entirely studio bound, and Leach was forced to build an intricately detailed jungle set. The [[BBC]] was so impressed with it that they kept photographs of it for several years as an example of excellent set design. | ||
*This is one of the few stories in which the Fourth Doctor removes his scarf for any extended period of time. He does not wear it for most of the 3rd and 4th episodes. | * This is one of the few stories in which the Fourth Doctor removes his scarf for any extended period of time. He does not wear it for most of the 3rd and 4th episodes. | ||
*This was the first story to feature the Fourth Doctor behind the console of the TARDIS. The TARDIS console room had not been seen on-screen since the [[Third Doctor]] serial ''[[Death to the Daleks]]''. A new TARDIS console makes its television debut in this story although it was first used in ''[[Pyramids of Mars]]'' which was filmed before Planet of Evil. | * This was the first story to feature the Fourth Doctor behind the console of the TARDIS. The TARDIS console room had not been seen on-screen since the [[Third Doctor]] serial ''[[Death to the Daleks]]''. A new TARDIS console makes its television debut in this story although it was first used in ''[[Pyramids of Mars]]'' which was filmed before Planet of Evil. | ||
*The story was inspired by the movie ''[[Wikipedia:Forbidden Planet|Forbidden Planet]]'' and [[Wikipedia:Robert Louis Stevenson|Robert Louis Stevenson]]'s novel ''[[Wikipedia:The Strange Case of Dr Jekyll and Mr Hyde|The Strange Case of Dr Jekyll and Mr Hyde]]''. ''Forbidden Planet'' was itself inspired by [[William Shakespeare]]'s play ''The Tempest'', and the Doctor quotes Shakespeare at one point in the story. | * The story was inspired by the movie ''[[Wikipedia:Forbidden Planet|Forbidden Planet]]'' and [[Wikipedia:Robert Louis Stevenson|Robert Louis Stevenson]]'s novel ''[[Wikipedia:The Strange Case of Dr Jekyll and Mr Hyde|The Strange Case of Dr Jekyll and Mr Hyde]]''. ''Forbidden Planet'' was itself inspired by [[William Shakespeare]]'s play ''The Tempest'', and the Doctor quotes Shakespeare at one point in the story. | ||
*Both [[Frederick Jaeger]] and [[Ewen Solon]] had worked together on a previous story- ''[[The Savages]]'' in [[1966]]. | * Both [[Frederick Jaeger]] and [[Ewen Solon]] had worked together on a previous story- ''[[The Savages]]'' in [[1966]]. | ||
*[[Michael Wisher]] plays Morelli. Wisher appeared in several other ''[[Doctor Who]]'' stories in various roles, but is best known for his portrayal of [[Davros]] in ''[[Genesis of the Daleks]]''. | * [[Michael Wisher]] plays Morelli. Wisher appeared in several other ''[[Doctor Who]]'' stories in various roles, but is best known for his portrayal of [[Davros]] in ''[[Genesis of the Daleks]]''. | ||
*[[Prentis Hancock]], who plays [[Salamar]], is perhaps best known for playing Paul Morrow in ''Space:1999''. | * [[Prentis Hancock]], who plays [[Salamar]], is perhaps best known for playing Paul Morrow in ''Space:1999''. | ||
===Ratings=== | === Ratings === | ||
*Part 1 - 10.4 million viewers | * Part 1 - 10.4 million viewers | ||
*Part 2 - 9.9 million viewers | * Part 2 - 9.9 million viewers | ||
*Part 3 - 9.1 million viewers | * Part 3 - 9.1 million viewers | ||
*Part 4 - 10.1 million viewers | * Part 4 - 10.1 million viewers | ||
===Myths=== | === Myths === | ||
''to be added'' | ''to be added'' | ||
===Filming locations=== | === Filming locations === | ||
*[[BBC Television Centre]], Shepherd's Bush, [[London]] | * [[BBC Television Centre]], Shepherd's Bush, [[London]] | ||
*[[Ealing Television Film Studios]], Ealing Green, Ealing | * [[Ealing Television Film Studios]], Ealing Green, Ealing | ||
===Production errors=== | === Production errors === | ||
{{discontinuity}} | {{discontinuity}} | ||
*Tom Baker almost falls over after throwing Sorenson and the container of anti-matter down into the pool. | * Tom Baker almost falls over after throwing Sorenson and the container of anti-matter down into the pool. | ||
*When expelling the anti-matter that the Doctor had, the door on the outside of the ship opens after they eject it - when expelling the Doctor the door on the ship opens before they attempt to eject him. | * When expelling the anti-matter that the Doctor had, the door on the outside of the ship opens after they eject it - when expelling the Doctor the door on the ship opens before they attempt to eject him. | ||
==Continuity== | == Continuity == | ||
*Zeta Minor is revisited in [[PDA]]: ''[[Zeta Major (novel)|Zeta Major]]''. | * Zeta Minor is revisited in [[PDA]]: ''[[Zeta Major (novel)|Zeta Major]]''. | ||
*[[DW]]: ''[[The Three Doctors]]'' also deals extensively with anti-matter. | * [[DW]]: ''[[The Three Doctors]]'' also deals extensively with anti-matter. | ||
==[[Fourth Doctor - Timeline|Timeline]]== | == [[Fourth Doctor - Timeline|Timeline]] == | ||
*This story takes place after [[DW]]: ''[[Terror of the Zygons]]'' | * This story takes place after [[DW]]: ''[[Terror of the Zygons]]'' | ||
*This story takes place before [[ST]]: ''[[The Republican's Story]]'' | * This story takes place before [[ST]]: ''[[The Republican's Story]]'' | ||
==DVD, Video and Other releases== | == DVD, Video and Other releases == | ||
===VHS releases=== | === VHS releases === | ||
*This story was released on [[VHS]] in [[January]] [[1994]]. | * This story was released on [[VHS]] in [[January]] [[1994]]. | ||
<gallery hideaddbutton="true" > | <gallery hideaddbutton="true" > | ||
| Line 204: | Line 204: | ||
</gallery> | </gallery> | ||
===DVD releases=== | === DVD releases === | ||
* Region 2 [[15 October]] [[2007]] | * Region 2 [[15 October]] [[2007]] | ||
::PAL - | ::PAL - | ||
| Line 216: | Line 216: | ||
Contents: | Contents: | ||
*Commentary by [[Tom Baker]], [[Elisabeth Sladen]], [[Philip Hinchcliffe]] and [[Prentis Hancock]] | * Commentary by [[Tom Baker]], [[Elisabeth Sladen]], [[Philip Hinchcliffe]] and [[Prentis Hancock]] | ||
*A Darker Side - Making-of feature | * A Darker Side - Making-of feature | ||
*Planetary Performance: Acting in ''Doctor Who'' | * Planetary Performance: Acting in ''Doctor Who'' | ||
*Studio Scene - Footage of Tom Baker and Elisabeth Sladen filming the final scene of Part One | * Studio Scene - Footage of Tom Baker and Elisabeth Sladen filming the final scene of Part One | ||
*Continuities | * Continuities | ||
*Photo Gallery | * Photo Gallery | ||
*Production Subtitles | * Production Subtitles | ||
*Coming Soon - DVD release of [[Destiny of the Daleks]] | * Coming Soon - DVD release of [[Destiny of the Daleks]] | ||
*Radio Times Listings | * Radio Times Listings | ||
*Easter Egg - Hidden Hinchcliffe: Philip Hinchcliffe discusses his experiences as producer of ''Doctor Who.'' To access this hidden feature, press left at ''Continuities'' on the Special Features menu. | * Easter Egg - Hidden Hinchcliffe: Philip Hinchcliffe discusses his experiences as producer of ''Doctor Who.'' To access this hidden feature, press left at ''Continuities'' on the Special Features menu. | ||
| Line 247: | Line 247: | ||
</gallery> | </gallery> | ||
===Audio release=== | === Audio release === | ||
*Excerpts from [[Dudley Simpson]]'s score, arranged by [[Heathcliff Blair]], were released by Silva Screen in the early 1990s on their compilation CD ''Pyramids of Mars: Classic Music from the Tom Baker Era'' (FILMCD 134) | * Excerpts from [[Dudley Simpson]]'s score, arranged by [[Heathcliff Blair]], were released by Silva Screen in the early 1990s on their compilation CD ''Pyramids of Mars: Classic Music from the Tom Baker Era'' (FILMCD 134) | ||
<gallery hideaddbutton="true" widths="200" captionalign="left"> | <gallery hideaddbutton="true" widths="200" captionalign="left"> | ||
Music-1179.jpg|cd release | Music-1179.jpg|cd release | ||
</gallery> | </gallery> | ||
==Novelisation and its audiobook== | == Novelisation and its audiobook == | ||
[[ | [[File:Planet of Evil novel.jpg|right|75px]] | ||
: ''Main article: [[The Planet of Evil (novelisation)]]'' | : ''Main article: [[The Planet of Evil (novelisation)]]'' | ||
Novelised as ''[[The Planet of Evil (novelisation)|The Planet of Evil]]'' by [[Terrance Dicks]], was published by [[Target Books]] in [[July]] [[1977]]. | Novelised as ''[[The Planet of Evil (novelisation)|The Planet of Evil]]'' by [[Terrance Dicks]], was published by [[Target Books]] in [[July]] [[1977]]. | ||
==External links== | == External links == | ||
*{{bbcepguideclassic|planetofevil/|Planet of Evil}} | * {{bbcepguideclassic|planetofevil/|Planet of Evil}} | ||
*{{dwrefguide|who_4h.htm|Planet of Evil}} | * {{dwrefguide|who_4h.htm|Planet of Evil}} | ||
*{{briefhistory|serials/4h.html|Planet of Evil}} | * {{briefhistory|serials/4h.html|Planet of Evil}} | ||
{{DWTV}} | {{DWTV}} | ||
{{Wikipedia|Planet_of_Evil}} | {{Wikipedia|Planet_of_Evil}} | ||
[[Category:Articles that were originally Wikipedia forks]] | [[Category:Articles that were originally Wikipedia forks]] | ||
[[Category:Doctor Who (1963) television stories]] | [[Category:Doctor Who (1963) television stories]] | ||
[[Category:Fourth Doctor television stories]] | [[Category:Fourth Doctor television stories]] | ||
Revision as of 04:34, 5 November 2011
Planet of Evil was the second story of Season 13 of Doctor Who.
Synopsis
The TARDIS picks up a distress call and the Doctor and Sarah arrive on the planet Zeta Minor. There they discover that a Morestran geological expedition has fallen prey to an unseen killer and only the leader, Professor Sorenson, remains alive. A military mission from Morestra has also arrived to investigate. The culprit is revealed to be a creature from a universe of antimatter, retaliating for the removal by Sorenson of some antimatter samples from around the pit that acts as an interface between the two universes.
The Morestrans take off in their ship, but it is slowly dragged back towards the planet due to the antimatter on board. Sorenson himself becomes infected by antimatter and gradually transforms into antiman, a monster capable of draining the life from others.
The Morestran commander, the increasingly unhinged Salamar, attacks Sorenson with a radiation source but this only causes him to multiply, and soon the ship is overrun by deadly creatures.
The Doctor finds the original Sorenson, takes him back to the planet in the TARDIS and throws both him and his samples into the pit, fulfilling a bargain he earlier made with the antimatter creature. Sorenson reappears unharmed and the Doctor returns him to the Morestran ship, which is now freed of the planet's influence.
Plot
Episode 1
On a dark and distant planet, a spaceman named Braun steps out of a small base unit and plants a sign in the nearby jungle floor indicating a name and date of death. Unearthly howls echo from the jungle around him, and he points a rifle warily at his surroundings before returning to the base. Meanwhile, elsewhere on the planet, another spaceman, Baldwin finds some crystals near a pit, handing them over to Professor Sorenson.
Baldwin receives a call from Braun: it is nearly night, and they need to get back to base quickly. Sorenson notes the vein they have uncovered is almost seventy percent pure. The last time they hit a vein this rich, Lorenzo died and the vein vanished. Sorenson says the planet is alive and took the vein back, but vows he will not be beaten again. Unable to persuade Sorenson, Baldwin leaves him. At base camp, Braun is attacked by an invisible force, and he vanishes, screaming. When Baldwin makes it back to the base, he is also attacked, just managing to send a distress signal before he, too, vanishes.
In the TARDIS, Sarah wants to know what is wrong: the Doctor had promised her they would be back in London five minutes before they left Loch Ness. The Doctor eventually admits that they have emerged from the time vortex 30,000 years too late. The TARDIS receives Baldwin's distress call, and the Doctor lands the ship. They emerge in the jungle, the Doctor tracking the signal with a small device. Suddenly, Sarah seems transfixed by a strange sound and stares straight ahead at something unseen, but the feeling soon passes.
A probe ship approaches Zeta Minor, the last planet in the known universe. The ship's Controller, Salamar, assigns Vishinsky, the most experienced crewmember, to lead the landing party. The ship has barely enough fuel to make the return journey — they do not have power for a scan before sending the party down to locate Sorenson and his team.
The Doctor and Sarah reach the base. They discover Braun's almost mummified body on the ground. The base unit's interior is dark, and the Doctor surmises that they are some months too late. Sarah goes back to the TARDIS to get his spectromixer so he can fix their position, while the Doctor tries to restore the base's power. When Sarah leaves, the Doctor discovers Baldwin's body, in the same mummified state.
Sarah makes it back to the TARDIS, entering just as the armed landing party draws near. Vishinsky calls back up to the probe ship, and Salamar orders that the TARDIS be brought back up to the ship and placed in quarantine. The landing party places a clamp on the TARDIS door, trapping Sarah inside, who has no idea what is going on. The police box is transmatted away.
The landing party spots Sorenson, who, although acting a bit strangely, assures Vishinsky that he is all right, and that his theory about Zeta Minor has proved correct. He found the vital discovery the previous night in Sector 5. Sorenson believes Baldwin returned to the base, suffering from fatigue, and leads the party over to it. Vishinsky asks about the other six members of his expedition. Sorenson is evasive about the exact number, and concedes that they have lost some people, but the important thing is that the mission is a success. When the reach the base, the landing party find the Doctor still working on the systems next to Baldwin's body. Sorenson is startled to see the corpse, and says Baldwin has been murdered... just like the others.
Sarah finally finds the TARDIS doors unlocked, and steps up to find herself on board the probe ship. Salamar tells her that she is in orbit over Zeta Minor and a prisoner of the Morestrans. Salamar contacts Vishinsky and tells him to keep a careful watch on the Doctor while he questions Sarah. Salamar does not believe that Sarah and the Doctor just "picked up" the distress signal, as Zeta Minor is so remote.
The probe ship lands on the planet, near the base. Sorenson relates that they had only been working a few weeks when the killings began, always happening at night. Salamar believes it is the work of alien infiltrators, and suggests the Doctor confess before he is subjected to interrogation. When Salamar is told that there is no sign of life anywhere else, he concludes that the Doctor and Sarah must be responsible, and gives the order for their execution.
However, the Doctor and Sarah are escaping through the window of the store room they are being kept in, whose magnetic locks are weak due to the power loss. The moment they step out, they encounter a semi-transparent, monstrous figure, its outlines glowing red, reaching out for them.
Episode 2
One of the guards, O'Hara, fires at the creature, but it grabs him and he vanishes, screaming, only for his body to reappear, drained and mummified like the others. The Doctor is not sure what the creature is, but tells Sarah that he has a very unpleasant theory. Ponti, who heard O'Hara's screams, informs and Salamar that the base in under attack, and they find the two time travellers missing. The Morestrans fire at them as they run away into the jungle.
Dawn breaks on Zeta Minor, and the creature does not seem to like daylight. Vishinsky launches the occuloid tracker, a flying drone with a camera eye, to search the jungle for the fugitives. Meanwhile, Sorenson confirms that O'Hara died the same way as the other members of his expedition, through total dehydration — a kind of rapid freeze drying. Sorenson brushes off the deaths as irrelevant. His mission to Zeta Minor was to find a new source of energy to replace Morestra's dying sun, and he has succeeded. Sorenson demands that his mineral samples be taken aboard and they leave the planet immediately. However, Salamar says that alien forces must be sought out and eliminated.
The tracker finds the Doctor and Sarah near the pit in Sector 5, a dark pool without any reflections. A capture party arrives, led by Ponti, but as they search the two roughly, Ponti falls into the pit with a cry. The Doctor warns the rest back, telling them they are tampering with the balance of nature on the planet and it may already be too late. At the base, Sorenson gets De Haan to help load his canisters of refined ore onto the ship. Sorensen excitedly notes that six pounds of which could produce heat equal to the output of their sun for three centuries; full scale exploitation of Zeta Minor would provide perpetual energy.
The Doctor implores Salamar to listen to him: Zeta Minor is the boundary between the known universe and one of anti-matter. By coming here, they have crossed that boundary. He warns Sorenson that if he takes those samples, they will never be able to leave this planet, but Salamar orders the Doctor and Sarah taken away to the quarantine area. Sarah suggests they simply leave in the TARDIS, but the Doctor says that the Morestrans are endangering the universe as well as themselves. He opens a canister of refined ore and takes a few crystals, placing them in an old toffee tin to test a theory.
The ship tries to take off, but the systems are not responding properly. The creature attacks the ship. The force fields are raised, but there is not enough power to repel its pure energy form. Several Morestran crewmen rush out to fire at the creature, but to no avail as it drains them one by one. The Doctor tells them to link the force field to the atomic accelerator. Salamar hesitates, but Vishinsky says they have to try and he reluctantly gives the order. This seems to work; the creature is driven back and vanishes.
The Doctor tries to reason with Sorenson: as long as the ore is aboard, the creature will return, and they will be trapped here. If they jettison the canisters, and make their intention to leave empty handed clear, they will be allowed to take off. The Doctor offers to communicate that intention to the creature. Salamar agrees to let him go alone, but launches the tracker to observe him. When the Doctor reaches the pit, the creature rises, engulfing the Time Lord. He falls into the pool...
Episode 3
The Doctor seemingly dead, Sorenson asks Salamar to take off, but Salamar wants the ore samples removed first. As the two men argue, Sarah slips out of the ship into the jungle. As De Haan and Morelli start to transfer the canisters off, Sorenson sneaks into the quarantine area and takes one away.
The Doctor continues his seemingly endless fall through darkness, slowing until he is suspended, floating before the gigantic energy creature. When Sarah reaches the pit, she sees the Doctor climbing out, half delirious and falling in and out of consciousness. Vishinsky spots them on the tracker's signal and goes out to get them despite Salamar's protests. In his quarters, Sorenson records his observations on the ore's increase in flux activity, but something is obviously affecting him. He doubles over in pain, and his eyes begin to glow red. He quickly quaffs a solution from a flask, and returns to normal.
The Doctor is placed in the ship's sickbay. When he awakens, the ship is starting to take off, but Sarah assures him that the samples have been jettisoned. The Doctor relaxes, as he had given his word as a Time Lord to whatever was in the pit. The ship's systems start to fail as before, however, and the Doctor realises he still has some antimatter ore in the toffee tin, which he used to survive the pit. Morelli is given the tin to jettison it, but as he turns a corner, he is attacked and drained. The ship has reached free space but drag is still increasing, so the Doctor deduces that there must be antimatter still aboard.
A feral Sorenson drinks another dose of his infusion, and returns to normal. Examining the body in the sickbay, Vishinsky discovers that Morelli was killed the same way, even though the creature could not have gotten on board through the force field. Vishinsky then ejects Morelli's body into space. On Sorenson's advice, Salamar goes to the sickbay and accuses the Doctor once again of causing the deaths and demands they open up the TARDIS or be shot.
The ship has stopped making any headway altogether, hanging suspended in space despite the thrusters going at full power. The Doctor tells them that they have reached the end of their elastic; it will not stretch any further. In the sickbay, Sarah sees Sorenson double over in pain again, and starts to experience the same sensations she did on Zeta Minor. By the time she recovers, Sorenson is gone. Sarah hears De Haan's dying screams, and goes to investigate, crying out as he sees something feeding on the crewman. Her cry distracts Salamar long enough for the Doctor to punch him and leave the quarantine area. The Doctor reaches Sarah, who describes what she saw, a hybrid creature the Doctor dubs "Anti-Man".
Salamar, recovered from the blow, finds the Doctor and Sarah over De Haan's shrivelled body. Before the Doctor can explain, Salamar shoots him and orders that they be taken to the ejector chamber. In his quarters, Sorenson takes another dose of the formula, but can no longer hold off the transformation. He collapses onto his bed, eyes aglow.
The Doctor and Sarah are strapped to the ejector trays. Vishinsky protests that they have no evidence to execute them like this, and refuses to obey Salamar's order. In the struggle between the two men, however, the ejection lever is thrown...
Episode 4
Reig, a crewman on the command deck cries for help over the ship's intercom as he is attacked. Salamar and his men rush out of the sickbay, allowing Vishinsky to reverse the ejector control before he too leaves. They find Reig dead in the same way. Salamar still rants that the Doctor caused this but Vishinsky snaps back that they were with them when Reig's death took place. Vishinsky gives the order for a red alert; he is relieving Salamar of command.
Sarah helps the Doctor out of the ejector trays, and tells him about what she felt before De Haan was killed. When the Doctor finds out she was with Sorenson when that happened, he realises that the professor has been infected with antimatter, his brain cells being destroyed and descending to a brutish mental level, creating Anti-Man. He tells Sarah to pass the message to the command deck to seal the hatches and keep Anti-Man isolated.
As the Doctor goes deeper into the ship, the section hatchways close. He uses the sonic screwdriver to enter Sorensen's quarters, finding the canister of antimatter ore. He also finds the bottle of Sorenson's solution, and finds that the liquid reacts with the antimatter. Sorenson, normal once again, enters the room. The Doctor tells him that the solution — an oral vaccine Sorenson believes that will protect him against antiquark penetration — did protect him for a time. However, it set up a cycle of chemical change, hybridising his tissues to the point where the next change could be the last. He reminds Sorenson that as scientists, they buy their privilege to experiment at the cost of total responsibility. He hands Sorenson the canister; he knows what he must do.
On the command deck, Salamar has taken the ship's neutron accelerator. He intends to expose Sorensen to its radiation, even if it means killing them both in the process. Raving, he forces Vishinsky to open the hatch at gunpoint, and goes off to hunt Sorenson down. In the meantime, Sorenson is proceeding to the ejection chamber, intending to jettison himself and the antimatter. Unfortunately, he transforms into Anti-Man again before he can throw the lever.
The Doctor finds the chamber empty, and the canister abandoned. The ship continues its acceleration towards Zeta Minor, as there are now two sources of antimatter, the other being Sorensen himself. When he finds out that Salamar is hunting Sorensen with a neutron accelerator, he goes to stop him, telling Vishinsky to keep the hatches open.
He is too late. Salamar has found Anti-Man and opens the accelerator's shield. Anti-Man drains Salamar, but the radiation boosts his power. After finding Salamar's body, the Doctor finds himself faced with multiple, semi-transparent Anti-Men, like the creature on the planet, which he dispels by waving the canister of antimatter at them. He reaches the command deck, and tells Vishinsky that Sorensen has multiplied. However, even with the hatches resealed, the Anti-Men are able to burn their way through them. The intercom is filled with the screams of dying men.
The ship is 15 minutes from impact. The Doctor takes a pistol and leaves the command deck. He works his way past more Anti-Men until he finds the Sorenson Anti-Man, whom he stuns with the pistol and takes into the TARDIS. He pilots the time ship down to Sector 5 on Zeta Minor, as the Anti-Men start burning though to the command deck.
The TARDIS lands in Sector 5, and the Doctor and Anti-Man are locked in a struggle on the edge of the pit. Anti-Man loses his footing and falls in, and the Doctor throws the canister in after him. On the ship, the other Anti-Men fade out of existence, and the ship begins to pull away from Zeta Minor. Unexpectedly, the Doctor finds Sorenson, restored to human form, at the edge of the pit. He takes the professor into the TARDIS and it dematerialises just as the creature rises from the pit. Because the Doctor kept his word, Sorenson was released.
The Doctor returns to the ship for Sarah, but before they leave, the Doctor tells the still-suggestible Sorenson that he abandoned his antiquark research for a source of energy derived from the kinetic forces of planetary movement. Sarah hugs Vishinsky good-bye. The Doctor notes they have an appointment in London, and they're already 30,000 years late...
Cast
- The Doctor - Tom Baker
- Sarah Jane Smith - Elisabeth Sladen
- Vishinsky - Ewen Solon
- Sorenson - Frederick Jaeger
- Salamar - Prentis Hancock
- Morelli - Michael Wisher
- De Haan - Graham Weston
- Ponti - Louis Mahoney
- Braun - Terence Brook
- Baldwin - Tony McEwan
- O'Hara - Haydn Wood
- Reig - Melvyn Bedford
Crew
- Writer - Louis Marks
- Director - David Maloney
- Designer - Roger Murray-Leach
- Producer - Philip Hinchcliffe
- Script Editor - Robert Holmes
- Assistant Floor Manager - Karilyn Collier
- Costumes - Andrew Rose
- Film Cameraman - Stan Speel, Kenneth McMillan
- Film Editor - M A C Adams
- Incidental Music - Dudley Simpson
- Make-Up - Jenny Shircore
- Production Assistant - Malachy Shaw Jones
- Production Unit Manager - Janet Radenkovic
- Special Sounds - Peter Howell
- Studio Lighting - Brian Clemett
- Studio Sound - Tony Millier, Brendan Shaw
- Theme Arrangement - Delia Derbyshire
- Title Music - Ron Grainer
- Visual Effects - Dave Havard
References
Astronomical objects
- Zeta Minor is beyond Cygnus A.
The Doctor
- The Doctor tells Sarah Jane he met William Shakespeare. He said the man was charming but a "dreadful actor". The Doctor will see Shakespeare again in his Tenth Incarnation.
The Doctor's items
- The Doctor sends Sarah back to the TARDIS to get his spectrum mixer, which he can use to fix their spatial position via the position of the stars
Technology
- The Morestrans use an Oculoid tracking android to track individuals.
Transport technology
- Morestran technology is advanced enough to allow the TARDIS to be transposed back to their ship
Story notes
- From a certain point of view, this is the first story of the Philip Hinchcliffe era. The stories of Hinchcliffe's first year — which from a production standpoint included every story from The Ark in Space to Terror of the Zygons — were commissioned by Barry Letts and Terrance Dicks.
- Philip Hinchcliffe has remarked that he approached Roger Murray-Leach to find out what sort of landscape he could do best in a studio. Murray-Leach remarked that he could "always do a good jungle." Despite the jungle setting of this serial, the shoot was entirely studio bound, and Leach was forced to build an intricately detailed jungle set. The BBC was so impressed with it that they kept photographs of it for several years as an example of excellent set design.
- This is one of the few stories in which the Fourth Doctor removes his scarf for any extended period of time. He does not wear it for most of the 3rd and 4th episodes.
- This was the first story to feature the Fourth Doctor behind the console of the TARDIS. The TARDIS console room had not been seen on-screen since the Third Doctor serial Death to the Daleks. A new TARDIS console makes its television debut in this story although it was first used in Pyramids of Mars which was filmed before Planet of Evil.
- The story was inspired by the movie Forbidden Planet and Robert Louis Stevenson's novel The Strange Case of Dr Jekyll and Mr Hyde. Forbidden Planet was itself inspired by William Shakespeare's play The Tempest, and the Doctor quotes Shakespeare at one point in the story.
- Both Frederick Jaeger and Ewen Solon had worked together on a previous story- The Savages in 1966.
- Michael Wisher plays Morelli. Wisher appeared in several other Doctor Who stories in various roles, but is best known for his portrayal of Davros in Genesis of the Daleks.
- Prentis Hancock, who plays Salamar, is perhaps best known for playing Paul Morrow in Space:1999.
Ratings
- Part 1 - 10.4 million viewers
- Part 2 - 9.9 million viewers
- Part 3 - 9.1 million viewers
- Part 4 - 10.1 million viewers
Myths
to be added
Filming locations
- BBC Television Centre, Shepherd's Bush, London
- Ealing Television Film Studios, Ealing Green, Ealing
Production errors
- Tom Baker almost falls over after throwing Sorenson and the container of anti-matter down into the pool.
- When expelling the anti-matter that the Doctor had, the door on the outside of the ship opens after they eject it - when expelling the Doctor the door on the ship opens before they attempt to eject him.
Continuity
- Zeta Minor is revisited in PDA: Zeta Major.
- DW: The Three Doctors also deals extensively with anti-matter.
Timeline
- This story takes place after DW: Terror of the Zygons
- This story takes place before ST: The Republican's Story
DVD, Video and Other releases
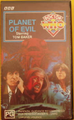
VHS releases

UK VHS cover
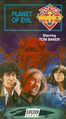
Australian VHS cover
US VHS cover


DVD releases
- Region 2 15 October 2007
- PAL -
- Region 4 5 December 2007
- PAL -
- NTSC -
Contents:
- Commentary by Tom Baker, Elisabeth Sladen, Philip Hinchcliffe and Prentis Hancock
- A Darker Side - Making-of feature
- Planetary Performance: Acting in Doctor Who
- Studio Scene - Footage of Tom Baker and Elisabeth Sladen filming the final scene of Part One
- Continuities
- Photo Gallery
- Production Subtitles
- Coming Soon - DVD release of Destiny of the Daleks
- Radio Times Listings
- Easter Egg - Hidden Hinchcliffe: Philip Hinchcliffe discusses his experiences as producer of Doctor Who. To access this hidden feature, press left at Continuities on the Special Features menu.
Notes:
- Editing for DVD release completed by Doctor Who Restoration Team.

Region 2 UK cover
- Planet fo Evil DVD Australian cover.jpg
Region 4 Australian cover

Region 1 US cover


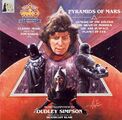
Audio release
- Excerpts from Dudley Simpson's score, arranged by Heathcliff Blair, were released by Silva Screen in the early 1990s on their compilation CD Pyramids of Mars: Classic Music from the Tom Baker Era (FILMCD 134)
cd release

Novelisation and its audiobook

- Main article: The Planet of Evil (novelisation)
Novelised as The Planet of Evil by Terrance Dicks, was published by Target Books in July 1977.
External links
- Planet of Evil at the BBC's official site
- Planet of Evil at the Doctor Who Reference Guide
- Planet of Evil at Shannon Sullivan's A Brief History of Time (Travel)