The Macra Terror (TV story): Difference between revisions
Mini-mitch (talk | contribs) |
No edit summary |
||
| (217 intermediate revisions by 67 users not shown) | |||
| Line 1: | Line 1: | ||
{{title dab away}} | |||
{{real world}} | {{real world}} | ||
{{ | {{ImageLinkTV}} | ||
{{Infobox Story | {{Infobox Story SMW | ||
|image = Cower.jpg | |||
image=Cower.jpg | | |novelisation = The Macra Terror (novelisation) | ||
series=[[Doctor Who television stories|''Doctor Who'' television stories]]| | |series = [[Doctor Who television stories|''Doctor Who'' television stories]] | ||
season number= | |season number = Season 4 (Doctor Who 1963)| | ||
story number= 34| | |season serial number = 7 | ||
doctor=Second Doctor | | |story number = 34 | ||
companions= [[ | |doctor = Second Doctor | ||
enemy= | |companions = [[Polly Wright|Polly]], [[Ben Jackson|Ben]], [[Jamie McCrimmon|Jamie]] | ||
|enemy = [[Macra]] [[Control (The Macra Terror)|Control]] | |||
writer= | |setting = [[Planet (The Macra Terror)|Earth colony]], [[far future]] | ||
director= [[John Davies]] | | |writer = Ian Stuart Black | ||
producer= [[Innes Lloyd]] | |director = [[John Davies (director)|John Davies]] | ||
|producer = [[Innes Lloyd]] | |||
epcount=4| | |epcount = 4 | ||
broadcast date= | |broadcast date = 11 March - 1 April 1967 | ||
network= | |network = BBC1 | ||
format= 4x25-minute episodes | | |format = 4x25-minute episodes | ||
production code= [[List of production codes|JJ]] | | |serial production code = [[List of production codes|JJ]] | ||
prev=The Moonbase (TV story)| | |prev = The Moonbase (TV story) | ||
next=The Faceless Ones (TV story) | |next = The Faceless Ones (TV story) | ||
|trailer = The Macra Terror Trailer Doctor Who | |||
|clip = "Doctor, Look!" The Macra Terror Doctor Who | |||
|clip2 = The TARDIS Team Arrive The Macra Terror Doctor Who | |||
|thwr = 116 | |||
|thwr2 = 245 | |||
}} | }} | ||
'''''The Macra Terror''''' was the seventh serial of [[Season 4 (Doctor Who 1963)|season 4]] of ''[[Doctor Who]]''. | |||
It was the first story to feature the lead actor's face in the opening title sequence, a tradition that carried on to the [[Survival (TV story)|final episode]] of the classic series and returned with ''[[The Snowmen (TV story)|The Snowmen]]'' in the revived format and remained until ''[[Twice Upon a Time (TV story)|Twice Upon a Time]]'' (barring ''[[Death in Heaven (TV story)|Death in Heaven]]'' and ''[[Sleep No More (TV story)|Sleep No More]]''). | |||
Currently, all four episodes are missing from the [[BBC Archives]]. However, all four parts have been released in full animation on [[DVD releases|DVD]], [[Blu-ray]], special edition [[Steelbook]] and digital download in both colour and original black-and-white.<ref>https://www.doctorwho.tv/news/?article=brand-new-animation-of-missing-doctor-who-serial-the-macra-terror-to-be-released-on-dvd-and-bluray#_</ref> [[BFI Southbank]] also held a Q&A with [[Anneke Wills]] on [[16 March (releases)|16 March]].<ref>https://whatson.bfi.org.uk/Online/default.asp?doWork::WScontent::loadArticle=Load&BOparam::WScontent::loadArticle::article_id=CCB1CFC5-343C-4B57-9D39-9AAD818AE12C&BOparam::WScontent::loadArticle::context_id=DF3F885C-B33F-40C5-A426-BF0681A89953</ref> | |||
== Synopsis == | == Synopsis == | ||
When the [[Second Doctor]], Polly | When the [[Second Doctor]], [[Ben Jackson|Ben]], [[Polly Wright|Polly]] and [[Jamie McCrimmon|Jamie]] visit a [[human]] [[Planet (The Macra Terror)|colony]] that appears to be one big holiday camp, they think they have come across a truly happy place. Yet a shadowy presence soon makes them realise that the surface contentment is carefully controlled. | ||
The colony's inhabitants have been brainwashed by giant, [[crab]]-like creatures | The colony's inhabitants have been [[brainwashing|brainwashed]] by giant, [[crab]]-like creatures — the [[Macra]]. Insidious propaganda, broadcast by the Controller, forces the humans to [[mining|mine]] a [[gas]] that is essential for the Macra to survive, but fatal to them. | ||
The colony must be saved | The colony must be saved — but how? The Doctor and his team are up against it, particularly when Ben falls under the influence of the Macra. Can he be rescued from their evil clutches? Can the gas pumping equipment be destroyed, getting rid of the Macra for good? | ||
== Plot == | == Plot == | ||
=== Episode 1 === | === Episode 1 === | ||
A drum majorette and a futuristic band rehearse for a festival performance. The Pilot of the | A drum majorette and a futuristic band rehearse for a festival performance. [[Pilot (The Macra Terror)|The Pilot]] of the colony compliments [[Barney (The Macra Terror)|Barney]], the band's leader, but their idyllic conversation is disrupted when [[Medok]], another colony member, bursts through half-crazed and escapes outside. [[Ola]], the Chief of Police and several guards pursue him. Ola explains that Medok has "refused treatment". The Pilot is suddenly deadly serious; Medok must not get away. In the wilderness outside the colony, Medok takes cover in rocks to hide from the oncoming guards. As they pass him, [[The Doctor's TARDIS|the TARDIS]] materialises, and [[Second Doctor|the Doctor]], [[Ben Jackson|Ben]], [[Polly Wright|Polly]] and [[Jamie McCrimmon|Jamie]] tentatively step out, wary of the huge claw they saw on the [[time scanner]]. Medok attacks, but Ben and Jamie subdue him as Ola and the guards arrive. They tie up Medok. Ola thanks them for apprehending their convict and welcomes the strangers, inviting them to meet their Pilot, who will want to thank them for their help. | ||
As the music chimes, signalling a work-shift change, the Pilot offers his gratitude to the strangers. He sends them to the Refreshing Department. Jamie hangs back, suspicious, but follows with Polly. As they arrive, a picture of a man appears on a large screen and a friendly, commanding voice welcomes them. The Pilot explains this is the colony's Controller, then takes his leave as Barney offers the four travellers the hospitality of the Department: shampoos, clothes cleaning, beauty treatments etc. | |||
As the | As Ola roughly accompanies Medok back into the colony, Medok's old friend [[Questa]] sees him. Questa has heard he's been seeing things. Medok corrects him: there ''are'' things, horrible creatures coming out at night. [[Controller (The Macra Terror)|The Controller]] announces a reception to welcome the strangers. Questa asks Medok to join in like he used to. As Medok spews more dangerous talk, Ola drags him away. | ||
At the prison, the Doctor manages to break into Medok's cell and talk to him. He's curious about what Medok has seen, but Medok is suspicious of this stranger. He mentions creatures he has seen at night that crawl over the ground. Medok takes his chance, pushes the Doctor and escapes. An alarm bell sounds and the Doctor explains his actions to the Pilot and Ola. Ola wants to send the Doctor to "work in the pits", but the Doctor is saved by his ignorance of colony laws and the fact that he caught Medok in the first place. He casually mentions people crawling over the colony to Ola, who warns him his talk might end him up in the hospital "for correction." The Pilot is eager for the strangers to learn more about the colony. He tells Ola to bring them to the Labour Centre. En route, they pass though a construction area where new homes are being built. The Doctor spots Medok hiding in the site but says nothing. | |||
At the Labour Centre, the Controller informs the work force of the escaped prisoner. The travellers ask about the work being done, but the answers are vague: they tap and refine gas, but can't describe what they use the gas for. Suddenly two workers stagger in with "gas sickness." Ola and Questa brush it off, saying the work must be done. Polly is surprised and doubtful, then notices the Doctor is gone. | |||
The Doctor has slipped away to find Medok back at the construction site and questions him more about the creatures he's seen — giant insects with huge claws. Others have seen them too, but they get locked up in the hospital. Another alarm sounds and Medok sends the Doctor back. The others are relieved to find the Doctor, as curfew is announced. Barney shows the travellers to their sleeping cubicles in the Refreshing Department but, as soon as it is quiet, the Doctor slips out to find Medok again. As he does, the Controller informs the colony that all people seen out of their sleeping compartments risk their lives. As Ola and the guards patrol, the Doctor evades them and finds Medok. They hole themselves up in a half-completed house. They seem surrounded, but the Doctor finds an escape hatch. While he helps Medok escape, Medok spots one of the crab-like creatures below them. | |||
=== Episode 2 === | |||
Medok is excited to have seen the creature with the Doctor, thinking he can prove he wasn't "seeing things." His shouts bring Ola and the guards to them, and Ola completely dismisses their claims. He brings the Doctor before the Pilot. | |||
The Pilot sees the Doctor individually. While the Doctor is impressed with the colony's technology, especially a piece of equipment that allows him to see the whole of the colony, the Pilot questions him about his "crime". The Doctor starts to explain why he believes Medok, but Ola interrupts to report that Medok swears the Doctor was trying to make him give himself up. The Doctor is released back to the Refreshing Department, and Medok returns to the hospital for another round of treatment. The Controller commands that the strangers be given "the advantage of high-powered adaption" within their "deep sleep" to prevent any further criticism from them, making them more like other obedient colony members. The Pilot sets about this process. | |||
Jamie, Ben and Polly are already being brainwashed in their sleep. Jamie sleeps fitfully, and the thinking patterns do not take hold. He awakes and tries to alert Ben to voices he thinks he hears, but Ben argues him down, quoting passages from the brainwashing and saying that they will need to work in the morning. | |||
The Doctor arrives at Polly's cubicle and overhears her brainwashing. He shorts the circuits controlling this, which wakes Polly up. He makes her promise to disregard anything she may have dreamt about and ensure she always makes decisions carefully. The Doctor rushes off to Ben and Jamie's room and disconnects the machinery, but Ben is angered, saying it is an insult to the colony. He gets into a scuffle with Jamie but eventually leaves and reports the Doctor's crimes to Ola. The Doctor and Jamie are taken away. | |||
At the hospital, the Pilot is lamenting that Medok's treatment is failing and he'll probably have to be sent to the pits for life | At the hospital, the Pilot is lamenting that Medok's treatment is failing and he'll probably have to be sent to the pits for life. | ||
The Pilot confronts the Doctor about his actions, but the Doctor is proud of | Meanwhile, Polly angrily leaves the cubicles after arguing with Ben and runs to the construction site to avoid him. Ben follows and captures her, violently dragging her back towards the cubicles. Polly spots something in the distance and screams. She describes it as a creature like a large crab with huge claws. Ben sees nothing and is dubious until he spots something himself. A huge claw grabs Polly, and Ben fights it off. After a while, the creature retreats. After the release of Polly, they soon find themselves surrounded by Macra, but their nimble legs let them escape back to the colony. | ||
[[File:ControllerAppearsToTheCrowd.png|thumb|An old disheveled "Controller" appears to the crowd. ]] | |||
The Pilot confronts the Doctor about his actions, but the Doctor is proud of them. Seeing the Pilot also has a nerve circuit attached to his rest cubicle, the Doctor fuses that, too. Ben and Polly are also brought before the Pilot. Polly tells their harrowing tale, asking Ben for confirmation. Ben denies seeing any creatures, much to the consternation of Polly. The Doctor is convinced Ben has been brought under the evil influences at the heart of the colony. He and Jamie ask pointed questions regarding the Controller which start to get even the Pilot thinking about the true motives of his leader. This eventually forces the "Controller" to appear in person. An old, dishevelled man appears on the screen. He can barely speak and does not have the voice of the Controller; however, he is clearly a much older version of the man portrayed as the Controller on screen. The man is suddenly grabbed by a claw, and yells at the creature to get back and he'll obey, but to no avail, and he is dragged away out of camera shot. Polly then screams that the Macra are in control. | |||
=== Episode 3 === | === Episode 3 === | ||
The Doctor, Jamie and Polly are condemned to pit labour in the "danger gang". The Controller orders the Pilot to forget what he saw on the screen. The Pilot orders Ben to keep an eye on his friends. | The Doctor, Jamie and Polly are condemned to pit labour in the "danger gang". The Controller orders the Pilot to forget what he saw on the screen. The Pilot orders Ben to keep an eye on his friends. | ||
The three prisoners are brought to the pithead, where Officia is in charge. He recalls their shift leader, who turns out to be Medok. | The three prisoners are brought to the pithead, where Officia is in charge. He recalls their shift leader, who turns out to be Medok. Medok demands they have a supervisor, and the Doctor and Polly squabble over who should go. Jamie casually suggests that the Doctor may be more "useful" up top. Jamie and Polly are given masks and sent down. While the Doctor studies the controls, he spots Ben and talks with him. Ben is completely under control, and the Doctor comments that this is very unlike him and that he should keep out of Jamie's way as he will be less forgiving. | ||
There is soon a gas strike and the workers connect a large cable to stop a leak. Medok tells Polly and Jamie that the gas is lethal and no-one knows what it's used for | There is soon a gas strike and the workers connect a large cable to stop a leak which causes one of their team to collapse. Medok tells Polly and Jamie that the gas is lethal and no-one knows what it's used for. | ||
Meanwhile, the Doctor is working out some calculations on the wall and is very pleased with his work. The Pilot finds him and accuses him of stealing a secret formula, but the Doctor insists he has worked it out on his own. The Pilot orders that he erase his work so that no one sees it. | |||
The workers probe for more gas. Jamie finds a door, and Polly comments that it's very new and strong. Officia meddles in some of Medok's work, and gas erupts in his face. Jamie uses the opportunity to steal Officia's keys. Ben sees this and helps Officia out of the shaft. Jamie and Polly worry that Ben saw the theft. Jamie uses the keys to enter the strong door, but Polly is called back by Medok to work. An alarm sounds and, when Polly tells Medok that Jamie has escaped, he follows him, leaving Polly. | |||
Jamie | Up top, Officia realises his keys are gone, and Ben suggests he must have dropped them. When Officia leaves, Ben confesses to the Doctor that he knows Jamie took the keys but doesn't know why he didn't tell Officia. The Doctor says this is because he is recovering, but Ben leaves to tell the Pilot. | ||
While Medok searches for Jamie, he is attacked by a Macra. | |||
The Controller forbids the guards to be allowed into the old shaft (where Jamie and Medok have gone). | |||
Jamie discovers Medok dead, then finds a very still Macra in front of him. He throws a piece of rock at the inert creature. It opens its eyes briefly but remains chiefly inactive. | |||
The Doctor, now joined by Polly, is trying to analyse the gas and is not having success. | |||
Ben cannot find the Pilot, but when the Pilot is not in his office, his conditioning continues to break down, especially when another worker mentions the word "friends". The Controller orders gas diverted into the old shaft, intriguing the Doctor. The Doctor suggests that maybe the gas isn't to kill. He theorises it is to keep something else alive. The Doctor tries desperately to figure out how to help Jamie. As Jamie coughs and splutters, the Macra comes to life and moves towards him. He flees but is soon met by a second terrifying creature. | |||
=== Episode 4 === | === Episode 4 === | ||
The Doctor tries to work out how to reverse the gas flow but fails to understand the equipment. The Doctor then enters the pit head and fiddles with some equipment, which tricks Officia into revealing which controls to manipulate. The Doctor sets his plan into action by causing [[oxygen]] to flow into the shaft. Officia tries to get help, but the Doctor has the keys now and locks the entrance to the pithead from the outside. | |||
Down in the shaft, Jamie slides into a rock crevice, but it won't protect him long. The Macra manage to grab Jamie and extract him from the crevice, which causes a mini-landslide. As they are about to grab him, the oxygen inflow causes the Macra to slump, allowing Jamie to escape. | |||
Control immediately sends Ola and his guards to the locked door to return the gas to the shaft. The Doctor and Polly hurriedly escape into the mine, locking the heavy door behind them before the guards can follow. They find a pipe room and follow the shaft deeper, despite Polly's reluctance. | |||
Ola manages to open the door to the pithead and return the gas to flow into the shaft. | |||
Luckily Jamie has escaped the shaft by prying open a grate and wriggling into a cupboard back in the colony. Outside, some sort of cheerleading practice is taking place. Despite his best efforts, Jamie is seen by the leader and mistaken for an auditioning dancer. Jamie shows them the [[Highland Fling]] and flings himself out the door — right into the arms of Ola and the guards. Ben, still struggling, identifies him, and Jamie is arrested. As he is led away, Ben is clearly regretful. | |||
The Doctor | The Doctor and Polly hear the voice of the Controller and make their way towards the chamber and see that, indeed, the Macra are in charge. They inhale the gas and issue commands. They require the gas to survive and are entirely dependent on it, using the humans to mine it for them. The Doctor and Polly decide to take the risk of telling the Pilot and bringing him to see the truth. | ||
In the Pilot's office, Ola and the Pilot argue. Ola criticises the pit operations, allowing the strangers to escape and endanger the colony. The Doctor and Polly come right in, of their own free will. The Doctor greets everyone and tries to reconcile the two men. Jamie is horrified they've walked into a trap. The Doctor persuades the Pilot to go with him, despite the Controller's wild and panicked attempts to intervene. The colonists are meanwhile frightened by the Pilot's disobedience. The Pilot tells Ola to mind his own business and accompanies the Doctor. Polly and Jamie prepare for the worst. Ben's conditioning seems to be wearing off, but they realise Ben is absent. | |||
The | The Doctor takes the Pilot into forbidden territory through the pithead. Officia tries to stop them, to no avail. The Controller gives Ola full leadership of the colony and sends all the guards after the Pilot. By this time the Doctor and the Pilot have got to the chamber, allowing the Pilot to see the truth. The Pilot vows to kill the Macra, whilst the Controller screams that the Doctor and the Pilot must be destroyed. The humans double back to inform the colony. When they return to the pithead, the Doctor and the Pilot are arrested and, with Polly and Jamie, returned to the pipe room under orders of Control. Under orders from the Controller, the building is to be cleared for four minutes. | ||
Hearing this very specific time, Polly and her friends wonder what is going to happen to them until they realise gas is being vented into the pipe room. The Doctor and his friends begin to slowly succumb to the poison. Outside they hear a knock and realise it must be Ben. He has been hiding in the pit head, seeing that something like this may happen. The Doctor rapidly explains to Ben how to switch on inflow and outflow together and throw a lever. The Controller threatens Ben, explaining that it will destroy all lives — even human lives. Ben hesitates for a second but then pulls the lever, triggering an explosion. | |||
Later the colony celebrates its freedom from the Macra. The Pilot publicly thanks the strangers and decrees a dance festival be held every year, with the winners receiving a prize which will be known as "the Strangers' Trophy". Ben looks for the Doctor and finds him sitting down playing his recorder and enjoying himself. Ben tells him that he has heard that it is the intention to draft them into the colony and make the Doctor the next Pilot. The Doctor is horrified at this, so he and his companions discreetly dance their way out of the colony and back to the TARDIS. | |||
== Cast == | == Cast == | ||
* [[Second Doctor| | * [[Second Doctor|Dr. Who]] - [[Patrick Troughton]] | ||
* [[Ben Jackson]] - [[Michael Craze]] | * [[Ben Jackson]] - [[Michael Craze]] | ||
* [[Polly Wright|Polly]] - [[Anneke Wills]] | * [[Polly Wright|Polly]] - [[Anneke Wills]] | ||
| Line 105: | Line 126: | ||
* [[Questa]] - [[Ian Fairbairn]] | * [[Questa]] - [[Ian Fairbairn]] | ||
* [[Sunaa]] - [[Jane Enshawe]] | * [[Sunaa]] - [[Jane Enshawe]] | ||
* [[Chicki]] - [[Sandra Bryant]] ( | * [[Chicki]] - [[Sandra Bryant]] (episode one), [[Luan Peters|Karol Keyes]] (episode four) | ||
* [[Drum Majorette]] - [[Maureen Lane]] | * [[Drum majorette|Drum Majorette]] - [[Maureen Lane]] | ||
* [[Controller (The Macra Terror)|Controller]] - [[Graham Leaman]] | * [[Controller (The Macra Terror)|Controller]] - [[Graham Leaman]] | ||
* [[Alvis]] - [[Anthony Gardner]] | * [[Alvis]] - [[Anthony Gardner]] | ||
| Line 115: | Line 136: | ||
* Guards - [[John Caesar]], [[Steve Emerson]], [[Danny Rae]] | * Guards - [[John Caesar]], [[Steve Emerson]], [[Danny Rae]] | ||
* Cheerleaders - [[Roger Jerome]], [[Terry Wright]], [[Ralph Carrigan]] | * Cheerleaders - [[Roger Jerome]], [[Terry Wright]], [[Ralph Carrigan]] | ||
=== Uncredited cast === | |||
* Band - [[Avril Gaynor]], [[Jill Paris]], [[Fiona Fraser|Fiona Frazer]], [[Maris Hendrick]], [[Janice Hoye|Janice Hoy]], [[Amanda Scott]] ([[DWM 308]]) | |||
* Dancers - [[Sheila McGrath|Sheelagh McGrath]], [[Anthony Rayner]], [[Alan Troy]], [[Maureen Hillman]], [[Judy Nicholls|Judy Nichols]], [[Ted Merwood]] ([[DWM 308]]) | |||
* Citizens - [[George Gibbs]], [[Leslie Pitt]], [[Bill Beesley]], [[Deryn Fisher]], [[Maureen Morris]], [[Edwina King]], [[Leonard Kingston]], [[Tony Starr]] ([[DWM 308]]) | |||
* [[Verna]] - [[Nina Huby]] ([[DWM 308]]) | |||
* Refreshing Department Personnel - [[Sheila McGrath|Sheelagh McGrath]], [[Maureen Hillman]], [[Judy Nicholls|Judy Nichols]], [[Ted Merwood]] ([[DWM 308]]) | |||
* Labour Centre Personnel - [[George Gibbs]], [[Leslie Pitt]], [[Bill Beesley]], [[Deryn Fisher]], [[Maureen Morris]], [[Edwina King]] ([[DWM 308]]) | |||
* Miners in Labour Centre - [[Anthony Rayner]], [[Alan Troy]] ([[DWM 308]]) | |||
* [[Pilot (The Macra Terror)|Pilot]]'s Secretary - [[Linda Reynolds]] ([[DWM 308]]) | |||
* Scientist at Hospital - [[Paul Phillips]] ([[DWM 308]]) | |||
* Mine Workers - [[Sheila McGrath|Sheelagh McGrath]], [[Maureen Hillman]], [[Judy Nicholls|Judy Nichols]], [[Anthony Rayner]], [[Alan Troy]], [[Walter Henry]], [[Leonard Kingston]], [[Tony Starr]] ([[DWM 308]]) | |||
== Crew == | == Crew == | ||
| Line 120: | Line 153: | ||
* [[Costumes]] - [[Daphne Dare]], [[Vanessa Clark]] | * [[Costumes]] - [[Daphne Dare]], [[Vanessa Clark]] | ||
* [[Designer (crew)|Designer]] - [[Kenneth Sharp]] | * [[Designer (crew)|Designer]] - [[Kenneth Sharp]] | ||
* [[Film Cameraman]] - [[Peter Hamilton]] | * [[Film Cameraman]] - [[Peter Hamilton (cameraman)|Peter Hamilton]] | ||
* [[Film Editor]] - [[Eddie Wallstab]] | * [[Film Editor]] - [[Eddie Wallstab]] | ||
* [[Incidental Music]] - [[Dudley Simpson]] | * [[Incidental Music]] - [[Dudley Simpson]] | ||
| Line 133: | Line 166: | ||
* [[Doctor Who theme|Title Music]] - [[Ron Grainer]] | * [[Doctor Who theme|Title Music]] - [[Ron Grainer]] | ||
== | === Animation unit === | ||
* The ancestors of the colony came from [[Earth]] many centuries ago | * Character artist - [[Martin Geraghty]] | ||
* Storyboards and animation clean-up - Martin Geraghty | |||
* Background artist | |||
** [[Colin Howard]] | |||
** [[Graham Bleathman]] | |||
** [[Lydia Butz]] | |||
* 2D character director - [[Louis Jones]] | |||
* 2D animation producer - [[Lindsay Holyoak]] | |||
* Production coordinator - [[Hannah Campbell]] | |||
* Asset supervisor - [[Dylan Shipley]] | |||
* Asset build - [[Rebecca Hahner]] | |||
* Lead Rigger - [[Oli Putland]] | |||
* Lead character animator - [[Nick Clackett]] | |||
* 2D animators | |||
** [[Dan Keeble]] | |||
** [[Sam Shaw]] | |||
** [[Chris Bowles]] | |||
** [[Joanna Hepworth]] | |||
** [[Oli Knowles]] | |||
** [[Luke Hyde]] | |||
** [[Eliot Russell]] | |||
** [[Emma Shepherd]] | |||
* Junior animators | |||
** [[Guy Potts]] | |||
** [[Jodie Haslam]] | |||
* 3D animation and compsitising - [[Rob Ritchie]] | |||
* Online animatic editing - [[Johnathan Ogle]] | |||
* Edit assistant - [[Owen Simons]] | |||
* Additional animation - [[David Busch]] | |||
* Sound restoration and mastering - [[Mark Ayres]] | |||
* With thanks to [[Graham Strong]] | |||
* Mastering - [[Peter Crocker]] | |||
* Special thanks to | |||
** [[Richard Bignell]] | |||
** [[Jon Doyle]] | |||
** [[Linda Duncan]] | |||
** [[Toby Hadoke]] | |||
** [[Derek Handley]] | |||
** [[John Kelly (producer)|John Kelly]] | |||
** [[Des Shaw]] | |||
** [[Isabel Skinner]] | |||
** [[AnneMarie Walsh]] | |||
** [[Jon Turner]] | |||
* 2D animation services - [[Sun and Moon studios]], Bristol | |||
* Director - [[Charles Norton]] | |||
* Executive producers | |||
** [[Paul Hembury]] | |||
** [[Rebecca Richmond]] | |||
== Worldbuilding == | |||
* The ancestors of the colony came from [[Earth]] many centuries ago. | |||
* The song "[[Chromophone Band]]" is playing when the Doctor and his companions arrive at the colony and when the Macra are defeated. | * The song "[[Chromophone Band]]" is playing when the Doctor and his companions arrive at the colony and when the Macra are defeated. | ||
== Story notes == | == Story notes == | ||
* This story is the first to use a new title sequence incorporating an image of Patrick Troughton's face, designed by [[Bernard Lodge]] and realised by | {{video|Second Doctor Title Sequence The Macra Terror Doctor Who|thumb|A recreation of the title sequence, from the 2019 animated version of ''The Macra Terror''.}} | ||
* This story | * Working titles for this story were ''The Spidermen'', ''The Insect-Men'' and ''The Macras''. | ||
* Sandra Bryant, who played Chicki in | * This story is the first to use a new title sequence incorporating an image of Patrick Troughton's face, designed by [[Bernard Lodge]] and realised by Ben Palmer. A new arrangement of the theme tune was also produced by [[Delia Derbyshire]] with assistance from [[Dick Mills]] for the title sequence. Due to a production error, it was not used until [[The Faceless Ones (TV story)|the following story]]'s second episode. | ||
* Richard Beale is credited as | * This story takes place almost immediately after ''[[The Moonbase (TV story)|The Moonbase]]'' — the TARDIS crew witnessed the Macra claw on the time scanner in the previous serial. | ||
* John Harvey (Officia) is erroneously credited as | * [[Sandra Bryant]], who played Chicki in episode one, asked to be released from her contract so she could accept another, more attractive offer of work. This was agreed to by [[Innes Lloyd]] and so, in an unusual move, the role was recast for episode four (the only other episode in which Chicki appears), going instead to [[Luan Peters|Karol Keyes]]. | ||
* The Macra | * Director [[John Davies]] recalled in the DVD commentary on the animated version that the only brief [[Innes Lloyd]] gave him for this story was "make it frightening". | ||
* All four episodes are missing, though some clips survive. The audio of the entire story is available. | * [[Richard Beale]] is credited as "Broadcast Voice" for episodes one and three. For episode two, he is billed as "Broadcast and Propaganda Voice" on-screen and as "Broadcast and Propaganda Voices" in ''[[Radio Times]]''. | ||
* In ''[[A History of the Universe]]'' and ''[[ | * [[John Harvey]] (Officia) is erroneously credited as "Official" in ''Radio Times'' for episode four. | ||
* The Macra returned to ''Doctor Who'' forty years later in ''[[Gridlock (TV story)|Gridlock]]''. To date, this marks the third longest interval between consecutive appearances by a character or alien race in franchise history, only overtaken by the [[Great Intelligence]] and [[Alpha Centauri (The Curse of Peladon)|Alpha Centauri]]. | |||
* All four episodes are missing from the [[BBC Archives]], though some clips on 16mm black & white film and 8mm cine film survive. The audio of the entire story is available. | |||
* This is also the last four-part story to be incomplete. | |||
* The only known copy of ''The Macra Terror'' to not have been confirmed as destroyed is the prints sent to Hong Kong. Given ''[[The Tomb of the Cybermen (TV story)|The Tomb of the Cybermen]]'' was recovered from the country and ''Macra'' wasn't, its fate is mysterious. It was possibly sent to another country off-record or the episodes were obtained by private collectors. | |||
* In ''[[A History of the Universe (reference book)|A History of the Universe]]'' and ''[[AHistory]]'', this story is arbitrarily dated to 2366 (it's in a time when Earth's colonies are remote, and the level of technology isn't very high). | |||
* In the original script, the Doctor was sent to the House of (rather than “Hospital for”) Correction alongside Medok, and it was after the brainwashing attempts there failed that he was sent to the pithead. | |||
* The Macra were originally giant spiders and then insects before becoming crabs. [[Gerry Davis]] felt that this would draw comparisons to the [[Zarbi]]. Despite this, dialogue referring to them as insects made into the final story (the decision to make them crabs was made after the scripts were delivered). | |||
* With the 2019 announcement that ''[[The Faceless Ones (TV story)|The Faceless Ones]]'' would be receiving an animated reconstruction, followed by ''[[The Evil of the Daleks (TV story)|The Evil of the Daleks]]'' in 2021, this serial marks the start of a 17-episode run of animated reconstructions. The previous consecutive run was 7 episodes, starting with episode 4 of ''[[The Tenth Planet (TV story)|The Tenth Planet]]'' and running through to the end of ''[[The Power of the Daleks (TV story)|The Power of the Daleks]]''. | |||
* Polly sports a shorter hairstyle in this episode as a result of her makeover in the colony's Refreshing Department. Although some reports have suggested that this reflected [[Anneke Wills]]' decision to restyle her own hair (resulting in her wearing extensions during the episode's early scenes), Wills herself has indicated that she donned a pixie-cut wig to hide her (uncut) long hair.<ref>[https://twitter.com/annekewills/status/428181835676282880 Anneke Wills on Twitter: "@SGMilne It was a wig!"]</ref> | |||
* [[Frazer Hines]] described the Macra as "rubbish". | |||
* The unfeasibly large Macra prop needed to be mounted on a van in order to be moved, and was therefore very awkward to manipulate in the studio. [[Innes Lloyd]] was unhappy with the work of [[Shawcraft Models]] and contacted the BBC's Visual Effects Department for guidance as to whether the monster should reasonably have cost the £500 paid to the propmakers. | |||
* Because only one Macra was constructed for the serial, the closing moments of episode three ‒ in which Jamie was menaced by two of the monsters ‒ had to be recorded out of sequence. First [[John Davies]] taped all of the scenes involving the Macra which moved from right to left, followed by those in which the “other” Macra moved from left to right. | |||
* The word Macra comes from the genus name of the Japanese spider crab, ''macrocheira kaempferi''. | |||
=== Changes in the animated version === | |||
* Episode one begins with the final scene from ''[[The Moonbase (TV story)|The Moonbase]]'' in which the time travellers see the image of the claw on the time scanner. | |||
* The refreshing department sequence is removed, including the rough and tumble machine. Instead, Polly already has her short haircut. | |||
* All characters, except Ben, keep the same clothing during the whole story. | |||
* Polly, Ben and Jamie are all sleeping in one room during the brainwashing scene rather than Polly having a room of her own. | |||
* When Polly is attacked by the Macra, Ben doesn't immediately try to save her. He instead stares blankly for a few moments before eventually trying to help. | |||
* Polly is physically picked up and suspended upside down by a Macra when it attacks her. | |||
* Hanging lights are added to the colony. | |||
* The Macra now have legs. | |||
* The Doctor writes his formula on a transparent board instead of pipelines. | |||
* Medok's corpse is changed into a puddle of ooze. | |||
* Chicki, Sunaa and the Pilot's secretary all look the same. | |||
* Many Macras are in control room, instead of only the leader. | |||
* The leader of the Macra is grey rather than being a lighter colour than the other Macra. | |||
* The final sequence of the Doctor and his companions "taking a leaf out of Jamie's book" and dancing their way out of the Colony is omitted, being instead replaced with a musical wide-shot of the colony's base, much like the ending of its modern counterpart [[Gridlock (TV story)|''Gridlock''.]] | |||
=== Ratings === | === Ratings === | ||
| Line 155: | Line 267: | ||
=== Myths === | === Myths === | ||
* The image of the Controller seen on the screen in the Pilot's office was a photograph of story editor Gerry Davis. ''(It was a photograph of Graham Leaman, who played the Controller.)'' | * The image of the Controller seen on the screen in the Pilot's office was a photograph of story editor Gerry Davis. ''(It was a photograph of Graham Leaman, who played the Controller.)'' | ||
* For many years, the shot from ''[[The Three Doctors (TV story)|The Three Doctors]] ''of the Second Doctor running away from an explosion on the Time Lords' monitor was long believed to be a scene from this now lost story. ''(While ''The Macra Terror'' did still exist in its entirety at this time, as did every single ''Doctor Who'' episode bar "[[The Daleks' Master Plan (TV story)|The Feast of Steven]]"'','' the shot was in fact specially filmed for the tenth anniversary special.)'' | |||
=== Filming locations === | === Filming locations === | ||
* Associated Portland Cement Company Quarry, Houghton Road, Dunstable | * Associated Portland Cement Company Quarry, Houghton Road, Dunstable (Planet surface) | ||
* [[Ealing Television Film Studios]], Ealing Green, Ealing | * [[Ealing Television Film Studios]], Ealing Green, Ealing | ||
* [[Lime Grove Studios|Lime Grove Studios (Studio D)]] | * [[Lime Grove Studios|Lime Grove Studios (Studio D)]] | ||
=== Production errors === | === Production errors === | ||
===== Original production ===== | |||
{{discontinuity}} | {{discontinuity}} | ||
* In | * The surviving [[tele-snaps]] from episode one highlight a very clear production error: When Medok watches the TARDIS materialise, it appears at the top of a cliff. But when the Doctor and co emerge from it, it is now inside a cave ''(this error also occurs in the animated version)''. | ||
* The Macra's top claw is longer than the bottom, but when it grabs the Controller, they are the same | * When Polly is being attacked by the Macra, Ben tries to open one of it's claws which is holding Polly's foot. But in the next shot, her foot is no longer in the claw. | ||
* In episode two, a music cue enters too early, and has to be hastily faded out. This occurs at the point when the Broadcast voice insanely insists "There are no Macra!" | |||
* The Macra's top claw is longer than the bottom, but when it grabs the Controller they are now the same length. | |||
===== Animated version ===== | |||
* When Polly, Ben and Jamie are being brainwashed while they are sleeping, Ben is shown to be lying on his right-hand side. But on the close-up shot of his face, he is now on his left-hand side. | |||
* When Polly is being suspended upside down by the Macra, Ben can briefly be heard grunting even though, at that point, he is just standing there and not trying to save Polly. ''(As explained above, in the original episode, Ben immediately tries to help Polly which is what lead to this audio sync error).'' | |||
* When Jamie is trying to unlock the door in the mine, he is clearly just trying the same key over and over again. ''(This is likely due to the fact that him trying different keys would have been too complex to animate).'' | |||
* In episode four, Jamie pulls two wooden beams away from the lift entrance in the tunnels. The second beam extends below the bottom edge of the screen. When Jamie pulls it away the beam is incomplete, the beam seemingly having not been drawn any further than the frame bounds. | |||
* Just after the Doctor has shown the Macra to the Pilot, one of them appears at the window but it does not cast a shadow on the floor. | |||
* When the Doctor and the Pilot are being confronted by Ola in the pithead, the colony logo on some of the guards guns is printed backwards. | |||
== Continuity == | == Continuity == | ||
* The | * The Doctor would later encounter the Macra in his [[Tenth Doctor|tenth]] ([[TV]]: ''[[Gridlock (TV story)|Gridlock]]'') and [[Twelfth Doctor|twelfth]] ([[COMIC]]: ''[[Surfshock (comic story)|Surfshock]]'') incarnations. | ||
* [[Bishop (Lucifer Rising)|Bishop]] may have dealt with "the Macra case" in or before [[2157]]. ([[PROSE]]: ''[[Lucifer Rising (novel)|Lucifer Rising]]'') | |||
== Home video and audio releases == | == Home video and audio releases == | ||
=== Audio releases === | |||
* The soundtrack of this story was released on cassette, with linking narration by [[Colin Baker]], on [[6 July]] [[1992]]. The same narration by Baker was used with a higher-quality, remastered version of the soundtrack on the first CD release, [[7 August]] [[2000]]. | * The soundtrack of this story was released on cassette, with linking narration by [[Colin Baker]], on [[6 July (releases)|6 July]] [[1992 (releases)|1992]]. The same narration by Baker was used with a higher-quality, remastered version of the soundtrack on the first CD release, [[7 August (releases)|7 August]] [[2000 (releases)|2000]]. It was also included on the DVD and Blu-ray animated release as a special feature. | ||
* A new linking narration by [[Anneke Wills]] was recorded and released with the soundtrack in the box set ''[[ | * A new linking narration by [[Anneke Wills]] was recorded and released with the soundtrack in the box set ''[[The Lost TV Episodes - Collection Four]]'', released on [[2 February (releases)|2 February]] [[2012 (releases)|2012]]. | ||
<gallery | <gallery position="center" captionalign="center" hideaddbutton="true"> | ||
Bbccd-macraterror.jpg|2000 CD release, with narration by [[Colin Baker]] | Bbccd-macraterror.jpg|2000 CD release, with narration by [[Colin Baker]] | ||
Lost TV Eps coll4 cover.jpg|The Lost TV Episodes - Collection Four box set, which includes new narration for ''The Macra Terror'' by [[Anneke Wills]] | Lost TV Eps coll4 cover.jpg|''[[The Lost TV Episodes - Collection Four]]'' box set, which includes new narration for ''The Macra Terror'' by [[Anneke Wills]] | ||
The Macra Terror (Early Release).jpg|Early recording release | The Macra Terror (Early Release).jpg|Early recording release | ||
</gallery> | |||
=== DVD releases === | |||
* All four episodes of this story are [[missing episodes|missing]] from the BBC archive. However, some clips of moments removed by the Australian censors as being too violent for Antipodean broadcast survive. These are available on the ''[[Lost in Time (DVD box set)|Lost in Time]]'' DVD box set. | |||
* The animated version, for the first time featuring a Black & White and a Colour version of the story, was released on DVD in the UK on [[25 March (releases)|25 March]] [[2019 (releases)|2019]], Australia in [[April (releases)|April]] 2019 and again in [[February (releases)|February]] [[2020 (releases)|2020]] and North America on [[12 November (releases)|12 November]] 2019. Additionally a Blu-ray and Steelbook edition was released in the UK and a Blu-ray edition released in Austalia, simultaneously with their respective DVD releases. | |||
==== Special Features ==== | |||
* Commentary (moderated by [[Toby Hadoke]]): | |||
** Episode 1 - Actors [[Frazer Hines]] ([[Jamie McCrimmon|Jamie]]), [[Maureen Lane]] ([[Drum majorette]]) and [[Anthony Gardner]] ([[Alvis]]) | |||
** Episode 2 - Actor [[Terence Lodge]] ([[Medok]]) | |||
** Episode 3 - Director [[John Davies (director)|John Davies]] | |||
** Episode 4 - Actors Frazer Hines, Maureen Lane and Anthony Gardner | |||
* Episode Reconstructions - Surviving film frames, fragments of existing footage and set photographs are brought together with the original unedited audio to reconstruct a presentation of the original now lost live-action production of {{'}}''The Macra Terror''{{'}} as seen by viewers of [[BBC One|BBC 1]] in 1967 Produced by [[Derek Handley]]. Available to watch with or without an optional narration track read by [[Anneke Wills]]. | |||
* [[The Wheel in Space: Episode 1 (home video)|Bonus Mini-Episode]] - A ten-minute animated short, built around [[The Wheel in Space (TV story)|an otherwise lost ''Doctor Who'' story from 1968]] starring [[Patrick Troughton]] and Frazer Hines. Directed by [[AnneMarie Walsh]]. | |||
* Animation Test - Prior to the project being formally commissioned, this short animation test (of a scene from episode 3 of {{'}}''The Macra Terror''{{'}}) was produced in March 2018, to investigate the feasibility of mounting the production in full. | |||
* Animatics - A selection of scenes showing how the new animated version of {{'}}''The Macra Terror''{{'}} went from initial storyboards to final animation. Storyboard art by [[Adrian Salmon]]. | |||
* Animation Gallery A gallery of artwork from the development, pre-production and animation of the new animated version of {{'}}''The Macra Terror''{{'}}, including character art from [[Martin Geraghty]] and background paintings from [[Graham Bleathman]], [[Colin Howard]] and [[Lydia Butz]]. | |||
* Teaser Trailer - A short teaser trailer animated by [[Rob Ritchie]], intended to promote the announcement of a new production of {{'}}''The Macra Terror''{{'}} in December 2018. | |||
* 1992 Audio Presentation - In 1992, the BBC Audio Collection released {{'}}''The Macra Terror''{{'}} on audio cassette, in a special release narrated by [[Colin Baker]]. It was the first time that the story had been made commercially available by the BBC and the audio only release in included here in full. | |||
* Surviving Footage - Less than two minutes of original footage still exist from the 1967 production of {{'}}''The Macra Terror''{{'}}. These film fragments have been painstakingly restored and digitally remastered for this release, with considerable improvements made to the overall picture quality and resolution of this unique footage. Film restoration by [[Peter Crocker]]. | |||
* Behind the Scenes Film - In 1967, during pre-production of {{'}}''The Macra Terror''{{'}}, film cameras visited the visual effects workshop in Uxbridge where work was underway on construction of the [[Macra]] props. Special effects props and models from other ''[[Doctor Who]]'' stories can also be seen in the workshop, including parts of a [[Cyberman]] from {{'}}''[[The Tenth Planet (TV story)|The Tenth Planet]]''{{'}} (1966) and an aeroplane from {{'}}''[[The Faceless Ones (TV story)|The Faceless Ones]]''{{'}} (1967). This footage is accompanied by an audio commentary track from ''Doctor Who'' visual effects designer and BBC visual effects historian [[Mike Tucker]], exploring some of the effects techniques and props featured in the film. | |||
* Censored Scene - A reconstruction of a scene from episode 2 of {{'}}''The Macra Terror''{{'}} that was heavily cut by censors for the episode's Australian television transmission in November 1967. | |||
* Title Sequences - {{'}}''The Macra Terror''{{'}} saw the debut of a new [[title sequence]] for ''Doctor Who'' - the first time the programme had made such a change. The title sequence is presented here in full, remastered in HD and in a number of alternate versions. | |||
* Photo Gallery - A collection of 36 photographs taken during the production of {{'}}''The Macra Terror''{{'}} in 1967, featuring original design department set photographs and ''[[Radio Times]]'' publicity images. All presented in HD. | |||
* Production Paperwork - A full set of original camera scripts, studio schedules, floor plans and other materials are available to view by accessing disc 2 via your computer's DVD or Bly Ray ROM drive. | |||
The Steelbook edition also includes the [[Tenth Doctor]] story ''[[Gridlock (TV story)|Gridlock]]'' as a bonus feature. The episode is presented in standard definition. | |||
=== Digital releases === | |||
* The animated version of the story is available for streaming through Tubi (US) for free as part of Season 4 of ''Classic Doctor Who'' in November 2023 for the 60th anniversary. Though episodes 1-3 are in black and white while the fourth episode is in colour. | |||
<gallery position="center" captionalign="center" hideaddbutton="true"> | |||
The Macra Terror DVD.jpg|Region 2 DVD cover | |||
The Macra Terror 1st Aus DVD.jpg|Region 4 1st DVD cover | |||
The Macra Terror 2nd Aus DVD.jpg|Region 4 2nd DVD cover | |||
The Macra Terror US DVD.jpg|Region 1 DVD cover | |||
The Macra Terror 2019 Blu-ray UK.jpg|Region 2 Blu-ray cover | |||
The Macra Terror Aus Blu-ray.jpg|Region 4 Blu-ray cover | |||
The Macra Terror 2019 Steelbook Blu-ray UK.jpg|Region 2 Steelbook cover | |||
</gallery> | </gallery> | ||
== External links == | == External links == | ||
* {{bbcepguideclassic|macraterror/|The Macra Terror}} | * {{bbcepguideclassic|macraterror/|The Macra Terror}} | ||
* {{radiotimes|2009-05-31/the-macra-terror|The Macra Terror}} | |||
{{dwcast}} | {{dwcast}} | ||
* [http://www.bbc.co.uk/doctorwho/classic/photonovels/macra/ BBC - Doctor Who - Classic Series - Photonovel - '''The Macra Terror'''] | * [http://www.bbc.co.uk/doctorwho/classic/photonovels/macra/ BBC - Doctor Who - Classic Series - Photonovel - '''The Macra Terror'''] | ||
{{dwrefguide|who_2j.htm|The Macra Terror}} | |||
* {{briefhistory|serials/jj.html|The Macra Terror}} | * {{briefhistory|serials/jj.html|The Macra Terror}} | ||
* {{locguide|macraterror|The Macra Terror}} | * {{locguide|macraterror|The Macra Terror}} | ||
== Footnotes == | |||
{{reflist}} | |||
{{DWTV}} | {{DWTV}} | ||
{{TitleSort}} | {{TitleSort}} | ||
[[Category:Animated missing episodes]] | |||
[[Category:Doctor Who (1963) television stories]] | [[Category:Doctor Who (1963) television stories]] | ||
[[Category:Second Doctor television stories]] | [[Category:Second Doctor television stories]] | ||
[[Category:1967 television stories]] | [[Category:1967 television stories]] | ||
[[Category:Season 4 stories]] | [[Category:Season 4 stories]] | ||
[[Category:Macra stories | [[Category:Macra television stories]] | ||
[[Category:Four part serials]] | [[Category:Four part serials]] | ||
[[Category:Television stories that use Delia Derbyshire's 1st theme]] | |||
[[Category:Stories with missing episodes]] | |||
[[Category:Doctor Who animated television stories]] | |||
[[Category:BFI-exhibited television stories]] | |||
[[es:The Macra Terror]] | |||
[[fr:The Macra Terror]] | |||
[[ru:Террор Макра]] | |||
[[Category:Completely missing serials]] | |||
Latest revision as of 19:24, 4 September 2024
The Macra Terror was the seventh serial of season 4 of Doctor Who.
It was the first story to feature the lead actor's face in the opening title sequence, a tradition that carried on to the final episode of the classic series and returned with The Snowmen in the revived format and remained until Twice Upon a Time (barring Death in Heaven and Sleep No More).
Currently, all four episodes are missing from the BBC Archives. However, all four parts have been released in full animation on DVD, Blu-ray, special edition Steelbook and digital download in both colour and original black-and-white.[1] BFI Southbank also held a Q&A with Anneke Wills on 16 March.[2]
Synopsis[[edit] | [edit source]]
When the Second Doctor, Ben, Polly and Jamie visit a human colony that appears to be one big holiday camp, they think they have come across a truly happy place. Yet a shadowy presence soon makes them realise that the surface contentment is carefully controlled.
The colony's inhabitants have been brainwashed by giant, crab-like creatures — the Macra. Insidious propaganda, broadcast by the Controller, forces the humans to mine a gas that is essential for the Macra to survive, but fatal to them.
The colony must be saved — but how? The Doctor and his team are up against it, particularly when Ben falls under the influence of the Macra. Can he be rescued from their evil clutches? Can the gas pumping equipment be destroyed, getting rid of the Macra for good?
Plot[[edit] | [edit source]]
Episode 1[[edit] | [edit source]]
A drum majorette and a futuristic band rehearse for a festival performance. The Pilot of the colony compliments Barney, the band's leader, but their idyllic conversation is disrupted when Medok, another colony member, bursts through half-crazed and escapes outside. Ola, the Chief of Police and several guards pursue him. Ola explains that Medok has "refused treatment". The Pilot is suddenly deadly serious; Medok must not get away. In the wilderness outside the colony, Medok takes cover in rocks to hide from the oncoming guards. As they pass him, the TARDIS materialises, and the Doctor, Ben, Polly and Jamie tentatively step out, wary of the huge claw they saw on the time scanner. Medok attacks, but Ben and Jamie subdue him as Ola and the guards arrive. They tie up Medok. Ola thanks them for apprehending their convict and welcomes the strangers, inviting them to meet their Pilot, who will want to thank them for their help.
As the music chimes, signalling a work-shift change, the Pilot offers his gratitude to the strangers. He sends them to the Refreshing Department. Jamie hangs back, suspicious, but follows with Polly. As they arrive, a picture of a man appears on a large screen and a friendly, commanding voice welcomes them. The Pilot explains this is the colony's Controller, then takes his leave as Barney offers the four travellers the hospitality of the Department: shampoos, clothes cleaning, beauty treatments etc.
As Ola roughly accompanies Medok back into the colony, Medok's old friend Questa sees him. Questa has heard he's been seeing things. Medok corrects him: there are things, horrible creatures coming out at night. The Controller announces a reception to welcome the strangers. Questa asks Medok to join in like he used to. As Medok spews more dangerous talk, Ola drags him away.
At the prison, the Doctor manages to break into Medok's cell and talk to him. He's curious about what Medok has seen, but Medok is suspicious of this stranger. He mentions creatures he has seen at night that crawl over the ground. Medok takes his chance, pushes the Doctor and escapes. An alarm bell sounds and the Doctor explains his actions to the Pilot and Ola. Ola wants to send the Doctor to "work in the pits", but the Doctor is saved by his ignorance of colony laws and the fact that he caught Medok in the first place. He casually mentions people crawling over the colony to Ola, who warns him his talk might end him up in the hospital "for correction." The Pilot is eager for the strangers to learn more about the colony. He tells Ola to bring them to the Labour Centre. En route, they pass though a construction area where new homes are being built. The Doctor spots Medok hiding in the site but says nothing.
At the Labour Centre, the Controller informs the work force of the escaped prisoner. The travellers ask about the work being done, but the answers are vague: they tap and refine gas, but can't describe what they use the gas for. Suddenly two workers stagger in with "gas sickness." Ola and Questa brush it off, saying the work must be done. Polly is surprised and doubtful, then notices the Doctor is gone.
The Doctor has slipped away to find Medok back at the construction site and questions him more about the creatures he's seen — giant insects with huge claws. Others have seen them too, but they get locked up in the hospital. Another alarm sounds and Medok sends the Doctor back. The others are relieved to find the Doctor, as curfew is announced. Barney shows the travellers to their sleeping cubicles in the Refreshing Department but, as soon as it is quiet, the Doctor slips out to find Medok again. As he does, the Controller informs the colony that all people seen out of their sleeping compartments risk their lives. As Ola and the guards patrol, the Doctor evades them and finds Medok. They hole themselves up in a half-completed house. They seem surrounded, but the Doctor finds an escape hatch. While he helps Medok escape, Medok spots one of the crab-like creatures below them.
Episode 2[[edit] | [edit source]]
Medok is excited to have seen the creature with the Doctor, thinking he can prove he wasn't "seeing things." His shouts bring Ola and the guards to them, and Ola completely dismisses their claims. He brings the Doctor before the Pilot.
The Pilot sees the Doctor individually. While the Doctor is impressed with the colony's technology, especially a piece of equipment that allows him to see the whole of the colony, the Pilot questions him about his "crime". The Doctor starts to explain why he believes Medok, but Ola interrupts to report that Medok swears the Doctor was trying to make him give himself up. The Doctor is released back to the Refreshing Department, and Medok returns to the hospital for another round of treatment. The Controller commands that the strangers be given "the advantage of high-powered adaption" within their "deep sleep" to prevent any further criticism from them, making them more like other obedient colony members. The Pilot sets about this process.
Jamie, Ben and Polly are already being brainwashed in their sleep. Jamie sleeps fitfully, and the thinking patterns do not take hold. He awakes and tries to alert Ben to voices he thinks he hears, but Ben argues him down, quoting passages from the brainwashing and saying that they will need to work in the morning.
The Doctor arrives at Polly's cubicle and overhears her brainwashing. He shorts the circuits controlling this, which wakes Polly up. He makes her promise to disregard anything she may have dreamt about and ensure she always makes decisions carefully. The Doctor rushes off to Ben and Jamie's room and disconnects the machinery, but Ben is angered, saying it is an insult to the colony. He gets into a scuffle with Jamie but eventually leaves and reports the Doctor's crimes to Ola. The Doctor and Jamie are taken away.
At the hospital, the Pilot is lamenting that Medok's treatment is failing and he'll probably have to be sent to the pits for life.
Meanwhile, Polly angrily leaves the cubicles after arguing with Ben and runs to the construction site to avoid him. Ben follows and captures her, violently dragging her back towards the cubicles. Polly spots something in the distance and screams. She describes it as a creature like a large crab with huge claws. Ben sees nothing and is dubious until he spots something himself. A huge claw grabs Polly, and Ben fights it off. After a while, the creature retreats. After the release of Polly, they soon find themselves surrounded by Macra, but their nimble legs let them escape back to the colony.
The Pilot confronts the Doctor about his actions, but the Doctor is proud of them. Seeing the Pilot also has a nerve circuit attached to his rest cubicle, the Doctor fuses that, too. Ben and Polly are also brought before the Pilot. Polly tells their harrowing tale, asking Ben for confirmation. Ben denies seeing any creatures, much to the consternation of Polly. The Doctor is convinced Ben has been brought under the evil influences at the heart of the colony. He and Jamie ask pointed questions regarding the Controller which start to get even the Pilot thinking about the true motives of his leader. This eventually forces the "Controller" to appear in person. An old, dishevelled man appears on the screen. He can barely speak and does not have the voice of the Controller; however, he is clearly a much older version of the man portrayed as the Controller on screen. The man is suddenly grabbed by a claw, and yells at the creature to get back and he'll obey, but to no avail, and he is dragged away out of camera shot. Polly then screams that the Macra are in control.
Episode 3[[edit] | [edit source]]
The Doctor, Jamie and Polly are condemned to pit labour in the "danger gang". The Controller orders the Pilot to forget what he saw on the screen. The Pilot orders Ben to keep an eye on his friends.
The three prisoners are brought to the pithead, where Officia is in charge. He recalls their shift leader, who turns out to be Medok. Medok demands they have a supervisor, and the Doctor and Polly squabble over who should go. Jamie casually suggests that the Doctor may be more "useful" up top. Jamie and Polly are given masks and sent down. While the Doctor studies the controls, he spots Ben and talks with him. Ben is completely under control, and the Doctor comments that this is very unlike him and that he should keep out of Jamie's way as he will be less forgiving.
There is soon a gas strike and the workers connect a large cable to stop a leak which causes one of their team to collapse. Medok tells Polly and Jamie that the gas is lethal and no-one knows what it's used for.
Meanwhile, the Doctor is working out some calculations on the wall and is very pleased with his work. The Pilot finds him and accuses him of stealing a secret formula, but the Doctor insists he has worked it out on his own. The Pilot orders that he erase his work so that no one sees it.
The workers probe for more gas. Jamie finds a door, and Polly comments that it's very new and strong. Officia meddles in some of Medok's work, and gas erupts in his face. Jamie uses the opportunity to steal Officia's keys. Ben sees this and helps Officia out of the shaft. Jamie and Polly worry that Ben saw the theft. Jamie uses the keys to enter the strong door, but Polly is called back by Medok to work. An alarm sounds and, when Polly tells Medok that Jamie has escaped, he follows him, leaving Polly.
Up top, Officia realises his keys are gone, and Ben suggests he must have dropped them. When Officia leaves, Ben confesses to the Doctor that he knows Jamie took the keys but doesn't know why he didn't tell Officia. The Doctor says this is because he is recovering, but Ben leaves to tell the Pilot.
While Medok searches for Jamie, he is attacked by a Macra.
The Controller forbids the guards to be allowed into the old shaft (where Jamie and Medok have gone).
Jamie discovers Medok dead, then finds a very still Macra in front of him. He throws a piece of rock at the inert creature. It opens its eyes briefly but remains chiefly inactive.
The Doctor, now joined by Polly, is trying to analyse the gas and is not having success.
Ben cannot find the Pilot, but when the Pilot is not in his office, his conditioning continues to break down, especially when another worker mentions the word "friends". The Controller orders gas diverted into the old shaft, intriguing the Doctor. The Doctor suggests that maybe the gas isn't to kill. He theorises it is to keep something else alive. The Doctor tries desperately to figure out how to help Jamie. As Jamie coughs and splutters, the Macra comes to life and moves towards him. He flees but is soon met by a second terrifying creature.
Episode 4[[edit] | [edit source]]
The Doctor tries to work out how to reverse the gas flow but fails to understand the equipment. The Doctor then enters the pit head and fiddles with some equipment, which tricks Officia into revealing which controls to manipulate. The Doctor sets his plan into action by causing oxygen to flow into the shaft. Officia tries to get help, but the Doctor has the keys now and locks the entrance to the pithead from the outside.
Down in the shaft, Jamie slides into a rock crevice, but it won't protect him long. The Macra manage to grab Jamie and extract him from the crevice, which causes a mini-landslide. As they are about to grab him, the oxygen inflow causes the Macra to slump, allowing Jamie to escape.
Control immediately sends Ola and his guards to the locked door to return the gas to the shaft. The Doctor and Polly hurriedly escape into the mine, locking the heavy door behind them before the guards can follow. They find a pipe room and follow the shaft deeper, despite Polly's reluctance.
Ola manages to open the door to the pithead and return the gas to flow into the shaft.
Luckily Jamie has escaped the shaft by prying open a grate and wriggling into a cupboard back in the colony. Outside, some sort of cheerleading practice is taking place. Despite his best efforts, Jamie is seen by the leader and mistaken for an auditioning dancer. Jamie shows them the Highland Fling and flings himself out the door — right into the arms of Ola and the guards. Ben, still struggling, identifies him, and Jamie is arrested. As he is led away, Ben is clearly regretful.
The Doctor and Polly hear the voice of the Controller and make their way towards the chamber and see that, indeed, the Macra are in charge. They inhale the gas and issue commands. They require the gas to survive and are entirely dependent on it, using the humans to mine it for them. The Doctor and Polly decide to take the risk of telling the Pilot and bringing him to see the truth.
In the Pilot's office, Ola and the Pilot argue. Ola criticises the pit operations, allowing the strangers to escape and endanger the colony. The Doctor and Polly come right in, of their own free will. The Doctor greets everyone and tries to reconcile the two men. Jamie is horrified they've walked into a trap. The Doctor persuades the Pilot to go with him, despite the Controller's wild and panicked attempts to intervene. The colonists are meanwhile frightened by the Pilot's disobedience. The Pilot tells Ola to mind his own business and accompanies the Doctor. Polly and Jamie prepare for the worst. Ben's conditioning seems to be wearing off, but they realise Ben is absent.
The Doctor takes the Pilot into forbidden territory through the pithead. Officia tries to stop them, to no avail. The Controller gives Ola full leadership of the colony and sends all the guards after the Pilot. By this time the Doctor and the Pilot have got to the chamber, allowing the Pilot to see the truth. The Pilot vows to kill the Macra, whilst the Controller screams that the Doctor and the Pilot must be destroyed. The humans double back to inform the colony. When they return to the pithead, the Doctor and the Pilot are arrested and, with Polly and Jamie, returned to the pipe room under orders of Control. Under orders from the Controller, the building is to be cleared for four minutes.
Hearing this very specific time, Polly and her friends wonder what is going to happen to them until they realise gas is being vented into the pipe room. The Doctor and his friends begin to slowly succumb to the poison. Outside they hear a knock and realise it must be Ben. He has been hiding in the pit head, seeing that something like this may happen. The Doctor rapidly explains to Ben how to switch on inflow and outflow together and throw a lever. The Controller threatens Ben, explaining that it will destroy all lives — even human lives. Ben hesitates for a second but then pulls the lever, triggering an explosion.
Later the colony celebrates its freedom from the Macra. The Pilot publicly thanks the strangers and decrees a dance festival be held every year, with the winners receiving a prize which will be known as "the Strangers' Trophy". Ben looks for the Doctor and finds him sitting down playing his recorder and enjoying himself. Ben tells him that he has heard that it is the intention to draft them into the colony and make the Doctor the next Pilot. The Doctor is horrified at this, so he and his companions discreetly dance their way out of the colony and back to the TARDIS.
Cast[[edit] | [edit source]]
- Dr. Who - Patrick Troughton
- Ben Jackson - Michael Craze
- Polly - Anneke Wills
- Jamie McCrimmon - Frazer Hines
- Pilot - Peter Jeffrey
- Medok - Terence Lodge
- Ola - Gertan Klauber
- Barney - Graham Armitage
- Questa - Ian Fairbairn
- Sunaa - Jane Enshawe
- Chicki - Sandra Bryant (episode one), Karol Keyes (episode four)
- Drum Majorette - Maureen Lane
- Controller - Graham Leaman
- Alvis - Anthony Gardner
- Control Voice - Denis Goacher
- Broadcast and Propaganda Voice - Richard Beale
- Macra Operator - Robert Jewell
- Officia - John Harvey
- Guards - John Caesar, Steve Emerson, Danny Rae
- Cheerleaders - Roger Jerome, Terry Wright, Ralph Carrigan
Uncredited cast[[edit] | [edit source]]
- Band - Avril Gaynor, Jill Paris, Fiona Frazer, Maris Hendrick, Janice Hoy, Amanda Scott (DWM 308)
- Dancers - Sheelagh McGrath, Anthony Rayner, Alan Troy, Maureen Hillman, Judy Nichols, Ted Merwood (DWM 308)
- Citizens - George Gibbs, Leslie Pitt, Bill Beesley, Deryn Fisher, Maureen Morris, Edwina King, Leonard Kingston, Tony Starr (DWM 308)
- Verna - Nina Huby (DWM 308)
- Refreshing Department Personnel - Sheelagh McGrath, Maureen Hillman, Judy Nichols, Ted Merwood (DWM 308)
- Labour Centre Personnel - George Gibbs, Leslie Pitt, Bill Beesley, Deryn Fisher, Maureen Morris, Edwina King (DWM 308)
- Miners in Labour Centre - Anthony Rayner, Alan Troy (DWM 308)
- Pilot's Secretary - Linda Reynolds (DWM 308)
- Scientist at Hospital - Paul Phillips (DWM 308)
- Mine Workers - Sheelagh McGrath, Maureen Hillman, Judy Nichols, Anthony Rayner, Alan Troy, Walter Henry, Leonard Kingston, Tony Starr (DWM 308)
Crew[[edit] | [edit source]]
- Assistant Floor Manager - Anne Faggetter
- Costumes - Daphne Dare, Vanessa Clark
- Designer - Kenneth Sharp
- Film Cameraman - Peter Hamilton
- Film Editor - Eddie Wallstab
- Incidental Music - Dudley Simpson
- Make-Up - Gillian James, Jeanne Richmond
- Producer - Innes Lloyd
- Production Assistant - Chris D'Oyly John
- Script Editor - Gerry Davis
- Special Sounds - Brian Hodgson
- Studio Lighting - Frank Cresswell
- Studio Sound - Hugh Barker, Gordon Mackie
- Theme Arrangement - Delia Derbyshire
- Title Music - Ron Grainer
Animation unit[[edit] | [edit source]]
- Character artist - Martin Geraghty
- Storyboards and animation clean-up - Martin Geraghty
- Background artist
- 2D character director - Louis Jones
- 2D animation producer - Lindsay Holyoak
- Production coordinator - Hannah Campbell
- Asset supervisor - Dylan Shipley
- Asset build - Rebecca Hahner
- Lead Rigger - Oli Putland
- Lead character animator - Nick Clackett
- 2D animators
- Junior animators
- 3D animation and compsitising - Rob Ritchie
- Online animatic editing - Johnathan Ogle
- Edit assistant - Owen Simons
- Additional animation - David Busch
- Sound restoration and mastering - Mark Ayres
- With thanks to Graham Strong
- Mastering - Peter Crocker
- Special thanks to
- 2D animation services - Sun and Moon studios, Bristol
- Director - Charles Norton
- Executive producers
Worldbuilding[[edit] | [edit source]]
- The ancestors of the colony came from Earth many centuries ago.
- The song "Chromophone Band" is playing when the Doctor and his companions arrive at the colony and when the Macra are defeated.
Story notes[[edit] | [edit source]]
- Working titles for this story were The Spidermen, The Insect-Men and The Macras.
- This story is the first to use a new title sequence incorporating an image of Patrick Troughton's face, designed by Bernard Lodge and realised by Ben Palmer. A new arrangement of the theme tune was also produced by Delia Derbyshire with assistance from Dick Mills for the title sequence. Due to a production error, it was not used until the following story's second episode.
- This story takes place almost immediately after The Moonbase — the TARDIS crew witnessed the Macra claw on the time scanner in the previous serial.
- Sandra Bryant, who played Chicki in episode one, asked to be released from her contract so she could accept another, more attractive offer of work. This was agreed to by Innes Lloyd and so, in an unusual move, the role was recast for episode four (the only other episode in which Chicki appears), going instead to Karol Keyes.
- Director John Davies recalled in the DVD commentary on the animated version that the only brief Innes Lloyd gave him for this story was "make it frightening".
- Richard Beale is credited as "Broadcast Voice" for episodes one and three. For episode two, he is billed as "Broadcast and Propaganda Voice" on-screen and as "Broadcast and Propaganda Voices" in Radio Times.
- John Harvey (Officia) is erroneously credited as "Official" in Radio Times for episode four.
- The Macra returned to Doctor Who forty years later in Gridlock. To date, this marks the third longest interval between consecutive appearances by a character or alien race in franchise history, only overtaken by the Great Intelligence and Alpha Centauri.
- All four episodes are missing from the BBC Archives, though some clips on 16mm black & white film and 8mm cine film survive. The audio of the entire story is available.
- This is also the last four-part story to be incomplete.
- The only known copy of The Macra Terror to not have been confirmed as destroyed is the prints sent to Hong Kong. Given The Tomb of the Cybermen was recovered from the country and Macra wasn't, its fate is mysterious. It was possibly sent to another country off-record or the episodes were obtained by private collectors.
- In A History of the Universe and AHistory, this story is arbitrarily dated to 2366 (it's in a time when Earth's colonies are remote, and the level of technology isn't very high).
- In the original script, the Doctor was sent to the House of (rather than “Hospital for”) Correction alongside Medok, and it was after the brainwashing attempts there failed that he was sent to the pithead.
- The Macra were originally giant spiders and then insects before becoming crabs. Gerry Davis felt that this would draw comparisons to the Zarbi. Despite this, dialogue referring to them as insects made into the final story (the decision to make them crabs was made after the scripts were delivered).
- With the 2019 announcement that The Faceless Ones would be receiving an animated reconstruction, followed by The Evil of the Daleks in 2021, this serial marks the start of a 17-episode run of animated reconstructions. The previous consecutive run was 7 episodes, starting with episode 4 of The Tenth Planet and running through to the end of The Power of the Daleks.
- Polly sports a shorter hairstyle in this episode as a result of her makeover in the colony's Refreshing Department. Although some reports have suggested that this reflected Anneke Wills' decision to restyle her own hair (resulting in her wearing extensions during the episode's early scenes), Wills herself has indicated that she donned a pixie-cut wig to hide her (uncut) long hair.[3]
- Frazer Hines described the Macra as "rubbish".
- The unfeasibly large Macra prop needed to be mounted on a van in order to be moved, and was therefore very awkward to manipulate in the studio. Innes Lloyd was unhappy with the work of Shawcraft Models and contacted the BBC's Visual Effects Department for guidance as to whether the monster should reasonably have cost the £500 paid to the propmakers.
- Because only one Macra was constructed for the serial, the closing moments of episode three ‒ in which Jamie was menaced by two of the monsters ‒ had to be recorded out of sequence. First John Davies taped all of the scenes involving the Macra which moved from right to left, followed by those in which the “other” Macra moved from left to right.
- The word Macra comes from the genus name of the Japanese spider crab, macrocheira kaempferi.
Changes in the animated version[[edit] | [edit source]]
- Episode one begins with the final scene from The Moonbase in which the time travellers see the image of the claw on the time scanner.
- The refreshing department sequence is removed, including the rough and tumble machine. Instead, Polly already has her short haircut.
- All characters, except Ben, keep the same clothing during the whole story.
- Polly, Ben and Jamie are all sleeping in one room during the brainwashing scene rather than Polly having a room of her own.
- When Polly is attacked by the Macra, Ben doesn't immediately try to save her. He instead stares blankly for a few moments before eventually trying to help.
- Polly is physically picked up and suspended upside down by a Macra when it attacks her.
- Hanging lights are added to the colony.
- The Macra now have legs.
- The Doctor writes his formula on a transparent board instead of pipelines.
- Medok's corpse is changed into a puddle of ooze.
- Chicki, Sunaa and the Pilot's secretary all look the same.
- Many Macras are in control room, instead of only the leader.
- The leader of the Macra is grey rather than being a lighter colour than the other Macra.
- The final sequence of the Doctor and his companions "taking a leaf out of Jamie's book" and dancing their way out of the Colony is omitted, being instead replaced with a musical wide-shot of the colony's base, much like the ending of its modern counterpart Gridlock.
Ratings[[edit] | [edit source]]
- Episode 1 - 8.0 million viewers
- Episode 2 - 7.9 million viewers
- Episode 3 - 8.5 million viewers
- Episode 4 - 8.4 million viewers
Myths[[edit] | [edit source]]
- The image of the Controller seen on the screen in the Pilot's office was a photograph of story editor Gerry Davis. (It was a photograph of Graham Leaman, who played the Controller.)
- For many years, the shot from The Three Doctors of the Second Doctor running away from an explosion on the Time Lords' monitor was long believed to be a scene from this now lost story. (While The Macra Terror did still exist in its entirety at this time, as did every single Doctor Who episode bar "The Feast of Steven", the shot was in fact specially filmed for the tenth anniversary special.)
Filming locations[[edit] | [edit source]]
- Associated Portland Cement Company Quarry, Houghton Road, Dunstable (Planet surface)
- Ealing Television Film Studios, Ealing Green, Ealing
- Lime Grove Studios (Studio D)
Production errors[[edit] | [edit source]]
Original production[[edit] | [edit source]]
- The surviving tele-snaps from episode one highlight a very clear production error: When Medok watches the TARDIS materialise, it appears at the top of a cliff. But when the Doctor and co emerge from it, it is now inside a cave (this error also occurs in the animated version).
- When Polly is being attacked by the Macra, Ben tries to open one of it's claws which is holding Polly's foot. But in the next shot, her foot is no longer in the claw.
- In episode two, a music cue enters too early, and has to be hastily faded out. This occurs at the point when the Broadcast voice insanely insists "There are no Macra!"
- The Macra's top claw is longer than the bottom, but when it grabs the Controller they are now the same length.
Animated version[[edit] | [edit source]]
- When Polly, Ben and Jamie are being brainwashed while they are sleeping, Ben is shown to be lying on his right-hand side. But on the close-up shot of his face, he is now on his left-hand side.
- When Polly is being suspended upside down by the Macra, Ben can briefly be heard grunting even though, at that point, he is just standing there and not trying to save Polly. (As explained above, in the original episode, Ben immediately tries to help Polly which is what lead to this audio sync error).
- When Jamie is trying to unlock the door in the mine, he is clearly just trying the same key over and over again. (This is likely due to the fact that him trying different keys would have been too complex to animate).
- In episode four, Jamie pulls two wooden beams away from the lift entrance in the tunnels. The second beam extends below the bottom edge of the screen. When Jamie pulls it away the beam is incomplete, the beam seemingly having not been drawn any further than the frame bounds.
- Just after the Doctor has shown the Macra to the Pilot, one of them appears at the window but it does not cast a shadow on the floor.
- When the Doctor and the Pilot are being confronted by Ola in the pithead, the colony logo on some of the guards guns is printed backwards.
Continuity[[edit] | [edit source]]
- The Doctor would later encounter the Macra in his tenth (TV: Gridlock) and twelfth (COMIC: Surfshock) incarnations.
- Bishop may have dealt with "the Macra case" in or before 2157. (PROSE: Lucifer Rising)
Home video and audio releases[[edit] | [edit source]]
Audio releases[[edit] | [edit source]]
- The soundtrack of this story was released on cassette, with linking narration by Colin Baker, on 6 July 1992. The same narration by Baker was used with a higher-quality, remastered version of the soundtrack on the first CD release, 7 August 2000. It was also included on the DVD and Blu-ray animated release as a special feature.
- A new linking narration by Anneke Wills was recorded and released with the soundtrack in the box set The Lost TV Episodes - Collection Four, released on 2 February 2012.
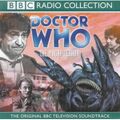
2000 CD release, with narration by Colin Baker

The Lost TV Episodes - Collection Four box set, which includes new narration for The Macra Terror by Anneke Wills
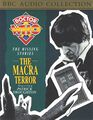
Early recording release


.jpg)
DVD releases[[edit] | [edit source]]
- All four episodes of this story are missing from the BBC archive. However, some clips of moments removed by the Australian censors as being too violent for Antipodean broadcast survive. These are available on the Lost in Time DVD box set.
- The animated version, for the first time featuring a Black & White and a Colour version of the story, was released on DVD in the UK on 25 March 2019, Australia in April 2019 and again in February 2020 and North America on 12 November 2019. Additionally a Blu-ray and Steelbook edition was released in the UK and a Blu-ray edition released in Austalia, simultaneously with their respective DVD releases.
Special Features[[edit] | [edit source]]
- Commentary (moderated by Toby Hadoke):
- Episode 1 - Actors Frazer Hines (Jamie), Maureen Lane (Drum majorette) and Anthony Gardner (Alvis)
- Episode 2 - Actor Terence Lodge (Medok)
- Episode 3 - Director John Davies
- Episode 4 - Actors Frazer Hines, Maureen Lane and Anthony Gardner
- Episode Reconstructions - Surviving film frames, fragments of existing footage and set photographs are brought together with the original unedited audio to reconstruct a presentation of the original now lost live-action production of 'The Macra Terror' as seen by viewers of BBC 1 in 1967 Produced by Derek Handley. Available to watch with or without an optional narration track read by Anneke Wills.
- Bonus Mini-Episode - A ten-minute animated short, built around an otherwise lost Doctor Who story from 1968 starring Patrick Troughton and Frazer Hines. Directed by AnneMarie Walsh.
- Animation Test - Prior to the project being formally commissioned, this short animation test (of a scene from episode 3 of 'The Macra Terror') was produced in March 2018, to investigate the feasibility of mounting the production in full.
- Animatics - A selection of scenes showing how the new animated version of 'The Macra Terror' went from initial storyboards to final animation. Storyboard art by Adrian Salmon.
- Animation Gallery A gallery of artwork from the development, pre-production and animation of the new animated version of 'The Macra Terror', including character art from Martin Geraghty and background paintings from Graham Bleathman, Colin Howard and Lydia Butz.
- Teaser Trailer - A short teaser trailer animated by Rob Ritchie, intended to promote the announcement of a new production of 'The Macra Terror' in December 2018.
- 1992 Audio Presentation - In 1992, the BBC Audio Collection released 'The Macra Terror' on audio cassette, in a special release narrated by Colin Baker. It was the first time that the story had been made commercially available by the BBC and the audio only release in included here in full.
- Surviving Footage - Less than two minutes of original footage still exist from the 1967 production of 'The Macra Terror'. These film fragments have been painstakingly restored and digitally remastered for this release, with considerable improvements made to the overall picture quality and resolution of this unique footage. Film restoration by Peter Crocker.
- Behind the Scenes Film - In 1967, during pre-production of 'The Macra Terror', film cameras visited the visual effects workshop in Uxbridge where work was underway on construction of the Macra props. Special effects props and models from other Doctor Who stories can also be seen in the workshop, including parts of a Cyberman from 'The Tenth Planet' (1966) and an aeroplane from 'The Faceless Ones' (1967). This footage is accompanied by an audio commentary track from Doctor Who visual effects designer and BBC visual effects historian Mike Tucker, exploring some of the effects techniques and props featured in the film.
- Censored Scene - A reconstruction of a scene from episode 2 of 'The Macra Terror' that was heavily cut by censors for the episode's Australian television transmission in November 1967.
- Title Sequences - 'The Macra Terror' saw the debut of a new title sequence for Doctor Who - the first time the programme had made such a change. The title sequence is presented here in full, remastered in HD and in a number of alternate versions.
- Photo Gallery - A collection of 36 photographs taken during the production of 'The Macra Terror' in 1967, featuring original design department set photographs and Radio Times publicity images. All presented in HD.
- Production Paperwork - A full set of original camera scripts, studio schedules, floor plans and other materials are available to view by accessing disc 2 via your computer's DVD or Bly Ray ROM drive.
The Steelbook edition also includes the Tenth Doctor story Gridlock as a bonus feature. The episode is presented in standard definition.
Digital releases[[edit] | [edit source]]
- The animated version of the story is available for streaming through Tubi (US) for free as part of Season 4 of Classic Doctor Who in November 2023 for the 60th anniversary. Though episodes 1-3 are in black and white while the fourth episode is in colour.
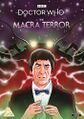
Region 2 DVD cover
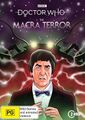
Region 4 1st DVD cover

Region 4 2nd DVD cover
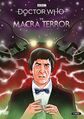
Region 1 DVD cover

Region 2 Blu-ray cover

Region 4 Blu-ray cover

Region 2 Steelbook cover


External links[[edit] | [edit source]]
- The Macra Terror at the BBC's official site
- The Macra Terror at RadioTimes
- The Macra Terror at BroaDWcast
- BBC - Doctor Who - Classic Series - Photonovel - The Macra Terror
- The Macra Terror at the Doctor Who Reference Guide
- The Macra Terror at Shannon Sullivan's A Brief History of Time (Travel)
- The Macra Terror at The Locations Guide
Footnotes[[edit] | [edit source]]
- ↑ https://www.doctorwho.tv/news/?article=brand-new-animation-of-missing-doctor-who-serial-the-macra-terror-to-be-released-on-dvd-and-bluray#_
- ↑ https://whatson.bfi.org.uk/Online/default.asp?doWork::WScontent::loadArticle=Load&BOparam::WScontent::loadArticle::article_id=CCB1CFC5-343C-4B57-9D39-9AAD818AE12C&BOparam::WScontent::loadArticle::context_id=DF3F885C-B33F-40C5-A426-BF0681A89953
- ↑ Anneke Wills on Twitter: "@SGMilne It was a wig!"