Warriors' Gate (TV story): Difference between revisions
Gingerfool (talk | contribs) mNo edit summary |
|||
| (268 intermediate revisions by 66 users not shown) | |||
| Line 1: | Line 1: | ||
{{Infobox | {{title dab away}} | ||
{{real world}} | |||
image= | {{ImageLinkTV}} | ||
series=[[Doctor Who | {{Infobox Story SMW | ||
number= | |novelisation = Doctor Who and Warriors' Gate (novelisation) | ||
story number= 113| | |image= WarriorsGateTrio.jpg | ||
doctor= | |series=[[Doctor Who television stories|''Doctor Who'' television stories]] | ||
companions= | |season number= Season 18 (Doctor Who 1963)| | ||
enemy= [[ | |season serial number = 5 | ||
|story number= 113 | |||
writer= | |doctor = Fourth Doctor | ||
director= [[Paul Joyce]] | |companions= [[K9 Mark II]], [[Romana II]], [[Adric]] | ||
producer= [[John Nathan-Turner]]| | |featuring= Biroc | ||
broadcast date= | |featuring2= Lazlo | ||
format= | |enemy= [[Captain]] [[Rorvik]] | ||
production code= [[List of production codes|5S]]| | |setting= [[The Gateway]] | ||
|writer= Steve Gallagher | |||
next | |director= [[Paul Joyce]] | ||
}}{{ | |producer= [[John Nathan-Turner]] | ||
|epcount = 4 | |||
|broadcast date= 3 - 24 January 1981 | |||
|network = BBC1 | |||
|format= 4x25-minute episodes | |||
|serial production code= [[List of production codes|5S]] | |||
|prev= State of Decay (TV story) | |||
|next= The Keeper of Traken (TV story) | |||
|made prev = Full Circle (TV story) | |||
|made next=The Keeper of Traken (TV story) | |||
|adapted into = Warriors' Gate (audio story) | |||
|thwr = 33|thwr2=166|thwr3=168|thwr4=238 | |||
}}{{you may|Warriors' Gate (reference book)|n1=the reference book of the same name}} | |||
'''''Warriors' Gate''''' was the fifth story of [[Season 18 (Doctor Who 1963)|the 18th season]] of ''[[Doctor Who]]''. It was the final regular appearance of [[Lalla Ward]] as [[Romana II|Romana]] and [[John Leeson]] as [[K9 Mark II|K9]] and concluded the "[[E-Space]] trilogy". The decision was made not to replace [[K9 Mark II|K9]] with another new model which was the direction taken when [[K9 Mark I|Mark I]] left in ''[[The Invasion of Time (TV story)|The Invasion of Time]]''. | |||
'' | From a production standpoint, it marked [[Graeme Harper]]'s directorial debut on the programme, although he wasn't credited in that capacity for his work. His promotion to the [[Director (crew)|director]]'s chair followed one of the rare instances that a director was fired during production of a ''Doctor Who'' story — although credited director [[Paul Joyce]] was quickly re-hired. | ||
It was the first episode in which the Doctor started to view [[Adric]] as a [[companion]], after the [[Alzarian]] had stowed away on [[The Doctor's TARDIS|the TARDIS]]. After Romana's departure, the Doctor decided not to take Adric home and instead allowed him to carry on travelling, even back to the Doctor's [[N-Space|own universe]]. | |||
==Synopsis== | == Synopsis == | ||
A strange creature forces its way into | [[Biroc|A strange creature]] forces its way into [[The Doctor's TARDIS|the TARDIS]], steering it to a white void occupied only by the ruins of an old building and a [[spaceship]]. This empty space is [[the Gateway|a gateway]] to the past and future. The creature responsible for taking them there is [[Biroc]], a member of the enslaved race known as the [[Tharil]]. The gateway offers the only exit from [[E-Space]], but the void is contracting. Are the [[Fourth Doctor]] and his friends fated to spend eternity in E-Space? What final shocking revelation awaits the Doctor? | ||
==Plot== | == Plot == | ||
===Part | === Part one === | ||
A countdown takes place, leading up to the crew of a spacecraft using a [[Tharil]] to | A countdown takes place, leading up to the crew of a spacecraft using a [[Tharil]] to attempt to escape from “nowhere”. They fail. Onboard [[The Doctor's TARDIS|the TARDIS]], the [[Fourth Doctor]] is at the controls. They have entered a disruption and the Doctor struggles to make sense of it. | ||
The Tharil, [[Biroc]] is taken away but escapes from his escort. He is seen by [[Lane (Warriors' Gate)|Lane]] who warns the bridge. Meanwhile, the Doctor is trying to land the TARDIS | The Tharil, [[Biroc]], is taken away but escapes from his escort. He is seen by [[Lane (Warriors' Gate)|Lane]], who warns the bridge. Meanwhile, the Doctor is trying to land the TARDIS. He moves to press a button but [[Romana II|Romana]] prevents him from doing so because it is dangerous. He considers if he subconsciously wanted to press the button. | ||
The Doctor | [[File:Inspection.jpg|thumb|left|[[Rorvik]]'s group inspect [[The Doctor's TARDIS|the TARDIS]].]] | ||
Romana is still trying to avoid returning to [[Gallifrey]]. She asks the Doctor if they have the right to take [[Adric]] out of his own time and universe. The Doctor tells her Adric will love it on Gallifrey. Adric decides to press a button and does so, determined by flipping a coin, a method suggested by the Doctor. Biroc has escaped the craft and runs through a white void. | |||
The TARDIS lands and the console sparks. Smoke pours out of [[K9 Mark II|K9]]. The Doctor avoids the [[time wind]]s coming through the open doors of the TARDIS as Biroc enters and walks to the controls. On the spacecraft, they pick up the TARDIS on their scanners, noting it as a craft. Biroc begins operating the TARDIS controls. The Doctor and Romana note that he is on a different time line, prompting Romana to wonder why he hasn't been torn apart. On the craft, Captain [[Rorvik]] decides to wake another Tharil up to navigate them out of the “gap between timelines”. He announces that they are to go out to the TARDIS. Biroc speaks with the TARDIS crew; he tells them not to trust Rorvik and his men. He says he (Biroc) is a “shadow of his past, and your future” to the TARDIS crew, and then he leaves to cross the white void. | |||
The Doctor shows Romana the co-ordinates, all zero. He leaves to follow Biroc, after telling K9 to follow him but then realising he has been damaged by the time winds; he finds a sign of life in K9 and then sets off. Romana tells Adric that they are in the gap between the negative co-ordinates of E-Space and the positive [[N-Space]], which Adric likens to an intersection. The pair set about repairing K9, who warns them of three approaching humanoids. Using a [[mass detector]], Rorvik and two of his crew search for the craft they picked up. The TARDIS crew see them approaching on their scanner. | |||
Biroc arrives at a stone arch with a door in it; he enters and is closely followed by the Doctor. Inside, Biroc inspects a cobwebbed dining hall. He passes through what appears to be a mirror and disappears. Rorvik's group are inspecting the TARDIS. They cannot determine what it is. The Doctor arrives in the dining hall and makes his way around it. He inspects two skeletons in armour, brushing off cobwebs he moves on; one skeleton moves. The Doctor crouches by the mirror as the skeleton advances on him; it raises its axe and swings. | |||
== | === Part two === | ||
The Doctor notices the skeleton attacking him just in time to dodge its axe. | |||
A cat and mouse game ensues with the Doctor impersonating a skeleton by keeping still and holding an axe in his hand. However when the Doctor attempts to move away, the skeleton spots him trying to escape and cleaves the axe shaft in two. | |||
Meanwhile back on the TARDIS, Romana and Adric are arguing about the trustworthiness of the men from Rorvik's crew outside, with Romana deciding to exit the TARDIS and introduce herself to the men, ordering Adric to stay put. They both have a conversation with Romana commenting on the mass detector and Rorvik questioning her on the whereabouts of Biroc, with Romana commenting on the subjectivity of memory. After explaining the problems concerning their ship, Romana then gives a signal on cue signalling danger before being escorted by Rorvik's men. After they leave Adric peeks outside the TARDIS doors. | |||
In the abandoned building, the Doctor is confronting two skeleton warriors when he points out that he "usually gets along with machines so well". The Doctor tricks the skeletons into killing each other by staying still and letting them hit each other with their weapons, therefore getting himself out of a predicament. | |||
Adric and K9 exit the TARDIS against Romana's orders to follow her, with K9 experiencing calculation errors due to the damage sustained earlier. | |||
Adric tells K9 to stay put and while he is away, K9 manages to restore calculation errors. In the spaceship, Romana is hooked up to navigation equipment exactly like Biroc was earlier, but is initially found ineffective in controlling the navigation equipment. As a result of this failure, Rorvik announces to his crew that they need to bring more Tharils out of hibernation to be navigator, despite his own acknowledgement of the risks involved in their survival. | |||
However when an image on the navigation screen is found, the crew decide that Romana is useful as a navigator and leave her in the seat despite the risks. | |||
Rorvik decides to exit the spaceship with his crew when one of them can't come out due to a leg injury. This however turns out to be a ruse as the same man along with his companion walk normally with the door closing behind them. | |||
Back at the building, the Doctor attempts to extract information out the skeletons by tweaking their machinery with a sharp dagger. After a few taps a mechanical voice from the fallen skeleton identifies itself as the "Gundan" whose directive is to "kill the brutes". It emerges that the Gundans are machines designed by human slaves of the Tharils to fight back against their masters, who fled to safety through the "gateway". When the Doctor attempts to find out the exact nature of the gateway, the Gundan shuts down from power failure, frustrating the Doctor when the conversation was "just getting interesting". The Doctor wishes that an alternative power source was nearby when he is surprised by K9's arrival. The Doctor uses K9 to obtain more information from the machine, who reveals that there are three gateways and they are one, implying that although they are different entrances, they have the same exit and that the "masters" came from the gateway. | |||
While this is happening Rorvik and his men find the Doctor talking to the machine and just when they were getting very close to finding out the gateway's secret, one of the Gundans decapitates the other Gundan and then retreats through a gateway. During the chaos the Doctor escapes with K9, who is even lower on power supply, and when the crew catch up to the Doctor, he escapes through a gateway by walking backwards into it. | |||
Back on the spaceship, two of the crew members staying behind wheel out one of the hibernating Tharil and manage to revive the creature with a large electric shock presumably at the cost of their lives. The creature emerges from underneath its covering and finds the navigation deck with Romana still trapped in the chair. She screams as the Tharil touches her with its hand. | |||
=== | === Part three === | ||
The Tharil, whose name is Lazlo, frees Romana. When Aldo and Royce search for him, he hides, and Romana pretends she is still connected to the machine. | |||
===[[: | The Doctor can see Rorvik and his men on the other side of the mirror. Biroc explains to the Doctor that the mirror is a gateway to E-Space. The Doctor's damaged hand is healed by the time winds, and K9 can pass through the mirror and be healed, but for him it wouldn't be permanent. Biroc and the Doctor go to a mansion in the strange black-and-white world beyond the mirror. | ||
K9 is getting worse, and when he hears Packard and Lane discussing odd readings, K9 decides to investigate. Packard and Lane have noticed that distances seem to be getting shorter. They go back to the ship, seen by Adric, who follows them and meets up with Romana. Romana and Adric follow Lane to the damaged area of the ship and discover that the ship's hull is made of dwarf star alloy. K9 finds Romana and Adric, repeating warnings. Adric tries to shut him up, and Romana is captured by Lane and Packard. | |||
In the ship, Lazlo rescues Romana and takes her to another timeline. Adric and K9 hide on the MZ laser which the slavers are taking back to the Gateway. In the Gateway, the men see Lazlo and Romana pass through the mirror. | |||
Lazlo is healed, and he and Romana go to the mansion. They see the Doctor and Biroc eating at a table with Tharils. Biroc tells the Doctor the Tharils crossed the timelines to build an empire, enslaving humans. When the Tharils turn on the Doctor, Romana runs to him. Gundan robots enter, signalling the start of the human rebellion. The Doctor and Romana suddenly appear in the same hall but at a different time, surrounded by Rorvik and his men. | |||
=== Part four === | |||
Rorvik won't listen when the Doctor says only time-sensitives can go through the mirrors. K9 arrives and tells the Doctor that the dwarf star alloy in the slavers' ship is causing the Gateway to contract. Rorvik threatens the Doctor, who is standing near the mirror. Biroc, on the other side, tells him to do nothing. | |||
Adric arrives and threatens the slavers with their own MZ laser. The Doctor and his friends escape. The slavers see their ship just outside and realise the Gateway is contracting further. They fire at the mirrors but are unable to break through. | |||
Rorvik decides to use a backblast to break the mirrors, but the Doctor realises it would destroy everything. He and Romana head for the ship to short out its power. Meanwhile, Rorvik has his men revive the Tharils, aware that most may not survive, because they will need a navigator. Sagan tries to revive the Tharils, but trying to speed up the process doesn't work, electrocuting the Tharils instead. | |||
Rorvik finds the Doctor and Romana, but they are rescued by Biroc, who brings them to safety of the TARDIS. The Doctor now understands why Biroc told him to not do anything. Lazlo kills Sagan and revives the rest of the Tharils. | |||
Romana informs the Doctor that she is staying in E-Space to help Biroc free his people. K9, unable to function on this side of the mirror, stays with her. | |||
Rorvik starts up his engines, and Biroc takes Romana and K9 through the mirrors while the TARDIS dematerialises. The energy from the backblast destroys the slaver ship, but the Tharils are able to phase to a different timeline and escape the destruction. | |||
The TARDIS returns to N-Space. Romana and K9 are ready to start their new lives. | |||
== Cast == | |||
* [[Fourth Doctor|Doctor Who]] - [[Tom Baker]] | |||
* [[Romana II|Romana]] - [[Lalla Ward]] | |||
* [[Adric]] - [[Matthew Waterhouse]] | |||
* Voice of [[K9 Mark II|K9]] - [[John Leeson]] | |||
* [[Rorvik]] - [[Clifford Rose]] | |||
* [[Packard (Warriors' Gate)|Packard]] - [[Kenneth Cope]] | |||
* [[Lane (Warriors' Gate)|Lane]] - [[David Kincaid]] | |||
* [[Aldo]] - [[Freddie Earlle]] | |||
* [[Royce]] - [[Harry Waters]] | |||
* [[Biroc]] - [[David Weston]] | |||
* [[Sagan]] - [[Vincent Pickering]] | |||
* [[Gundan]] - [[Robert Vowles]] | |||
* [[Lazlo]] - [[Jeremy Gittins]] | |||
=== Uncredited Cast === | |||
* [[Tharil]]s - [[Joe Santo]], [[Carl Bohun]], [[Andy Hart]], [[James Muir]], [[Michael Gordon|Michael Gordon-Browne]], [[Laurie Goode]], [[Stephen Frost]], [[Mark Arden]] | |||
* Crewman [[Kilroy]] - [[Mike Mungarvan]] | |||
* Crewman - [[Robin McPherson]] | |||
== Crew == | |||
* [[Assistant Floor Manager]] - [[Val McCrimmon]] | |||
* [[Costumes]] - [[June Hudson]] | |||
* [[Director's assistant|Director's Assistant]] - [[Joyce Stansfield]] | |||
* [[Designer (crew)|Designer]] - [[Graeme Story]] | |||
* [[Executive Producer]] - [[Barry Letts]] | |||
* [[Incidental Music]] - [[Peter Howell]] | |||
* [[Make-Up]] - [[Pauline Cox]] | |||
* [[Producer]] - [[John Nathan-Turner]] | |||
* [[Production Assistant]] - [[Graeme Harper]] | |||
* [[Production Unit Manager]] - [[Angela Smith]] | |||
* [[Script Editor]] - [[Christopher H. Bidmead]] | |||
* [[Senior cameraman|Senior Cameraman]] - [[Alec Wheal]] | |||
* [[Special Sounds]] - [[Dick Mills]] | |||
* [[Studio Lighting]] - [[John Dixon (technician)|John Dixon]] | |||
* [[Studio Sound]] - [[Alan Fogg]] | |||
* [[Technical manager|Technical Manager]] - [[John Dean]] | |||
* [[Theme Arrangement]] - [[Peter Howell]] | |||
* [[Doctor Who theme|Title Music]] - [[Ron Grainer]] | |||
* [[Videotape editor|Video-Tape Editor]] - [[Rod Waldron]] | |||
* [[Video effects|Video Effects]] - [[Robin Lobb]] | |||
* [[Vision Mixer]]s - [[Jim Stephens]], [[Paul del Bravo]] | |||
* [[Visual Effects]] - [[Mat Irvine]] | |||
=== Uncredited crew === | |||
* [[Studio engineer|Studio Engineer]] - [[Dave Murphy]] ([[INFO]]: ''Warriors' Gate'') | |||
* [[Grams operator|Grams Operators]] - [[Gerry Borrows]], [[Gordon Phillipson]] ([[INFO]]: ''Warriors' Gate'') | |||
* [[Costume assistant|Costume Assistant]] - [[Sarah Leigh]] ([[INFO]]: ''Warriors' Gate'') | |||
* [[Design assistant|Design Assistant]] - [[Roger Harris]] ([[INFO]]: ''Warriors' Gate'') | |||
* [[Show working supervisor|Show Working Supervisors]] - [[Chick Hetherington]], [[Harry Randall (crew)|Harry Randall]] ([[INFO]]: ''Warriors' Gate'') | |||
* [[Production secretary|Production Secretary]] - [[Jane Judge]] ([[INFO]]: ''Warriors' Gate'') | |||
* [[Make-up assistant|Make-Up Assistants]] - [[Cathy Burczac]], [[Penny Ferguson]], [[Caroline Gibbs]], [[Lesley Holmes]], [[Wendy Holmes]], [[Helen Johnson]], [[Jan Lee]], [[Lisa Pickering]], [[Heather Squires]] ([[INFO]]: ''Warriors' Gate'') | |||
* [[Floor assistant|Floor Assistants]] - [[Katy Marshall]], [[Laura Gilbert]] ([[INFO]]: ''Warriors' Gate'') | |||
* [[Graphics]] - [[Ian Hewett]] ([[INFO]]: ''Warriors' Gate'') | |||
* [[Props buyer|Props Buyer]] - [[Gill Meredith]] ([[INFO]]: ''Warriors' Gate'') | |||
* [[Visual effects assistant|Effects Assistants]] - [[Charles Jeanes]], [[Simon Taylor|Simon Tayler]], [[Bryony Keating]], [[Steve Lucas]], [[Charlie Lumm]] ([[INFO]]: ''Warriors' Gate'') | |||
* [[Effects cameraman|Effects Cameraman]] - [[Gene Carr]] ([[INFO]]: ''Warriors' Gate'') | |||
* [[Lighting chargehand|Lighting Chargehand]] - [[Les Calder]] ([[INFO]]: ''Warriors' Gate'') | |||
== Worldbuilding == | |||
=== Cultural references from the real world === | |||
* When Biroc vanishes during a conversation with the Doctor, the Doctor states that he is gone again, which is "like talking to a [[Cheshire cat]]". | |||
* K9 quotes the 3rd law of [[Isaac Newton|Newton]]. | |||
* K9 quotes the ''[[I Ching]]'' and explains its working principles. | |||
* The Doctor's parting words to Romana paraphrases ''[[Julius Caesar]]''. ("You were the noblest Romana of them all"). | |||
=== Foods and beverages === | |||
* The Doctor eats a pickle with Rorvik and drinks [[wine]] with Biroc. | |||
=== Locations === | |||
* [[The Gateway]] is the intersection point between [[E-Space]] and [[N-Space]]. | |||
* Aldo and Royce recall a Tharil hunt on [[Shapeer]]. | |||
=== Minerals === | |||
* Rorvik's ship is made of [[dwarf star alloy]], the only material that can hold [[Time sensitivity|time sensitives]] such as the [[Tharil]]s. | |||
=== Species === | |||
* Tharils are not affected by the [[time wind]]s and can walk the [[timeline]]s. | |||
* Romana defines the Tharil "a sort of leonine mesomorph". | |||
=== Robots === | |||
* The [[Gundan]]s were built by the [[human]]s to walk the time lines and travel through the mirrors at [[the Gateway]]. | |||
=== Romana === | |||
* [[Romana II|Romana]] leaves the Doctor, but does not wish to return to the [[Time Lord]]s or [[Gallifrey]]. She takes K9 with her, whose [[memory wafer]]s have been replaced and reworked to function past the mirrors. | |||
=== TARDIS === | |||
* Romana stops the Doctor from pushing the button to activate the reverse bias, hinting it is dangerous in full flight. | |||
=== Technology === | |||
* [[Mass detector]]s can be used to find objects within a space with zero coordinates. | * [[Mass detector]]s can be used to find objects within a space with zero coordinates. | ||
* The | * The TARDIS is called a "ship for midgets". | ||
* There are at least three types of [[warp drive]]: "continuum warp", "implicate theory" and "supralight speed with dampers". Toroidal time dilators are components of a warp drive. | |||
=== Time anomalies === | |||
* Both Packard and Romana refer to heading to a [[time rift]] when the timelines collide. | |||
=== Influences === | |||
* [[Steve Gallagher]] was influenced by the films of {{w|Jean Cocteau}}, such as ''[https://en.wikipedia.org/wiki/Beauty_and_the_Beast_(1946_film) La belle et la bête]'' and {{wi|Orpheus (film)|Orphee}}, in which mirrors provide a gateway into another world. He also drew upon elements of {{wi|The Demolished Man}} and {{wi|The Forever War}}. | |||
* | * The Calibans were named after the half-human slave in ''[[The Tempest]]''. | ||
* | |||
== | == Story notes == | ||
* | * This is the final story in the [[E-Space]] Trilogy. | ||
* | * The script development for this serial went through two distinct phases. Initially, the project was tackled by {{w|Christopher Priest (novelist)|Christopher Priest}}. In Priest's version of the final chapter of the E-Space trilogy, the Doctor and Romana would have exited E-Space via a political thriller involving [[Gallifrey]]. This script was called ''Sealed Orders'', and presumably would have dealt more directly with Romana's failure to return to her home planet following her temporary assignment to find the [[Key to Time]]. After considerable time massaging this treatment, it was abandoned, to be replaced by a [[Steve Gallagher]]-penned effort called ''The Dream Time'' (also sometimes referred to as simply ''Dream Time''). Though the basic elements of this story would remain in ''Warrior's Gate'', the final script was heavily re-written by [[script editor]] [[Christopher H. Bidmead]] and director [[Paul Joyce]]. Joyce would later claim that in fact the scripts were so much a product of his efforts that he, in fact, deserved the writing credit. | ||
* | * In addition to the difficulties surrounding the writing of this story, virtually every phase of the production of this serial was problematic. [[Tom Baker]] was particularly tetchy due both to his ongoing illness during the seasons and the departure of his then-lover, [[Lalla Ward]], from the series. Both he and Ward were deeply displeased with their characterisations in the initial script — which was one of the reasons [[Paul Joyce]] became so heavily involved in the re-write. He couldn't get his stars to perform unless their script concerns were directly addressed. Meanwhile, Paul Joyce had little experience directing for television, and had considerable disagreements with [[John Nathan-Turner]] and lighting director [[John Dixon (technician)|John Dixon]]. Ultimately, Joyce was sacked. However, no one could understand Joyce’s camera script. Joyce was quickly brought back. Also, the production was hit by a strike of the BBC carpenters, which further delayed matters. Neither Baker nor Ward attended the wrap party and [[Christopher H. Bidmead]] decided not extend his contract as script editor. | ||
*Part | * The ''Privateer'' bridge set was briefly condemned as unsafe by inspectors in the middle of the production block using it until a compromise was made that limited the number of people who could be up on its upper level at any one time. | ||
* {{w|Robert Hardy}}, [[Derek Jacobi]], [[Stratford Johns]], [[John Normington]], Jon Stafford and [[Frank Windsor]] were all considered for the role of [[Rorvik]]. ([[TCH 33]]) | |||
* [[Colin Baker]], [[John Carson]], [[Tony Caunter]], [[Kenneth Colley]], [[James Ellis]], [[Ronald Fraser]], [[William Gaunt]], [[Brian Glover]], [[Don Henderson]], [[Del Henney]], [[Glyn Houston]], [[William Lucas]], [[Michael Robbins]], [[Maurice Roëves]], [[George Sewell]], [[John Stratton]] and [[Stephen Yardley]] were considered for Packer. | |||
* [https://en.wikipedia.org/wiki/Michael_Gothard Michael Gothard] and [https://en.wikipedia.org/wiki/Ronald_Lacey Ronald Lacey] were considered for Biroc. | |||
* The working title for this story was ''The Dream Time''.<ref>www.shannonsullivan.com/doctorwho/serials/5s.html</ref> | |||
* The story originally opened with an attack on the ''Privateer'' by an "Antonine Killer", which led to the ship becoming trapped at the Gateway. | |||
* [[Lalla Ward]] was unhappy with Romana's leaving scene, thinking it was too rushed. [[John Nathan-Turner]] and [[Christopher H. Bidmead]] didn't want the series to turn into a soap opera. She loathed this story as it was her last, but she was pleased that she got an open-ended departure. | |||
* [[Stephen Gallagher]] was influenced by a radio serial he had done in [[1979]] called ''The Babylon Run.'' | |||
* [[Freddie Earlle]] accepted his role without seeing the script because he wanted so badly to do ''Doctor Who''. His surname is misspelled on-screen as 'Earle' for all four episodes, but spelled correctly in ''Radio Times''. | |||
* A crewman named Nestor was excised from the script, his lines being shared between Lane and Packard. | |||
* The Gundans were originally Shoguns (simply "Guns" was also considered). | |||
* [[Robert Vowles]], who provided the Gundan's voice, is credited for parts one and two, but features only in part two. Also, the Gundan's opening line ''"No Tharil shall outlive the day of the feast"'' is shown in the DVD's English HoH subtitles as ''"Thou shalt outlive the day of the feast"''. | |||
* The Tharils were originally named Tharks, Thars, and Tharls. The latter was altered at a late stage on the suggestion of [[Ian Levine]], who fretted that longtime fans would confuse it with the [[Thal]]s. | |||
* According to [[Paul Joyce]], who was unprepared for [[Tom Baker]] and [[Lalla Ward]]'s feud, "I don't think even {{w|Tom Stoppard}} or {{w|Harold Pinter}} could have written a scene that would have satisfied both Tom and Lalla at that point." | |||
* [[Stephen Gallagher]] based the run-down crew on his former colleagues at {{w|ITV Granada|Granada Television}}. | |||
* As this was K9's last story, [[Stephen Gallagher]] was credited in his local paper as "the man who killed K9". | |||
* While it has never been cited as an influence on this story, the ''[[Blake's 7 (series)|Blakes 7]]'' episode "[[w:c:blakes7:City at the Edge of the World (episode)|City at the Edge of the World]]" (season 3, 11 February 1980) has very marked similarities: a crew of villainous space pirates led by a deranged, obsessive captain; a subjugated race of mystical beings who covertly manipulate events to gain the upper hand (while demoting the regular cast to mere catalysts in their scheme); and most markedly of all a mysterious portal / force field that repels all brute force but which does not deter the villain of the piece from trying to break it with stronger and stronger means, until he eventually kills himself in the backblast. | |||
* The original idea involved a person discovering the home of a forgotten civilisation where a hall of mirrors provided access to parallel worlds. This was inspired by the Dreamtime, the metaphysical "time outside time" also called the Dreaming or ''alcheringa'', which is part of the belief system of Australian aborigines. | |||
* Biroc and Lazlo were named after [[Academy Award]]-winning cinematographers {{w|Joseph Biroc}} and {{w|Ernest Laszlo}}. | |||
* Rorvik and Sagan were named after American authors: {{w|David Rorvik}} wrote the infamous [[1978]] hoax ''In His Image: The Cloning of a Man'' while, at that stage, astrophysicist [[Carl Sagan]] was best known for his [[1977]] {{w|Pulitzer Prize}} winner {{wi|The Dragons of Eden|The Dragons of Eden: Speculations on the Evolution of Human Intelligence}}. | |||
* [[Paul Joyce]] was chosen to direct based on his {{wi|Play for Today}} "Keep Smiling", which [[John Nathan-Turner]] liked. | |||
* [[Paul Joyce]] envisaged making the story in the style of a feature film, and was enthusiastic about pushing the boundaries of what could be accomplished. However, he became concerned that [[Steve Gallagher|Stephen Gallagher]]'s inexperience in writing for television was resulting in scripts that would not translate well to a visual medium. | |||
* In the original script, Rorvik allowed Biroc to escape so that he could lead the slavers to a Time Lord. | |||
* The story originally concluded with Rorvik and his crew becoming phantasmal entities. | |||
* For the Gateway sequence, black-and-white photographs of Powis Castle in Powys, [[Wales]] were used to represent the world beyond the mirrors. | |||
* The first studio session was intended to concentrate on scenes aboard the privateer, but there was an immediate delay when [[Paul Joyce]]'s decision to incorporate the studio lighting gantry into the spaceship set drew the objections of [[John Dixon (technician)|John Dixon]], who was in charge of lighting. Recording was delayed for two hours, and Joyce came close to relieving Dixon of his duties. As a result, only a small number of scenes was recorded. | |||
* Part two originally closed on the Doctor disappearing through the mirror, but it had now been decided that Romana's terror as the injured Lazlo approached her was more dramatic. | |||
* In scenes cut from parts two and three, Adric was shown to have detached one of K·9's ears to aid in the process of triangulation. This meant that the robot dog should have been missing an ear during the scenes in the old banqueting hall, but nobody had remembered to alter the prop accordingly. | |||
* It was following the serial's stressful production that [[Christopher H. Bidmead]] decided not to stay on as script editor. He felt that he was expending too much time and energy on the show without suitable respect or reward, and his working relationship with [[John Nathan-Turner]] was beginning to sour. His decision became final when his request for a substantial raise was rejected. | |||
* [[Harry Waters]] was first earmarked for Sagan but was cast as Royce after the original choice for the role, [https://en.wikipedia.org/wiki/George_Innes George Innes], turned out to be unavailable for the required recording dates. | |||
* Most of Rorvik's crew wore ex [[NASA]] clothing. | |||
=== | === Ratings === | ||
* Part one - 7.1 million viewers | |||
* Part two - 6.7 million viewers | |||
* Part three - 8.3 million viewers | |||
* Part four - 7.8 million viewers | |||
===Filming locations=== | === Filming locations === | ||
*Powis Castle, Welshpool, Powys ( | * Powis Castle, Welshpool, Powys (black-and-white still photographs used in the story) | ||
*[[BBC Television Centre]] (TC6 & TC1), Shepherd's Bush, [[London]] | * [[BBC Television Centre]] (TC6 & TC1), Shepherd's Bush, [[London]] | ||
===Production errors=== | === Production errors === | ||
{{discontinuity}} | {{discontinuity}} | ||
*In part two, a Gundan's axe falls onto the Doctor's back, without harm. | * In part two, a Gundan's axe falls onto the Doctor's back, without harm. | ||
* | * When Lane informs Packard of Romana's escape in part three, a boom microphone comes into shot right next to the MZ laser. | ||
*Adric takes K9's ear, but when | * When Adric removes K9's ear in part two, the edge of the set is visible in the top right corner of the screen. | ||
*When Packard swings K9 overhead, | * Adric takes K9's ear, but when K9 subsequently meets the Doctor, he's got both. | ||
* When Packard swings K9 overhead, his hollow interior is visible. It is also visible momentarily before the time winds damage him. | |||
* When Sagan tries and fails to revive the Tharils, some of the supposedly dead Tharils on the table can be seen breathing. | |||
* In part one, when the time winds damage K9, smoke pours out of him. Behind the prop (visible just below its head) is a pipe leading to it, which can be seen filling up with smoke at the beginning of this shot. | |||
==Continuity== | == Continuity == | ||
*[[ | * [[TV]]: ''[[The Keeper of Traken (TV story)|The Keeper of Traken]]'' follows directly from this story. | ||
* | * K9 and [[the Mistress (The Choice)|his Mistress]] also fought slavery in a [[pocket universe]] in [[AUDIO]]: ''[[The Choice (audio story)|The Choice]]'' and ''[[The Search (audio story)|The Search]]''. | ||
* Romana was later retrieved from E-Space by the [[Seventh Doctor]]. ([[PROSE]]: ''[[Blood Harvest (novel)|Blood Harvest]]'') | |||
* [[Eleventh Doctor|The Doctor]] would later echo his sentiment that [[River Song|someone]] he was leaving behind would be more than "alright." ([[TV]]: ''[[Let's Kill Hitler (TV story)|Let's Kill Hitler]]'') | |||
* K9 tells Romana that she misconceives his functional nature when she asks him how he feels. His [[K9 Mark IV|successor]] will say something similar to [[Sarah Jane Smith]]. ([[TV]]: ''[[Invasion of the Bane (TV story)|Invasion of the Bane]]'') | |||
== | == Home video and audio releases == | ||
=== DVD releases === | |||
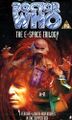
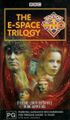
''Warriors' Gate'' has been released in a box set alongside ''Full Circle'' and ''State of Decay'', titled ''[[The E-Space Trilogy]]''. | |||
Editing for the DVD release was completed by the [[Doctor Who Restoration Team]]. | |||
Contents: | |||
* Commentary by [[Lalla Ward]] ([[Romana II|Romana]]), [[John Leeson]] ([[K9 Mark II|K-9]]), [[Paul Joyce]] (Director), script editor [[Christopher H. Bidmead]] (Script Editor) and [[Mat Irvine]] (Visual Effects Designer) | |||
* ''[[The Dreaming (documentary)|The Dreaming]]'' - Cast and crew look back at the making of ''Warriors' Gate'', featuring [[Clifford Rose]] ([[Rorvik]]), [[David Weston]] ([[Biroc]]) and [[Steve Gallagher|Stephen Gallagher]] (Writer) | |||
< | * ''[[The Boy with the Golden Star (documentary)|The Boy with the Golden Star]]'' - Actor [[Matthew Waterhouse]], who played the part of [[Adric]], looks back on his time on ''[[Doctor Who]]'' | ||
* ''[[Lalla's Wardrobe: A Frockumentary (documentary)|Lalla's Wardrobe]]'' - A fun trip through Romana's time on the show via the many costumes actress Lalla Ward wore along the way, featuring Costume Designers [[June Hudson]] and [[Louise Page]] | |||
* Extended and Deleted Scenes - Missing scenes from an earlier edit of Part Two | |||
* Isolated Music Score - [[Peter Howell]]'s score is available on a separate music track | |||
* Continuity | |||
* ''[[Radio Times]]'' Billings | |||
* Photo Gallery | |||
* Coming Soon Trailer - ''[[The Rescue (TV story)|The Rescue]]'' and ''[[The Romans (TV story)|The Romans]]'' | |||
* Production Information Subtitles | |||
* [[Easter Egg]]: Mat Irvine bonus interview. To access this hidden feature, press right at Continuity on the Special Features menu to reveal a hidden ''Doctor Who'' logo. | |||
<gallery position="center" captionalign="center" hideaddbutton="true"> | |||
File:The E-Space Trilogy DVD UK cover.jpg|DVD UK box set cover | File:The E-Space Trilogy DVD UK cover.jpg|DVD UK box set cover | ||
File:The E-Space Trilogy DVD Australian cover.jpg|DVD Australian box set cover | File:The E-Space Trilogy DVD Australian cover.jpg|DVD Australian box set cover | ||
File:The | File:The e-space trilogy.jpg|DVD US box set cover | ||
File:Warriors gate region 4.jpg|Warriors Gate Region 4 cover | |||
File:Warriors Gate.jpg|Warriors Gate Region 1 cover | |||
File:Warriors gate region 2.jpg|Warriors Gate Region 2 cover | |||
</gallery> | </gallery> | ||
===Video releases=== | === Video releases === | ||
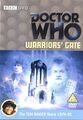
* Warriors' Gate was released on video in 1997 by BBC Worldwide as part of a boxed set containing: ''[[Full Circle]]'', ''[[State of Decay]]'' and ''Warriors' Gate''. | * ''Warriors' Gate'' was released on video in 1997 by BBC Worldwide as part of a boxed set containing: ''[[Full Circle (TV story)|Full Circle]]'', ''[[State of Decay (TV story)|State of Decay]]'' and ''Warriors' Gate''. | ||
<gallery> | <gallery position="center" captionalign="center" hideaddbutton="true" widths="200"> | ||
File:Warriors Gate VHS Australian cover.jpg|VHS Australian cover | File:Warriors Gate VHS Australian cover.jpg|VHS Australian cover | ||
</gallery> | </gallery> | ||
====Box set covers==== | ==== Box set covers ==== | ||
<gallery> | <gallery position="center" captionalign="center" hideaddbutton="true"> | ||
File:The E-Space Trilogy VHS UK cover.jpg|VHS UK box set cover | File:The E-Space Trilogy VHS UK cover.jpg|VHS UK box set cover | ||
File:The E-Space Trilogy VHS Australian cover.jpg|VHS Australian box set cover | File:The E-Space Trilogy VHS Australian cover.jpg|VHS Australian box set cover | ||
| Line 171: | Line 307: | ||
</gallery> | </gallery> | ||
== | == External links == | ||
* {{bbcepguideclassic|warriorsgate/|Warriors' Gate}} | |||
: '' | * {{radiotimes|2011-04-06/warriors-gate}} | ||
{{dwcast}} | |||
{{dwrefguide|who_5s.htm|Warriors' Gate}} | |||
* {{briefhistory|serials/5s.html|Warriors' Gate}} | |||
* {{locguide|warriorsgate|Warriors' Gate}} | |||
* [http://nzdwfc.tetrap.com/archive/tsv37/riders.html TSV:37 Riders on the Time Winds - Understanding '''Warriors' Gate'''] | |||
== Footnotes == | |||
{{reflist}} | |||
{{DWTV}} | |||
{{TitleSort}} | |||
[[Category:Doctor Who (1963) television stories]] | |||
[[Category: | |||
[[Category:1981 television stories]] | [[Category:1981 television stories]] | ||
[[Category:Stories set outside time and space]] | [[Category:Stories set outside time and space]] | ||
[[Category:K9 television stories]] | |||
[[Category:K9 | |||
[[Category:Season 18 stories]] | [[Category:Season 18 stories]] | ||
[[Category:Romana II television stories]] | |||
[[es:Warriors' Gate]] | |||
[[ru:Врата воинов]] | |||
Latest revision as of 11:29, 3 August 2024
- You may be looking for the reference book of the same name.
Warriors' Gate was the fifth story of the 18th season of Doctor Who. It was the final regular appearance of Lalla Ward as Romana and John Leeson as K9 and concluded the "E-Space trilogy". The decision was made not to replace K9 with another new model which was the direction taken when Mark I left in The Invasion of Time.
From a production standpoint, it marked Graeme Harper's directorial debut on the programme, although he wasn't credited in that capacity for his work. His promotion to the director's chair followed one of the rare instances that a director was fired during production of a Doctor Who story — although credited director Paul Joyce was quickly re-hired.
It was the first episode in which the Doctor started to view Adric as a companion, after the Alzarian had stowed away on the TARDIS. After Romana's departure, the Doctor decided not to take Adric home and instead allowed him to carry on travelling, even back to the Doctor's own universe.
Synopsis[[edit] | [edit source]]
A strange creature forces its way into the TARDIS, steering it to a white void occupied only by the ruins of an old building and a spaceship. This empty space is a gateway to the past and future. The creature responsible for taking them there is Biroc, a member of the enslaved race known as the Tharil. The gateway offers the only exit from E-Space, but the void is contracting. Are the Fourth Doctor and his friends fated to spend eternity in E-Space? What final shocking revelation awaits the Doctor?
Plot[[edit] | [edit source]]
Part one[[edit] | [edit source]]
A countdown takes place, leading up to the crew of a spacecraft using a Tharil to attempt to escape from “nowhere”. They fail. Onboard the TARDIS, the Fourth Doctor is at the controls. They have entered a disruption and the Doctor struggles to make sense of it. The Tharil, Biroc, is taken away but escapes from his escort. He is seen by Lane, who warns the bridge. Meanwhile, the Doctor is trying to land the TARDIS. He moves to press a button but Romana prevents him from doing so because it is dangerous. He considers if he subconsciously wanted to press the button.

Romana is still trying to avoid returning to Gallifrey. She asks the Doctor if they have the right to take Adric out of his own time and universe. The Doctor tells her Adric will love it on Gallifrey. Adric decides to press a button and does so, determined by flipping a coin, a method suggested by the Doctor. Biroc has escaped the craft and runs through a white void.
The TARDIS lands and the console sparks. Smoke pours out of K9. The Doctor avoids the time winds coming through the open doors of the TARDIS as Biroc enters and walks to the controls. On the spacecraft, they pick up the TARDIS on their scanners, noting it as a craft. Biroc begins operating the TARDIS controls. The Doctor and Romana note that he is on a different time line, prompting Romana to wonder why he hasn't been torn apart. On the craft, Captain Rorvik decides to wake another Tharil up to navigate them out of the “gap between timelines”. He announces that they are to go out to the TARDIS. Biroc speaks with the TARDIS crew; he tells them not to trust Rorvik and his men. He says he (Biroc) is a “shadow of his past, and your future” to the TARDIS crew, and then he leaves to cross the white void.
The Doctor shows Romana the co-ordinates, all zero. He leaves to follow Biroc, after telling K9 to follow him but then realising he has been damaged by the time winds; he finds a sign of life in K9 and then sets off. Romana tells Adric that they are in the gap between the negative co-ordinates of E-Space and the positive N-Space, which Adric likens to an intersection. The pair set about repairing K9, who warns them of three approaching humanoids. Using a mass detector, Rorvik and two of his crew search for the craft they picked up. The TARDIS crew see them approaching on their scanner.
Biroc arrives at a stone arch with a door in it; he enters and is closely followed by the Doctor. Inside, Biroc inspects a cobwebbed dining hall. He passes through what appears to be a mirror and disappears. Rorvik's group are inspecting the TARDIS. They cannot determine what it is. The Doctor arrives in the dining hall and makes his way around it. He inspects two skeletons in armour, brushing off cobwebs he moves on; one skeleton moves. The Doctor crouches by the mirror as the skeleton advances on him; it raises its axe and swings.
Part two[[edit] | [edit source]]
The Doctor notices the skeleton attacking him just in time to dodge its axe. A cat and mouse game ensues with the Doctor impersonating a skeleton by keeping still and holding an axe in his hand. However when the Doctor attempts to move away, the skeleton spots him trying to escape and cleaves the axe shaft in two.
Meanwhile back on the TARDIS, Romana and Adric are arguing about the trustworthiness of the men from Rorvik's crew outside, with Romana deciding to exit the TARDIS and introduce herself to the men, ordering Adric to stay put. They both have a conversation with Romana commenting on the mass detector and Rorvik questioning her on the whereabouts of Biroc, with Romana commenting on the subjectivity of memory. After explaining the problems concerning their ship, Romana then gives a signal on cue signalling danger before being escorted by Rorvik's men. After they leave Adric peeks outside the TARDIS doors.
In the abandoned building, the Doctor is confronting two skeleton warriors when he points out that he "usually gets along with machines so well". The Doctor tricks the skeletons into killing each other by staying still and letting them hit each other with their weapons, therefore getting himself out of a predicament.
Adric and K9 exit the TARDIS against Romana's orders to follow her, with K9 experiencing calculation errors due to the damage sustained earlier. Adric tells K9 to stay put and while he is away, K9 manages to restore calculation errors. In the spaceship, Romana is hooked up to navigation equipment exactly like Biroc was earlier, but is initially found ineffective in controlling the navigation equipment. As a result of this failure, Rorvik announces to his crew that they need to bring more Tharils out of hibernation to be navigator, despite his own acknowledgement of the risks involved in their survival.
However when an image on the navigation screen is found, the crew decide that Romana is useful as a navigator and leave her in the seat despite the risks. Rorvik decides to exit the spaceship with his crew when one of them can't come out due to a leg injury. This however turns out to be a ruse as the same man along with his companion walk normally with the door closing behind them.
Back at the building, the Doctor attempts to extract information out the skeletons by tweaking their machinery with a sharp dagger. After a few taps a mechanical voice from the fallen skeleton identifies itself as the "Gundan" whose directive is to "kill the brutes". It emerges that the Gundans are machines designed by human slaves of the Tharils to fight back against their masters, who fled to safety through the "gateway". When the Doctor attempts to find out the exact nature of the gateway, the Gundan shuts down from power failure, frustrating the Doctor when the conversation was "just getting interesting". The Doctor wishes that an alternative power source was nearby when he is surprised by K9's arrival. The Doctor uses K9 to obtain more information from the machine, who reveals that there are three gateways and they are one, implying that although they are different entrances, they have the same exit and that the "masters" came from the gateway.
While this is happening Rorvik and his men find the Doctor talking to the machine and just when they were getting very close to finding out the gateway's secret, one of the Gundans decapitates the other Gundan and then retreats through a gateway. During the chaos the Doctor escapes with K9, who is even lower on power supply, and when the crew catch up to the Doctor, he escapes through a gateway by walking backwards into it.
Back on the spaceship, two of the crew members staying behind wheel out one of the hibernating Tharil and manage to revive the creature with a large electric shock presumably at the cost of their lives. The creature emerges from underneath its covering and finds the navigation deck with Romana still trapped in the chair. She screams as the Tharil touches her with its hand.
Part three[[edit] | [edit source]]
The Tharil, whose name is Lazlo, frees Romana. When Aldo and Royce search for him, he hides, and Romana pretends she is still connected to the machine.
The Doctor can see Rorvik and his men on the other side of the mirror. Biroc explains to the Doctor that the mirror is a gateway to E-Space. The Doctor's damaged hand is healed by the time winds, and K9 can pass through the mirror and be healed, but for him it wouldn't be permanent. Biroc and the Doctor go to a mansion in the strange black-and-white world beyond the mirror.
K9 is getting worse, and when he hears Packard and Lane discussing odd readings, K9 decides to investigate. Packard and Lane have noticed that distances seem to be getting shorter. They go back to the ship, seen by Adric, who follows them and meets up with Romana. Romana and Adric follow Lane to the damaged area of the ship and discover that the ship's hull is made of dwarf star alloy. K9 finds Romana and Adric, repeating warnings. Adric tries to shut him up, and Romana is captured by Lane and Packard.
In the ship, Lazlo rescues Romana and takes her to another timeline. Adric and K9 hide on the MZ laser which the slavers are taking back to the Gateway. In the Gateway, the men see Lazlo and Romana pass through the mirror.
Lazlo is healed, and he and Romana go to the mansion. They see the Doctor and Biroc eating at a table with Tharils. Biroc tells the Doctor the Tharils crossed the timelines to build an empire, enslaving humans. When the Tharils turn on the Doctor, Romana runs to him. Gundan robots enter, signalling the start of the human rebellion. The Doctor and Romana suddenly appear in the same hall but at a different time, surrounded by Rorvik and his men.
Part four[[edit] | [edit source]]
Rorvik won't listen when the Doctor says only time-sensitives can go through the mirrors. K9 arrives and tells the Doctor that the dwarf star alloy in the slavers' ship is causing the Gateway to contract. Rorvik threatens the Doctor, who is standing near the mirror. Biroc, on the other side, tells him to do nothing.
Adric arrives and threatens the slavers with their own MZ laser. The Doctor and his friends escape. The slavers see their ship just outside and realise the Gateway is contracting further. They fire at the mirrors but are unable to break through.
Rorvik decides to use a backblast to break the mirrors, but the Doctor realises it would destroy everything. He and Romana head for the ship to short out its power. Meanwhile, Rorvik has his men revive the Tharils, aware that most may not survive, because they will need a navigator. Sagan tries to revive the Tharils, but trying to speed up the process doesn't work, electrocuting the Tharils instead.
Rorvik finds the Doctor and Romana, but they are rescued by Biroc, who brings them to safety of the TARDIS. The Doctor now understands why Biroc told him to not do anything. Lazlo kills Sagan and revives the rest of the Tharils.
Romana informs the Doctor that she is staying in E-Space to help Biroc free his people. K9, unable to function on this side of the mirror, stays with her.
Rorvik starts up his engines, and Biroc takes Romana and K9 through the mirrors while the TARDIS dematerialises. The energy from the backblast destroys the slaver ship, but the Tharils are able to phase to a different timeline and escape the destruction.
The TARDIS returns to N-Space. Romana and K9 are ready to start their new lives.
Cast[[edit] | [edit source]]
- Doctor Who - Tom Baker
- Romana - Lalla Ward
- Adric - Matthew Waterhouse
- Voice of K9 - John Leeson
- Rorvik - Clifford Rose
- Packard - Kenneth Cope
- Lane - David Kincaid
- Aldo - Freddie Earlle
- Royce - Harry Waters
- Biroc - David Weston
- Sagan - Vincent Pickering
- Gundan - Robert Vowles
- Lazlo - Jeremy Gittins
Uncredited Cast[[edit] | [edit source]]
- Tharils - Joe Santo, Carl Bohun, Andy Hart, James Muir, Michael Gordon-Browne, Laurie Goode, Stephen Frost, Mark Arden
- Crewman Kilroy - Mike Mungarvan
- Crewman - Robin McPherson
Crew[[edit] | [edit source]]
- Assistant Floor Manager - Val McCrimmon
- Costumes - June Hudson
- Director's Assistant - Joyce Stansfield
- Designer - Graeme Story
- Executive Producer - Barry Letts
- Incidental Music - Peter Howell
- Make-Up - Pauline Cox
- Producer - John Nathan-Turner
- Production Assistant - Graeme Harper
- Production Unit Manager - Angela Smith
- Script Editor - Christopher H. Bidmead
- Senior Cameraman - Alec Wheal
- Special Sounds - Dick Mills
- Studio Lighting - John Dixon
- Studio Sound - Alan Fogg
- Technical Manager - John Dean
- Theme Arrangement - Peter Howell
- Title Music - Ron Grainer
- Video-Tape Editor - Rod Waldron
- Video Effects - Robin Lobb
- Vision Mixers - Jim Stephens, Paul del Bravo
- Visual Effects - Mat Irvine
Uncredited crew[[edit] | [edit source]]
- Studio Engineer - Dave Murphy (INFO: Warriors' Gate)
- Grams Operators - Gerry Borrows, Gordon Phillipson (INFO: Warriors' Gate)
- Costume Assistant - Sarah Leigh (INFO: Warriors' Gate)
- Design Assistant - Roger Harris (INFO: Warriors' Gate)
- Show Working Supervisors - Chick Hetherington, Harry Randall (INFO: Warriors' Gate)
- Production Secretary - Jane Judge (INFO: Warriors' Gate)
- Make-Up Assistants - Cathy Burczac, Penny Ferguson, Caroline Gibbs, Lesley Holmes, Wendy Holmes, Helen Johnson, Jan Lee, Lisa Pickering, Heather Squires (INFO: Warriors' Gate)
- Floor Assistants - Katy Marshall, Laura Gilbert (INFO: Warriors' Gate)
- Graphics - Ian Hewett (INFO: Warriors' Gate)
- Props Buyer - Gill Meredith (INFO: Warriors' Gate)
- Effects Assistants - Charles Jeanes, Simon Tayler, Bryony Keating, Steve Lucas, Charlie Lumm (INFO: Warriors' Gate)
- Effects Cameraman - Gene Carr (INFO: Warriors' Gate)
- Lighting Chargehand - Les Calder (INFO: Warriors' Gate)
Worldbuilding[[edit] | [edit source]]
Cultural references from the real world[[edit] | [edit source]]
- When Biroc vanishes during a conversation with the Doctor, the Doctor states that he is gone again, which is "like talking to a Cheshire cat".
- K9 quotes the 3rd law of Newton.
- K9 quotes the I Ching and explains its working principles.
- The Doctor's parting words to Romana paraphrases Julius Caesar. ("You were the noblest Romana of them all").
Foods and beverages[[edit] | [edit source]]
- The Doctor eats a pickle with Rorvik and drinks wine with Biroc.
Locations[[edit] | [edit source]]
- The Gateway is the intersection point between E-Space and N-Space.
- Aldo and Royce recall a Tharil hunt on Shapeer.
Minerals[[edit] | [edit source]]
- Rorvik's ship is made of dwarf star alloy, the only material that can hold time sensitives such as the Tharils.
Species[[edit] | [edit source]]
- Tharils are not affected by the time winds and can walk the timelines.
- Romana defines the Tharil "a sort of leonine mesomorph".
Robots[[edit] | [edit source]]
- The Gundans were built by the humans to walk the time lines and travel through the mirrors at the Gateway.
Romana[[edit] | [edit source]]
- Romana leaves the Doctor, but does not wish to return to the Time Lords or Gallifrey. She takes K9 with her, whose memory wafers have been replaced and reworked to function past the mirrors.
TARDIS[[edit] | [edit source]]
- Romana stops the Doctor from pushing the button to activate the reverse bias, hinting it is dangerous in full flight.
Technology[[edit] | [edit source]]
- Mass detectors can be used to find objects within a space with zero coordinates.
- The TARDIS is called a "ship for midgets".
- There are at least three types of warp drive: "continuum warp", "implicate theory" and "supralight speed with dampers". Toroidal time dilators are components of a warp drive.
Time anomalies[[edit] | [edit source]]
- Both Packard and Romana refer to heading to a time rift when the timelines collide.
Influences[[edit] | [edit source]]
- Steve Gallagher was influenced by the films of Jean Cocteau, such as La belle et la bête and Orphee, in which mirrors provide a gateway into another world. He also drew upon elements of The Demolished Man and The Forever War.
- The Calibans were named after the half-human slave in The Tempest.
Story notes[[edit] | [edit source]]
- This is the final story in the E-Space Trilogy.
- The script development for this serial went through two distinct phases. Initially, the project was tackled by Christopher Priest. In Priest's version of the final chapter of the E-Space trilogy, the Doctor and Romana would have exited E-Space via a political thriller involving Gallifrey. This script was called Sealed Orders, and presumably would have dealt more directly with Romana's failure to return to her home planet following her temporary assignment to find the Key to Time. After considerable time massaging this treatment, it was abandoned, to be replaced by a Steve Gallagher-penned effort called The Dream Time (also sometimes referred to as simply Dream Time). Though the basic elements of this story would remain in Warrior's Gate, the final script was heavily re-written by script editor Christopher H. Bidmead and director Paul Joyce. Joyce would later claim that in fact the scripts were so much a product of his efforts that he, in fact, deserved the writing credit.
- In addition to the difficulties surrounding the writing of this story, virtually every phase of the production of this serial was problematic. Tom Baker was particularly tetchy due both to his ongoing illness during the seasons and the departure of his then-lover, Lalla Ward, from the series. Both he and Ward were deeply displeased with their characterisations in the initial script — which was one of the reasons Paul Joyce became so heavily involved in the re-write. He couldn't get his stars to perform unless their script concerns were directly addressed. Meanwhile, Paul Joyce had little experience directing for television, and had considerable disagreements with John Nathan-Turner and lighting director John Dixon. Ultimately, Joyce was sacked. However, no one could understand Joyce’s camera script. Joyce was quickly brought back. Also, the production was hit by a strike of the BBC carpenters, which further delayed matters. Neither Baker nor Ward attended the wrap party and Christopher H. Bidmead decided not extend his contract as script editor.
- The Privateer bridge set was briefly condemned as unsafe by inspectors in the middle of the production block using it until a compromise was made that limited the number of people who could be up on its upper level at any one time.
- Robert Hardy, Derek Jacobi, Stratford Johns, John Normington, Jon Stafford and Frank Windsor were all considered for the role of Rorvik. (TCH 33)
- Colin Baker, John Carson, Tony Caunter, Kenneth Colley, James Ellis, Ronald Fraser, William Gaunt, Brian Glover, Don Henderson, Del Henney, Glyn Houston, William Lucas, Michael Robbins, Maurice Roëves, George Sewell, John Stratton and Stephen Yardley were considered for Packer.
- Michael Gothard and Ronald Lacey were considered for Biroc.
- The working title for this story was The Dream Time.[1]
- The story originally opened with an attack on the Privateer by an "Antonine Killer", which led to the ship becoming trapped at the Gateway.
- Lalla Ward was unhappy with Romana's leaving scene, thinking it was too rushed. John Nathan-Turner and Christopher H. Bidmead didn't want the series to turn into a soap opera. She loathed this story as it was her last, but she was pleased that she got an open-ended departure.
- Stephen Gallagher was influenced by a radio serial he had done in 1979 called The Babylon Run.
- Freddie Earlle accepted his role without seeing the script because he wanted so badly to do Doctor Who. His surname is misspelled on-screen as 'Earle' for all four episodes, but spelled correctly in Radio Times.
- A crewman named Nestor was excised from the script, his lines being shared between Lane and Packard.
- The Gundans were originally Shoguns (simply "Guns" was also considered).
- Robert Vowles, who provided the Gundan's voice, is credited for parts one and two, but features only in part two. Also, the Gundan's opening line "No Tharil shall outlive the day of the feast" is shown in the DVD's English HoH subtitles as "Thou shalt outlive the day of the feast".
- The Tharils were originally named Tharks, Thars, and Tharls. The latter was altered at a late stage on the suggestion of Ian Levine, who fretted that longtime fans would confuse it with the Thals.
- According to Paul Joyce, who was unprepared for Tom Baker and Lalla Ward's feud, "I don't think even Tom Stoppard or Harold Pinter could have written a scene that would have satisfied both Tom and Lalla at that point."
- Stephen Gallagher based the run-down crew on his former colleagues at Granada Television.
- As this was K9's last story, Stephen Gallagher was credited in his local paper as "the man who killed K9".
- While it has never been cited as an influence on this story, the Blakes 7 episode "City at the Edge of the World" (season 3, 11 February 1980) has very marked similarities: a crew of villainous space pirates led by a deranged, obsessive captain; a subjugated race of mystical beings who covertly manipulate events to gain the upper hand (while demoting the regular cast to mere catalysts in their scheme); and most markedly of all a mysterious portal / force field that repels all brute force but which does not deter the villain of the piece from trying to break it with stronger and stronger means, until he eventually kills himself in the backblast.
- The original idea involved a person discovering the home of a forgotten civilisation where a hall of mirrors provided access to parallel worlds. This was inspired by the Dreamtime, the metaphysical "time outside time" also called the Dreaming or alcheringa, which is part of the belief system of Australian aborigines.
- Biroc and Lazlo were named after Academy Award-winning cinematographers Joseph Biroc and Ernest Laszlo.
- Rorvik and Sagan were named after American authors: David Rorvik wrote the infamous 1978 hoax In His Image: The Cloning of a Man while, at that stage, astrophysicist Carl Sagan was best known for his 1977 Pulitzer Prize winner The Dragons of Eden: Speculations on the Evolution of Human Intelligence.
- Paul Joyce was chosen to direct based on his Play for Today "Keep Smiling", which John Nathan-Turner liked.
- Paul Joyce envisaged making the story in the style of a feature film, and was enthusiastic about pushing the boundaries of what could be accomplished. However, he became concerned that Stephen Gallagher's inexperience in writing for television was resulting in scripts that would not translate well to a visual medium.
- In the original script, Rorvik allowed Biroc to escape so that he could lead the slavers to a Time Lord.
- The story originally concluded with Rorvik and his crew becoming phantasmal entities.
- For the Gateway sequence, black-and-white photographs of Powis Castle in Powys, Wales were used to represent the world beyond the mirrors.
- The first studio session was intended to concentrate on scenes aboard the privateer, but there was an immediate delay when Paul Joyce's decision to incorporate the studio lighting gantry into the spaceship set drew the objections of John Dixon, who was in charge of lighting. Recording was delayed for two hours, and Joyce came close to relieving Dixon of his duties. As a result, only a small number of scenes was recorded.
- Part two originally closed on the Doctor disappearing through the mirror, but it had now been decided that Romana's terror as the injured Lazlo approached her was more dramatic.
- In scenes cut from parts two and three, Adric was shown to have detached one of K·9's ears to aid in the process of triangulation. This meant that the robot dog should have been missing an ear during the scenes in the old banqueting hall, but nobody had remembered to alter the prop accordingly.
- It was following the serial's stressful production that Christopher H. Bidmead decided not to stay on as script editor. He felt that he was expending too much time and energy on the show without suitable respect or reward, and his working relationship with John Nathan-Turner was beginning to sour. His decision became final when his request for a substantial raise was rejected.
- Harry Waters was first earmarked for Sagan but was cast as Royce after the original choice for the role, George Innes, turned out to be unavailable for the required recording dates.
- Most of Rorvik's crew wore ex NASA clothing.
Ratings[[edit] | [edit source]]
- Part one - 7.1 million viewers
- Part two - 6.7 million viewers
- Part three - 8.3 million viewers
- Part four - 7.8 million viewers
Filming locations[[edit] | [edit source]]
- Powis Castle, Welshpool, Powys (black-and-white still photographs used in the story)
- BBC Television Centre (TC6 & TC1), Shepherd's Bush, London
Production errors[[edit] | [edit source]]
- In part two, a Gundan's axe falls onto the Doctor's back, without harm.
- When Lane informs Packard of Romana's escape in part three, a boom microphone comes into shot right next to the MZ laser.
- When Adric removes K9's ear in part two, the edge of the set is visible in the top right corner of the screen.
- Adric takes K9's ear, but when K9 subsequently meets the Doctor, he's got both.
- When Packard swings K9 overhead, his hollow interior is visible. It is also visible momentarily before the time winds damage him.
- When Sagan tries and fails to revive the Tharils, some of the supposedly dead Tharils on the table can be seen breathing.
- In part one, when the time winds damage K9, smoke pours out of him. Behind the prop (visible just below its head) is a pipe leading to it, which can be seen filling up with smoke at the beginning of this shot.
Continuity[[edit] | [edit source]]
- TV: The Keeper of Traken follows directly from this story.
- K9 and his Mistress also fought slavery in a pocket universe in AUDIO: The Choice and The Search.
- Romana was later retrieved from E-Space by the Seventh Doctor. (PROSE: Blood Harvest)
- The Doctor would later echo his sentiment that someone he was leaving behind would be more than "alright." (TV: Let's Kill Hitler)
- K9 tells Romana that she misconceives his functional nature when she asks him how he feels. His successor will say something similar to Sarah Jane Smith. (TV: Invasion of the Bane)
Home video and audio releases[[edit] | [edit source]]
DVD releases[[edit] | [edit source]]
Warriors' Gate has been released in a box set alongside Full Circle and State of Decay, titled The E-Space Trilogy.
Editing for the DVD release was completed by the Doctor Who Restoration Team.
Contents:
- Commentary by Lalla Ward (Romana), John Leeson (K-9), Paul Joyce (Director), script editor Christopher H. Bidmead (Script Editor) and Mat Irvine (Visual Effects Designer)
- The Dreaming - Cast and crew look back at the making of Warriors' Gate, featuring Clifford Rose (Rorvik), David Weston (Biroc) and Stephen Gallagher (Writer)
- The Boy with the Golden Star - Actor Matthew Waterhouse, who played the part of Adric, looks back on his time on Doctor Who
- Lalla's Wardrobe - A fun trip through Romana's time on the show via the many costumes actress Lalla Ward wore along the way, featuring Costume Designers June Hudson and Louise Page
- Extended and Deleted Scenes - Missing scenes from an earlier edit of Part Two
- Isolated Music Score - Peter Howell's score is available on a separate music track
- Continuity
- Radio Times Billings
- Photo Gallery
- Coming Soon Trailer - The Rescue and The Romans
- Production Information Subtitles
- Easter Egg: Mat Irvine bonus interview. To access this hidden feature, press right at Continuity on the Special Features menu to reveal a hidden Doctor Who logo.

DVD UK box set cover
DVD Australian box set cover
DVD US box set cover
Warriors Gate Region 4 cover
Warriors Gate Region 1 cover
Warriors Gate Region 2 cover


Video releases[[edit] | [edit source]]
- Warriors' Gate was released on video in 1997 by BBC Worldwide as part of a boxed set containing: Full Circle, State of Decay and Warriors' Gate.
VHS Australian cover

Box set covers[[edit] | [edit source]]
VHS UK box set cover
VHS Australian box set cover
VHS US box set cover


External links[[edit] | [edit source]]
- Warriors' Gate at the BBC's official site
- Warriors' Gate at RadioTimes
- Warriors' Gate at BroaDWcast
- Warriors' Gate at the Doctor Who Reference Guide
- Warriors' Gate at Shannon Sullivan's A Brief History of Time (Travel)
- Warriors' Gate at The Locations Guide
- TSV:37 Riders on the Time Winds - Understanding Warriors' Gate
Footnotes[[edit] | [edit source]]
- ↑ www.shannonsullivan.com/doctorwho/serials/5s.html