The Abominable Snowmen (TV story): Difference between revisions
Gingerfool (talk | contribs) mNo edit summary |
|||
| (425 intermediate revisions by more than 100 users not shown) | |||
| Line 1: | Line 1: | ||
{{Infobox | {{title dab away}} | ||
{{real world}} | |||
image= | {{ImageLinkTV}} | ||
series=[[Doctor Who | {{Infobox Story SMW | ||
number= 38 | | |image = abominable title.jpg | ||
doctor= | |novelisation = Doctor Who and the Abominable Snowmen (novelisation) | ||
companions= [[Jamie McCrimmon]] | |series = [[Doctor Who television stories|''Doctor Who'' television stories]] | ||
enemy= [[ | |season number = Season 5 (Doctor Who 1963)| | ||
|season serial number = 2 | |||
writer= | |story number = 38 | ||
director= [[Gerald Blake]] | | |doctor = Second Doctor | ||
producer= [[Innes Lloyd]]| | |companions = [[Jamie McCrimmon|Jamie]], [[Victoria Waterfield|Victoria]] | ||
broadcast date= 30 September | |featuring = Edward Travers | ||
format= | |featuring2 = Thonmi | ||
production code= [[List of production codes|NN]]| | |featuring3 = Padmasambhava | ||
|enemy = The [[Great Intelligence]] | |||
next | |setting = [[Tibet]], [[1935]] | ||
|writer = Mervyn Haisman, Henry Lincoln | |||
|director = [[Gerald Blake]] | |||
|producer = [[Innes Lloyd]] | |||
|epcount = 6 | |||
|broadcast date = 30 September - 4 November 1967 | |||
|network = BBC1 | |||
|format = 6x25-minute episodes | |||
|serial production code = [[List of production codes|NN]] | |||
|clip = An Abominable Confrontation! - The Abominable Snowmen - Doctor Who | |||
|prev = The Tomb of the Cybermen (TV story) | |||
|next = The Ice Warriors (TV story) | |||
}}{{you may|The Abominable Showmen (comic story)}} | |||
'''''The Abominable Snowmen''''' was the second serial of [[Season 5 (Doctor Who 1963)|season 5]] of ''[[Doctor Who]]''. It introduced the [[Robot Yeti]] and the [[Great Intelligence]]. | |||
Currently, only episode two still exists in the [[BBC Archives]]. | |||
All six episodes were released on [[DVD releases|DVD]], [[Blu-ray]] and as exclusive [[Steelbook]] in animated form on [[5 September (releases)|5 September]] [[2022 (releases)|2022]] along with the surviving episode.<ref>https://www.doctorwho.tv/news/?article=missing-adventure-the-abominable-snowmen-animation</ref><ref>https://www.doctorwho.tv/news-and-features/the-abominable-snowmen-cover-art-and-special-features-revealed</ref> It was released alongside [[Troughton in Tibet (documentary)|a "making-of" documentary]] filmed on [[27 June (production)|27 June]] [[2021 (production)|2021]].<ref>https://cultbox.co.uk/news/missing-doctor-who-story-the-abominable-snowmen-to-be-animated-in-2022</ref> | |||
== | == Synopsis == | ||
Mysterious forces are at work in [[1930s]] [[Tibet]]. Savage [[Robot Yeti|Yeti]] are besieging a Buddhist monastery. The [[Second Doctor]], [[Jamie McCrimmon|Jamie]] and [[Victoria Waterfield|Victoria]] arrive expecting a friendly welcome from the abbot, but soon become ensnared in the plans of the extradimensional being known as the [[Great Intelligence]]. | |||
== Plot == | |||
=== Episode one === | |||
[[File:Absnow1.jpg|thumb|left|The Doctor is confronted by the Det-Sen monks and Professor Travers.]] | |||
Professor Edward Travers, an anthropologist and explorer, is awoken from his sleep by the screams of a man and goes to investigate. He is horrified to see a lumbering, hairy creature standing over his companion John's lifeless body. It grabs Travers' gun and twists it into scrap metal as the terrified man scampers into the night. | |||
The | The TARDIS has materialised on a cold and windy hillside. The Doctor is delighted at their destination — the [[Himalayas]]. He tells Jamie and Victoria to start searching for what he calls a "Holy [[Ghanta]]". They begin searching through a trunk, wherein Jamie finds a pair of [[bagpipes]] and a [[sword]], and the Doctor finds a fur coat which he puts on to protect himself against the cold weather. He leaves Jamie and Victoria to look for the Ghanta, which he explains is a [[bell]]. | ||
The Doctor goes out and observes an ornate monastery in a valley below. He sees a set of gigantic footprints in the snow. | |||
Victoria | Jamie and Victoria find the Ghanta and discover a label on it reading "Detsen Monastery". The Doctor returns to the TARDIS and convinces Jamie and Victoria to stay put whilst he deals with the situation outside. | ||
The Doctor | The Doctor is certain he is being watched and elects to travel to the monastery first. Victoria soon gets bored of the TARDIS and convinces Jamie to explore. | ||
En route to the monastery, the Doctor finds the remains of Travers' camp and the dead body. He takes the rucksack with him. | |||
Jamie and Victoria find the huge animal footprints around the TARDIS. Jamie goes back into the TARDIS to fetch the sword. | |||
The Doctor arrives at the monastery, clutching the remains of Travers' rifle and rucksack. There is no response when he knocks on the huge wooden doors. He enters. The inner courtyard is deserted, much to his confusion, but when he turns back to the door, his route is blocked by a group of armed monks. Travers is also present, and before the Doctor can explain his presence, Travers spots his rucksack in the Doctor's hand. Travers is convinced the Doctor is responsible for the death of his friend, despite his earlier claims to the monks blaming it on a beast. The Doctor protests that he can't be the beast, but Travers states he must have got confused by the coat in the night. The Doctor loudly protests his innocence to the peaceful monks, but Travers insists he is lying. The leading warrior monk, a gruff man by the name of [[Khrisong]], sends the Doctor to a cell. | |||
Back on the hillside, Jamie and Victoria have followed the trails of footprints right to the mouth of a deep cave. At first, Jamie is unwilling to enter it for fear of some savage animal, but he changes his mind when he spots timbers holding up the roof and sees it must be a manmade system. Victoria sees a huge creature at the cave mouth, and the pair watch in horror as massive claws push a boulder that traps them inside. | |||
The Doctor is increasingly irritated in the confines of his cell. He climbs up to a window to peer outside. Travers pops his head through a hatch and mockingly informs him of the hundred-foot drop beneath the window. He accuses the Doctor of being a sabotaging journalist. When the Doctor asks what Travers is talking about, Travers cries, "You know! The Yeti! The Abominable Snowmen!" | |||
Jamie, unable to shift the rock, decides to go deeper into the cave system. | |||
The Doctor protests he has no idea to what Travers is referring. He does say he has encountered Yetis before, and they are naturally timid so wouldn't have inflicted any damage on him or his friend. | |||
Khrisong is in conference in the courtyard over the fate of this apparent murderer. The other monks doubt Travers can be certain of his claims, but Khrisong says, "He is an Englishman. Why should he lie?" The monks are almost certain the Yeti are somehow responsible for this death and a spate of recent deaths of fellow monks. Khrisong believes that if the Doctor isn't directly the killer he may be inciting the Yetis. The more peaceful monks elect to turn over the matter to the Abbot after [[prayer]]. Once they have gone, Khrisong ignores their decision and orders the Doctor brought to him. | |||
Back in the darkness of the sealed cave, Jamie has found a pyramid of silver spheres placed on a raised plinth. Before either can ponder their significance, the boulder shifts again and the huge form of a Yeti enters the cave, trapping the terrified travellers. Victoria screams as Jamie tries to defend her from the monster with his sword, only to see it snapped in two by the creature's hands as it lumbers toward them. | |||
===Episode | === Episode two === | ||
[[ | [[File:The Abominable Snowmen2.jpg|right|thumb|[[Jamie McCrimmon|Jamie]] and [[Victoria Waterfield|Victoria]] pursued by the Yeti.]] | ||
Jamie and Victoria evade the Yeti by causing a mini-cave-in and depart with one of the strange spheres. As they do, the buried Yeti emerges from the rubble and begins to pursue them. They head toward the monastery. | |||
[[Thonmi]], one of the monks, has been sent by Khrisong to fetch the Doctor. The Doctor stalls for time and extracts information from Thonmi. He alludes to being at the monastery in [[1630]] and goes to give the bell, which has been hidden in the hay, to Thonmi, but he is interrupted by Khrisong, who pulls him away. Thonmi now left alone, finds the bell and fervently prays before it. | |||
The other monks encounter Khrisong leading the Doctor through the courtyard and object to his plan. The Doctor discovers he is to be used as bait to tempt the Yeti. If the Yeti saves him, he is in cahoots with them; if it attacks, the monks will try to save him. As he is led away, Travers is seen leaving the monastery. He gloats to the Doctor that, without him getting in the way, Travers will claim a Yeti easily. | |||
Thonmi takes the bell to the private chamber of Abbot [[Songsten]], who is in communion with the master of the monastery, [[Padmasambhava]]. The ancient spiritual guide of the monastery knows the Doctor personally from his previous visit. | |||
[[ | |||
The Doctor has been tied up by his hands to some kind of pulley which is connected to the gate. No matter how much he protests, it falls on deaf ears. | |||
Jamie and Victoria encounter Travers on the mountainside. Jamie explains about the "beastie" and the cave. Travers, almost at gunpoint, tells Jamie to show him the cave of the Yeti. Jamie will only agree if he is shown the way to the monastery. Travers agrees. | |||
Padmasambhava knows of the Doctor's wisdom, but he fears he will intervene in the "Great Plan". Thonmi is told to depart, his memory wiped of what he has heard, with the instruction of the Abbot that the Doctor is to be released without harm. | |||
Whilst the monks keep watch over the Doctor, Jamie, Victoria and Travers return to the monastery. Travers insists he was wrong to have blamed the Doctor and he should be freed. His wishes are met when Thonmi arrives with the Abbot's instructions. Khrisong is shocked to hear of the Doctor being in possession of the bell. | |||
In the inner sanctum, it has been decided that the Doctor should leave the monastery. And if he is not to leave, he is to be persuaded. | |||
Back in the monastery, Jamie shows the Doctor the sphere he stole from the cave. Bewildered, he puts it down by the [[Buddha]] statue. He seems very keen to see a Yeti close up. As he says this, reports of three Yetis approaching the monastery reach the monks. They rush to a window and see the three creatures, much to the excitement of Travers. Jamie has a plan to capture one of the Yetis for the Doctor. Unsure, the Doctor leaves him to it. Jamie sets up a net, not too dissimilar to the trap he has set for Daleks in the past, and captures a Yeti in a net. It struggles briefly but then falls lifeless. | |||
Later the Doctor examines the creature and [[deduce]]s it is some kind of robot. He finds a small flap in the chest of the machine which now has a missing section. Elsewhere in the monastery, the sphere brought back by Jamie comes to life and begins to roll off in the direction of the captured Yeti. | |||
=== Episode three === | |||
[[File:Absnow2.jpg|thumb|left|The Det-Sen monks examine the captive Yeti.]] | |||
Travers is worried that the real Yeti are threatened by the robot ones, but others suspect he is the one controlling the robots. Outside the monastery, he observes two of the robots come to life and head for [[Det-Sen Monastery|Det-Sen]]. It soon appears the creatures are under the control of Padmasambhava, who is moving miniature Yeti-like chess pieces around a map of the area. | |||
Inside the monastery, the sphere slowly makes its way toward the dormant Yeti robot with the Doctor. Monks look for it, having worked out its purpose. Khrisong finds a sphere outside the walls, and the others observe the two Yeti retrieving it without harming it. The Doctor concludes the two were obeying specific orders. Khrisong is overawed by the situation. He begins to trust the Doctor, who decides to try to return to the TARDIS with Jamie for equipment to track the missing sphere. The pulsing globe reaches the dormant Yeti and revives it, causing the robot to menace Victoria and Thonmi. | |||
=== Episode four === | |||
[[File:Absnow3.jpg|thumb|right|The awakened Yeti battles its way out of Det-Sen.]] | |||
The awakened Yeti fights its way out of Det-Sen despite warrior monks encircling it. Their swords penetrate it, but it staggers on. The Yeti returns to the cave where it meets Abbott Songsten. | |||
When the Doctor and Jamie reach the TARDIS they find it guarded by another Yeti. | |||
Padmasambhava communes with the Great Intelligence and vows that "the Great Experiment begins". | |||
Songsten places the pyramid in the centre of the cave that Jamie was in earlier. It begins to glow. Travers watches as the Abbott leaves and enters the cave himself. | |||
The Doctor throws a stone at the Yeti and discovers it is inactive. The Doctor takes out its control sphere for examination. | |||
Travers watches in awe as the pyramid begins to glow and expand. It begins to release a noise that causes him such distress he runs from the cave. | |||
As the Doctor is fetching his equipment from inside the TARDIS, the sphere begins to move of its own free will. As the Doctor struggles with the sphere, he tells Jamie to put a rock in the Yeti's flap. This calms the sphere. The Doctor speculates that the spheres are charged with returning to their own Yetis. | |||
Khrisong is angry that Thonmi opened the door to allow the Yeti to flee — albeit to avoid further bloodshed. Victoria and Thonmi are imprisoned for supposedly reviving the creature after some monks question Khrisong's loyalty. | |||
The signal restarts inside the sphere, but this time it is a call to the other Yetis. | |||
In prison, Thonmi asks Victoria how the Doctor came by the bell. Victoria is unsure and asks for its history. Thonmi explains it was given to a stranger 300 years ago for safe keeping. Victoria explains that this was the Doctor himself. Thonmi isn't surprised by Victoria's brief explanation of time travel as he says that Padmasambhava has found a way of liberating himself from body and time. | |||
Songsten returns. He puts the guard in a trance to make him forget his arrival. The Abbot informs Padmasambhava their plan is working. The old master says the Great Intelligence is already taking on corporeal form. To prepare for the next phase, Padmasambhava orders all monks to leave the monastery. | |||
On the mountainside, the Doctor and Jamie are surrounded by Yeti. The only way to save themselves is by bowling the sphere one way and running the other. | |||
A monk brings food to Victoria and Thonmi. Victoria takes some of the drink and coughs wildly before falling to the floor. The monk runs out for medical assistance, at which point Victoria dashes up, leaves the cell and locks Thonmi in. | |||
Songsten breaks the news that Padmasambhava has ordered they leave the monastery behind. Khrisong is furious at such a command and is resistant. The confrontation is interrupted by a monk saying Victoria has escaped. As they seek her out, the Doctor and Jamie return to the monastery, followed by Travers, who is burbling incoherently about a pyramid. The Doctor forges an uneasy new alliance with Khrisong to enable the monks to stay at the monastery. [[Rinchen]] imprisons the Doctor, Jamie and Travers, despite Khrisong's protestations, and order him and his monks to seek out Victoria. Realising the monks will not leave peacefully, Songsten is given orders by Padmasambhava to open the gates of the monastery to more Yeti. | |||
Victoria has ventured alone to the Inner Sanctum of the monastery where Padmasambhava invites her in. He is an ancient and wizened man. | |||
=== Episode five === | |||
[[File:Padmasambhava.jpg|thumb|left|The ancient and wizened face of the Master Padmasambhava.]] | |||
Victoria realises the ancient man manipulating the small Yeti figures is ordering the robots around the countryside. He wipes her mind of their meeting and summons more Yeti to attack. | |||
Soon enough four Yetis enter through the main gate and cause havoc in the monastery. | |||
Elsewhere in the monastery, Travers is delirious and incoherent in his ramblings about the glowing pyramid and a great evil that threatens them all. The Doctor and his companions are kept in their cell as the Yetis maraud through the monastery. Jamie is very worried for Victoria. | |||
Khrisong takes the blame for the attack, saying they should have retreated sooner. On command, the Yeti retreat from the monastery again, killing Rinchen by knocking the giant Buddha statue on to him. Khrisong says the monastery is cursed and they must leave. | |||
Padmasambhava wished only to scare the monks away, not kill them. He communes with the unknown beings and asks if they will be content now. They want the Doctor dealt with. He sends Victoria as his emissary. | |||
In the cell, the Doctor and Jamie are trying to triangulate the signal controlling the Yeti. As they do, Travers awakes and is perfectly fine. | |||
Khrisong is distraught about the death of the monk. Victoria enters the courtyard and speaks with the voice of Padmasambhava to urge them to leave and not to blame the strangers, who are innocent of any evil. Victoria is freed from her trance whilst orders are given to free the Doctor and his friends. The monks prepare to leave. | |||
Soon Jamie and Victoria are reunited, but she is still dormant. The only time she responds is to the Doctor's voice when she begs to leave the monastery. Thonmi believes she must have gone to the Inner Sanctum — he also drops the knowledge that she believed that Padmasambhava and the Doctor knew each other. Riled by this information the Doctor sneaks away. | |||
Padmasambhava begs to be released now that he has "brought the world to its end", but he is thwarted. The Doctor enters and speaks to his old friend. Padmasambhava says he encountered the formless Great Intelligence on the astral plane, and the entity borrowed his form to conduct an experiment, which he was told was harmless but is now out of control. The Doctor asks questions he needs to help save the monastery, but the old man slumps forward, his heart stopped. The Doctor leaves and returns to his friends. Seconds later the body of Padmasambhava rises back up. | |||
Jamie tries to awaken Victoria but is thwarted. The Doctor helps Victoria recover from her trance-like state by counter-hypnotising her. She forgets everything that has happened since she left the cell earlier. | |||
Travers and the Doctor venture outside to try to triangulate the signal. They leave to find the group of dormant Yetis from earlier. Travers goes to try to rile them, but they move of their own accord before he gets too close. The Doctor is stunned when he gets the readings. | |||
Khrisong prepares his monks to leave when the Doctor returns with news that the Yetis are being controlled from the monastery itself. Travers' memory begins to return and he remembers Songsten placing the pyramid in the cave. | |||
At the cave, the physical manifestation of the Intelligence is growing stronger and pouring forth menacingly. | |||
=== Episode six === | |||
[[File:Absnow4.jpg|thumb|Victoria battles Padmasambhava for control of the Yeti.]] | |||
After learning of Songsten's involvement with the Yetis, the Doctor is concerned as Khrisong is currently with the Abbott. | |||
In the inner sanctum, Songsten has submitted to the Great Intelligence, despite the voice of Padmasambhava lamenting the great evil. Khrisong arrives to get Songsten away. Songsten disarms Khrisong and strikes him in the neck. Padmasambhava battles with his controllers, begging to be let go. The Doctor and his friends arrive and overpower Songsten, realising he too has been entranced to commit the will of the Intelligence. Songsten is bound and returned to the other monks. Khrisong's last words to the Doctor are that it is not Songsten to blame but instead Padmasambhava. | |||
Thonmi gives news to the monks of Khrisong's death at the hands of Songsten. The monks go to kill Songsten, but the Doctor stops them. The violent nature of Songsten persuades them that it is not the Songsten they know and that he is being controlled. Thonmi tries to blame Padmasambhava, but the Doctor insists he is being controlled too. The Doctor tells all the monks to flee quickly so he can defeat the Intelligence. He keeps Jamie, Victoria and Thonmi at his side while the others flee. Travers doesn't believe that Songsten is innocent so goes to the cave to destroy the pyramid. Using his suggestible nature, as he did on Victoria, the Doctor discovers from Songsten that the Yeti are designed to serve the Great Intelligence and that Padmasambhava and they spent 200 years building the creatures. He goes on to explain that the Great Intelligence has now broken their promise to stay in the cave and are demanding the whole mountain. The Doctor plans to destroy the Intelligence's equipment to control the robotic Yeti. Songsten says the control unit is behind Padmasambhava's throne. Victoria is taught the Jewel of the Lotus prayer to act as a deterrent to Padmasambhava hypnotising her again. | |||
Padmasambhava moves the Yeti to attack the monastery, narrowly missing collision with Travers en route. When Travers reaches the mountain, he sees the mountain top covered in a thick pulsating substance which makes it impossible to climb. | |||
The monks leave the monastery, including the warrior monks — despite them offering their support to the Doctor's efforts. | |||
The Yeti begin to surround the monastery gate. Travers sees this from a distance and decides to hang back. | |||
The Doctor and his companions return to the inner sanctum. Padmasambhava is incensed the Doctor hasn't left. The Doctor demands to know why the Great Intelligence has seized his old friend's body. He replies that the Doctor's brain wouldn't be able to comprehend it. The Doctor doubles over in pain and, as Padmasambhava rises from his chair, gives Jamie and Thonmi the shout to enter the control room. Padmasambhava moves the Yeti in. Victoria tries to stop him. He tries to hypnotise her. She uses the prayer to stop it. | |||
Seeing the Yeti enter, Travers follows. | |||
Despite her best efforts, Victoria is paralysed. The Doctor shouts to Jamie to destroy the pyramid. Jamie finds a sphere similar to the ones seen on the mountain and destroys it. The Yetis chests implode and the creatures are immobilised, but Padmasambhava scoffs at this minor set back. Travers appears and shoots Padmasambhava, but the old man is impenetrable to bullets. Jamie finds a pyramid in the control room and destroys that. A huge tremor rumbles through the monastery. The mountaintop explodes. Padmasambhava begins to disintegrate. His final words are to the Doctor, thanking his old friend for setting him free. The Doctor sends Thonmi to fetch the monks back. The Doctor and his companions wish to leave and, despite Thonmi's protestations, do so with Travers as their guide. | |||
The Doctor and his companions soon discover a fallen Yeti. Crestfallen, Travers says this is the end of his mission, then he sees another Yeti — a real one — and dashes off in pursuit. The Doctor, Jamie and Victoria head back off to the TARDIS — hoping to find somewhere warmer on their next trip. | |||
== Cast == | == Cast == | ||
* [[Second Doctor|Dr. Who]] - [[Patrick Troughton]] | |||
* [[Jamie McCrimmon]] - [[Frazer Hines]] | |||
* [[Victoria Waterfield]] - [[Deborah Watling]] | |||
* [[Professor]] [[Edward Travers]] - [[Jack Watling]] | |||
* [[Padmasambhava]] - [[Wolfe Morris]] | |||
* Abbot [[Songsten]] - [[Charles Morgan]] | |||
* [[Khrisong]] - [[Norman Jones]] | |||
* [[Rinchen]] - [[David Grey]] | |||
* [[Thonmi]] - [[David Spenser]] | |||
* [[Sapan]] - [[Raymond Llewellyn]] | |||
* [[Ralpachan]] - [[David Baron]] | |||
* [[Robot Yeti|Yeti]] - [[Reg Whitehead]], [[Tony Harwood]], [[Richard Kerley]], [[John Hogan]] | |||
=== Uncredited cast === | |||
* [[John Angus Mackay|John's]] Body - [[Reg Whitehead]] | |||
* Warrior Monks - [[Pat Gorman]], [[Crawford Lyle]], [[Richard King]], [[Michael Durham]], [[Antonio Dimaggio|Antonio de Maggio]], [[Barry Dupres]] | |||
* Lamas - [[Richard Atherton]], [[Bobby Beaumont]], [[Terry Nelson]], [[Charles Finch]], [[Jack Rowlands|Jack Rowland]], [[Roger Bowdler]] (all [[DWM 224]]) | |||
== Crew == | |||
* [[Assistant Floor Manager]] - [[Roselyn Parker]] | |||
* [[Costumes]] - [[Martin Baugh]] | |||
* [[Designer (crew)|Designer]] - [[Malcolm Middleton]] | |||
* [[Film Cameraman]] - [[Peter Bartlett]] | |||
* Film Cameraman - [[Ken Westbury]] | |||
* [[Film Editor]] - [[Philip Barnikel]] | |||
* [[Make-Up]] - [[Sylvia James]] | |||
* [[Special Sounds]] - [[Brian Hodgson]] | |||
* [[Studio Lighting]] - [[Howard King]] | |||
* [[Studio Sound]] - [[Norman Bennett]] | |||
* Studio Sound - [[Alan Edmonds]] | |||
* [[Doctor Who theme|Title Music]] - [[Ron Grainer]] and the [[BBC Radiophonic Workshop]], arranged by [[Delia Derbyshire]] | |||
* [[Visual Effects]] - [[Ron Oates]], [[Ulrich Grosser]] | |||
* [[Production Assistant]] - [[Marjorie Yorke]] | |||
* Writer - [[Mervyn Haisman]], [[Henry Lincoln]] | |||
* Story Editor - [[Peter Bryant]] | |||
* [[Director (crew)|Director]] - [[Gerald Blake]] | |||
* [[Producer]] - [[Innes Lloyd]] | |||
=== Animation Team === | |||
Animation by [[Digitoonz Media & Entertainment PVT LTD]] | |||
* Studio Head - [[Prashant Kumar]] | |||
* Animation Director - [[Ayan Banerjee]] | |||
* Animation Supervisors | |||
** [[Souvik Nandi]] | |||
** [[Rajib Tala]] | |||
* Design Supervisors | |||
** [[Sandip Dutta]] | |||
** [[Naishriti Saraha]] | |||
* Animatic Supervisor - [[Biman Mohanta]] | |||
* Background Supervisors | |||
** [[Prasanta Bose]] | |||
** [[Satendre Singh]] | |||
* CG Background Team | |||
** [[Souvik Modak]] | |||
** [[Sudip Chandra]] | |||
** [[Lalit Karnel]] | |||
* Project Coordinator - [[Modhmita Bera]] | |||
* Production Coordinator (Rig) - [[Abhishek Singh]] | |||
* Rig Suprvisors | |||
** [[Goopal Nath]] | |||
** [[Bidhu Bhushan]] | |||
* Pre-Composition | |||
** [[Shashikant Kumar]] | |||
** [[Raghav Kurana]] | |||
** [[Ranjit Singh]] | |||
** [[Keshav Kumar]] | |||
* Head of Production - [[Mantosh Kumar]] | |||
* CEO/Founder - [[Vikas Kumar]] | |||
* Post-Production Editing, Compositing & Grading by [[Shapeshifter]] | |||
* Head of Studio - [[David Devjak]] | |||
* Technical Director - [[Connor Hodder]] | |||
* Post-Production Coordinator - [[Adam Boys]] | |||
* Compositors | |||
** [[Chris Downey]] | |||
** [[Hannah Lyn Walker]] | |||
** [[Michael Puglisi]] | |||
* Sound Restoration & Mastering - [[Mark Ayres]] | |||
* With thanks to [[Graham Strong]] | |||
* Opening Titles & 3D Tardis Exterior - [[Rob Ritchie]] | |||
* Additional 3D Modelling - [[Matt Umney]] | |||
* Concept Design - [[Ioan Morris]] | |||
* Original Character Designs - [[Luke Marcatili]] | |||
* Script Supervisor - [[Mark B. Oliver]] | |||
* QAR - The Ark | |||
* Business & Legal Affairs - [[Linda Duncan]] | |||
* Production Finance - [[Aisha Bhatti]] | |||
* Consumer Products | |||
** [[Fiona Ball]] | |||
** [[Rebecca Richmond]] | |||
* Associate Producer - [[Damian Shanahan]] | |||
* Produced and Directed by | |||
** [[Chloe Grech]] | |||
** [[Gary Russell]] | |||
* Executive Producers for [[Big Finish Creative]] | |||
** [[Jason Haigh-Ellery]] | |||
** [[Mark B. Oliver]] | |||
** [[Gary Russell]] | |||
* Executive Producer for [[BBC Studios]] - [[Russell Minton]] | |||
== Worldbuilding == | |||
* The Doctor plays "[[Twinkle Twinkle Little Star]]" on his recorder. | |||
== Story notes == | |||
* The working title for this story was ''The Abominable Snowman''. | |||
* This story saw the first appearance of the Great Intelligence. It would return later that season in {{cs|The Web of Fear (TV story)}} but it would not make its next appearance until forty-four years later in {{cs|The Snowmen (TV story)}}. This marked the longest interval between consecutive television appearances by an antagonist in the franchise's history until the return of [[the Toymaker]] in {{cs|The Giggle (TV story)}}. | |||
* Only episode two of this six-part story exists in the [[BBC Archives]] as a [[telerecording|16mm black & white film telerecording]]. It was returned in 1982, having been recovered from the collection of a retired BBC projectionist. | |||
* Episode two was shown alongside episode one of the ''The Web of Fear ''(then the only surviving episode of the serial) as part of [[BSB's Doctor Who Weekend]] in September 1990, under the banner of ''[[The Yeti Rarities]]''. | |||
* The script did not describe the Yeti in any great detail so costume designer Martin Baugh decided that they should have a bear-like appearance and be covered in thick fur. The costumes were built over a bamboo frame padded with foam rubber and sprayed with black paint. | |||
* [[Deborah Watling]] named this as her favourite story, in part due to the experience of working with her father. | |||
* According to [[Jack Watling]], one of the actors playing the Yeti fell hundreds of feet during filming and was feared dead, but was merely inebriated and fortunately cushioned by the foam rubber inside the costume. | |||
* A shot of Padmasambhava's wizened head melting was considered too horrific and went unused. | |||
* Filming in Wales was so cold that [[Frazer Hines]] wore rolled up trousers under his kilt. | |||
* [[Deborah Watling]] claimed to have suggested her father [[Jack Watling]] for Professor Travers. She told ''the [[Radio Times]] ''in [[1973]] that the first sight of him in his beard caused both of them to corpse. | |||
* This was the first story to not have any created background music, with chanting being used to create atmosphere. | |||
* This was the first story to have the new theme arrangement for the end credits instead of the original theme for any Second Doctor story. The next time the theme would be used would be in {{cs|[[Spearhead from Space (TV story)]]}}. | |||
* It was initially reported that the animated reconstruction of this story would be the last ''Doctor Who'' animation due to [[BBC America]] withdrawing their funding.<ref>https://www.radiotimes.com/tv/sci-fi/doctor-who-animated-episodes-cancelled-newsupdate/</ref> Neither BBC America or [[BBC Studios]] confirmed nor denied these claims though it eventually proved to not be the case with the news in [[August (releases)|August]] [[2023 (releases)|2023]] that {{cs|[[The Underwater Menace (TV story)]]}} was being animated<ref>https://www.radiotimes.com/tv/sci-fi/doctor-who-underwater-menace-animation-newsupdate/</ref>. | |||
* [[David Spenser]] was [[Victor Pemberton]]'s partner. | |||
* The production was beset with rainfalls which delayed filming for two days and caused the crew to work on what was supposed to be their rest day. The rain also ensured that there would be no snow on the ground, which [[Gerald Blake]] had hoped would help sell Snowdonia as a stand-in for the Himalayas. The ground was instead muddy and slippery, causing trouble for the actors, particularly those in the Yeti costumes, who found themselves falling frequently. For episode six, a regular Yeti costume was used with its bamboo frame and extra stuffing removed. | |||
* As well as being the only surviving episode, the original 35mm film inserts for episode two still exist in the BBC Archives, but the film inserts for all the other episodes is sadly thought to have been destroyed. | |||
** For the latest DVD and Blu-ray release of the serial in animated form, the surviving episode has been remastered using these original inserts, making it not only one of few stories produced in the black and white era to have original surviving film elements, but one of few to use said elements to create a perfectly high picture quality for its home media release. | |||
* Very similar to {{cs|[[The Wheel in Space (TV story)]]}}, the only known copy of ''The Abominable Snowmen'' to not have been confirmed as destroyed is the prints sent to Nigeria. Given {{cs|[[The Enemy of the World (TV story)]]}} and {{cs|[[The Web of Fear (TV story)]]}} (except for Episode 3, which is disappeared before its shipment to the BBC) are both recovered from the country and ''The Abominable Snowmen'' wasn't, its fate is mysterious. It was possibly sent to another country off-record or the episodes were obtained by private collectors. | |||
* [[Henry Lincoln]] knew [[Patrick Troughton]] as they previously acted together in several plays. After Troughton had started on ''Doctor Who,'' Lincoln encountered him on the streets of Kew and learned that the actor was frustrated by the lack of stories set on Earth. Having read the completed scripts for this serial while on holiday in [[France]], Troughton sent Lincoln a postcard which read "Sooper Script Specially No 6. Very Happy. Thank you. Do some more please. Pat T". | |||
* Before chosing the Yeti as a monster, [[Henry Lincoln]] considered writing a script about [[Loch Ness Monster]]. | |||
* [[Mervyn Haisman]] and [[Henry Lincoln]] were keen to capture Tibetan culture accurately and so used authentic names and details - Padmasambhava was an eighth-century Buddhist master who was invited to Tibet by its king, Trisong Detsen; “Khrisong” was an alternative transliteration of “Trisong”; Songsten and Ralpachan were named for other Tibetan monarchs; Yeshe Rinchen was a Tibetan imperial preceptor; Sapan was another name for the Buddhist scholar Sakya Pandita, both hailed from the thirteenth century; and Thonmi Sambhota was a seventh-century figure, traditionally held to be the creator of the Tibetan script. | |||
* Songsten originally had the more authentic name “Songtsen”. | |||
* The production team spent six days filming in Snowdonia. This was the longest location filming the series had experienced at the time. | |||
=== Changes in the animated version === | |||
* There is snow on the ground when the time travellers step out of the TARDIS. | |||
* At the beginning of the story, Jamie and Victoria are wearing the same clothes they will later wear in {{cs|[[Fury from the Deep (TV story)]]}}. | |||
* The monastery sits atop a small mound. | |||
* The monks are more Asian in appearance and wear shoes rather than sandals. | |||
* The Yeti are stockier around the waist. | |||
* Ralpachan has a scar across his left eye. | |||
* Sapan has a white beard. | |||
* The door to the Doctor's cell leads outside. | |||
* When Jamie and Victoria get sealed in the cave in Episode One, it is not made clear that the boulder is pushed across the entrance by a Yeti. | |||
* Jamie puts the control sphere he finds in the cave in his pocket rather than his bag. | |||
* Padmasambhava is faintly visible behind a curtain when speaking in the sanctum. | |||
* The control sphere rolls faster. | |||
* There are fewer Yeti models. | |||
* Before Songsten places the pyramid among the control spheres, the majority of the spheres disappear after he adds the last one. | |||
* The pyramid in the cave forms a series of interlacing lines rather than a glow. | |||
* Padmasambhava's entire body is grey, his eyes often glow and he levitates during the final confrontation. | |||
=== Ratings === | |||
* Episode one - 6.3 million viewers | |||
* Episode two - 6.0 million viewers | |||
* Episode three - 7.1 million viewers | |||
* Episode four - 7.1 million viewers | |||
* Episode five - 7.2 million viewers | |||
* Episode six - 7.4 million viewers | |||
=== Myths === | |||
* Ralpachan was played by David Baron, often said to be the playwright Harold Pinter under a stage name. Pinter has since denied this rumour. ''(David Baron was indeed Pinter's name for the purposes of [[Equity]], the British actors' union, but he had relinquished it by the time this serial was produced.)'' | |||
=== Filming locations === | |||
*[[ | * [[Ealing Television Film Studios]], Ealing Green, Ealing | ||
*[[ | * [[Lime Grove Studios|Lime Grove Studios (Studio D)]], Lime Grove, London | ||
* Nant Ffrancon Pass, North Wales (Mountainside) | |||
* | |||
=== Production errors === | |||
{{discontinuity}} | |||
== | ==== Original Production ==== | ||
* | * In Episode One, snow is seen on the TARDIS scanner; however, when the time travellers emerge, not a flake is visible. | ||
* | * In the aerial shot of the monastery, it clearly has a large open courtyard. But in all the shots inside the courtyard, the lack of light indicates that it has a roof. | ||
* | * In the first close up shot of the control sphere in Episode Two, the camera is visible in it's reflection. | ||
* | |||
* | ==== Animated Version ==== | ||
* | * Jamie puts the control sphere in his pocket in Episode Two. But his pocket is clearly very small and would not be able to hold an object that size. | ||
* | * Just as the Doctor, Jamie and Victoria are leaving, Ralpachan strikes the gong but the sound doesn't come until a few seconds later. | ||
* | |||
== Continuity == | |||
* The Doctor encounters the Great Intelligence, the Yeti, and Professor Travers again. ([[TV]]: {{cs|[[The Web of Fear (TV story)]]}}, [[HOMEVID]]: {{cs|[[Downtime (home video)]]}}, [[PROSE]]: {{cs|[[Downtime (novelisation)]]}}) | |||
* A Yeti, either robotic or genuine, appears in the [[Death Zone]]. ([[TV]]: {{cs|[[The Five Doctors (TV story)]]}}) | |||
* The [[Eleventh Doctor]] fights the [[Great Intelligence]], both before ([[TV]]: {{cs|[[The Snowmen (TV story)]]}}) and after ([[TV]]: {{cs|[[The Bells of Saint John (TV story)]]}}) this encounter. It returns to take revenge on the Doctor throughout his time stream. ([[TV]]: {{cs|[[The Name of the Doctor (TV story)]]}}) | |||
* The Doctor wears his [[the Doctor's fur coat|fur coat]] several times. ([[TV]]: {{cs|[[The Ice Warriors (TV story)]]}}, {{cs|[[The Five Doctors (TV story)]]}}, {{cs|[[Time and the Rani (TV story)]]}}, {{cs|[[The Name of the Doctor (TV story)]]}}, [[COMIC]]: {{cs|[[A Cold Day in Hell! (comic story)]]}}, [[AUDIO]]: {{cs|[[Beyond the Ultimate Adventure (audio story)]]}}) | |||
* The [[Fifth Doctor]] and his companions [[Peri Brown]] and [[Erimem]] visit Tibet in [[1917]]. ([[AUDIO]]: {{cs|[[The Roof of the World (audio story)]]}}) | |||
* | * While giving [[Erimem]] a tour of [[the TARDIS]], she and the [[Fifth Doctor]] come across the coat in the wardrobe. When Erimem asks what kind of animal it is, the Doctor replies "a polyester...fierce animals, no one's ever caught one alive..sharp teeth...terrible things." Erimem realises he's teasing her. ([[AUDIO]]: {{cs|[[No Place Like Home (audio story)]]}}) | ||
* | * [[Torchwood India]] later retrieved several of the Robot Yeti's [[control sphere]]s from the Himalayas. ([[AUDIO]]: {{cs|[[Golden Age (audio story)]]}}) | ||
* According to one account, the Great Intelligence was one of the [[Great Old One|Elder Gods]]. ([[AUDIO]]: {{cs|[[Black and White (audio story)]]}}) Another account gave a different origin (or development) of the Great Intelligence. ([[TV]]: {{cs|[[The Snowmen (TV story)]]}}) The [[Lethbridge-Stewart (series)|Lethbridge-Stewart]] series of novels, under direct license from the [[Haisman Literary Estate]], has gone to great lengths to explain how the various origins of the Great Intelligence fit together, by suggesting it is a multi-dimensional being that manifests in different ways across different timelines, all an imprint of [[The Great Intelligence|Sunyata]], who exist in the void between realities. ([[PROSE]]: {{cs|[[The Forgotten Son (novel)]]}}, {{cs|[[Times Squared (novel)]]}}, {{cs|[[Night of the Intelligence (novel)]]}}, [[AUDIO]]: {{cs|[[Time of the Intelligence (audio story)]]}}) | |||
* On the [[Inferno Earth]], Travers was killed during his expedition to the Himalayas in 1935 while [[John Angus Mackay]] survived. ([[PROSE]]: {{cs|[[The Schizoid Earth (novel)]]}}) | |||
* Jamie refers to a recent visit to the [[Cyber-tomb|Cybermen's tomb]]. ([[TV]]: {{cs|[[The Tomb of the Cybermen (TV story)]]}}) | |||
== Home video and audio releases == | |||
=== DVD releases === | |||
Only episode two exists in the [[BBC Archives]]. It was released on ''[[The Troughton Years]]'' VHS, before later being released in a digitally re-mastered form on the ''[[Lost in Time (DVD box set)|Lost in Time]]'' [[DVD]] box set alongside a handful of other surviving clips (also digitally restored) in [[2004 (releases)|2004]]. | |||
== | <gallery position="center" captionalign="center" hideaddbutton="true"> | ||
File:Lostintime.jpg|Lost in Time Region 2 | |||
File:Lost in Time Australian Region 4.jpg|Lost in Time Region 4 | |||
File:Lostna-collection.jpg|Lost in Time Region 1 | |||
File:Lostna-troughton.jpg|Lost in Time Region 1 (Disc 3) | |||
Lost in Time 2.jpg|Lost in Time Region 4 Re release | |||
</gallery> | |||
An animated version of the story, with both a Black & White and Colour version, was released on DVD in the UK on [[5 September (releases)|5 September]] [[2022 (releases)|2022]] and Australia in [[October (releases)|October]] 2022. Additionally a Blu-ray and Steelbook edition was released in the UK and a Blu-ray edition released in Australia, simultaneously with their respective DVD releases. | |||
== | ==== Special Features ==== | ||
* | * Commentary (moderated by [[Toby Hadoke]]): | ||
** Episode 1 - Production assistant [[Judy Shears]] | |||
** Episode 2 (live-action) - Actor [[Deborah Watling]] ([[Victoria Waterfield|Victoria]]) (recorded in 2004) | |||
** Episode 2 (live-action) - Actor [[Frazer Hines]] ([[Jamie McCrimmon|Jamie]]) and film camera assistant [[John Walker]] | |||
** Episode 2 (animated) - Animation producer and director [[Gary Russell]] | |||
** Episode 3 - Cameraman [[Bernard Newnham]] | |||
** Episode 4 - Actor Frazer Hines and film camera assistant John Walker | |||
** Episode 5 - Special sound designer [[Brian Hodgson]] and make-up designer [[Sylvia James]] | |||
** Episode 6 - Animation producer and director Gary Russell | |||
* 8mm Home Movie Footage - Location work during September 1967 as captured by actor Frazer Hines (Jamie) and director [[Gerald Blake]]. | |||
* ''The Abominable Snowmen'' Episode Four - Existing material featured in ''[[Late Night Line-Up]]'' broadcast on 25th November 1967. | |||
* ''[[31 Who]]'' - ''31 West'' host [[Shyama Perera]] and former ''[[Doctor Who]]'' producer [[John Nathan-Turner]] interview writer [[Mervyn Haisman]] about the [[Robot Yeti|Yeti]] serials for the BSB programme ''31 Who'' recorded on 8th September 1990 for transmission on 23rd September 1990. | |||
* ''The Abominable Snowmen'' - Restored version of Episode Two, with reconstructions of the other episodes from off-screen [[Tele-snaps]] and soundtrack recordings. This has optional narration by Fraser Hines originally recorded for [[BBC Worldwide]] and released in July 2001. | |||
* ''[[Troughton in Tibet: Making 'The Abominable Snowmen' (documentary)|Troughton in Tibet: Making 'The Abominable Snowmen']]'' - Actor Frazer Hines (Jamie) and Toby Hadoke present recollections of the production of the serial from make-up supervisor Sylvia James, film camera assistant John Walker, actors [[John Hogan]] (Yeti) and [[Raymond Llewellyn|Ray Llewellyn]] ([[Sapan]]), floor assistant [[Bernard Doe]], location visitor [[Alison Pagent]] and [[Giles Watling]] (son of [[Jack Watling]] and brother of Deborah Watling). Other contributors include writer Mervyn Haisman (recorded in 1990), actor Deborah Watling (Victoria; recorded in 2011), actor Jack Watling ([[Edward Travers|Travers]]; recorded in 1995), actor [[David Spenser]] ([[Thonmi]]; recorded in 1987) and production assistant Judy Spears (recorded in 2006). | |||
* Photo Gallery - Images from the BBC Photo Library accompanied by sound effects and music for the serial by Brian Hodgson. | |||
* Teaser Trailer - The trailer for the animated version of the adventure as released on 23rd November, 2021, the series' 58th anniversary. | |||
* Scripts - A full set of camera scripts and {{'}}''[[Radio Times]]''{{'}} cuttings for {{'}}''The Abominable Snowmen''{{'}} in PDF format accessible via a computer DVD or Blu-Ray ROM drive. | |||
* All known copies of episode two, including audio recordings made by fans during the original broadcast in 1967, contain a brief audio drop-out late in the episode. [[Second Doctor|The Doctor]] is examining the captured [[Robot Yeti|Yeti]] and is supposed to say, "You were right about one thing, Victoria. This creature certainly doesn't seem to be flesh and [[blood]]." In what appears to have been a fault with the [[master videotape recording]], the sound cuts in with "...toria." The fact that the audio recordings of episode two also include this loss of sound indicates that the episode was transmitted with the fault intact. The original [[VHS]] release of episode two was edited to remove the silent section and "...toria", coming in instead on the [[Second Doctor]]'s next line. This was done to avoid customer complaints that the tape was faulty, whilst maintaining the running time of the episode. The [[DVD]] release contains a "patchwork repair" of the fault, originally performed by [[Mark Ayres]] of the [[Doctor Who Restoration Team]] for the [[BBC Audio]] [[CD]] release, which uses the appropriate words spoken by [[Patrick Troughton|Troughton]] with the correct vocal inflexions, taken from other Second Doctor episodes. | |||
* | |||
== | <gallery position="center" captionalign="center" hideaddbutton="true"> | ||
The Abominable Snowmen DVD.jpg|Region 2 cover | |||
TheAbominableSnowmenAUS.jpg|Region 4 cover | |||
The Abominable Snowmen Blu-ray.jpg|Region 2 Blu-ray cover | |||
The Abominable Snowmen Steelbook.jpg|Region 2 Limited Edition Steelbook | |||
</gallery> | |||
== | === Audio releases === | ||
* | * This story's soundtrack was released on CD by BBC Audio, with linking narration by [[Frazer Hines]], on [[2 July (releases)|2 July]] [[2001 (releases)|2001]]. | ||
* The story was re-released in two box sets, first in the ''[[Yeti Attack]]'' set (with ''[[The Web of Fear (TV story)|The Web of Fear]]'', released [[7 July (releases)|7 July]] [[2003 (releases)|2003]]), and second as part of the ''[[Doctor Who: The Lost TV Episodes - Collection Four]]'' set (released [[2 February (releases)|2 February]] [[2012 (releases)|2012]]). | |||
* | |||
* The story was released again on Vinyl by Demon Records, also with the Frazer Hines narration, on [[27 September (releases)|27 September]] [[2019 (releases)|2019]]. | |||
<gallery position="center" captionalign="center" hideaddbutton="true"> | |||
File:The_Abominable_Snowmencd.jpg|CD release | |||
Bbccd-yetiattack.jpg|''Yeti Attack'' box set | |||
Lost TV Eps coll4 cover.jpg|The Lost TV Episodes - Collection Four | |||
The_Abominable_Snowmen_Vinyl.jpg|Vinyl Record release | |||
</gallery> | |||
== External links == | == External links == | ||
* | * {{bbcepguideclassic|abominablesnowmen/|The Abominable Snowmen}} | ||
* | * {{radiotimes|2009-06-27/the-abominable-snowmen|The Abominable Snowmen}} | ||
* | {{dwcast}} | ||
{{dwrefguide|who_2n.htm|The Abominable Snowmen}} | |||
* {{briefhistory|serials/nn.html|The Abominable Snowmen}} | |||
* {{locguide|abominablesnowmen|The Abominable Snowmen}} | |||
{{elx|page url=http://www.bbc.co.uk/doctorwho/classic/photonovels/snowmen/|page name=Photonovel of ''The Abominable Snowmen''|website url=http://www.bbc.co.uk/doctorwho/classic/|website name=Doctor Who website}} | |||
{{DWTV}} | |||
{{Great Intelligence stories}} | |||
{{TitleSort}} | |||
[[Category:Animated missing episodes]] | |||
[[Category:Articles that were originally Wikipedia forks]] | |||
[[Category:Doctor Who (1963) television stories]] | |||
[[Category:Stories set in Tibet]] | |||
[[Category:Stories set in 1935]] | |||
[[Category:1967 television stories]] | |||
[[Category:Stories with missing episodes]] | |||
[[Category:Season 5 stories]] | |||
[[Category:Yeti television stories]] | |||
[[Category:Six part serials]] | |||
[[Category:Great Intelligence television stories]] | |||
[[Category:Doctor Who animated television stories]] | |||
[[ | [[es:The Abominable Snowmen]] | ||
[[ | [[fr:The Abominable Snowmen]] | ||
[[ru:Снежные люди (ТВ история)]] | |||
Latest revision as of 11:33, 3 August 2024
- You may be looking for The Abominable Showmen (comic story).
The Abominable Snowmen was the second serial of season 5 of Doctor Who. It introduced the Robot Yeti and the Great Intelligence.
Currently, only episode two still exists in the BBC Archives.
All six episodes were released on DVD, Blu-ray and as exclusive Steelbook in animated form on 5 September 2022 along with the surviving episode.[1][2] It was released alongside a "making-of" documentary filmed on 27 June 2021.[3]
Synopsis[[edit] | [edit source]]
Mysterious forces are at work in 1930s Tibet. Savage Yeti are besieging a Buddhist monastery. The Second Doctor, Jamie and Victoria arrive expecting a friendly welcome from the abbot, but soon become ensnared in the plans of the extradimensional being known as the Great Intelligence.
Plot[[edit] | [edit source]]
Episode one[[edit] | [edit source]]

Professor Edward Travers, an anthropologist and explorer, is awoken from his sleep by the screams of a man and goes to investigate. He is horrified to see a lumbering, hairy creature standing over his companion John's lifeless body. It grabs Travers' gun and twists it into scrap metal as the terrified man scampers into the night.
The TARDIS has materialised on a cold and windy hillside. The Doctor is delighted at their destination — the Himalayas. He tells Jamie and Victoria to start searching for what he calls a "Holy Ghanta". They begin searching through a trunk, wherein Jamie finds a pair of bagpipes and a sword, and the Doctor finds a fur coat which he puts on to protect himself against the cold weather. He leaves Jamie and Victoria to look for the Ghanta, which he explains is a bell.
The Doctor goes out and observes an ornate monastery in a valley below. He sees a set of gigantic footprints in the snow.
Jamie and Victoria find the Ghanta and discover a label on it reading "Detsen Monastery". The Doctor returns to the TARDIS and convinces Jamie and Victoria to stay put whilst he deals with the situation outside.
The Doctor is certain he is being watched and elects to travel to the monastery first. Victoria soon gets bored of the TARDIS and convinces Jamie to explore.
En route to the monastery, the Doctor finds the remains of Travers' camp and the dead body. He takes the rucksack with him.
Jamie and Victoria find the huge animal footprints around the TARDIS. Jamie goes back into the TARDIS to fetch the sword.
The Doctor arrives at the monastery, clutching the remains of Travers' rifle and rucksack. There is no response when he knocks on the huge wooden doors. He enters. The inner courtyard is deserted, much to his confusion, but when he turns back to the door, his route is blocked by a group of armed monks. Travers is also present, and before the Doctor can explain his presence, Travers spots his rucksack in the Doctor's hand. Travers is convinced the Doctor is responsible for the death of his friend, despite his earlier claims to the monks blaming it on a beast. The Doctor protests that he can't be the beast, but Travers states he must have got confused by the coat in the night. The Doctor loudly protests his innocence to the peaceful monks, but Travers insists he is lying. The leading warrior monk, a gruff man by the name of Khrisong, sends the Doctor to a cell.
Back on the hillside, Jamie and Victoria have followed the trails of footprints right to the mouth of a deep cave. At first, Jamie is unwilling to enter it for fear of some savage animal, but he changes his mind when he spots timbers holding up the roof and sees it must be a manmade system. Victoria sees a huge creature at the cave mouth, and the pair watch in horror as massive claws push a boulder that traps them inside.
The Doctor is increasingly irritated in the confines of his cell. He climbs up to a window to peer outside. Travers pops his head through a hatch and mockingly informs him of the hundred-foot drop beneath the window. He accuses the Doctor of being a sabotaging journalist. When the Doctor asks what Travers is talking about, Travers cries, "You know! The Yeti! The Abominable Snowmen!"
Jamie, unable to shift the rock, decides to go deeper into the cave system.
The Doctor protests he has no idea to what Travers is referring. He does say he has encountered Yetis before, and they are naturally timid so wouldn't have inflicted any damage on him or his friend.
Khrisong is in conference in the courtyard over the fate of this apparent murderer. The other monks doubt Travers can be certain of his claims, but Khrisong says, "He is an Englishman. Why should he lie?" The monks are almost certain the Yeti are somehow responsible for this death and a spate of recent deaths of fellow monks. Khrisong believes that if the Doctor isn't directly the killer he may be inciting the Yetis. The more peaceful monks elect to turn over the matter to the Abbot after prayer. Once they have gone, Khrisong ignores their decision and orders the Doctor brought to him.
Back in the darkness of the sealed cave, Jamie has found a pyramid of silver spheres placed on a raised plinth. Before either can ponder their significance, the boulder shifts again and the huge form of a Yeti enters the cave, trapping the terrified travellers. Victoria screams as Jamie tries to defend her from the monster with his sword, only to see it snapped in two by the creature's hands as it lumbers toward them.
Episode two[[edit] | [edit source]]

Jamie and Victoria evade the Yeti by causing a mini-cave-in and depart with one of the strange spheres. As they do, the buried Yeti emerges from the rubble and begins to pursue them. They head toward the monastery.
Thonmi, one of the monks, has been sent by Khrisong to fetch the Doctor. The Doctor stalls for time and extracts information from Thonmi. He alludes to being at the monastery in 1630 and goes to give the bell, which has been hidden in the hay, to Thonmi, but he is interrupted by Khrisong, who pulls him away. Thonmi now left alone, finds the bell and fervently prays before it.
The other monks encounter Khrisong leading the Doctor through the courtyard and object to his plan. The Doctor discovers he is to be used as bait to tempt the Yeti. If the Yeti saves him, he is in cahoots with them; if it attacks, the monks will try to save him. As he is led away, Travers is seen leaving the monastery. He gloats to the Doctor that, without him getting in the way, Travers will claim a Yeti easily.
Thonmi takes the bell to the private chamber of Abbot Songsten, who is in communion with the master of the monastery, Padmasambhava. The ancient spiritual guide of the monastery knows the Doctor personally from his previous visit.
The Doctor has been tied up by his hands to some kind of pulley which is connected to the gate. No matter how much he protests, it falls on deaf ears.
Jamie and Victoria encounter Travers on the mountainside. Jamie explains about the "beastie" and the cave. Travers, almost at gunpoint, tells Jamie to show him the cave of the Yeti. Jamie will only agree if he is shown the way to the monastery. Travers agrees.
Padmasambhava knows of the Doctor's wisdom, but he fears he will intervene in the "Great Plan". Thonmi is told to depart, his memory wiped of what he has heard, with the instruction of the Abbot that the Doctor is to be released without harm.
Whilst the monks keep watch over the Doctor, Jamie, Victoria and Travers return to the monastery. Travers insists he was wrong to have blamed the Doctor and he should be freed. His wishes are met when Thonmi arrives with the Abbot's instructions. Khrisong is shocked to hear of the Doctor being in possession of the bell.
In the inner sanctum, it has been decided that the Doctor should leave the monastery. And if he is not to leave, he is to be persuaded.
Back in the monastery, Jamie shows the Doctor the sphere he stole from the cave. Bewildered, he puts it down by the Buddha statue. He seems very keen to see a Yeti close up. As he says this, reports of three Yetis approaching the monastery reach the monks. They rush to a window and see the three creatures, much to the excitement of Travers. Jamie has a plan to capture one of the Yetis for the Doctor. Unsure, the Doctor leaves him to it. Jamie sets up a net, not too dissimilar to the trap he has set for Daleks in the past, and captures a Yeti in a net. It struggles briefly but then falls lifeless.
Later the Doctor examines the creature and deduces it is some kind of robot. He finds a small flap in the chest of the machine which now has a missing section. Elsewhere in the monastery, the sphere brought back by Jamie comes to life and begins to roll off in the direction of the captured Yeti.
Episode three[[edit] | [edit source]]

Travers is worried that the real Yeti are threatened by the robot ones, but others suspect he is the one controlling the robots. Outside the monastery, he observes two of the robots come to life and head for Det-Sen. It soon appears the creatures are under the control of Padmasambhava, who is moving miniature Yeti-like chess pieces around a map of the area.
Inside the monastery, the sphere slowly makes its way toward the dormant Yeti robot with the Doctor. Monks look for it, having worked out its purpose. Khrisong finds a sphere outside the walls, and the others observe the two Yeti retrieving it without harming it. The Doctor concludes the two were obeying specific orders. Khrisong is overawed by the situation. He begins to trust the Doctor, who decides to try to return to the TARDIS with Jamie for equipment to track the missing sphere. The pulsing globe reaches the dormant Yeti and revives it, causing the robot to menace Victoria and Thonmi.
Episode four[[edit] | [edit source]]

The awakened Yeti fights its way out of Det-Sen despite warrior monks encircling it. Their swords penetrate it, but it staggers on. The Yeti returns to the cave where it meets Abbott Songsten.
When the Doctor and Jamie reach the TARDIS they find it guarded by another Yeti.
Padmasambhava communes with the Great Intelligence and vows that "the Great Experiment begins".
Songsten places the pyramid in the centre of the cave that Jamie was in earlier. It begins to glow. Travers watches as the Abbott leaves and enters the cave himself.
The Doctor throws a stone at the Yeti and discovers it is inactive. The Doctor takes out its control sphere for examination.
Travers watches in awe as the pyramid begins to glow and expand. It begins to release a noise that causes him such distress he runs from the cave.
As the Doctor is fetching his equipment from inside the TARDIS, the sphere begins to move of its own free will. As the Doctor struggles with the sphere, he tells Jamie to put a rock in the Yeti's flap. This calms the sphere. The Doctor speculates that the spheres are charged with returning to their own Yetis.
Khrisong is angry that Thonmi opened the door to allow the Yeti to flee — albeit to avoid further bloodshed. Victoria and Thonmi are imprisoned for supposedly reviving the creature after some monks question Khrisong's loyalty.
The signal restarts inside the sphere, but this time it is a call to the other Yetis.
In prison, Thonmi asks Victoria how the Doctor came by the bell. Victoria is unsure and asks for its history. Thonmi explains it was given to a stranger 300 years ago for safe keeping. Victoria explains that this was the Doctor himself. Thonmi isn't surprised by Victoria's brief explanation of time travel as he says that Padmasambhava has found a way of liberating himself from body and time.
Songsten returns. He puts the guard in a trance to make him forget his arrival. The Abbot informs Padmasambhava their plan is working. The old master says the Great Intelligence is already taking on corporeal form. To prepare for the next phase, Padmasambhava orders all monks to leave the monastery.
On the mountainside, the Doctor and Jamie are surrounded by Yeti. The only way to save themselves is by bowling the sphere one way and running the other.
A monk brings food to Victoria and Thonmi. Victoria takes some of the drink and coughs wildly before falling to the floor. The monk runs out for medical assistance, at which point Victoria dashes up, leaves the cell and locks Thonmi in.
Songsten breaks the news that Padmasambhava has ordered they leave the monastery behind. Khrisong is furious at such a command and is resistant. The confrontation is interrupted by a monk saying Victoria has escaped. As they seek her out, the Doctor and Jamie return to the monastery, followed by Travers, who is burbling incoherently about a pyramid. The Doctor forges an uneasy new alliance with Khrisong to enable the monks to stay at the monastery. Rinchen imprisons the Doctor, Jamie and Travers, despite Khrisong's protestations, and order him and his monks to seek out Victoria. Realising the monks will not leave peacefully, Songsten is given orders by Padmasambhava to open the gates of the monastery to more Yeti.
Victoria has ventured alone to the Inner Sanctum of the monastery where Padmasambhava invites her in. He is an ancient and wizened man.
Episode five[[edit] | [edit source]]

Victoria realises the ancient man manipulating the small Yeti figures is ordering the robots around the countryside. He wipes her mind of their meeting and summons more Yeti to attack.
Soon enough four Yetis enter through the main gate and cause havoc in the monastery.
Elsewhere in the monastery, Travers is delirious and incoherent in his ramblings about the glowing pyramid and a great evil that threatens them all. The Doctor and his companions are kept in their cell as the Yetis maraud through the monastery. Jamie is very worried for Victoria.
Khrisong takes the blame for the attack, saying they should have retreated sooner. On command, the Yeti retreat from the monastery again, killing Rinchen by knocking the giant Buddha statue on to him. Khrisong says the monastery is cursed and they must leave.
Padmasambhava wished only to scare the monks away, not kill them. He communes with the unknown beings and asks if they will be content now. They want the Doctor dealt with. He sends Victoria as his emissary.
In the cell, the Doctor and Jamie are trying to triangulate the signal controlling the Yeti. As they do, Travers awakes and is perfectly fine.
Khrisong is distraught about the death of the monk. Victoria enters the courtyard and speaks with the voice of Padmasambhava to urge them to leave and not to blame the strangers, who are innocent of any evil. Victoria is freed from her trance whilst orders are given to free the Doctor and his friends. The monks prepare to leave.
Soon Jamie and Victoria are reunited, but she is still dormant. The only time she responds is to the Doctor's voice when she begs to leave the monastery. Thonmi believes she must have gone to the Inner Sanctum — he also drops the knowledge that she believed that Padmasambhava and the Doctor knew each other. Riled by this information the Doctor sneaks away.
Padmasambhava begs to be released now that he has "brought the world to its end", but he is thwarted. The Doctor enters and speaks to his old friend. Padmasambhava says he encountered the formless Great Intelligence on the astral plane, and the entity borrowed his form to conduct an experiment, which he was told was harmless but is now out of control. The Doctor asks questions he needs to help save the monastery, but the old man slumps forward, his heart stopped. The Doctor leaves and returns to his friends. Seconds later the body of Padmasambhava rises back up.
Jamie tries to awaken Victoria but is thwarted. The Doctor helps Victoria recover from her trance-like state by counter-hypnotising her. She forgets everything that has happened since she left the cell earlier.
Travers and the Doctor venture outside to try to triangulate the signal. They leave to find the group of dormant Yetis from earlier. Travers goes to try to rile them, but they move of their own accord before he gets too close. The Doctor is stunned when he gets the readings.
Khrisong prepares his monks to leave when the Doctor returns with news that the Yetis are being controlled from the monastery itself. Travers' memory begins to return and he remembers Songsten placing the pyramid in the cave.
At the cave, the physical manifestation of the Intelligence is growing stronger and pouring forth menacingly.
Episode six[[edit] | [edit source]]

After learning of Songsten's involvement with the Yetis, the Doctor is concerned as Khrisong is currently with the Abbott.
In the inner sanctum, Songsten has submitted to the Great Intelligence, despite the voice of Padmasambhava lamenting the great evil. Khrisong arrives to get Songsten away. Songsten disarms Khrisong and strikes him in the neck. Padmasambhava battles with his controllers, begging to be let go. The Doctor and his friends arrive and overpower Songsten, realising he too has been entranced to commit the will of the Intelligence. Songsten is bound and returned to the other monks. Khrisong's last words to the Doctor are that it is not Songsten to blame but instead Padmasambhava.
Thonmi gives news to the monks of Khrisong's death at the hands of Songsten. The monks go to kill Songsten, but the Doctor stops them. The violent nature of Songsten persuades them that it is not the Songsten they know and that he is being controlled. Thonmi tries to blame Padmasambhava, but the Doctor insists he is being controlled too. The Doctor tells all the monks to flee quickly so he can defeat the Intelligence. He keeps Jamie, Victoria and Thonmi at his side while the others flee. Travers doesn't believe that Songsten is innocent so goes to the cave to destroy the pyramid. Using his suggestible nature, as he did on Victoria, the Doctor discovers from Songsten that the Yeti are designed to serve the Great Intelligence and that Padmasambhava and they spent 200 years building the creatures. He goes on to explain that the Great Intelligence has now broken their promise to stay in the cave and are demanding the whole mountain. The Doctor plans to destroy the Intelligence's equipment to control the robotic Yeti. Songsten says the control unit is behind Padmasambhava's throne. Victoria is taught the Jewel of the Lotus prayer to act as a deterrent to Padmasambhava hypnotising her again.
Padmasambhava moves the Yeti to attack the monastery, narrowly missing collision with Travers en route. When Travers reaches the mountain, he sees the mountain top covered in a thick pulsating substance which makes it impossible to climb.
The monks leave the monastery, including the warrior monks — despite them offering their support to the Doctor's efforts.
The Yeti begin to surround the monastery gate. Travers sees this from a distance and decides to hang back.
The Doctor and his companions return to the inner sanctum. Padmasambhava is incensed the Doctor hasn't left. The Doctor demands to know why the Great Intelligence has seized his old friend's body. He replies that the Doctor's brain wouldn't be able to comprehend it. The Doctor doubles over in pain and, as Padmasambhava rises from his chair, gives Jamie and Thonmi the shout to enter the control room. Padmasambhava moves the Yeti in. Victoria tries to stop him. He tries to hypnotise her. She uses the prayer to stop it.
Seeing the Yeti enter, Travers follows.
Despite her best efforts, Victoria is paralysed. The Doctor shouts to Jamie to destroy the pyramid. Jamie finds a sphere similar to the ones seen on the mountain and destroys it. The Yetis chests implode and the creatures are immobilised, but Padmasambhava scoffs at this minor set back. Travers appears and shoots Padmasambhava, but the old man is impenetrable to bullets. Jamie finds a pyramid in the control room and destroys that. A huge tremor rumbles through the monastery. The mountaintop explodes. Padmasambhava begins to disintegrate. His final words are to the Doctor, thanking his old friend for setting him free. The Doctor sends Thonmi to fetch the monks back. The Doctor and his companions wish to leave and, despite Thonmi's protestations, do so with Travers as their guide.
The Doctor and his companions soon discover a fallen Yeti. Crestfallen, Travers says this is the end of his mission, then he sees another Yeti — a real one — and dashes off in pursuit. The Doctor, Jamie and Victoria head back off to the TARDIS — hoping to find somewhere warmer on their next trip.
Cast[[edit] | [edit source]]
- Dr. Who - Patrick Troughton
- Jamie McCrimmon - Frazer Hines
- Victoria Waterfield - Deborah Watling
- Professor Edward Travers - Jack Watling
- Padmasambhava - Wolfe Morris
- Abbot Songsten - Charles Morgan
- Khrisong - Norman Jones
- Rinchen - David Grey
- Thonmi - David Spenser
- Sapan - Raymond Llewellyn
- Ralpachan - David Baron
- Yeti - Reg Whitehead, Tony Harwood, Richard Kerley, John Hogan
Uncredited cast[[edit] | [edit source]]
- John's Body - Reg Whitehead
- Warrior Monks - Pat Gorman, Crawford Lyle, Richard King, Michael Durham, Antonio de Maggio, Barry Dupres
- Lamas - Richard Atherton, Bobby Beaumont, Terry Nelson, Charles Finch, Jack Rowland, Roger Bowdler (all DWM 224)
Crew[[edit] | [edit source]]
- Assistant Floor Manager - Roselyn Parker
- Costumes - Martin Baugh
- Designer - Malcolm Middleton
- Film Cameraman - Peter Bartlett
- Film Cameraman - Ken Westbury
- Film Editor - Philip Barnikel
- Make-Up - Sylvia James
- Special Sounds - Brian Hodgson
- Studio Lighting - Howard King
- Studio Sound - Norman Bennett
- Studio Sound - Alan Edmonds
- Title Music - Ron Grainer and the BBC Radiophonic Workshop, arranged by Delia Derbyshire
- Visual Effects - Ron Oates, Ulrich Grosser
- Production Assistant - Marjorie Yorke
- Writer - Mervyn Haisman, Henry Lincoln
- Story Editor - Peter Bryant
- Director - Gerald Blake
- Producer - Innes Lloyd
Animation Team[[edit] | [edit source]]
Animation by Digitoonz Media & Entertainment PVT LTD
- Studio Head - Prashant Kumar
- Animation Director - Ayan Banerjee
- Animation Supervisors
- Design Supervisors
- Animatic Supervisor - Biman Mohanta
- Background Supervisors
- CG Background Team
- Project Coordinator - Modhmita Bera
- Production Coordinator (Rig) - Abhishek Singh
- Rig Suprvisors
- Pre-Composition
- Head of Production - Mantosh Kumar
- CEO/Founder - Vikas Kumar
- Post-Production Editing, Compositing & Grading by Shapeshifter
- Head of Studio - David Devjak
- Technical Director - Connor Hodder
- Post-Production Coordinator - Adam Boys
- Compositors
- Sound Restoration & Mastering - Mark Ayres
- With thanks to Graham Strong
- Opening Titles & 3D Tardis Exterior - Rob Ritchie
- Additional 3D Modelling - Matt Umney
- Concept Design - Ioan Morris
- Original Character Designs - Luke Marcatili
- Script Supervisor - Mark B. Oliver
- QAR - The Ark
- Business & Legal Affairs - Linda Duncan
- Production Finance - Aisha Bhatti
- Consumer Products
- Associate Producer - Damian Shanahan
- Produced and Directed by
- Executive Producers for Big Finish Creative
- Executive Producer for BBC Studios - Russell Minton
Worldbuilding[[edit] | [edit source]]
- The Doctor plays "Twinkle Twinkle Little Star" on his recorder.
Story notes[[edit] | [edit source]]
- The working title for this story was The Abominable Snowman.
- This story saw the first appearance of the Great Intelligence. It would return later that season in The Web of Fear [+]Loading...["The Web of Fear (TV story)"] but it would not make its next appearance until forty-four years later in The Snowmen [+]Loading...["The Snowmen (TV story)"]. This marked the longest interval between consecutive television appearances by an antagonist in the franchise's history until the return of the Toymaker in The Giggle [+]Loading...["The Giggle (TV story)"].
- Only episode two of this six-part story exists in the BBC Archives as a 16mm black & white film telerecording. It was returned in 1982, having been recovered from the collection of a retired BBC projectionist.
- Episode two was shown alongside episode one of the The Web of Fear (then the only surviving episode of the serial) as part of BSB's Doctor Who Weekend in September 1990, under the banner of The Yeti Rarities.
- The script did not describe the Yeti in any great detail so costume designer Martin Baugh decided that they should have a bear-like appearance and be covered in thick fur. The costumes were built over a bamboo frame padded with foam rubber and sprayed with black paint.
- Deborah Watling named this as her favourite story, in part due to the experience of working with her father.
- According to Jack Watling, one of the actors playing the Yeti fell hundreds of feet during filming and was feared dead, but was merely inebriated and fortunately cushioned by the foam rubber inside the costume.
- A shot of Padmasambhava's wizened head melting was considered too horrific and went unused.
- Filming in Wales was so cold that Frazer Hines wore rolled up trousers under his kilt.
- Deborah Watling claimed to have suggested her father Jack Watling for Professor Travers. She told the Radio Times in 1973 that the first sight of him in his beard caused both of them to corpse.
- This was the first story to not have any created background music, with chanting being used to create atmosphere.
- This was the first story to have the new theme arrangement for the end credits instead of the original theme for any Second Doctor story. The next time the theme would be used would be in Spearhead from Space [+]Loading...["[[Spearhead from Space (TV story)]]"].
- It was initially reported that the animated reconstruction of this story would be the last Doctor Who animation due to BBC America withdrawing their funding.[4] Neither BBC America or BBC Studios confirmed nor denied these claims though it eventually proved to not be the case with the news in August 2023 that The Underwater Menace [+]Loading...["[[The Underwater Menace (TV story)]]"] was being animated[5].
- David Spenser was Victor Pemberton's partner.
- The production was beset with rainfalls which delayed filming for two days and caused the crew to work on what was supposed to be their rest day. The rain also ensured that there would be no snow on the ground, which Gerald Blake had hoped would help sell Snowdonia as a stand-in for the Himalayas. The ground was instead muddy and slippery, causing trouble for the actors, particularly those in the Yeti costumes, who found themselves falling frequently. For episode six, a regular Yeti costume was used with its bamboo frame and extra stuffing removed.
- As well as being the only surviving episode, the original 35mm film inserts for episode two still exist in the BBC Archives, but the film inserts for all the other episodes is sadly thought to have been destroyed.
- For the latest DVD and Blu-ray release of the serial in animated form, the surviving episode has been remastered using these original inserts, making it not only one of few stories produced in the black and white era to have original surviving film elements, but one of few to use said elements to create a perfectly high picture quality for its home media release.
- Very similar to The Wheel in Space [+]Loading...["[[The Wheel in Space (TV story)]]"], the only known copy of The Abominable Snowmen to not have been confirmed as destroyed is the prints sent to Nigeria. Given The Enemy of the World [+]Loading...["[[The Enemy of the World (TV story)]]"] and The Web of Fear [+]Loading...["[[The Web of Fear (TV story)]]"] (except for Episode 3, which is disappeared before its shipment to the BBC) are both recovered from the country and The Abominable Snowmen wasn't, its fate is mysterious. It was possibly sent to another country off-record or the episodes were obtained by private collectors.
- Henry Lincoln knew Patrick Troughton as they previously acted together in several plays. After Troughton had started on Doctor Who, Lincoln encountered him on the streets of Kew and learned that the actor was frustrated by the lack of stories set on Earth. Having read the completed scripts for this serial while on holiday in France, Troughton sent Lincoln a postcard which read "Sooper Script Specially No 6. Very Happy. Thank you. Do some more please. Pat T".
- Before chosing the Yeti as a monster, Henry Lincoln considered writing a script about Loch Ness Monster.
- Mervyn Haisman and Henry Lincoln were keen to capture Tibetan culture accurately and so used authentic names and details - Padmasambhava was an eighth-century Buddhist master who was invited to Tibet by its king, Trisong Detsen; “Khrisong” was an alternative transliteration of “Trisong”; Songsten and Ralpachan were named for other Tibetan monarchs; Yeshe Rinchen was a Tibetan imperial preceptor; Sapan was another name for the Buddhist scholar Sakya Pandita, both hailed from the thirteenth century; and Thonmi Sambhota was a seventh-century figure, traditionally held to be the creator of the Tibetan script.
- Songsten originally had the more authentic name “Songtsen”.
- The production team spent six days filming in Snowdonia. This was the longest location filming the series had experienced at the time.
Changes in the animated version[[edit] | [edit source]]
- There is snow on the ground when the time travellers step out of the TARDIS.
- At the beginning of the story, Jamie and Victoria are wearing the same clothes they will later wear in Fury from the Deep [+]Loading...["[[Fury from the Deep (TV story)]]"].
- The monastery sits atop a small mound.
- The monks are more Asian in appearance and wear shoes rather than sandals.
- The Yeti are stockier around the waist.
- Ralpachan has a scar across his left eye.
- Sapan has a white beard.
- The door to the Doctor's cell leads outside.
- When Jamie and Victoria get sealed in the cave in Episode One, it is not made clear that the boulder is pushed across the entrance by a Yeti.
- Jamie puts the control sphere he finds in the cave in his pocket rather than his bag.
- Padmasambhava is faintly visible behind a curtain when speaking in the sanctum.
- The control sphere rolls faster.
- There are fewer Yeti models.
- Before Songsten places the pyramid among the control spheres, the majority of the spheres disappear after he adds the last one.
- The pyramid in the cave forms a series of interlacing lines rather than a glow.
- Padmasambhava's entire body is grey, his eyes often glow and he levitates during the final confrontation.
Ratings[[edit] | [edit source]]
- Episode one - 6.3 million viewers
- Episode two - 6.0 million viewers
- Episode three - 7.1 million viewers
- Episode four - 7.1 million viewers
- Episode five - 7.2 million viewers
- Episode six - 7.4 million viewers
Myths[[edit] | [edit source]]
- Ralpachan was played by David Baron, often said to be the playwright Harold Pinter under a stage name. Pinter has since denied this rumour. (David Baron was indeed Pinter's name for the purposes of Equity, the British actors' union, but he had relinquished it by the time this serial was produced.)
Filming locations[[edit] | [edit source]]
- Ealing Television Film Studios, Ealing Green, Ealing
- Lime Grove Studios (Studio D), Lime Grove, London
- Nant Ffrancon Pass, North Wales (Mountainside)
Production errors[[edit] | [edit source]]
Original Production[[edit] | [edit source]]
- In Episode One, snow is seen on the TARDIS scanner; however, when the time travellers emerge, not a flake is visible.
- In the aerial shot of the monastery, it clearly has a large open courtyard. But in all the shots inside the courtyard, the lack of light indicates that it has a roof.
- In the first close up shot of the control sphere in Episode Two, the camera is visible in it's reflection.
Animated Version[[edit] | [edit source]]
- Jamie puts the control sphere in his pocket in Episode Two. But his pocket is clearly very small and would not be able to hold an object that size.
- Just as the Doctor, Jamie and Victoria are leaving, Ralpachan strikes the gong but the sound doesn't come until a few seconds later.
Continuity[[edit] | [edit source]]
- The Doctor encounters the Great Intelligence, the Yeti, and Professor Travers again. (TV: The Web of Fear [+]Loading...["[[The Web of Fear (TV story)]]"], HOMEVID: Downtime [+]Loading...["[[Downtime (home video)]]"], PROSE: Downtime [+]Loading...["[[Downtime (novelisation)]]"])
- A Yeti, either robotic or genuine, appears in the Death Zone. (TV: The Five Doctors [+]Loading...["[[The Five Doctors (TV story)]]"])
- The Eleventh Doctor fights the Great Intelligence, both before (TV: The Snowmen [+]Loading...["[[The Snowmen (TV story)]]"]) and after (TV: The Bells of Saint John [+]Loading...["[[The Bells of Saint John (TV story)]]"]) this encounter. It returns to take revenge on the Doctor throughout his time stream. (TV: The Name of the Doctor [+]Loading...["[[The Name of the Doctor (TV story)]]"])
- The Doctor wears his fur coat several times. (TV: The Ice Warriors [+]Loading...["[[The Ice Warriors (TV story)]]"], The Five Doctors [+]Loading...["[[The Five Doctors (TV story)]]"], Time and the Rani [+]Loading...["[[Time and the Rani (TV story)]]"], The Name of the Doctor [+]Loading...["[[The Name of the Doctor (TV story)]]"], COMIC: A Cold Day in Hell! [+]Loading...["[[A Cold Day in Hell! (comic story)]]"], AUDIO: Beyond the Ultimate Adventure [+]Loading...["[[Beyond the Ultimate Adventure (audio story)]]"])
- The Fifth Doctor and his companions Peri Brown and Erimem visit Tibet in 1917. (AUDIO: The Roof of the World [+]Loading...["[[The Roof of the World (audio story)]]"])
- While giving Erimem a tour of the TARDIS, she and the Fifth Doctor come across the coat in the wardrobe. When Erimem asks what kind of animal it is, the Doctor replies "a polyester...fierce animals, no one's ever caught one alive..sharp teeth...terrible things." Erimem realises he's teasing her. (AUDIO: No Place Like Home [+]Loading...["[[No Place Like Home (audio story)]]"])
- Torchwood India later retrieved several of the Robot Yeti's control spheres from the Himalayas. (AUDIO: Golden Age [+]Loading...["[[Golden Age (audio story)]]"])
- According to one account, the Great Intelligence was one of the Elder Gods. (AUDIO: Black and White [+]Loading...["[[Black and White (audio story)]]"]) Another account gave a different origin (or development) of the Great Intelligence. (TV: The Snowmen [+]Loading...["[[The Snowmen (TV story)]]"]) The Lethbridge-Stewart series of novels, under direct license from the Haisman Literary Estate, has gone to great lengths to explain how the various origins of the Great Intelligence fit together, by suggesting it is a multi-dimensional being that manifests in different ways across different timelines, all an imprint of Sunyata, who exist in the void between realities. (PROSE: The Forgotten Son [+]Loading...["[[The Forgotten Son (novel)]]"], Times Squared [+]Loading...["[[Times Squared (novel)]]"], Night of the Intelligence [+]Loading...["[[Night of the Intelligence (novel)]]"], AUDIO: Time of the Intelligence [+]Loading...["[[Time of the Intelligence (audio story)]]"])
- On the Inferno Earth, Travers was killed during his expedition to the Himalayas in 1935 while John Angus Mackay survived. (PROSE: The Schizoid Earth [+]Loading...["[[The Schizoid Earth (novel)]]"])
- Jamie refers to a recent visit to the Cybermen's tomb. (TV: The Tomb of the Cybermen [+]Loading...["[[The Tomb of the Cybermen (TV story)]]"])
Home video and audio releases[[edit] | [edit source]]
DVD releases[[edit] | [edit source]]
Only episode two exists in the BBC Archives. It was released on The Troughton Years VHS, before later being released in a digitally re-mastered form on the Lost in Time DVD box set alongside a handful of other surviving clips (also digitally restored) in 2004.
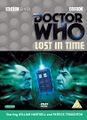
Lost in Time Region 2
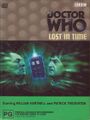
Lost in Time Region 4
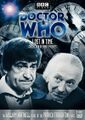
Lost in Time Region 1
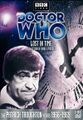
Lost in Time Region 1 (Disc 3)
Lost in Time Region 4 Re release


An animated version of the story, with both a Black & White and Colour version, was released on DVD in the UK on 5 September 2022 and Australia in October 2022. Additionally a Blu-ray and Steelbook edition was released in the UK and a Blu-ray edition released in Australia, simultaneously with their respective DVD releases.
Special Features[[edit] | [edit source]]
- Commentary (moderated by Toby Hadoke):
- Episode 1 - Production assistant Judy Shears
- Episode 2 (live-action) - Actor Deborah Watling (Victoria) (recorded in 2004)
- Episode 2 (live-action) - Actor Frazer Hines (Jamie) and film camera assistant John Walker
- Episode 2 (animated) - Animation producer and director Gary Russell
- Episode 3 - Cameraman Bernard Newnham
- Episode 4 - Actor Frazer Hines and film camera assistant John Walker
- Episode 5 - Special sound designer Brian Hodgson and make-up designer Sylvia James
- Episode 6 - Animation producer and director Gary Russell
- 8mm Home Movie Footage - Location work during September 1967 as captured by actor Frazer Hines (Jamie) and director Gerald Blake.
- The Abominable Snowmen Episode Four - Existing material featured in Late Night Line-Up broadcast on 25th November 1967.
- 31 Who - 31 West host Shyama Perera and former Doctor Who producer John Nathan-Turner interview writer Mervyn Haisman about the Yeti serials for the BSB programme 31 Who recorded on 8th September 1990 for transmission on 23rd September 1990.
- The Abominable Snowmen - Restored version of Episode Two, with reconstructions of the other episodes from off-screen Tele-snaps and soundtrack recordings. This has optional narration by Fraser Hines originally recorded for BBC Worldwide and released in July 2001.
- Troughton in Tibet: Making 'The Abominable Snowmen' - Actor Frazer Hines (Jamie) and Toby Hadoke present recollections of the production of the serial from make-up supervisor Sylvia James, film camera assistant John Walker, actors John Hogan (Yeti) and Ray Llewellyn (Sapan), floor assistant Bernard Doe, location visitor Alison Pagent and Giles Watling (son of Jack Watling and brother of Deborah Watling). Other contributors include writer Mervyn Haisman (recorded in 1990), actor Deborah Watling (Victoria; recorded in 2011), actor Jack Watling (Travers; recorded in 1995), actor David Spenser (Thonmi; recorded in 1987) and production assistant Judy Spears (recorded in 2006).
- Photo Gallery - Images from the BBC Photo Library accompanied by sound effects and music for the serial by Brian Hodgson.
- Teaser Trailer - The trailer for the animated version of the adventure as released on 23rd November, 2021, the series' 58th anniversary.
- Scripts - A full set of camera scripts and 'Radio Times' cuttings for 'The Abominable Snowmen' in PDF format accessible via a computer DVD or Blu-Ray ROM drive.
- All known copies of episode two, including audio recordings made by fans during the original broadcast in 1967, contain a brief audio drop-out late in the episode. The Doctor is examining the captured Yeti and is supposed to say, "You were right about one thing, Victoria. This creature certainly doesn't seem to be flesh and blood." In what appears to have been a fault with the master videotape recording, the sound cuts in with "...toria." The fact that the audio recordings of episode two also include this loss of sound indicates that the episode was transmitted with the fault intact. The original VHS release of episode two was edited to remove the silent section and "...toria", coming in instead on the Second Doctor's next line. This was done to avoid customer complaints that the tape was faulty, whilst maintaining the running time of the episode. The DVD release contains a "patchwork repair" of the fault, originally performed by Mark Ayres of the Doctor Who Restoration Team for the BBC Audio CD release, which uses the appropriate words spoken by Troughton with the correct vocal inflexions, taken from other Second Doctor episodes.
Region 2 cover
Region 4 cover
Region 2 Blu-ray cover

Region 2 Limited Edition Steelbook


Audio releases[[edit] | [edit source]]
- This story's soundtrack was released on CD by BBC Audio, with linking narration by Frazer Hines, on 2 July 2001.
- The story was re-released in two box sets, first in the Yeti Attack set (with The Web of Fear, released 7 July 2003), and second as part of the Doctor Who: The Lost TV Episodes - Collection Four set (released 2 February 2012).
- The story was released again on Vinyl by Demon Records, also with the Frazer Hines narration, on 27 September 2019.
CD release
Yeti Attack box set
The Lost TV Episodes - Collection Four
Vinyl Record release


External links[[edit] | [edit source]]
- The Abominable Snowmen at the BBC's official site
- The Abominable Snowmen at RadioTimes
- The Abominable Snowmen at BroaDWcast
- The Abominable Snowmen at the Doctor Who Reference Guide
- The Abominable Snowmen at Shannon Sullivan's A Brief History of Time (Travel)
- The Abominable Snowmen at The Locations Guide
- Photonovel of The Abominable Snowmen on the Doctor Who website
| ||||||||||||||||||||||
- ↑ https://www.doctorwho.tv/news/?article=missing-adventure-the-abominable-snowmen-animation
- ↑ https://www.doctorwho.tv/news-and-features/the-abominable-snowmen-cover-art-and-special-features-revealed
- ↑ https://cultbox.co.uk/news/missing-doctor-who-story-the-abominable-snowmen-to-be-animated-in-2022
- ↑ https://www.radiotimes.com/tv/sci-fi/doctor-who-animated-episodes-cancelled-newsupdate/
- ↑ https://www.radiotimes.com/tv/sci-fi/doctor-who-underwater-menace-animation-newsupdate/