The Abominable Snowmen (TV story): Difference between revisions
m (Robot: Automated text replacement) |
m (Robot: Removing from Category:Stories that have been novelised) |
||
| Line 214: | Line 214: | ||
[[Category:Season 5 stories]] | [[Category:Season 5 stories]] | ||
[[Category:Yeti stories]] | [[Category:Yeti stories]] | ||
[[Category:Six part serials]] | [[Category:Six part serials]] | ||
[[Category:The Great Intelligence stories]] | [[Category:The Great Intelligence stories]] | ||
Revision as of 22:53, 12 June 2013
The Abominable Snowmen was the second story in season five of Doctor Who. This story introduced the Robot Yeti and the Great Intelligence. Only episode two still exists in the BBC archives.
Synopsis
Mysterious forces are at work in 1930s Tibet. The once gentle Yeti have turned savage and besieged a Buddhist monastery. The Second Doctor, Jamie and Victoria arrive expecting a friendly welcome from the abbot, but soon become ensnared in the plans of the extradimensional being known as the Great Intelligence.
Plot
Episode one

Professor Edward Travers, an anthropologist and explorer, is awoken from his sleep by the screams of his companion. He is horrified to see a lumbering, hairy creature standing over his friend's lifeless body. It grabs Travers' gun and twists it into scrap metal as the terrified man scampers into the night.
The TARDIS has materialised on a cold and windy hillside. The Doctor is delighted at their destination. He tells Jamie and Victoria to start searching for what he calls a "Holy Ghanta". When Jamie asks where they are, the Doctor says they have landed in Tibet, and the Det-Sen Monastery will "give them a welcome of a lifetime" if they arrive with the Ghanta: a bell and holy Buddhist relic which the Doctor took some three hundred years ago for safe-keeping.
While the Doctor steps outside in an extremely furry coat to investigate, Jamie and Victoria find the Ghanta and an impressive-looking sword which Jamie keeps. Meanwhile the Doctor is certain he is being watched and elects to travel to the monastery first to prepare the way. En route, he finds the remains of Travers' camp and the dead body. He takes the rucksack with him as evidence.
Victoria soon gets bored of the TARDIS and convinces Jamie to explore. Jamie is convinced that as a Highlander he'll be unaffected by the harsh chill, but soon discovers otherwise. They find huge animal footprints around the TARDIS.
The Doctor arrives at the monastery, clutching the remains of Travers' rifle and rucksack. There is no response when he knocks on the huge wooden doors. The inner courtyard is deserted. However, when he turns back to the door, his route is blocked by a group of armed monks. Travers is also present and before the Doctor can explain his presence, he spots his rucksack in the Doctor's hand. Travers is convinced the Doctor is responsible for the death of his friend, despite his earlier claims to the monks that a beast had done so.
The Doctor loudly protests his innocence to the peaceful monks, but Travers insists he is lying. The leading warrior monk, a gruff man by the name of Khrisong, says the matter would be of little consequence had some of their own not also been killed. The Doctor is thrown into a cell to await the monks' decision. Khrisong is not sure of Travers or why the stranger has come to the monastery.
Back on the hillside, Jamie and Victoria have followed the trails of footprints right to the mouth of a deep cave. At first, Jamie is unwilling to enter it for fear of some savage animal, but he changes his mind when he spots timbers holding up the roof. Victoria sees a huge creature at the cave mouth, and the pair watch in horror as massive claws push a boulder that traps them inside.
The Doctor is increasingly irritated in the confines of his cell. He climbs up to a window to peer outside. Travers pops his head through a hatch and mockingly informs him of the hundred-foot drop beneath the window. He accuses the Doctor of being a sabotaging journalist. When the Doctor asks what Travers is talking about, Travers cries, "You know! The Yeti! The Abominable Snowmen!"
The Doctor's response is simple enough – he knows from experience that the Yeti are naturally timid, so they aren't the culprits. He certainly doesn't have the strength of the beasts himself, for all his fur. Travers claims, "Khrisong will find out the truth".
Indeed, the warrior monk is in conference in the courtyard over the fate of this apparent murderer. The other monks doubt Travers can be certain of his claims, but Khrisong says, "He is an Englishman. Why should he lie?" The monks are almost certain the Yeti are somehow responsible. Khrisong believes this odd shift in behaviour makes the stranger more threatening – he requests a chance to prove the Doctor's guilt. The monks recoil in horror: "You are asking us to condemn a man to death." The more peaceful monks elect to turn over the matter to the Abbot after prayer. Once they have gone, Khrisong ignores their decision and orders the Doctor brought to him.
Back in the darkness of the sealed cave, Jamie has found a pyramid of silver spheres placed on a raised plinth. Before either can ponder their significance, the boulder shifts again and the lumbering form of a Yeti enters the cave, trapping the terrified travellers. Victoria screams as Jamie tries to defend her from the monster with his sword, only to see it snapped in two by the creature's hands as it lumbers toward them....
Episode two

Jamie and Victoria evade the Yeti and depart with one of the strange spheres. They head toward the monastery, where the Doctor is detained on Khrisong’s orders. He has, nevertheless, given the Ghanta to the friendly monk Thonmi. The novice takes it to the private chamber of Abbot Songsten, who is in communion with the master of the monastery, Padmasambhava. The ancient spiritual guide of the monastery knows the Doctor personally from his previous visit and though he knows of the Doctor's wisdom, he fears he will intervene in the Great Plan. Thonmi is told to depart, his memory wiped of what he has heard, with the instruction of the Abbot that the Doctor is to be released without harm.
The Doctor has been placed on trial. To test whether he controls the Yeti, he is tied to the monastery doors to lure the Yeti out. Travers has met Jamie and Victoria, who convince him the Doctor is no threat. The trio return to the monastery to see the Doctor freed on the Abbot's instructions. Soon after, the Yeti advance in an abortive attack on the monastery. One is overpowered and rendered dormant. The Doctor examines the creature and deduces it is some kind of robot, controlled by a missing spherical unit from its chest cavity. Elsewhere in the monastery, the sphere brought back by Jamie comes to life.
Episode three

Travers is worried that the real Yeti are threatened by the robot ones, but others suspect he is the one controlling the robots. Outside the monastery he observes two of the robots come to life and head for Det-Sen. It soon appears the creatures are under the control of Padmasambhava, who is moving miniature Yeti like chess pieces around a map of the area.
Inside the monastery the sphere slowly makes its way toward the dormant Yeti robot with the Doctor. Monks look for it, having worked out its purpose. Khrisong finds a sphere outside the walls and the others observe the two Yeti retrieving it without harming it. The Doctor concludes the two were obeying specific orders. Khrisong is overawed by the situation. He begins to trust the Doctor, who decides to try to return to the TARDIS with Jamie for equipment to track the missing sphere. The pulsing globe reaches the dormant Yeti and revives it, causing the robot to menace Victoria and her new friend Thonmi.
Episode four

The awakened Yeti fights its way out of Det-Sen, killing warrior monks in its way. Khrisong is angry that Thonmi opened the door to allow it to flee – albeit to avoid further bloodshed. Victoria and Thonmi are imprisoned for supposedly reviving the creature. The freed Yeti takes the sphere to the cave on the mountain, unaware it has been observed by Travers. Songsten himself soon arrives, guarded by Yeti and bearing a glowing pyramid of spheres.
The party deposits the pyramid in the cave and departs. Travers sneaks into the cave and finds the pyramid pulsing with life, cracking open and oozing a strange cobweb substance. He flees in terror and heads to the monastery, following the path taken by Songsten. The Abbot informs Padmasambhava their plan is working. The old master says the Great Intelligence is already taking on corporeal form. To prepare for the next phase, Padmasambhava orders all monks leave the monastery. This order is relayed throughout Det-Sen. Khrisong is furious at such a command and is resistant.
When the Doctor and Jamie reach the TARDIS they find it guarded by another Yeti. It is inactive and the Doctor takes out its control sphere for examination. He gets a tracking device from the TARDIS but moments later, in response to the pyramid, the sphere comes to life. It is only prevented from re-entering the dormant Yeti when Jamie lodges a rock in the open chest cavity.
They head back to the monastery but the sphere allows them to be pinpointed by their enemies and five Yeti are sent to deal with them. They escape only by giving up their sphere. When they return to the monastery the Doctor forges an uneasy new alliance with Khrisong to enable the monks to stay at the monastery. Realising the monks will not leave peacefully, Songsten opens the gates of the monastery to more Yeti.
Victoria has given her jailers the slip and ventured alone to the Inner Sanctum of the monastery where, against all the commands, she sees the ancient and wizened face of the Master Padmasambhava.
Episode five

Victoria realises the ancient man manipulating the small Yeti figures is ordering the robots around the countryside. He wipes her mind of their meeting and summons more Yeti to attack. Elsewhere in the monastery, Travers has returned but is delirious and incoherent in his ramblings about the glowing pyramid and a great evil that threatens them all. On command, the Yeti retreat from the monastery again, killing a monk named Rinchen before they depart. Even Khrisong realises the monks must leave.
Padmasambhava wished only to scare the monks away, not kill them. He sends Victoria as his emissary to urge them to leave and not to blame the strangers, who are innocent of any evil. When the Doctor discovers Padmasambhava is still alive after three hundred years, he becomes ever more concerned. He goes to the inner sanctum and confronts his old friend.
Padmasambhava says he encountered the formless Great Intelligence on the astral plane and the entity borrowed his form to conduct an experiment. It is out of control. The old man seems to die, lamenting his part in the crisis. The Doctor leaves and returns to his friends. Seconds later the body of Padmasambhava is reanimated by the Great Intelligence.
The Doctor helps Victoria recover from her trance-like state. He then helps Travers, who explains about the cave and the pyramid. The Doctor pieces together the nature of the threat while Travers recalls that Songsten was in the cave too. It is clear Songsten is the link between the Yeti and the monastery. At the cave, the physical manifestation of the Intelligence is growing stronger and pouring forth menacingly.
Episode six

In the inner sanctum, Songsten has submitted to the Great Intelligence, despite the voice of Padmasambhava lamenting the great evil. He slays Khrisong when the warrior monk arrives. The Doctor and his friends arrive and overpower Songsten, realising he too has been entranced to commit the will of the Intelligence. Songsten is bound and returned to the other monks. The violence of his manner persuades them he is the threat to Det-Sen. The Doctor tells all the monks to flee quickly so he can defeat the Intelligence. He keeps Jamie, Victoria and Thonmi at his side while the others flee.
The Doctor plans to destroy the Intelligence's equipment to control the robotic Yeti. They return to the inner sanctum. The Doctor distracts the being while Thonmi and Jamie start to destroy the equipment. Some Yeti still attack the Sanctum. It is not until these are destroyed that the robots become dormant once more. Destroying another pyramid of spheres expels the Intelligence. Left in peace, the aged Padmasambhava finally dies peacefully in the Doctor's arms.
With the danger over, the travellers depart the ruined monastery. Travers accompanies them up the mountain and his belief in the real Yeti is renewed when he spots one. He charges off to investigate as the TARDIS departs.
Cast
- The Doctor - Patrick Troughton
- Jamie McCrimmon - Frazer Hines
- Victoria Waterfield - Deborah Watling
- Professor Edward Travers - Jack Watling
- Padmasambhava - Wolfe Morris
- Songsten - Charles Morgan
- Khrisong - Norman Jones
- Rinchen - David Grey
- Thonmi - David Spenser
- Sapan - Raymond Llewellyn
- Ralpachan - David Baron
- Yeti - Reg Whitehead, Tony Harwood, Richard Kerley, John Hogan
Crew
- Assistant Floor Manager - Roselyn Parker
- Costumes - Martin Baugh
- Designer - Malcolm Middleton
- Film Cameraman - Peter Bartlett
- Film Cameraman - Ken Westbury
- Film Editor - Philip Barnikel
- Make-Up - Sylvia James
- Special Sounds - Brian Hodgson
- Studio Lighting - Howard King
- Studio Sound - Norman Bennett
- Studio Sound - Alan Edmonds
- Title Music - Ron Grainer and the BBC Radiophonic Workshop, arranged by Delia Derbyshire
- Visual Effects - Ron Oates, Ulrich Grosser
- Production Assistant - Marjorie Yorke
- Writer - Mervyn Haisman, Henry Lincoln
- Story Editor - Peter Bryant
- Director - Gerald Blake
- Producer - Innes Lloyd
References
- The Yeti are controlled by the Great Intelligence.
- The Yeti are simple but strong robots, created by Padmasambhava over two centuries, and controlled by the Intelligence.
- The Doctor has been to the Det-Sen Monastery before ("Every time I visit Det-Sen, the monastery seems to be in some kind of trouble"), including a visit in 1630 when he took the holy Ghanta into safekeeping. At least one visit must have taken place after the Doctor's first regeneration, as Padmasambhava says, "It is good to see [the Doctor's] face again".
- Thonmi says that the holy Ghanta has been missing for about two hundred years.
Story notes
- The character of Professor Travers is played by Jack Watling, the father of actress Deborah Watling, who plays Victoria.
- The character of Thonmi is played by David Spenser, who is the partner of Doctor Who writer Victor Pemberton, according to the Internet Movie Database.
- Episode 2 was shown alongside The Web of Fear episode 1 as part of BSB's Doctor Who Weekend in September 1990, under the banner of The Yeti Rarities.
Ratings
- Episode 1 - 6.3 million viewers
- Episode 2 - 6.0 million viewers
- Episode 3 - 7.1 million viewers
- Episode 4 - 7.1 million viewers
- Episode 5 - 7.2 million viewers
- Episode 6 - 7.4 million viewers
Myths
- Rapalchan was played by David Baron, often said to be the playwright Harold Pinter under a stage name. Pinter has since denied this rumour. (David Baron was indeed Pinter's name for the purposes of Equity, the British actors' union, but he had relinquished it by the time this serial was produced.)
Filming locations
- The North Wales mountain pass at Nant Ffrancon doubled as Tibet.
- Ealing Television Film Studios, Ealing Green, Ealing
- Lime Grove Studios (Studio D), Lime Grove, London
Production errors
- In episode one, snow is seen on the TARDIS scanner; however, when the travellers emerge not a flake is visible.
Continuity
- The Great Intelligence, the Yeti, and Professor Travers would return in the 1968 story TV: The Web of Fear and the 1995 spin-off video HOMEVID: Downtime and its novelisation, PROSE: Downtime. A reference to the Yeti is also made in TV: Eye of the Gorgon.
- A Yeti also appears in TV: The Five Doctors.
- This is the first appearance of the Doctor's fur coat. He would later wear it in TV: The Ice Warriors, TV: The Five Doctors, AUDIO: Beyond the Ultimate Adventure, TV: Time and the Rani, and COMIC: A Cold Day in Hell!.
- The Fifth Doctor and his companions Peri Brown and Erimem would visit Tibet in 1917. (AUDIO: The Roof of the World)
- Torchwood India later retrieved several of the Robot Yeti's control spheres from the Himalayas. (AUDIO: Golden Age)
- According to one account, the Great Intelligence was one of the Elder Gods. (AUDIO: Black and White) Another account gave a different origin (or development) of the Great Intelligence. (TV: The Snowmen)
- The Eleventh Doctor would fight the Great Intelligence in TV: The Snowmen and TV: The Bells of Saint John.
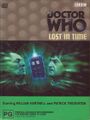
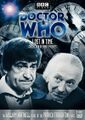
Home video and audio releases
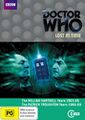
- Only Episode Two exists in the BBC Archives. It was released on the Troughton Years video. Episode Two was also released in digitally re-mastered form on the Lost in Time DVD.
- Remaining footage, plus a handful of clips, were also digitally restored and released on the Lost in Time DVD in 2004.
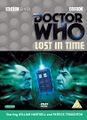
Lost in Time Region 2
Lost in Time Region 4
Lost in Time Region 1
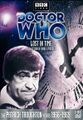
Lost in Time Region 1 (Disc 3)
Lost in Time Region 4 Re release


- All known copies of Episode Two, including audio recordings made by fans during the original broadcast in 1967, contain a brief audio drop-out late in the episode. The Doctor is examining the captured Yeti and is supposed to say "You were right about one thing, Victoria. This creature certainly doesn't seem to be flesh and blood." In what appears to have been a fault with the master videotape recording, the sound cuts in with "...toria." The fact that the audio recordings of Episode Two also include this loss of sound indicates that the episode was transmitted with the fault intact. The original VHS release of Episode Two was edited to remove the silent section and "...toria", coming in instead on the Second Doctor's next line. This was done to avoid customer complaints that the tape was faulty, whilst maintaining the running time of the episode. The DVD release contains a 'patchwork repair' of the fault, originally performed by Mark Ayres of the Doctor Who Restoration Team for the BBC Audio CD release, which uses the appropriate words spoken by Troughton with the correct vocal inflexions, taken from other second Doctor episodes.
- The soundtrack was released on CD, with linking narration by Frazer Hines, on 2 July 2001. It has been re-released in two box sets, first in the Yeti Attack set (with The Web of Fear, released 7 July 2003), and second as part of the Doctor Who: The Lost TV Episodes - Collection Four set (released 2 February 2012).

CD release
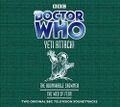
Yeti Attack box set
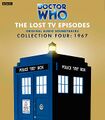
The Lost TV Episodes - Collection Four


External links
- The Abominable Snowmen at the BBC's official site
- The Abominable Snowmen at BroaDWcast
- The Abominable Snowmen at the Doctor Who Reference Guide
- The Abominable Snowmen at Shannon Sullivan's A Brief History of Time (Travel)
- The Abominable Snowmen at The Locations Guide
- The Abominable Snowmen transcripts
- Photonovel of The Abominable Snowmen, on the BBC website