Meglos (TV story): Difference between revisions
No edit summary |
Gingerfool (talk | contribs) mNo edit summary |
||
| (155 intermediate revisions by 52 users not shown) | |||
| Line 1: | Line 1: | ||
{{title dab away}} | |||
{{real world}} | {{real world}} | ||
{{ | {{ImageLinkTV}} | ||
{{Infobox Story | {{Infobox Story SMW | ||
|image = I am alive.jpg | |image = I am alive.jpg | ||
|novelisation = Meglos (novelisation) | |||
|novelisation=Meglos (novelisation) | |||
|series =[[Doctor Who television stories|''Doctor Who'' television stories]] | |series =[[Doctor Who television stories|''Doctor Who'' television stories]] | ||
|season number = | |season number = Season 18 (Doctor Who 1963)| | ||
|season serial number = 2 | |||
|story number = 110 | |story number = 110 | ||
|doctor = Fourth Doctor | |doctor = Fourth Doctor | ||
|companions = [[ | |companions = [[K9 Mark II]], [[Romana II]] | ||
|enemy = | |enemy = [[Meglos]] | ||
|setting = [[Zolfa-Thura]] and [[Tigella]], [[1980]] | |setting = [[Zolfa-Thura]] and [[Tigella]], [[1980]] | ||
|writer = | |writer = John Flanagan, Andrew McCulloch | ||
|director = [[Terence Dudley]] | |director = [[Terence Dudley]] | ||
|producer = [[John Nathan-Turner]] | |producer = [[John Nathan-Turner]] | ||
|epcount=4 | |epcount = 4 | ||
|broadcast date = | |broadcast date = 27 September - 18 October 1980 | ||
|network= | |network = BBC1 | ||
|format = 4x25-minute episodes | |format = 4x25-minute episodes | ||
|production code = [[List of production codes|5Q]] | |serial production code = [[List of production codes|5Q]] | ||
|prev = The Leisure Hive (TV story) | |prev = The Leisure Hive (TV story) | ||
|next = Full Circle (TV story) | |next = Full Circle (TV story) | ||
|made prev=State of Decay (TV story) | |made prev = State of Decay (TV story) | ||
|made next=Full Circle (TV story) | |made next=Full Circle (TV story) | ||
|clip=The Doctor's betrayal - Doctor Who Meglos - BBC | |clip = The Doctor's betrayal - Doctor Who Meglos - BBC | ||
}} | |clip2=I am the Doctor! - Doctor Who Meglos - BBC | ||
'''''Meglos''''' was the second | |clip3 = Caris encounters Meglos - Doctor Who Meglos - BBC | ||
|thwr = 2 | |||
|thwr2 = 72 | |||
}}{{dab page|Meglos (disambiguation)}} | |||
'''''Meglos''''' was the second serial of [[Season 18 (Doctor Who 1963)|season 18]] of ''[[Doctor Who]]''. It featured [[Jacqueline Hill]]'s return to the programme for the first time since the ''Doctor Who'' story ''[[The Chase (TV story)|The Chase]]'' in [[1965 (releases)|1965]]. However, she was not playing [[Barbara Wright]], but a whole new character - [[Lexa]]. | |||
''Meglos'' also allowed [[Tom Baker]] to play the Doctor and also the main antagonists of the story, making Baker the third actor of the Doctor to have played both the Doctor and one of the main antagonists in a story, following [[William Hartnell]] in ''{{nwlh|[[The Massacre (TV story)|The Massacre]]}}'', and [[Patrick Troughton]] in ''{{nwlh|[[The Enemy of the World (TV story)|The Enemy of the World]]}}''. | |||
''Meglos'' came into being after [[Christopher H. Bidmead]] purposefully sought out [[John Flanagan]] and [[Andrew McCulloch]] as new talent. Nathan-Turner was unimpressed with the ideas put forward and the serial was shuffled to various placements in the season, largely because it didn't feature [[Adric]]. | ''Meglos'' came into being after [[Christopher H. Bidmead]] purposefully sought out [[John Flanagan]] and [[Andrew McCulloch]] as new talent. Nathan-Turner was unimpressed with the ideas put forward and the serial was shuffled to various placements in the season, largely because it didn't feature [[Adric]]. | ||
Behind the scenes, ''Meglos'' was highly innovative as the [[ | Behind the scenes, ''Meglos'' was highly innovative as the [[BBC]]'s first use of [[Scene Sync]], a [[motion control]] technology that improved the believability of composite shots that used [[CSO]]. It would be the only ''Doctor Who'' serial to avail itself of the technology. Nevertheless, other BBC productions would use Scene Sync based on this successful test, such as [[Barry Letts]]' {{wi|Gulliver in Lilliput}}, starring [[Elisabeth Sladen]]. ([[DOC]]: ''[[The Scene Sync Story (documentary)|The Scene Sync Story]]'') | ||
== Synopsis == | == Synopsis == | ||
On [[Tigella]], two | On [[Tigella]], two opposing [[faction]]s are irrevocably divided over one fundamental issue: the [[Dodecahedron]], a mysterious artefact which provides the entire planet's [[energy]]. With the [[Savant (Meglos)|Savants]] and the [[Deon]]s locked in a crippling stalemate, and their [[civilisation]] on the brink of collapse, the Tigellan leader [[Zastor]] seeks the [[Fourth Doctor]]'s help. But the Doctor and [[Romana II]] have been trapped aboard [[the TARDIS]] in a [[time loop]] by [[Meglos]], the last of the [[Zolfa-Thuran]]s, who will stop at nothing to steal back the awesome power of the Dodecahedron. | ||
== Plot == | == Plot == | ||
=== Part one === | === Part one === | ||
In [[The Doctor's TARDIS|the TARDIS]], the [[Fourth Doctor]] and [[Romana II|Romana]] are repairing [[K9 Mark II|K9]] yet again. They | In [[The Doctor's TARDIS|the TARDIS]], the [[Fourth Doctor]] and [[Romana II|Romana]] are repairing [[K9 Mark II|K9]] yet again. They hover near the planet [[Tigella]]; the Doctor recalls an earlier visit when he befriended a man named [[Zastor]], leader of the [[Tigellan]]s, and decides to get in touch with him. | ||
On Tigella, a power loss occurs when a transformer breaks down. The inhabitants, living under the surface, find it hard to compensate. | On Tigella, a power loss occurs when a transformer breaks down. The inhabitants, living under the surface, find it hard to compensate. | ||
Arguments continue between the [[Deon]]s and the [[Savant]] | Arguments continue between the [[Deon]]s and the [[Savant (Meglos)|Savants]] over ownership of the [[Dodecahedron]], Tigella's power source and the Deons' deity. The Deons refuse the workers access to the Dodecahedron. Zastor, unable to decide, orders the Doctor sent for. [[Deedrix]] leads the workers in the belief that the Dodecahedron is merely an artefact; [[Lexa]], leader of the Deons, holds firm in her faith that the Dodecahedron is a [[god]]. | ||
On [[Zolfa-Thura]], a ship touches down. A party of [[Gaztak]]s led by General [[Grugger]] emerge. They bring forth an [[human|Earthling]], whom they stun. They brought him to the planet on the promise of reward. A hidden structure emerges from the ground. A door opens and the party enters. Within is [[Meglos]], a [[Zolfa-Thuran]]. | On [[Zolfa-Thura]], a ship touches down. A party of [[Gaztak]]s led by General [[Grugger]] emerge. They bring forth an [[human|Earthling]], whom they stun. They brought him to the planet on the promise of reward. A hidden structure emerges from the ground. A door opens and the party enters. Within is [[Meglos]], a [[Zolfa-Thuran]]. | ||
| Line 53: | Line 54: | ||
Grugger plans to steal the machinery, but Meglos traps him and his aide, [[Brotadac]], in the room. They agree to comply with his plan. | Grugger plans to steal the machinery, but Meglos traps him and his aide, [[Brotadac]], in the room. They agree to comply with his plan. | ||
{{video|Meglos' Transformation - Meglos - Doctor Who - BBC|thumb|left|[[Meglos]] transforms into Earthling form.}} | |||
They transfer | They then transfer Meglos' [[consciousness]] into the Earthling. His skin becomes cactus-like in appearance. Claiming the Doctor is a threat, Meglos traps him in a [[time loop]]. As Meglos turns around, it appears he has taken on the Doctor's appearance... | ||
=== Part two === | === Part two === | ||
| Line 60: | Line 61: | ||
Outside, the Gaztak ship lands. The Gaztaks stay with their ship whilst Meglos enters the Tigellan city and introduces himself. The Doctor and Romana break the loop by performing the actions before they happen, freeing themselves. Meglos swears allegiance to [[Ti]] in the Deon ceremony. He tells the Tigellans that it is not safe for them to remain near as they are not [[Time Lord]]s like him. They agree to leave him to work alone. Meanwhile, the TARDIS lands on Tigella and the Doctor and Romana emerge. They are crossing the ground to the city when Romana is attacked by [[Bell Plant]]s. The Doctor and K9 continue on their way, unaware of her troubles. | Outside, the Gaztak ship lands. The Gaztaks stay with their ship whilst Meglos enters the Tigellan city and introduces himself. The Doctor and Romana break the loop by performing the actions before they happen, freeing themselves. Meglos swears allegiance to [[Ti]] in the Deon ceremony. He tells the Tigellans that it is not safe for them to remain near as they are not [[Time Lord]]s like him. They agree to leave him to work alone. Meanwhile, the TARDIS lands on Tigella and the Doctor and Romana emerge. They are crossing the ground to the city when Romana is attacked by [[Bell Plant]]s. The Doctor and K9 continue on their way, unaware of her troubles. | ||
{{video|The Doctor Meglos - Doctor Who Meglos - BBC|thumb|The Doctor arrives.}} | |||
Meglos inspects the Dodecahedron and places a device on it. Lexa and [[Caris]] hide outside, having stayed behind to secretly observe the goings on. After Meglos leaves, they enter to find the Dodecahedron gone. The Doctor and K9 arrive at the Tigellan city. The guard tells him he didn't see him leave. Confused, the Doctor shrugs it off. He orders K9 to find Romana after noticing her absence. Meanwhile, Romana frees herself from the plants. She notices scorching on some of the vegetation. Lexa and Caris report their finding to Deedrix and Zastor and order the capture of the Doctor. The real Doctor is taken prisoner. | Meglos inspects the Dodecahedron and places a device on it. Lexa and [[Caris]] hide outside, having stayed behind to secretly observe the goings on. After Meglos leaves, they enter to find the Dodecahedron gone. The Doctor and K9 arrive at the Tigellan city. The guard tells him he didn't see him leave. Confused, the Doctor shrugs it off. He orders K9 to find Romana after noticing her absence. Meanwhile, Romana frees herself from the plants. She notices scorching on some of the vegetation. Lexa and Caris report their finding to Deedrix and Zastor and order the capture of the Doctor. The real Doctor is taken prisoner. | ||
Romana stumbles upon the Gaztak ship, and finds it responsible for the burning. The Gaztaks notice her and she runs. K9 heads back to the city as his batteries run low. The Gaztaks corner Romana and Brotadac orders her death. | Romana stumbles upon the Gaztak ship, and finds it responsible for the burning. The Gaztaks notice her and she runs. K9 heads back to the city as his batteries run low. The Gaztaks corner Romana and Brotadac orders her death... | ||
=== Part three === | === Part three === | ||
| Line 75: | Line 75: | ||
Zastor agrees to allow the Doctor to see the power room. Meglos is harassed by the Earthling he took over, who is fighting him. Meglos approaches Caris and tells her she will obey him. He shows her an impossible thing to prove his power, the shrunken Dodecahedron. Lexa returns to her Deons and gives them orders. | Zastor agrees to allow the Doctor to see the power room. Meglos is harassed by the Earthling he took over, who is fighting him. Meglos approaches Caris and tells her she will obey him. He shows her an impossible thing to prove his power, the shrunken Dodecahedron. Lexa returns to her Deons and gives them orders. | ||
The Deons stage a revolution. They capture the Doctor, Zastor and Deedrix in the power room. Lexa proclaims that, to pacify Ti, all non-believers will be sent to the surface. Lexa tells Zastor that his belief was only words, not actions, and he is | The Deons stage a revolution. They capture the Doctor, Zastor and Deedrix in the power room. Lexa proclaims that, to pacify Ti, all non-believers will be sent to the surface. Lexa tells Zastor that his belief was only words, not actions, and he is to be exiled. Lexa tells the Doctor that he is to be prepared for sacrifice. | ||
[[File:Plant vs Gaztak.jpg|thumb|left|[[Bell Plant]]s attack the [[Gaztak]]s.]] | [[File:Plant vs Gaztak.jpg|thumb|left|[[Bell Plant]]s attack the [[Gaztak]]s.]] | ||
| Line 86: | Line 86: | ||
Meglos emerges from the city and talks to Grugger, showing him the shrunken Dodecahedron. Meanwhile, Lexa continues her ceremony, hoping the sacrifice of the Doctor will return the Dodecahedron. The Gaztaks and Meglos board their ship again and prepare for take off. Romana and Caris begin to search for the real Doctor. | Meglos emerges from the city and talks to Grugger, showing him the shrunken Dodecahedron. Meanwhile, Lexa continues her ceremony, hoping the sacrifice of the Doctor will return the Dodecahedron. The Gaztaks and Meglos board their ship again and prepare for take off. Romana and Caris begin to search for the real Doctor. | ||
A large stone hangs above the Doctor. It is suspended by three ropes. A Deon burns through two of them. He moves to the third. | A large stone hangs above the Doctor. It is suspended by three ropes. A Deon burns through two of them. He moves to the third... | ||
=== Part four === | === Part four === | ||
| Line 97: | Line 97: | ||
Meglos tells Grugger and Brotadac that the Dodecahedron can be amplified by the screens to fire a beam capable of destroying planets. He asks them to choose a planet to be destroyed and Grugger picks Tigella, angered by the loss of life. The Dodecahedron powers up as the TARDIS lands nearby. | Meglos tells Grugger and Brotadac that the Dodecahedron can be amplified by the screens to fire a beam capable of destroying planets. He asks them to choose a planet to be destroyed and Grugger picks Tigella, angered by the loss of life. The Dodecahedron powers up as the TARDIS lands nearby. | ||
The Doctor decides to trick the Gaztaks by pretending to be Meglos. He leaves the others with the TARDIS. In the room, Meglos takes | The Doctor decides to trick the Gaztaks by pretending to be Meglos. He leaves the others with the TARDIS. In the room, Meglos takes off his coat and heads out to check the screen's alignment. The Doctor sees him and takes his own coat off. Grugger decides he no longer needs Meglos and tells Brotadac he can wear the Doctor's coat as he always wanted to. | ||
The Doctor enters and interrupts them. He stalls the countdown, telling them preparations need to be made. A Gaztak walks in carrying the real Doctor's coat. The Doctor tells Grugger it is a present for him. Grugger is unimpressed and pressures him to activate the Dodecahedron. | The Doctor enters and interrupts them. He stalls the countdown, telling them preparations need to be made. A Gaztak walks in carrying the real Doctor's coat. The Doctor tells Grugger it is a present for him. Grugger is unimpressed and pressures him to activate the Dodecahedron. | ||
| Line 108: | Line 108: | ||
Deedrix and Caris detain Meglos but he exits the body, leaving the Earthling behind. He shuffles out of the ship. Grugger and Brotadac begin the countdown. At zero the beams will converge and the Dodecahedron will activate. The Doctor, Romana, K9, Caris, Deedrix and the Earthling leave in the TARDIS. Meglos enters the room and returns to his cactus form. Grugger realises that something is wrong but is unable to stop it before detonation. | Deedrix and Caris detain Meglos but he exits the body, leaving the Earthling behind. He shuffles out of the ship. Grugger and Brotadac begin the countdown. At zero the beams will converge and the Dodecahedron will activate. The Doctor, Romana, K9, Caris, Deedrix and the Earthling leave in the TARDIS. Meglos enters the room and returns to his cactus form. Grugger realises that something is wrong but is unable to stop it before detonation. | ||
The Doctor returns to Tigella where he bids farewell to Zastor. Romana informs the Doctor that Gallifrey wants them back immediately. | The Doctor returns to Tigella where he bids farewell to Zastor. Romana informs the Doctor that Gallifrey wants them back immediately. The Earthling, initially wary of returning home since he told his wife he'd be back home much earlier, agrees to let the Doctor take him back in the TARDIS. However, the Earthling is somewhat puzzled (quite understandably) when the Doctor tells him he can drop him off at home before he leaves... | ||
== Cast == | == Cast == | ||
* [[Fourth Doctor| | * [[Fourth Doctor|Doctor Who]] - [[Tom Baker]] | ||
* [[Romana II|Romana]] - [[Lalla Ward]] | * [[Romana II|Romana]] - [[Lalla Ward]] | ||
* Voice of [[K9 Mark II|K9]] - [[John Leeson]] | * Voice of [[K9 Mark II|K9]] - [[John Leeson]] | ||
* General [[Grugger]] - [[Bill Fraser]] | * General [[Grugger]] - [[Bill Fraser]] | ||
* Lieutenant [[Brotadac]] - [[Frederick Treves]] | * Lieutenant [[Brotadac]] - [[Frederick Treves]] | ||
* [[Zastor]] - [[Edward Underdown]] | |||
* [[Lexa]] - [[Jacqueline Hill]] | |||
* [[Caris]] - [[Colette Gleeson]] | * [[Caris]] - [[Colette Gleeson]] | ||
* [[Deedrix]] - [[Crawford Logan]] | * [[Deedrix]] - [[Crawford Logan]] | ||
* [[ | * [[George Morris|Earthling]] - [[Christopher Owen]] | ||
* [[Guard (Meglos)|Tigellan Guard]] - [[Simon Shaw]] | |||
=== Uncredited cast === | |||
* Voice of [[Meglos]] - [[Crawford Logan]]<ref>{{cite web|url=http://www.bigfinish.com/releases/v/toby-hadoke-s-who-s-round-72---crawford-logan-1159|title=72. Toby Hadoke's Who's Round #72 - Crawford Logan|author=Big Finish|date of source=13 November 2014|website name=bigfinish.com|accessdate=14 November 2014}}</ref> | |||
* Savant - [[David Cole (extra)|David Cole]] ([[DWM 285]]) | |||
* Meglos - Tom Baker and Christopher Owen | |||
== Crew == | == Crew == | ||
* [[Assistant Floor Manager]] - [[Val McCrimmon | * [[Assistant Floor Manager]] - [[Val McCrimmon]] | ||
* [[Costumes]] - [[June Hudson]] | * [[Costumes]] - [[June Hudson]] | ||
* [[Director's assistant|Director's Assistant]] - [[Hermione Stewart]] | |||
* [[Designer (crew)|Designer]] - [[Philip Lindley]] | * [[Designer (crew)|Designer]] - [[Philip Lindley]] | ||
* [[Executive Producer]] - [[Barry Letts]] | * [[Executive Producer]] - [[Barry Letts]] | ||
| Line 135: | Line 140: | ||
* [[Production Unit Manager]] - [[Angela Smith]] | * [[Production Unit Manager]] - [[Angela Smith]] | ||
* [[Script Editor]] - [[Christopher H. Bidmead]] | * [[Script Editor]] - [[Christopher H. Bidmead]] | ||
* [[Senior cameraman|Senior Cameraman]] - [[Alec Wheal]] | |||
* [[Special Sounds]] - [[Dick Mills]] | * [[Special Sounds]] - [[Dick Mills]] | ||
* [[Studio Lighting]] - [[Bert Postlethwaite]] | * [[Studio Lighting]] - [[Bert Postlethwaite]] | ||
* [[Studio Sound]] - [[John Holmes]] | * [[Studio Sound]] - [[John Holmes (sound designer)|John Holmes]] | ||
* [[Technical manager|Technical Manager]] - [[Brendan Carr]] | |||
* [[Theme Arrangement]] - [[Peter Howell]] | * [[Theme Arrangement]] - [[Peter Howell]] | ||
* [[Doctor Who theme|Title Music]] - [[Ron Grainer]] | * [[Doctor Who theme|Title Music]] - [[Ron Grainer]] | ||
* [[Video effects|Video Effects]] - [[Dave Jervis|David Jervis]] | |||
* [[Videotape editor|Videotape Editors]] - [[Ian Williams]], [[Sam Upton]] | |||
* [[Vision Mixer]] - [[Graham Giles]] | |||
* [[Visual Effects]] - [[Steven Drewett]] | * [[Visual Effects]] - [[Steven Drewett]] | ||
== | === Uncredited crew === | ||
* [[Assistant Floor Manager]] - [[Alex Bridcut]] ([[INFO]]: ''Meglos'') | |||
* [[Director's assistant|Director's Assistant]] - [[Karen Loxton]] ([[INFO]]: ''Meglos'') | |||
* [[Floor assistant|Floor Assistant]] - [[Alan Sandbrook]] ([[INFO]]: ''Meglos'') | |||
* [[Grams operator|Grams Operator]] - [[Andrew Hunter]] ([[INFO]]: ''Meglos'') | |||
* [[Camera crew|Camera Crew]] - [[Crew 11]] ([[INFO]]: ''Meglos'') | |||
* [[Show working supervisor|Show Working Supervisor]] - [[Chick Hetherington]] ([[INFO]]: ''Meglos'') | |||
* [[Costume assistant|Costume Assistant]] - [[Sarah Leigh]] ([[INFO]]: ''Meglos'') | |||
* [[Make-up assistant|Make-Up Assistants]] - [[Catherine Whitfield]], [[Margaret Magee]], [[Jan Lee]], [[Janet Philips]] ([[INFO]]: ''Meglos'') | |||
* [[Design assistant|Design Assistant]] - [[Mary Greaves]] ([[INFO]]: ''Meglos'') | |||
* [[Props Buyer]] - [[Al Huxley]] ([[INFO]]: ''Meglos'') | |||
* [[Production secretary|Production Secretary]] - [[Jane Judge]] ([[INFO]]: ''Meglos'') | |||
* [[Visual effects assistant|Visual Effects Assistant]] - [[Mike Kelt]] ([[INFO]]: ''Meglos'') | |||
== Worldbuilding == | |||
=== K9 === | === K9 === | ||
* As a result of his brief swim at [[Brighton]] Beach, [[K9 Mark II|K9]]'s batteries are damaged and now require a recharge every two hours. | * As a result of his brief swim at [[Brighton]] Beach, [[K9 Mark II|K9]]'s batteries are damaged and now require a recharge every two hours. | ||
| Line 151: | Line 175: | ||
=== Species === | === Species === | ||
* The [[Tigellan]]s know of the [[Time Lord]]s. | * The [[Tigellan]]s know of the [[Time Lord]]s. | ||
* Time Lords are [[time sensitive]] enough to be aware of being in a [[time loop]]. | * Time Lords are [[Time sensitivity|time sensitive]] enough to be aware of being in a [[time loop]]. | ||
=== Romana === | === Romana === | ||
* Romana knows martial arts, and has heard of the [[Screens of Zolfa-Thura]]. | * Romana knows martial arts, and has heard of the [[Screens of Zolfa-Thura]]. | ||
=== Individual Tigellans === | |||
* [[Esrith]] is part of Lexa's rebellion. | |||
=== Individual === | |||
* Romana's outfit was inspired by ''[[Little Lord Fauntleroy]]''. | |||
== Story notes == | == Story notes == | ||
* The working titles for ''Meglos | * The working titles for ''Meglos'' were ''The Golden Pentangle'', ''The Golden Pentagram'', ''The Golden Star'', ''The Last Sol-Fataran'' and ''The Last Zolfa-Thuran''.<ref>http://www.shannonsullivan.com/doctorwho/serials/5q.html</ref> | ||
* The sound effect created for the approach of the [[Fendahl]] in [[TV]]: ''[[Image of the Fendahl (TV story)|Image of the Fendahl]]'' is re-used as background atmosphere for the Tigellan jungle, as well as effects used in ''[[The Daleks' Master Plan (TV story)|The Daleks' Master Plan]]'' and ''[[Planet of the Daleks (TV story)|Planet of the Daleks]]''. | |||
* The scenes set on the surface of Zolfa-Thura were realised by way of a new effects technique referred to as scene-sync - a development of the established CSO process. This involved two cameras being electronically synchronised to follow identical movements so that they could be made to track in unison and maintain the composite image (created in the usual way), whereas previously, the camera in CSO shots had almost invariably been static. | |||
* The sound effect created for the approach of the [[Fendahl]] in [[TV]]: ''[[Image of the Fendahl]]'' is re-used as background atmosphere for the Tigellan jungle, as well as effects used in ''[[The Daleks' Master Plan]]'' and ''[[Planet of the Daleks]]. | * Mysteriously, part four's end-titles theme music is played a whole-step lower than normal; curiously, this puts the tune back in its original key of E minor. | ||
* The scenes set on the surface of Zolfa-Thura were realised by way of a new effects technique referred to as scene-sync - a development of the established CSO process. This involved two cameras being electronically synchronised to follow identical movements so that they could be made to track in unison and maintain the composite image (created in the usual way), whereas previously CSO shots had almost invariably been static. | * Brotadac is an anagram of "bad actor", an in-joke from the production team. | ||
* [[Bill Fraser]] agreed to play | * [[Bill Fraser]] agreed to play Grugger on the condition that his character be allowed to kick K9 on-screen. | ||
* | * This is the last story until ''[[Four to Doomsday (TV story)|Four to Doomsday]]'' to not be part of a wider [[story arc]]. | ||
* | * This was the last story of Season 18 to be released on both VHS and DVD. | ||
* [[John Flanagan]] wanted [https://en.wikipedia.org/wiki/Lee_Marvin Lee Marvin] to play Grugger and was amazed when [[Bill Fraser]] was cast as he had not imagined him in the role at all. [https://en.wikipedia.org/wiki/Harry_Andrews Harry Andrews], [[Bernard Archard]], [[Brian Blessed]], [[Peter Cushing]], [[James Ellis]], [[Ronald Fraser]], [[Peter Gilmore]], [https://en.wikipedia.org/wiki/Donald_Houston Donald Houston], [[Glyn Houston]], [[Stratford Johns]], [[T. P. McKenna]], [[Donald Pleasence]], [[Leonard Sachs]], [[George Sewell]], [[Nigel Stock]], [[John Stratton]], [[Richard Todd]], [https://en.wikipedia.org/wiki/Peter_Vaughan Peter Vaughan], [[Frank Windsor]] and [[Peter Wyngarde]] were also considered. | |||
* [[Timothy Bateson]], [[Geoffrey Bayldon]] and [[Colin Jeavons]] were considered for Broadtac. | |||
* [[Maurice Denham]], [[Esmond Knight]] and [[Ralph Michael]] were considered for Zastor. | |||
* In the original storyline, Lexa simply vanished from the action once she had served her purpose within the narrative. [[Christopher H. Bidmead]] suggested her act of self-sacrifice as a more dramatic end for the character. | |||
* [[Jacqueline Hill]] regretted appearing in the story feeling that since she played Barbara, it was inappropriate to appear as a different character. She admitted that show had changed considerably since her time and was now recognisable in name only. | |||
* This is the only story of the original run where every credited cast member appears in every episode. | |||
* [[John Flanagan]] and [[Andrew McCulloch]] were struggling to think of the ultimate villain, until they realised that it was sitting there the whole time - a gnarled cactus. | |||
* Keen to inject more science into the scripts, [[Christopher H. Bidmead]] suggested the chronic hysteresis element, the terminology derived from a loop-like phenomenon which arises in fields such as electromagnetism. | |||
* This story features the only use in ''Doctor Who'' of a camera-linking system known as Scene-Sync that allowed the use of non-static shots of characters superimposed onto a miniature set. As the cameras on the actors were moved, the cameras on the miniature set moved the equivalent scaled amount automatically. The exact scale motion was achieved by trial and error, involving minute adjustments to the voltage delivered to the slave camera's motors. | |||
* During production of this story, [[Madame Tussauds]] in London debuted the "Doctor Who Exhibition". Included were sculptures of both the Fourth Doctor and his Meglos doppelganger. As a result, [[Tom Baker]] is the only person to have appeared twice in the wax museum. | |||
* The Dodecahedron was originally a five-sided object, thereby influencing the number of screens found on Zolfa-Thura, rather than a twelve-sided object made up of pentagons. | |||
* [[John Nathan-Turner]] chose [[Terence Dudley]] to direct, having worked with him on ''[[All Creatures Great and Small]].'' Dudley was also friends with [[Jacqueline Hill]]'s husband [[Alvin Rakoff]]. | |||
* [[John Flanagan]] and [[Andrew McCulloch]] hoped that many of the scenes on Zolfa-Thura and in the Tigellan jungle would be achieved on location, but [[John Nathan-Turner]] decided that their scripts represented an opportunity to save money by confining all recording to the studio. | |||
* For a time, it was suggested that the Gaztaks might exhibit an East Asian appearance, with [[Bill Fraser]] and [[Frederick Treves]] made up accordingly, but this notion was dropped. | |||
* [[Christopher H. Bidmead]] was required to significantly expand some of the scripts, particularly part three, which was found to be running seven minutes short. Amongst the added material was Romana leading the Gaztaks in a circle through the jungle. | |||
* [[Tom Baker]] was now slowly recovering from the illness which had plagued him during ''[[The Leisure Hive (TV story)|The Leisure Hive]]'', but his long convalescence was still dampening his mood, and he disliked the latex facial appliance he had to wear to give him a cactus-like appearance. | |||
=== Ratings === | === Ratings === | ||
* Part | * Part one - 5.0 million viewers | ||
* Part | * Part two - 4.2 million viewers | ||
* Part | * Part three - 4.7 million viewers | ||
* Part | * Part four - 4.7 million viewers | ||
=== Filming locations === | === Filming locations === | ||
| Line 177: | Line 224: | ||
=== Production errors === | === Production errors === | ||
{{discontinuity}} | {{discontinuity}} | ||
* In part one the wires holding the planet up over Zolfa Thura are obvious. | * In part one, the wires holding the planet up over Zolfa Thura are obvious. | ||
* The cactus gloves | * In part one, when information about the Doctor is shown on a screen in Meglos's base, the word "date" is misspelled as "dateb", with the correct spelling appearing on screen briefly before the camera cuts away. | ||
* In the outdoor scenes on Zolfa Thura in parts one and four, the blue colour of the blue screen is visible through General Grugger's beard. | |||
* The cactus gloves worn by Tom Baker as Meglos show his wrists quite often. | |||
* When the Gaztaks first exit their ship in episode one, one of the Gaztaks holding the Earthling trips and nearly falls over. | |||
* Due to the poor CSO effects used in many of the outdoor scenes on Zolfa Thura, when Meglos buries the Dodecahedron in the sand between the Screens of Zolfa Thura in part four, he appears to be semi-transparent. | |||
* The closing theme in part four is erroneously played at a reduced pitch. ''Perhaps coincidentally, this means the theme is now being played in the same key as the Delia Derbyshire arrangement.'' | |||
== Continuity == | == Continuity == | ||
* The Gaztaks appear in [[PROSE]]: ''[[Warmonger]]''. | * The Gaztaks appear in [[PROSE]]: ''[[Warmonger (novel)|Warmonger]]''. | ||
* The Doctor previously encountered a villainous doppelganger of himself in his [[First Doctor|first incarnation]] in [[TV]]: ''[[The Massacre | * The Doctor previously encountered a villainous doppelganger of himself in his [[First Doctor|first incarnation]] in [[TV]]: ''[[The Massacre (TV story)|The Massacre]]'', and in his [[Second Doctor|second incarnation]] in [[TV]]: ''[[The Enemy of the World (TV story)|The Enemy of the World]]''. | ||
* K9 is being repaired during this story, the result of rolling into water when the Doctor hadn't set up his sea water defences. ([[TV]]: ''[[The Leisure Hive (TV story)|The Leisure Hive]]'') | |||
== Home video and audio releases == | == Home video and audio releases == | ||
=== CD Release === | === CD Release === | ||
<gallery | <gallery position="center" captionalign="center" hideaddbutton="true"> | ||
Music-1192.jpg|cd cover | Music-1192.jpg|cd cover | ||
</gallery> | </gallery> | ||
=== VHS Release === | === VHS Release === | ||
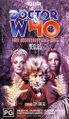
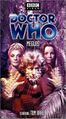
This story was released on VHS in the UK in March 2003. | This story was released on VHS in the UK in [[March (releases)|March]] [[2003 (releases)|2003]]. | ||
<gallery hideaddbutton="true" > | <gallery position="center" captionalign="center" hideaddbutton="true"> | ||
File:Meglos VHS UK cover.jpg|VHS UK cover | File:Meglos VHS UK cover.jpg|VHS UK cover | ||
File:Meglos VHS Australian cover.jpg|VHS Australian cover | File:Meglos VHS Australian cover.jpg|VHS Australian cover | ||
| Line 199: | Line 252: | ||
=== DVD Release === | === DVD Release === | ||
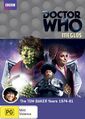
It was released on DVD on the following dates: | It was released on DVD on the following dates: | ||
* Region 2 - [[10 January (releases)|10 January]] [[2011]] | * Region 2 - [[10 January (releases)|10 January]] [[2011 (releases)|2011]] | ||
* Region 1 - [[11 January (releases)|11 January]] | * Region 1 - [[11 January (releases)|11 January]] 2011 | ||
* Region 4 - [[20 January (releases)|20 January]] | * Region 4 - [[20 January (releases)|20 January]] 2011 | ||
==== Special Features ==== | |||
* | * Commentary by [[Lalla Ward]] ([[Romana II|Romana]]), [[Christopher Owen]] ([[George Morris|Earthling]]), [[John Flanagan]] (writer), [[Paddy Kingsland]] (composer) and [[Peter Howell]] (composer) | ||
* ''[[Meglos Men]]'' - | * ''[[Meglos Men (documentary)|Meglos Men]]'' - Writers John Flanagan and [[Andrew McCulloch]] meet with script editor [[Christopher H. Bidmead]] | ||
* ''[[The Scene Sync Story]]'' - | * ''[[The Scene Sync Story (documentary)|The Scene Sync Story]]'' - A look at the pioneering technique used to create many of this story's shots | ||
* ''[[Jacqueline Hill - A Life in Pictures]]'' - | * ''[[Jacqueline Hill: A Life in Pictures (documentary)|Jacqueline Hill - A Life in Pictures]]'' - A look at the life of [[Jacqueline Hill]], with husband [[Alvin Rakoff]], ''[[Doctor Who]]'' producer [[Verity Lambert]] and actors [[William Russell]] and [[Ann Davies]] | ||
* ''[[Entropy Explained]]'' | * ''[[Entropy Explained (documentary)|Entropy Explained]]'' | ||
* Isolated Score | |||
* ''[[Radio Times]]'' Listings (PDF DVD-ROM - PC/Mac) | |||
* Production Information Subtitles | |||
* Photo Gallery | * Photo Gallery | ||
* | * Coming Soon Trailer - ''[[The Mutants (TV story)|The Mutants]]'' | ||
* [[Easter Egg]]: Clean 1980 title sequence & closing credits. To access this hidden feature, press left at Audio Options on the Special Features menu to reveal a hidden ''Doctor Who'' logo. | |||
<gallery | <gallery position="center" captionalign="center" hideaddbutton="true"> | ||
Meglos | Meglos.jpg|Region 1 cover | ||
Meglos region4.jpg|Region 4 cover | |||
Meglos uk.jpg|Region 2 UK cover | Meglos uk.jpg|Region 2 UK cover | ||
</gallery> | </gallery> | ||
| Line 222: | Line 278: | ||
== External links == | == External links == | ||
* {{bbcepguideclassic|meglos/|Meglos}} | * {{bbcepguideclassic|meglos/|Meglos}} | ||
* {{radiotimes|2011-03-20/meglos}} | |||
{{dwcast}} | {{dwcast}} | ||
{{dwrefguide|who_5q.htm|Meglos}} | |||
* {{briefhistory|serials/5q.html|Meglos}} | * {{briefhistory|serials/5q.html|Meglos}} | ||
== Footnotes == | |||
{{reflist}} | |||
{{DWTV}} | {{DWTV}} | ||
{{TitleSort}} | {{TitleSort}} | ||
[[Category:Doctor Who (1963) television stories]] | [[Category:Doctor Who (1963) television stories]] | ||
[[Category:K9 television stories]] | [[Category:K9 television stories]] | ||
[[Category:1980 television stories]] | [[Category:1980 television stories]] | ||
[[Category:Season 18 stories]] | [[Category:Season 18 stories]] | ||
[[Category: | [[Category:Romana II television stories]] | ||
[[Category:Stories set in the | [[Category:Stories set in 1980]] | ||
[[Category: | [[Category:Television stories set in Mutter's Spiral]] | ||
[[Category:Television stories with unique variations of the Doctor Who theme]] | |||
[[Category:Stories set in a time loop]] | |||
[[Category:Fourth Doctor television stories]] | |||
[[es:Meglos (serial)]] | |||
[[ru:Меглос (ТВ история)]] | |||
Latest revision as of 11:29, 3 August 2024
- You may wish to consult
Meglos (disambiguation)for other, similarly-named pages.
Meglos was the second serial of season 18 of Doctor Who. It featured Jacqueline Hill's return to the programme for the first time since the Doctor Who story The Chase in 1965. However, she was not playing Barbara Wright, but a whole new character - Lexa.
Meglos also allowed Tom Baker to play the Doctor and also the main antagonists of the story, making Baker the third actor of the Doctor to have played both the Doctor and one of the main antagonists in a story, following William Hartnell in The Massacre, and Patrick Troughton in The Enemy of the World.
Meglos came into being after Christopher H. Bidmead purposefully sought out John Flanagan and Andrew McCulloch as new talent. Nathan-Turner was unimpressed with the ideas put forward and the serial was shuffled to various placements in the season, largely because it didn't feature Adric.
Behind the scenes, Meglos was highly innovative as the BBC's first use of Scene Sync, a motion control technology that improved the believability of composite shots that used CSO. It would be the only Doctor Who serial to avail itself of the technology. Nevertheless, other BBC productions would use Scene Sync based on this successful test, such as Barry Letts' Gulliver in Lilliput, starring Elisabeth Sladen. (DOC: The Scene Sync Story)
Synopsis[[edit] | [edit source]]
On Tigella, two opposing factions are irrevocably divided over one fundamental issue: the Dodecahedron, a mysterious artefact which provides the entire planet's energy. With the Savants and the Deons locked in a crippling stalemate, and their civilisation on the brink of collapse, the Tigellan leader Zastor seeks the Fourth Doctor's help. But the Doctor and Romana II have been trapped aboard the TARDIS in a time loop by Meglos, the last of the Zolfa-Thurans, who will stop at nothing to steal back the awesome power of the Dodecahedron.
Plot[[edit] | [edit source]]
Part one[[edit] | [edit source]]
In the TARDIS, the Fourth Doctor and Romana are repairing K9 yet again. They hover near the planet Tigella; the Doctor recalls an earlier visit when he befriended a man named Zastor, leader of the Tigellans, and decides to get in touch with him. On Tigella, a power loss occurs when a transformer breaks down. The inhabitants, living under the surface, find it hard to compensate.
Arguments continue between the Deons and the Savants over ownership of the Dodecahedron, Tigella's power source and the Deons' deity. The Deons refuse the workers access to the Dodecahedron. Zastor, unable to decide, orders the Doctor sent for. Deedrix leads the workers in the belief that the Dodecahedron is merely an artefact; Lexa, leader of the Deons, holds firm in her faith that the Dodecahedron is a god.
On Zolfa-Thura, a ship touches down. A party of Gaztaks led by General Grugger emerge. They bring forth an Earthling, whom they stun. They brought him to the planet on the promise of reward. A hidden structure emerges from the ground. A door opens and the party enters. Within is Meglos, a Zolfa-Thuran.
Meglos outlines his plans to the Gaztaks. He wants them to have the Dodecahedron to power the galaxy. He tells them of the recent power fluctuations the Tigellans have been experiencing. The Earthling and Meglos are placed in adjacent chambers.
Grugger plans to steal the machinery, but Meglos traps him and his aide, Brotadac, in the room. They agree to comply with his plan.
They then transfer Meglos' consciousness into the Earthling. His skin becomes cactus-like in appearance. Claiming the Doctor is a threat, Meglos traps him in a time loop. As Meglos turns around, it appears he has taken on the Doctor's appearance...
Part two[[edit] | [edit source]]
Onboard the TARDIS, the Doctor and Romana continue around the loop. Their only respite is a small period of freedom between the loops. Meanwhile, Meglos leaves with the Gaztaks in their ship. On Tigella, Lexa tells Zastor that she will allow the Doctor access to the Dodecahedron if he swears the Deon oath.
Outside, the Gaztak ship lands. The Gaztaks stay with their ship whilst Meglos enters the Tigellan city and introduces himself. The Doctor and Romana break the loop by performing the actions before they happen, freeing themselves. Meglos swears allegiance to Ti in the Deon ceremony. He tells the Tigellans that it is not safe for them to remain near as they are not Time Lords like him. They agree to leave him to work alone. Meanwhile, the TARDIS lands on Tigella and the Doctor and Romana emerge. They are crossing the ground to the city when Romana is attacked by Bell Plants. The Doctor and K9 continue on their way, unaware of her troubles.
Meglos inspects the Dodecahedron and places a device on it. Lexa and Caris hide outside, having stayed behind to secretly observe the goings on. After Meglos leaves, they enter to find the Dodecahedron gone. The Doctor and K9 arrive at the Tigellan city. The guard tells him he didn't see him leave. Confused, the Doctor shrugs it off. He orders K9 to find Romana after noticing her absence. Meanwhile, Romana frees herself from the plants. She notices scorching on some of the vegetation. Lexa and Caris report their finding to Deedrix and Zastor and order the capture of the Doctor. The real Doctor is taken prisoner.
Romana stumbles upon the Gaztak ship, and finds it responsible for the burning. The Gaztaks notice her and she runs. K9 heads back to the city as his batteries run low. The Gaztaks corner Romana and Brotadac orders her death...
Part three[[edit] | [edit source]]
Grugger grabs Romana and questions her as to her origins. She tells him that he wouldn't believe her. Grugger orders her to lead him to her craft.
In the city, Deedrix and Caris speculate on the Dodecahedron's disappearance. An announcement informs them that the power loss has reached critical. This means the city will collapse.
Outside, Romana leads the Gaztaks in a circle back to their own ship. The Tigellans try to stop the damage. They have two hours to prevent the collapse. Lexa and Zastor question the Doctor and he realises they see him as the thief. Meanwhile, Romana convinces the Gaztaks to give her another chance to take them to her ship.
Zastor agrees to allow the Doctor to see the power room. Meglos is harassed by the Earthling he took over, who is fighting him. Meglos approaches Caris and tells her she will obey him. He shows her an impossible thing to prove his power, the shrunken Dodecahedron. Lexa returns to her Deons and gives them orders.
The Deons stage a revolution. They capture the Doctor, Zastor and Deedrix in the power room. Lexa proclaims that, to pacify Ti, all non-believers will be sent to the surface. Lexa tells Zastor that his belief was only words, not actions, and he is to be exiled. Lexa tells the Doctor that he is to be prepared for sacrifice.

Outside, Romana leads the Gaztaks to the Bell Plants. Stamping on a root, she instigates an attack and runs away. The city doors begin to close.
Romana finds K9 in a bush and carries him inside. The Gaztaks break free but are too slow to get indoors. Caris tells Meglos that he cannot escape but he disagrees, telling her there are ventilation shafts. He is again troubled by the Earthling. Though distracted by this, Caris pulls a gun on him and leads him through the city. The Gaztaks batter down the door and fight with the Tigellans. The Gaztaks force the Tigellans back.
Romana sees Meglos, whom she thinks is the Doctor. She hits Caris, dazing her, and Meglos runs away. The Gaztaks ransack the city and Grugger kicks K9, calling him "useless". Caris tells Romana that it was not the Doctor she saw.
Meglos emerges from the city and talks to Grugger, showing him the shrunken Dodecahedron. Meanwhile, Lexa continues her ceremony, hoping the sacrifice of the Doctor will return the Dodecahedron. The Gaztaks and Meglos board their ship again and prepare for take off. Romana and Caris begin to search for the real Doctor.
A large stone hangs above the Doctor. It is suspended by three ropes. A Deon burns through two of them. He moves to the third...
Part four[[edit] | [edit source]]
Zastor and Deedrix meet up with Caris and Romana. The Deons guarding the former are told of the attack and head for the surface. The new party heads for the power room. They rush in and Deedrix grabs the flaming torch from a Deon, preventing him from burning the final rope. Zastor and Romana tell Lexa of the Gaztak attack and that Meglos was the guilty one.
On their ship, the Gaztaks and Meglos approach Zolfa-Thura. Meglos promises Grugger and Brotadac all the power they wish. The Doctor questions Meglos' motives in taking the Dodecahedron to Zolfa-Thura. Romana reminds him of the screens of Zoltha-Thura and he concurs. Back on Zolfa-Thura, Meglos buries the Dodecahedron in the ground with the boundary of the Screens of Zolfa-Thura and activates it. The Dodecahedron rises atop of Meglos' room.
On Tigella, the Doctor and Romana bid farewell to the Tigellans before heading back to the TARDIS. However, as they leave, an apparently dead Gaztak rises and shoots at Romana. Lexa takes the shot. She falls, injured, and Romana rushes to her aid. The Doctor tells her they must leave, and Romana grabs K9 and follows him. Caris and Deedrix go with them.
Meglos tells Grugger and Brotadac that the Dodecahedron can be amplified by the screens to fire a beam capable of destroying planets. He asks them to choose a planet to be destroyed and Grugger picks Tigella, angered by the loss of life. The Dodecahedron powers up as the TARDIS lands nearby.
The Doctor decides to trick the Gaztaks by pretending to be Meglos. He leaves the others with the TARDIS. In the room, Meglos takes off his coat and heads out to check the screen's alignment. The Doctor sees him and takes his own coat off. Grugger decides he no longer needs Meglos and tells Brotadac he can wear the Doctor's coat as he always wanted to.
The Doctor enters and interrupts them. He stalls the countdown, telling them preparations need to be made. A Gaztak walks in carrying the real Doctor's coat. The Doctor tells Grugger it is a present for him. Grugger is unimpressed and pressures him to activate the Dodecahedron.
Outside, Romana, K9, Caris and Deedrix decide to have a closer look at the screens. The Doctor tells Brotadac that the screens require two minutes to power up. He heads outside. Grugger tells Brotadac to take the Doctor prisoner, deciding that he can be kept in their spacecraft as he is no longer needed. Brotadac instructs two Gaztaks to capture him. The Doctor hides and they take Meglos prisoner. However, Brotadac and some Gaztaks find the real Doctor and capture him also, still believing him to be Meglos. The take him to their ship.

Romana and her party see the Doctor being taken in. The Doctor is thrown in with Meglos. He tells Meglos that he has inverted the controls so that the Dodecahedron will destroy Zolfa-Thura and all on it. K9 distracts a guard posted to the Gaztak ship. Deedrix tries to knock him out so K9 shoots him. They then rush inside. K9 begins to cut down the door to the Doctor and Meglos' cell.
Deedrix and Caris detain Meglos but he exits the body, leaving the Earthling behind. He shuffles out of the ship. Grugger and Brotadac begin the countdown. At zero the beams will converge and the Dodecahedron will activate. The Doctor, Romana, K9, Caris, Deedrix and the Earthling leave in the TARDIS. Meglos enters the room and returns to his cactus form. Grugger realises that something is wrong but is unable to stop it before detonation.
The Doctor returns to Tigella where he bids farewell to Zastor. Romana informs the Doctor that Gallifrey wants them back immediately. The Earthling, initially wary of returning home since he told his wife he'd be back home much earlier, agrees to let the Doctor take him back in the TARDIS. However, the Earthling is somewhat puzzled (quite understandably) when the Doctor tells him he can drop him off at home before he leaves...
Cast[[edit] | [edit source]]
- Doctor Who - Tom Baker
- Romana - Lalla Ward
- Voice of K9 - John Leeson
- General Grugger - Bill Fraser
- Lieutenant Brotadac - Frederick Treves
- Zastor - Edward Underdown
- Lexa - Jacqueline Hill
- Caris - Colette Gleeson
- Deedrix - Crawford Logan
- Earthling - Christopher Owen
- Tigellan Guard - Simon Shaw
Uncredited cast[[edit] | [edit source]]
- Voice of Meglos - Crawford Logan[1]
- Savant - David Cole (DWM 285)
- Meglos - Tom Baker and Christopher Owen
Crew[[edit] | [edit source]]
- Assistant Floor Manager - Val McCrimmon
- Costumes - June Hudson
- Director's Assistant - Hermione Stewart
- Designer - Philip Lindley
- Executive Producer - Barry Letts
- Incidental Music - Paddy Kingsland, Peter Howell
- Make-Up - Cecile Hay-Arthur
- Producer - John Nathan-Turner
- Production Assistant - Marilyn Gold
- Production Unit Manager - Angela Smith
- Script Editor - Christopher H. Bidmead
- Senior Cameraman - Alec Wheal
- Special Sounds - Dick Mills
- Studio Lighting - Bert Postlethwaite
- Studio Sound - John Holmes
- Technical Manager - Brendan Carr
- Theme Arrangement - Peter Howell
- Title Music - Ron Grainer
- Video Effects - David Jervis
- Videotape Editors - Ian Williams, Sam Upton
- Vision Mixer - Graham Giles
- Visual Effects - Steven Drewett
Uncredited crew[[edit] | [edit source]]
- Assistant Floor Manager - Alex Bridcut (INFO: Meglos)
- Director's Assistant - Karen Loxton (INFO: Meglos)
- Floor Assistant - Alan Sandbrook (INFO: Meglos)
- Grams Operator - Andrew Hunter (INFO: Meglos)
- Camera Crew - Crew 11 (INFO: Meglos)
- Show Working Supervisor - Chick Hetherington (INFO: Meglos)
- Costume Assistant - Sarah Leigh (INFO: Meglos)
- Make-Up Assistants - Catherine Whitfield, Margaret Magee, Jan Lee, Janet Philips (INFO: Meglos)
- Design Assistant - Mary Greaves (INFO: Meglos)
- Props Buyer - Al Huxley (INFO: Meglos)
- Production Secretary - Jane Judge (INFO: Meglos)
- Visual Effects Assistant - Mike Kelt (INFO: Meglos)
Worldbuilding[[edit] | [edit source]]
K9[[edit] | [edit source]]
- As a result of his brief swim at Brighton Beach, K9's batteries are damaged and now require a recharge every two hours.
Objects[[edit] | [edit source]]
- The Doctor wasn't allowed to see the Dodecahedron on his previous visit (but did, as he remembers seeing it).
Species[[edit] | [edit source]]
- The Tigellans know of the Time Lords.
- Time Lords are time sensitive enough to be aware of being in a time loop.
Romana[[edit] | [edit source]]
- Romana knows martial arts, and has heard of the Screens of Zolfa-Thura.
Individual Tigellans[[edit] | [edit source]]
- Esrith is part of Lexa's rebellion.
Individual[[edit] | [edit source]]
- Romana's outfit was inspired by Little Lord Fauntleroy.
Story notes[[edit] | [edit source]]
- The working titles for Meglos were The Golden Pentangle, The Golden Pentagram, The Golden Star, The Last Sol-Fataran and The Last Zolfa-Thuran.[2]
- The sound effect created for the approach of the Fendahl in TV: Image of the Fendahl is re-used as background atmosphere for the Tigellan jungle, as well as effects used in The Daleks' Master Plan and Planet of the Daleks.
- The scenes set on the surface of Zolfa-Thura were realised by way of a new effects technique referred to as scene-sync - a development of the established CSO process. This involved two cameras being electronically synchronised to follow identical movements so that they could be made to track in unison and maintain the composite image (created in the usual way), whereas previously, the camera in CSO shots had almost invariably been static.
- Mysteriously, part four's end-titles theme music is played a whole-step lower than normal; curiously, this puts the tune back in its original key of E minor.
- Brotadac is an anagram of "bad actor", an in-joke from the production team.
- Bill Fraser agreed to play Grugger on the condition that his character be allowed to kick K9 on-screen.
- This is the last story until Four to Doomsday to not be part of a wider story arc.
- This was the last story of Season 18 to be released on both VHS and DVD.
- John Flanagan wanted Lee Marvin to play Grugger and was amazed when Bill Fraser was cast as he had not imagined him in the role at all. Harry Andrews, Bernard Archard, Brian Blessed, Peter Cushing, James Ellis, Ronald Fraser, Peter Gilmore, Donald Houston, Glyn Houston, Stratford Johns, T. P. McKenna, Donald Pleasence, Leonard Sachs, George Sewell, Nigel Stock, John Stratton, Richard Todd, Peter Vaughan, Frank Windsor and Peter Wyngarde were also considered.
- Timothy Bateson, Geoffrey Bayldon and Colin Jeavons were considered for Broadtac.
- Maurice Denham, Esmond Knight and Ralph Michael were considered for Zastor.
- In the original storyline, Lexa simply vanished from the action once she had served her purpose within the narrative. Christopher H. Bidmead suggested her act of self-sacrifice as a more dramatic end for the character.
- Jacqueline Hill regretted appearing in the story feeling that since she played Barbara, it was inappropriate to appear as a different character. She admitted that show had changed considerably since her time and was now recognisable in name only.
- This is the only story of the original run where every credited cast member appears in every episode.
- John Flanagan and Andrew McCulloch were struggling to think of the ultimate villain, until they realised that it was sitting there the whole time - a gnarled cactus.
- Keen to inject more science into the scripts, Christopher H. Bidmead suggested the chronic hysteresis element, the terminology derived from a loop-like phenomenon which arises in fields such as electromagnetism.
- This story features the only use in Doctor Who of a camera-linking system known as Scene-Sync that allowed the use of non-static shots of characters superimposed onto a miniature set. As the cameras on the actors were moved, the cameras on the miniature set moved the equivalent scaled amount automatically. The exact scale motion was achieved by trial and error, involving minute adjustments to the voltage delivered to the slave camera's motors.
- During production of this story, Madame Tussauds in London debuted the "Doctor Who Exhibition". Included were sculptures of both the Fourth Doctor and his Meglos doppelganger. As a result, Tom Baker is the only person to have appeared twice in the wax museum.
- The Dodecahedron was originally a five-sided object, thereby influencing the number of screens found on Zolfa-Thura, rather than a twelve-sided object made up of pentagons.
- John Nathan-Turner chose Terence Dudley to direct, having worked with him on All Creatures Great and Small. Dudley was also friends with Jacqueline Hill's husband Alvin Rakoff.
- John Flanagan and Andrew McCulloch hoped that many of the scenes on Zolfa-Thura and in the Tigellan jungle would be achieved on location, but John Nathan-Turner decided that their scripts represented an opportunity to save money by confining all recording to the studio.
- For a time, it was suggested that the Gaztaks might exhibit an East Asian appearance, with Bill Fraser and Frederick Treves made up accordingly, but this notion was dropped.
- Christopher H. Bidmead was required to significantly expand some of the scripts, particularly part three, which was found to be running seven minutes short. Amongst the added material was Romana leading the Gaztaks in a circle through the jungle.
- Tom Baker was now slowly recovering from the illness which had plagued him during The Leisure Hive, but his long convalescence was still dampening his mood, and he disliked the latex facial appliance he had to wear to give him a cactus-like appearance.
Ratings[[edit] | [edit source]]
- Part one - 5.0 million viewers
- Part two - 4.2 million viewers
- Part three - 4.7 million viewers
- Part four - 4.7 million viewers
Filming locations[[edit] | [edit source]]
to be added
Production errors[[edit] | [edit source]]
- In part one, the wires holding the planet up over Zolfa Thura are obvious.
- In part one, when information about the Doctor is shown on a screen in Meglos's base, the word "date" is misspelled as "dateb", with the correct spelling appearing on screen briefly before the camera cuts away.
- In the outdoor scenes on Zolfa Thura in parts one and four, the blue colour of the blue screen is visible through General Grugger's beard.
- The cactus gloves worn by Tom Baker as Meglos show his wrists quite often.
- When the Gaztaks first exit their ship in episode one, one of the Gaztaks holding the Earthling trips and nearly falls over.
- Due to the poor CSO effects used in many of the outdoor scenes on Zolfa Thura, when Meglos buries the Dodecahedron in the sand between the Screens of Zolfa Thura in part four, he appears to be semi-transparent.
- The closing theme in part four is erroneously played at a reduced pitch. Perhaps coincidentally, this means the theme is now being played in the same key as the Delia Derbyshire arrangement.
Continuity[[edit] | [edit source]]
- The Gaztaks appear in PROSE: Warmonger.
- The Doctor previously encountered a villainous doppelganger of himself in his first incarnation in TV: The Massacre, and in his second incarnation in TV: The Enemy of the World.
- K9 is being repaired during this story, the result of rolling into water when the Doctor hadn't set up his sea water defences. (TV: The Leisure Hive)
Home video and audio releases[[edit] | [edit source]]
CD Release[[edit] | [edit source]]
cd cover

VHS Release[[edit] | [edit source]]
This story was released on VHS in the UK in March 2003.

VHS UK cover
VHS Australian cover
VHS US cover


DVD Release[[edit] | [edit source]]
It was released on DVD on the following dates:
- Region 2 - 10 January 2011
- Region 1 - 11 January 2011
- Region 4 - 20 January 2011
Special Features[[edit] | [edit source]]
- Commentary by Lalla Ward (Romana), Christopher Owen (Earthling), John Flanagan (writer), Paddy Kingsland (composer) and Peter Howell (composer)
- Meglos Men - Writers John Flanagan and Andrew McCulloch meet with script editor Christopher H. Bidmead
- The Scene Sync Story - A look at the pioneering technique used to create many of this story's shots
- Jacqueline Hill - A Life in Pictures - A look at the life of Jacqueline Hill, with husband Alvin Rakoff, Doctor Who producer Verity Lambert and actors William Russell and Ann Davies
- Entropy Explained
- Isolated Score
- Radio Times Listings (PDF DVD-ROM - PC/Mac)
- Production Information Subtitles
- Photo Gallery
- Coming Soon Trailer - The Mutants
- Easter Egg: Clean 1980 title sequence & closing credits. To access this hidden feature, press left at Audio Options on the Special Features menu to reveal a hidden Doctor Who logo.

Region 1 cover
Region 4 cover
Region 2 UK cover


External links[[edit] | [edit source]]
- Meglos at the BBC's official site
- Meglos at RadioTimes
- Meglos at BroaDWcast
- Meglos at the Doctor Who Reference Guide
- Meglos at Shannon Sullivan's A Brief History of Time (Travel)
Footnotes[[edit] | [edit source]]
- ↑ Big Finish (13 November 2014). 72. Toby Hadoke's Who's Round #72 - Crawford Logan. bigfinish.com. Retrieved on 14 November 2014.
- ↑ http://www.shannonsullivan.com/doctorwho/serials/5q.html