Inferno (TV story): Difference between revisions
RavenclawDBS (talk | contribs) No edit summary |
Gingerfool (talk | contribs) mNo edit summary |
||
| (190 intermediate revisions by 52 users not shown) | |||
| Line 2: | Line 2: | ||
{{real world}} | {{real world}} | ||
{{ImageLinkTV}} | {{ImageLinkTV}} | ||
{{Infobox Story | {{Infobox Story SMW | ||
|image= Inferno title.jpg | |image = Inferno title.jpg | ||
|series=[[Doctor Who television stories|''Doctor Who'' television stories]] | |series = [[Doctor Who television stories|''Doctor Who'' television stories]] | ||
|season number= Season 7 | |season number = Season 7 (Doctor Who 1963)| | ||
|season serial number = 4 | |season serial number = 4 | ||
|story number= 54 | |story number = 54 | ||
|doctor=Third Doctor | |doctor = Third Doctor | ||
|companions = [[Liz Shaw|Liz]] | |companions = [[Alistair Gordon Lethbridge-Stewart|The Brigadier]], [[Liz Shaw|Liz]] | ||
|featuring = | |featuring = [[John Benton|Benton]] | ||
| | |enemy = [[Eric Stahlman]] | ||
|enemy= | |setting = [[Eastchester]] ([[Earth]] and [[Inferno universe|Parallel Earth]]), July, [[Dating protocol|1974 or 1980]] <ref>[https://www.lethbridge-stewart.co.uk/timeline/ Lethbridge-Stewart TIMELINE]</ref> | ||
|writer = Don Houghton | |||
|writer= | |director = [[Douglas Camfield]], [[Barry Letts]] (uncredited) | ||
|director= [[Douglas Camfield]], [[Barry Letts]] | |producer = [[Barry Letts]] | ||
|producer= [[Barry Letts]] | |novelisation = Inferno (novelisation) | ||
|novelisation= Inferno (novelisation) | |epcount = 7 | ||
|epcount=7 | |broadcast date = 9 May - 20 June 1970 | ||
|broadcast date= | |network = BBC1 | ||
|network= | |format = 7x25-minute episodes | ||
|format= 7x25-minute episodes | |serial production code = [[List of production codes|DDD]] | ||
|serial production code= [[List of production codes|DDD]] | |prev = The Ambassadors of Death (TV story) | ||
|prev= The Ambassadors of Death (TV story) | |next = Terror of the Autons (TV story) | ||
|next= Terror of the Autons (TV story) | |clip = Falling into a parallel universe - Doctor Who - BBC classic sci-fi | ||
|clip=Falling into a parallel universe - Doctor Who - BBC classic sci-fi | |clip3 = Lava eruption - Doctor Who - BBC classic sci-fi | ||
|clip3=Lava eruption - Doctor Who - BBC classic sci-fi | |clip2 = Monster professor - Doctor Who - BBC classic sci-fi | ||
|clip2=Monster professor - Doctor Who - BBC classic sci-fi | |thwr = 19 | ||
}}{{dab page|Inferno}} | }}{{dab page|Inferno (disambiguation)}} | ||
'''''Inferno''''' was the fourth and final serial of [[season 7]] of ''[[Doctor Who]]''. It was | '''''Inferno''''' was the fourth and final serial of [[Season 7 (Doctor Who 1963)|season 7]] of ''[[Doctor Who]]''. It was the final regular appearance of [[Caroline John]] as [[Liz Shaw]], although her departure is not depicted. It was also the first ''Doctor Who'' story to explore the concept of [[parallel universe]]s. | ||
''Inferno'' was the first story in which [[producer]] [[Barry Letts]] had any say on development and commissioning. [[Director (crew)|Director]] [[Douglas Camfield]] suffered a minor heart attack after completing the location filming and the studio scenes for episodes one and two. This left Letts to direct the studio scenes for the remaining five episodes. | |||
Several possible stories were considered for the season finale. ''[[The Mists of Madness (unproduced TV story)|The Mists of Madness]]'' by [[Brian Wright (writer)|Brian Wright]] and ''[[The Shadow People (unproduced TV story)|The Shadow People]]'' by [[Charlotte Plimmer|Charlotte]] and [[Dennis Plimmer]] were two. However, Wright was unavailable, and the Plimmers abandoned the project after a pay dispute. This left the way open for ''The Mo-Hole Project'', as it was then titled, by [[Don Houghton]]. The serial went through several name changes before becoming ''Inferno''. | |||
Several possible stories were considered for the season finale. ''[[The Mists of Madness (TV story)|The Mists of Madness]]'' by [[Brian Wright (writer)|Brian Wright]] and ''[[The Shadow People (TV story)|The Shadow People]]'' by [[Charlotte Plimmer|Charlotte]] and [[Dennis Plimmer]] were two. However, Wright was unavailable, and the Plimmers abandoned the project after a pay dispute. This left the way open for ''The Mo-Hole Project'', as it was then titled, by [[Don Houghton]]. The serial went through several name changes before becoming ''Inferno''. | |||
Houghton had based the drilling part of the story on real events. He had contacted the American Embassy to enquire about {{w|Project Mohole}}, a real world attempt to drill through the Earth's crust. Information on the project and why it was abandoned were not disclosed as such information was top secret. It was this secrecy that Houghton developed for his story. | Houghton had based the drilling part of the story on real events. He had contacted the American Embassy to enquire about {{w|Project Mohole}}, a real world attempt to drill through the Earth's crust. Information on the project and why it was abandoned were not disclosed as such information was top secret. It was this secrecy that Houghton developed for his story. | ||
Letts was worried when the first script draft arrived as he did not think there was enough in it to fill a seven-parter. Additions such as the [[Primord]]s and scenes featuring [[Venusian aikido]] were made to suitably lengthen the script. | Letts was worried when the first script draft arrived as he did not think there was enough in it to fill a seven-parter. Additions such as the [[Primord]]s and scenes featuring [[Venusian aikido]] were made to suitably lengthen the script. | ||
This was the final serial to rely solely on stock tracks for its incidental music; this had been done periodically throughout the programme's history to date, typically as a cost-saving manoeuvre. | |||
== Synopsis == | == Synopsis == | ||
[[UNIT]] is providing security cover at an experimental drilling project designed to penetrate the [[Earth]]'s crust and release a previously untapped source of [[energy]]. Soon, however, the drill head starts to leak an oily green liquid that transforms those who touch it into vicious [[Primord|primeval creatures]] with a craving for [[heat]]. | [[UNIT]] is providing security cover at an experimental drilling project at [[Eastchester]], designed to penetrate the [[Earth]]'s crust and release a previously untapped source of [[energy]]. Soon, however, the drill head starts to leak an oily green liquid that transforms those who touch it into vicious [[Primord|primeval creatures]] with a craving for [[heat]]. | ||
The Doctor is accidentally transported by the partially repaired [[The Doctor's TARDIS|TARDIS]] control console into a parallel universe where the drilling project is at a more advanced stage. Thwarted by his friends' ruthless alter egos, he works to save both universes. | The Doctor is accidentally transported "sideways in time" by the partially repaired [[The Doctor's TARDIS|TARDIS]] control console into a parallel universe where the drilling project is at a more advanced stage. Thwarted by his friends' ruthless alter egos, he works to save both universes. | ||
== Plot == | == Plot == | ||
=== Episode 1 === | === Episode 1 === | ||
The Doctor drives Bessie into an area marked | The Doctor drives Bessie into an area of a drilling complex marked ''RESTRICTED''. | ||
[[File:Inferno_ep1.JPG|thumb|left|The irrational Professor [[Stahlman]] dismisses the concerns of [[Keith Gold|Sir Keith]].]] | [[File:Inferno_ep1.JPG|thumb|left|The irrational Professor [[Eric Stahlman|Stahlman]] dismisses the concerns of [[Keith Gold|Sir Keith]].]] | ||
A maintenance worker | A maintenance worker named Harry Slocum enters a drilling unit nicknamed Inferno. He introduces himself to Sir Keith Gold and is told there is an issue with output pipe number two, which has been taken out of service. He is urged to fix it quickly, as Professor Stahlman does not want any delays. Stahlman is at loggerheads with Sir Keith and tells him he should never have stopped the output pipe for maintenance. He tells Sir Keith never to make a decision with regards to the drilling again, and to focus on running the project's canteen. | ||
As Slocum is fixing the pipe, he sees a [[green]] goo emanating from the base. He touches it, | As Slocum is fixing the pipe, he sees a [[green]] goo emanating from the base. He touches it, it burns and he is horrified to see his hand turn green. | ||
Sir Keith discusses | Sir Keith discusses Professor Stahlman with the scientist's personal assistant, Petra Williams. He confides that he has sent for an expert in oil rig mining, Greg Sutton, as he is nervous that there is no-one with real drilling expertise on the project. | ||
As Slocum leaves, he seems entranced. He heads outside the complex and stumbles against a piece of scaffolding. A man rushes out to help him. With a growl Slocum turns on | As Slocum leaves, he seems entranced. He heads outside the complex and stumbles against a piece of scaffolding. A man rushes out to help him. With a growl, Slocum turns on the man and kills him with his [[wrench]]. | ||
In a room inside the complex, Benton is hanging a picture in what is to be the UNIT | In a room inside the complex, Benton is hanging a picture in what is to be the temporary UNIT H.Q. The Brigadier enters and asks if there has been any sightings of Slocum. Benton says there hasn't been. The Doctor enters, and the Brigadier tells him of the [[murder]]. He shows him the wrench, which is still warm and was red hot when it was found. The Brigadier comments that trouble seems to follow the Doctor around, and he questions why he asked to be on this mission. The Doctor says that an opportunity to be at the first penetration of the Earth's crust was not to be turned down. He then heads off to do some experiments of his own. | ||
Sutton has arrived and is bewildered at having been pulled over with such urgency. Sir Keith shows him around the complex | Sutton has arrived and is bewildered at having been pulled over with such urgency. Sir Keith shows him around the complex, saying that the drill head is twenty miles deep. This has been achieved by having no pipes, the pipes visible containing coolant delivered to the drill bit. Instead, there is a robot drill that is fed by a cable from a nuclear reactor. Sutton asks what this is hoping to achieve. The project is aiming to pipe [[Stahlman's gas]] (named after the Professor, naturally), a powerful energy source trapped inside the Earth's crust since the dawn of time. Sir Keith begins to introduce Sutton to the staff. He tries to flirt with Petra and is snubbed. On being introduced to Professor Stahlman, the scientist is cold towards Sutton. Stahlman thinks that Sir Keith is trying to introduce as many experts into the project as he can to try to close it down, and counts the Doctor as one of these. Sir Keith introduces Sutton to the Doctor and asks his opinion on the project. He says that they should be heeding the warnings of the computers. As he leaves, he overhears Stahlman complaining about the experts to Petra. He causally, but loudly, points out a flaw in the mechanics to a nearby scientist, making Stahlman angry. | ||
The Doctor pulls up to a small building being guarded by a UNIT soldier. He asks if there is any news about Slocum; | The Doctor pulls up to a small building being guarded by a UNIT soldier. He asks if there is any news about Slocum; he is told that there isn't. The Doctor uses a device to open the door to the building remotely and drives [[Bessie]] in. Liz is inside working on the [[TARDIS console]]. The Doctor hands over the figures from the computer and tells her of the murder. She already knows as the sentry told her. They discuss the real reason they are here: the Doctor wants to use the [[nuclear power]] to try to jump-start his TARDIS console. He wants a test run straight away. Liz starts flicking switches and positions herself by the main switch. | ||
Slocum is skulking around the complex | Slocum is skulking around the complex; he is now covered in hair and has claws. Slocum enters a building marked ''NUCLEAR REACTOR SWITCH ROOM'', where a white-coated scientist called Bromley is on the telephone. Slocum approaches him from behind. | ||
The Doctor says he is ready. Liz pulls the lever down. The machine registers 7 mega volts. | The Doctor says he is ready. Liz pulls the lever down. The machine registers 7 mega volts. | ||
Slocum has | Slocum has knocked Bromley unconscious, and pulls the nuclear reactor's main switch down to maximum. | ||
{{video|Doctor takes a trip - Doctor Who - BBC classic sci-fi|thumb|"Too much power, Liz!"}} | |||
The console begins to shake. The Doctor says that there is too much power. Liz cannot do anything as the circuits are locked. | The console begins to shake. The Doctor says that there is too much power. Liz cannot do anything as the circuits are locked. With a rapidly sped-up TARDIS take-off sound, the console and the Doctor dematerialise. | ||
The Doctor is in some kind of limbo and is in some pain as he and the console fly through the darkness. He flies off into the black. | The Doctor is in some kind of limbo and is in some pain as he and the console fly through the darkness. He flies off into the black void. | ||
Liz uses a plank of wood to force the levers down. | Liz uses a plank of wood to force the levers down. | ||
The Doctor | The console reappears, followed by the Doctor a few seconds later. The Doctor is groggy, but fine, and is keen for another trial run. Liz tries to dissuade the Doctor, but he says he needs to know where he was and where he was going. An alarm goes off at the drill-head area. The Doctor and Liz hurry off to Bessie. | ||
The complex is in | The complex is in lockdown as the drill-head area fills with smoke. Professor Stahlman argues with Sir Keith as to why he ordered the lockdown. Sir Keith implores Stahlman to shut off the power, but he refuses. Sutton says that if the power is stopped now, it will never be able to be restarted again. Petra is ordered to check the coolant. Sutton tries to stop her, saying that the pressure is too dangerous, but she doesn't care. The Doctor and Liz enter the area. The Doctor says that there has been a nuclear power surge. The Brigadier enters and says that there has been another murder. The Doctor goes to Professor Stahlman to give him his advice, but is told to stop wasting his time. The Doctor heads off with the Brigadier. Petra returns, saying that the controls are jammed with the heat. Sutton tries to stop her from heading off, but instead goes with her to help. They find Professor Stahlman trying to stop it manually, and Sutton helps. | ||
The Doctor and the Brigadier go to examine the body. As they do, Slocum jumps up, growling. | The Doctor and the Brigadier go to examine the body. As they do, Slocum jumps up, growling. | ||
| Line 87: | Line 87: | ||
The Doctor stops any UNIT forces from attacking. | The Doctor stops any UNIT forces from attacking. | ||
Sutton has sorted the issue with the coolant. | Sutton has sorted the issue with the coolant. Professor Stahlman says the readings are too high, and is offended when Petra suggests they need the Doctor. | ||
The Doctor tries to calm Slocum. A UNIT soldier, Private Wyatt, sneaks up on Slocum and prepares to attack. | The Doctor tries to calm Slocum. A UNIT soldier, Private Wyatt, sneaks up on Slocum and prepares to attack. | ||
Stahlman is trying to contact the Doctor by telephone. | |||
The phone is ringing but | The phone is ringing, but everyone ignores it. Slocum attacks Wyatt. Wyatt manages to shoot him twice. They wrestle, and then Slocum slumps to the floor. | ||
Sir Keith wants to stop the drilling, but the Professor blocks it. | Sir Keith wants to stop the drilling, but the Professor blocks it. | ||
Slocum is wounded but alive. The Doctor wants to turn off the switch but can't as it is too hot | Slocum is wounded, but alive. The Doctor wants to turn off the switch but can't as it is too hot, so he borrows the Brigadier's gun and uses that. Slocum dies and as he slumps down, the wall he was leaning on is blackened and scorched. The Doctor answers the phone and tells Stahlman he has sorted everything. | ||
Professor Stahlman tells his workers to return to their duties. Sutton is cross with him and says he is just asking for trouble; he tries to confide with Petra and implores her to try to persuade Stahlman. | |||
The Doctor and the Brigadier examine the body. He was shot twice through the [[heart]] but remained alive for several minutes. The Doctor marvels at his abnormal resistance and strength. The body is still hot. The attacked UNIT scientist and Private Wyatt are seemingly fine. | The Doctor and the Brigadier examine the body. He was shot twice through the [[heart]], but remained alive for several minutes. The Doctor marvels at his abnormal resistance and strength. The body is still hot. The attacked UNIT scientist and Private Wyatt are seemingly fine. | ||
The Doctor and the Brigadier climb to the roof to discuss what is going on. The Doctor suggests that there is some kind of retrogression of body cells that causes the victim to turn into | The Doctor and the Brigadier climb to the roof to discuss what is going on. The Doctor suggests that there is some kind of retrogression of body cells that causes the victim to turn into an animal. The Doctor says that it is a very slow process and wasn't complete with Slocum. The Brigadier asks if he has ever heard a noise like the one Slocum made. The Doctor says he has, at [[Krakatoa]] in [[1883]]. The Brigadier asks if there is a link, but they are interrupted by a UNIT soldier, who reports that Wyatt has disappeared. The Brigadier and the soldier rush off to find him. The Doctor sees Wyatt high above on a walkway and pursues him. When the Doctor catches up, Wyatt is animalistic and approaches the Doctor, wielding his gun like a club. Wyatt swings too hard and throws himself off the edge of the walkway. The Doctor shouts for no-one to touch him. | ||
The UNIT scientist emerges from the building in a trance. | The UNIT scientist emerges from the building in a trance. | ||
[[File:Inferno_ep2.JPG|thumb|right|[[The Doctor]] and [[Liz Shaw|Liz]] examine a vial of mysterious [[Stahlman's ooze|green liquid]].]] | [[File:Inferno_ep2.JPG|thumb|right|[[The Doctor]] and [[Liz Shaw|Liz]] examine a vial of mysterious [[Stahlman's ooze|green liquid]].]] | ||
Professor Stahlman wants to increase the drilling speed when Petra calls him into a room where Sir Keith and Sutton are examining something. They open a box and show Stahlman a vial of the green goo. Sir Keith says that it has defied analysis, and to do so is very tricky as the substance is too hot and does not cool down. The Doctor tries to suggest what it is, again mentioning Krakatoa. The Brigadier wants to talk to Professor Stahlman and Sir Keith, but the scientist is reluctant to comply. The Brigadier insists. Left alone, Liz and the Doctor discuss the substance. The Doctor says he wants to hear it as he thinks it will let off a scream. Liz asks him to come and look at one of the computers. | |||
Professor Stahlman is callous and is not bothered about the deaths on the site; the Brigadier and Sir Keith plead with him to show more mercy. Stahlman says he has no time for these deaths nor any crazy theories of the Doctor's. The Doctor enters and asks if Professor Stahlman ever intends on paying heed to his computers. Stahlman insists that the computers are over-sensitive. The Doctor reacts angrily. Petra rushes in and says that the vial holding the green goo is about to break. Stahlman strides out and, against the Doctor's suggestions, takes the vial in his hands and puts it back into the box, ordering it to be deep frozen. Professor Stahlman makes it clear that his discussion with the Brigadier is over and that the computer is faulty. The Doctor shows Stahlman the computer and warns him that he should stop the drilling. Again, Stahlman says that the readings are inaccurate. The Doctor goes to leave to continue his work, and Stahlman tells him that he is having the nuclear power supply to the Doctor's hut disconnected. The Doctor tells Stahlman that he is being childish. Professor Stahlman tells Petra that they can up the work rate of the drill in twenty-five minutes. Petra asks if it is safe, but Stahlman disregards her. As Stahlman is left alone, he discovers that his hand has turned green. | |||
The Doctor asks Liz to go back to their hut and test the tri-gamma circuits on the console. Subtly he flicks a switch on one of the computers and closes his hut back up. | The Doctor asks Liz to go back to their hut and test the tri-gamma circuits on the console. Subtly he flicks a switch on one of the computers and closes his hut back up. | ||
Professor Stahlman opens the computer and removes a microcircuit. He finds a truncheon in the Brigadier's desk and goes to smash it. The Doctor stops him. Stahlman goes to do it again, and the Doctor uses [[Venusian aikido]] to paralyse him. The Brigadier breaks it up. Professor Stahlman leaves, saying that the Doctor is a madman. The Doctor tells the Brigadier what he saw. When they challenge Stahlman, the scientist accuses the Doctor of trying to sabotage the drilling. They check Stahlman's pockets, and he no longer has the microcircuit. As the Doctor leaves, he points out that the computer has already stopped working. Unseen, Professor Stahlman stamps on and destroys the microcircuit which he had dropped on the floor. | |||
The Doctor returns to his hut. Liz has fixed the tri-gamma circuits. She asks why he asked her to do it, and he says he strongly believes that the console is fine; it is just the nuclear surge that ruined his test. Liz says she is relieved they can't test again. The Doctor sends Liz off to run some tests through the computer. As soon as | The Doctor returns to his hut. Liz has fixed the tri-gamma circuits. She asks why he asked her to do it, and he says he strongly believes that the console is fine; it is just the nuclear surge that ruined his test. Liz says she is relieved they can't test again. The Doctor sends Liz off to run some tests through the computer. As soon as the Doctor is alone, he busies himself with the console. | ||
As Liz leaves, she is pursued by the animalistic form of | As Liz leaves, she is pursued by the animalistic form of what had once been Bromley. | ||
Liz returns to find the computer broken. When she explains to the Brigadier why she is there, he says that the Doctor knew the computer wasn't functioning. Liz rushes over and sees that the switch to provide power to the Doctor's hut is on | Liz returns to find the computer broken. When she explains to the Brigadier why she is there, he says that the Doctor knew the computer wasn't functioning. Liz rushes over and sees that the switch to provide the nuclear power supply to the Doctor's hut is on; she and the Brigadier run off to the hut. | ||
The Doctor hangs onto his console as it begins to shake. | The Doctor hangs onto his TARDIS console as it begins to shake. | ||
Professor Stahlman notices that the power is down, and runs over to the switch and switches the Doctor's supply off. | |||
Liz and the Brigadier return to see the Doctor | Liz and the Brigadier return the hut to see the Doctor, his console and Bessie dematerialise. | ||
=== Episode 3 === | === Episode 3 === | ||
Liz tries to bring back the now disappeared Doctor, but there is no power. | Liz tries to bring back the now disappeared Doctor, but there is no power. Wherever the Doctor is, he's trapped. | ||
Liz and the Brigadier return to the base. The Brigadier orders | Liz and the Brigadier return to the base. The Brigadier orders Professor Stahlman to reconnect the power and explains why, but he refuses. Sir Keith threatens to tell the ministry about this and the new mining speeds; Stahlman tells him to do so. When Stahlman leaves, Sir Keith says he will go to [[London]] as soon as possible but can't leave Professor Stahlman to do as he pleases at this critical point of the drilling. | ||
Professor Stahlman's hand is now bright green. As he puts on a pair of white gloves, he is seen by Petra, who tells him to get it checked. Stahlman tells her not to worry. | |||
Liz berates the Brigadier for not showing concern over the Doctor. The Brigadier says he has many concerns of which the Doctor is one. | Liz berates the Brigadier for not showing concern over the Doctor. The Brigadier says he has many concerns of which the Doctor is one. | ||
The Doctor awakes | The Doctor awakes in what appears to be his hut, but his surroundings are somewhat altered. On the wall is a poster that reads ''UNITY IS STRENGTH'' along with a black-and-white photograph of [[the Leader|a man]] with a thin moustache. His device does not open the door, so he forces it open. The hut's door has a sign reading ''TECHNICAL STORE'' with an unfamiliar logo on it. He drives Bessie out of the hut and pauses to close the door when he is shot at by soldiers. After protesting, he jumps aboard Bessie and drives off, pursued by the soldiers, who consider him a saboteur. He soon finds himself in a dead end where a soldier jumps aboard Bessie. The Doctor and the soldier fight as the Doctor drives. He manages to throw the soldier out of the car. He parks Bessie between some houses and hides in a bin. The pursuing soldiers run into the house, allowing the Doctor to escape. The Doctor sneaks onto a walkway above the compound and watches the soldiers look for him. He hears a snarl behind him, and one of the animalised humans approaches him. As he attacks, the Doctor uses a [[fire extinguisher]] to subdue him. This draws the attention of the soldiers, who continue to pursue him. Another animalised human approaches him, and the Doctor counters his attack with a wooden pole. | ||
Below, the soldiers are ordered to shoot on sight. They see a figure above them and | Below, the soldiers are ordered by their leader to shoot on sight. They see a figure above them and fire. The animalised human falls to the ground. | ||
A female figure marches though the compound. The Doctor sees that it is Liz, only with a different haircut. The Doctor | A uniformed female figure marches though the compound. The Doctor sees that it is Liz, only with a different haircut. The Doctor calls out to her and asks why she is wearing those clothes. The woman looks confused, then draws a gun on the Doctor and blows her whistle for backup. Soldiers arrive, and she orders them to take the Doctor away. | ||
The Doctor is brought into the Brigadier's office, where he is met with a figure similar to the Brigadier but | The Doctor is brought into the Brigadier's office, where he is met with a figure similar to the Brigadier, but has no moustache, sports an eyepatch and has a large scar by his eye. He asks how the Doctor got in. The Doctor responds quizzically and asks who he is. The man reveals himself to be Brigade Leader Lethbridge-Stewart, while the woman is Section Leader Elizabeth Shaw and the other man is Platoon Under Leader Benton. When the Brigade Leader asks who the Doctor is, the Doctor realises what has happened. He introduces himself as Doctor John Smith and says he is from a parallel space-time continuum. The Brigade Leader is unsure if he is mad or bluffing. The Doctor shows he has knowledge of the drill and the people running it, and wants to see Professor Stahlmann or Sir Keith. The Brigade Leader takes the Doctor to see Stahlmann. | ||
On the way, the Doctor notices that the drilling is three hours and twenty minutes away from the core, much in advance of where the Doctor has come from. | On the way, the Doctor notices that the drilling is three hours and twenty minutes away from the core, much in advance of where the Doctor has come from. The Doctor is brought before Stahlmann, who is referred to here as the Director but, unlike his bearded counterpart in the Doctor's universe, is clean-shaven, wears dark-tinted glasses and white gloves. The Doctor asks to see Sir Keith, but Director Stahlmann tells him that Sir Keith was killed in a car accident twenty-four hours ago, while on his way to the ministry in London. The Doctor draws attention to the broken computer that was giving out warning signs before it broke down. The Director accuses the Doctor of having sabotaged it and calls him away. He turns to Dr. Petra Williams, the Assistant Director of the project, and asks her to continue the drilling. Sutton tells her that there is no pressure getting to the drill head. Dr. Williams says she is aware of this, and tells Stahlmann what Sutton told her. He refuses to decelerate. Once Stahlmann is left alone, he feels a pain in his hand. He takes off the glove, and the hand beneath is bright green all over and hairy. | ||
The Doctor is being made to wait by the Brigade Leader. He asks what is going to happen to him and is told that he will be executed without trial under the Defence of the Republic Act 1943. When the Doctor asks about the | The Doctor is being made to wait by the Brigade Leader. He asks what is going to happen to him and is told that he will be executed without trial under the Defence of the Republic Act 1943. When the Doctor asks about the Royal Family, he is told they were all executed. When the Doctor sits down and begins to tell a story about how he met Edward VII in Paris, he is forced to his feet by the soldiers. When he badmouths them, the Brigade Leader tells him he cannot insult the Republican Security Forces who have been brought here to protect the drilling. The Doctor says they will need protecting if the computer giving out danger signals or Harry Slocum's death is anything to go by. The Brigade Leader says he is showing the amount of knowledge that only a spy could possess. The Doctor insists that he has seen it all in his world. The phone rings, and the Brigade Leader rushes out. Elizabeth tells him that Central Records have returned no match for the Doctor; officially, he does not exist. This confuses the Brigade Leader as Central Records have never failed him before. They both interrogate the Doctor. | ||
Dr. Williams is informed of a minor leak in the drill head. Sutton questions her and is frustrated when neither she nor the Director seem to be bothered. An alarm goes off. | |||
Hearing the alarm, the Brigade Leader and Elizabeth rush out. The Doctor calls over the guard and immobilises him with karate. | Hearing the alarm, the Brigade Leader and Elizabeth rush out. The Doctor calls over the guard and immobilises him with karate. | ||
Smoke and green goo are pouring out of the drill head. The Brigade Leader is ordering all of his men and all of the scientists to remain at their posts. | Smoke and green goo are pouring out of the drill head. The Brigade Leader is ordering all of his men and all of the scientists to remain at their posts. During this chaos, the Doctor sneaks forward. | ||
Sutton orders the scientists around, to no avail. | Sutton orders the scientists around, to no avail. Dr. Williams watches the reading increase. The scientists start to abandon their posts; the Brigade Leader threatens to shoot them. The Doctor has found a toolbox and is scrabbling around looking for a microcircuit. He is discovered by Platoon Under Leader Benton, who holds a gun to his head and remarks there is a firing squad outside waiting. The Doctor implores with Benton, saying that he knows how to stop all this. Benton is unmoved and asks "Are you coming with me quietly, or do I shoot you here and now?" | ||
=== Episode 4 === | === Episode 4 === | ||
Elizabeth stops | Elizabeth stops Benton. The Doctor thanks her, but she says that she only did so because it goes against procedure. The Doctor tries to buy time to fix the computer, and eventually Elizabeth allows it. The computer begins to work and assesses the problems. Director Stahlmann is angry that the Doctor has been allowed access to the computer, but Sutton and Elizabeth stick up for him. | ||
Sutton and | Sutton and Director Stahlmann argue about the safety precautions. Dr. Williams starts to listen to the Doctor's theories. The Doctor says that the heat and the pressure is proving too much for the velocity of the drill and that the only way to counteract it is to produce a reverse vortex by reversing all the systems. Reluctantly, Stahlmann agrees, then sends the Doctor away. Elizabeth compliments the Doctor, and then asks where he came from. He repeats his story about the parallel universe. Elizabeth asks about the version of herself in the Doctor's universe, and he says that she is a scientist. Elizabeth says that there is no similarity, but when the Doctor asks if she ever contemplated being a scientist, she admits she studied [[physics]] at university. The Doctor points out that it is there where the two points diverged. Elizabeth is doubtful, but the Doctor encourages her to think for herself. | ||
Dr. Williams and Sutton talk about the Doctor and his motivations for saving them. Sutton says he intends on cutting the drill down to minimum speed, regardless of what Director Stahlmann thinks. Dr. Williams tells Sutton that he needs to start towing the line a little more. Sutton refuses, despite knowing that those who disobey orders "disappear". | |||
Elizabeth is told that the emergency is over, thanks to the Doctor. The Doctor warns Elizabeth about the dangers of the drilling operation. | Elizabeth is told that the emergency is over, thanks to the Doctor. The Doctor warns Elizabeth about the dangers of the drilling operation. | ||
Director Stahlmann asks Sutton for progress and is told all is well. Stahlmann tells Sutton he intends on increasing the drilling speed, but Sutton says that this is madness. Stahlmann threatens to have Sutton killed if he continues to disobey him. | |||
The Brigade Leader and Elizabeth are firing questions at the Doctor. They ask him his name, who sent him, whether he is a saboteur, what organisation he works for, whether he is a traitor, how he gained access to the complex, who helped him and which of their enemies he is working with. The Doctor does not answer. Elizabeth warns him they have other methods of extracting this information and repeats the question. The Doctor says that he came on his own, by accident, and has slipped sideways through time. Elizabeth asks the Brigade Leader for permission to go to stage two interrogation. He blocks this, as he is fearful the Doctor will die before talking. | The Brigade Leader and Elizabeth are firing questions at the Doctor. They ask him his name, who sent him, whether he is a saboteur, what organisation he works for, whether he is a traitor, how he gained access to the complex, who helped him and which of their enemies he is working with. The Doctor does not answer. Elizabeth warns him they have other methods of extracting this information and repeats the question. The Doctor says that he came on his own, by accident, and has slipped sideways through time. Elizabeth asks the Brigade Leader for permission to go to stage two interrogation. He blocks this, as he is fearful the Doctor will die before talking. | ||
The Doctor hears the acceleration of the drilling and rises to try to stop it. The interrogation continues. | The Doctor hears the acceleration of the drilling and rises to try to stop it. The interrogation continues. Director Stahlmann enters, wanting to know what progress is being made. The Doctor draws attention to Stahlmann's gloves and challenges him to take them off. Stahlmann tries to brush over this, but the Brigade Leader asks him to. Stahlmann does so, and his hands are bandaged underneath. He says that he scorched them on a section of the drill-head. The Doctor begins babbling about the green goo and infection. The Brigade Leader orders the Doctor to be taken to the Security Centre and asks Elizabeth to supervise him into his cell. When they are alone, the Brigade Leader questions why Director Stahlmann is so concerned about the Doctor. The pair argue and Stahlmann leaves, saying he wants the Doctor "liquidated" by the end of the day. | ||
Sutton and | Sutton and Dr. Williams conspire about Director Stahlmann. Sutton is questioning why he is continuing to up the speed of drilling. Dr. Williams appears convinced by Sutton. | ||
The Doctor is escorted to his cell by Platoon Under Leader Benton. He notices he has a sleeping figure in the cell next to him. Platoon Under Leader Benton says he will be sleeping for some time, as he has been shot with a tranquilliser dart. Elizabeth comes to check on him. The Doctor refuses to be interrogated any more, until Platoon Under Leader Benton orders him to his feet at | The Doctor is escorted to his cell by Platoon Under Leader Benton. He notices he has a sleeping figure in the cell next to him. Platoon Under Leader Benton says he will be sleeping for some time, as he has been shot with a tranquilliser dart. Elizabeth comes to check on him. The Doctor refuses to be interrogated any more and lies down on the bed, until Platoon Under Leader Benton orders him to his feet at gunpoint. Again, Elizabeth asks who the Doctor is and how he came to the complex. The Doctor, again, tells the truth. Platoon Under Leader Benton asks for a moment alone with the Doctor to extract the information from him. Elizabeth sends all the guards away. She puts to him that he is a protester from a free speech group who is forming a demonstration and that if he confesses to that he will only get a few years in a labour camp. The Doctor refuses. Elizabeth says she will leave him to the Brigade Leader and leaves. Left alone, the Doctor tries to talk to the sleeping figure. After no response, he goes to sleep. A green hairy hand emerges from beneath the bedclothes. | ||
Back in the Doctor's universe, the Brigadier tells Liz that the UNIT soldiers have searched the entire complex for the Doctor, to no avail. They will not extend their search beyond the complex. Liz is concerned that the Doctor could be anywhere in space or time. When the Brigadier says that the Doctor can look after himself, Liz warns that he is not indestructible. | Back in the Doctor's universe, the Brigadier tells Liz that the UNIT soldiers have searched the entire complex for the Doctor, to no avail. They will not extend their search beyond the complex. Liz is concerned that the Doctor could be anywhere in space or time. When the Brigadier says that the Doctor can look after himself, Liz warns that he is not indestructible. | ||
Sir Keith asks | Sir Keith asks Professor Stahlman if there are any problems or precautions with the drilling. He responds in the negative to both. Sir Keith says he is going to London and, unless he receives some kind of assurances, he will tell the minister of the unsafe practices being carried about by Stahlman, who says he has no intention of playing it safe. When Stahlman leaves, Sir Keith tells the Brigadier and Liz that he is not sure that the Minister will even listen, as he has been blinded by Stahlman's promises of free energy. Sir Keith has an ominous feeling about the whole thing. | ||
In the parallel universe, the Doctor awakens to snarling from the sleeping figure. He calls for the guard, who enters to investigate. He is attacked and killed by the animalised human under the | In the parallel universe, the Doctor awakens to snarling from the sleeping figure in the next cell. He calls for the guard, who enters to investigate. He is attacked and killed by the animalised human who has emerged from under the bedclothes. The creature approaches the Doctor and bends the bars to enter the Doctor's cell. The Doctor flips his mattress onto the creature, knocking him over, and escapes via the creature's open cell, locking the door behind him. The Doctor runs into the complex and approaches a [[Land Rover]]. Surrounded by people and in an effort to hide, he gets into the back of the truck and it then drives off. | ||
The drill is thirty five minutes from | The drill is thirty-five minutes from penetrating the Earth's crust. Sutton asks Dr. Williams if everything is ready. Sutton has an ominous feeling about the whole thing and thinks they should be paying more attention to the computer. | ||
The Doctor has found a full | The Doctor has found a pile of full protective suits in the back of the truck. | ||
A guard discovers the carnage in the cell. | A guard discovers the carnage in the cell and sounds the alarm. | ||
The truck draws up and the Doctor | The truck draws up and the Doctor, now disguised in one of the protective suits, finds both soldiers and scientists waiting at the back of the vehicle. The Doctor tries the ploy of handing out the suits to the men, and it works. | ||
The drill is three minutes from | The drill is three minutes from penetration, and Director Stahlmann stares intently at the readings. | ||
The Doctor | The Doctor re-enters the compound with other similarly dressed men. | ||
The drill is two minutes from | The drill is two minutes from penetration. The disaster crew is at action stations. The Doctor and the other men in protective suits enter the main area and line up. The Doctor sneaks away and begins to tamper with a computer. The drill is one minute from penetration. The Brigade Leader notices the out-of-line figure and calls to him, telling him to get back to his post. The Doctor unveils himself by removing his protective helmet and shouts that the countdown should be stopped. Director Stahlmann orders the Doctor to be shot, and the Brigade Leader draws his gun. Sutton protests. The Doctor warns that they are about to release forces that they've never dreamed of. The drill lets out a high-pitched whine. The Doctor angrily yells "Listen to that! That's the sound of this planet screaming out its rage!" Sutton attacks the Brigade Leader and implores the Doctor to run. Wherever the Doctor turns, he is blocked by resistance security forces. Stahlmann now has the Brigade Leader's gun and is pointing it at the Doctor. The countdown reaches zero... | ||
=== Episode 5 === | === Episode 5 === | ||
The ground | The ground shakes as the countdown voice announces "penetration-zero", and everyone is thrown to to the floor. The technicians panic and abandon their posts in terror. The Brigade Leader attempts to stop them, but to no avail. The Doctor staggers to his feet and tries to stop Sutton, who has donned a spare protective suit taken from a wall locker, from going into the drill-head area. Director Stahlmann is attempting to enter as well; Sutton stops him and warns he should put a protective suit on before going in, but Stahlmann breaks free of Sutton's grip and rushes on inside ahead of the pair. The Doctor theorises that Stahlmann is not feeling the heat quite as much as they are. | ||
Dr. Williams confirms that nothing can be controlled remotely. | |||
Inside the | Inside the drill-head area, there is a huge explosion, and the green goo bubbles out of the drill itself. | ||
Sutton and the Doctor enter in their | Sutton and the Doctor enter in their protective suits. Suddenly, Sutton is struck about the head by Director Stahlmann. Whilst Sutton is unconscious, Stahlmann removes his helmet before he and the Doctor have a fist fight. Director Stahlmann is winning when Sutton staggers to his feet and strikes the crazed scientist down with a metal pole before collapsing in the fumes. The Doctor helps Sutton out of the area and back into the main area. When the Doctor tells everyone what Director Stahlmann did, they want to go in there and save him; the Doctor comments that Stahlmann seems to like it in there. Sutton and the Doctor prepare to go back in when the drill-head area's heat shield is suddenly closed by Stahlmann from inside. | ||
Inside, | Inside, Director Stahlmann is purposely contaminating the unconscious technicians with the goo. | ||
The Doctor asks how thick the | The Doctor asks how thick the heat shield is, and Sutton replies that it would stand up to a nuclear explosion. The Doctor warns that it will not be enough — saying that, compared to the energy unleashed from the Earth's core, a nuclear explosion would be little more than a summer breeze. | ||
An explosion rocks the complex. | An explosion rocks the complex. | ||
The Brigade Leader returns to see almost everybody has abandoned their post. | The Brigade Leader returns to see almost everybody has abandoned their post. Dr. Williams says that the computer is not working. The Brigade Leader reports of seismic tremors and [[earthquake]]s all over the country. The government have put him in control. Sutton asks if they have any plans to seal the shaft; the Brigade Leader says they do not. Sutton asks the Doctor if it is possible, but he says that no substance in the world is strong enough to withstand the unleashed energy. The pressure will only get worse until, in days or weeks, the Earth will vaporize. An animalised human has appeared behind them. The Brigade Leader goes to attack it, against the wishes of the Doctor. The Brigade Leader tries to shoot it, to no avail. The Doctor uses a fire extinguisher, which immediately kills it. The Doctor explains that the creatures can't stand the cold. Sutton wants to leave. Dr. Williams says she will accompany him. The Brigade Leader draws his gun on them. Platoon Under Leader Benton says he has found some resistance security forces. The Brigade Leader tells him to ensure nobody leaves the building. | ||
Benton marshals his troops. | |||
Dr. Williams is attempting to fix the computer. Sutton says there is no point and that they are all going to die. Dr. Williams says the whole complex needs re-wiring. Sutton says there is no chance of that as the government has abandoned them, but softens his tone when he sees how distressed Dr. Williams is. She now realises that it is the end; she and Sutton embrace. Sutton says he plans to leave and asks if Dr. Williams wants to come with him. | |||
Doctor | [''In the Brigade Leader's office, the Doctor, the Brigade Leader, Elizabeth, Sutton and Dr. Williams listen to the radio as an announcer reports geological disturbances across the country.''] | ||
Elizabeth is losing her mind at the planet's imminent demise. The Doctor says they still have a chance to save the other world. The Brigade Leader is exasperated that the Doctor is still continuing with that story. The Doctor explains the concept of the TARDIS and the fact he could use their nuclear reactor to get it working. He explains that in his world the drilling is behind schedule, and he can stop it before it takes place. The Brigade Leader wants to take a look at the TARDIS. As they leave, | Elizabeth is losing her mind at the planet's imminent demise. The Doctor says they still have a chance to save the other world. The Brigade Leader is exasperated that the Doctor is still continuing with that story. The Doctor explains the concept of the TARDIS and the fact he could use their nuclear reactor to get it working. He explains that in his world the drilling is behind schedule, and he can stop it before it takes place. The Brigade Leader wants to take a look at the TARDIS. As they leave, Dr. Williams tells him that all systems are breaking down. Once left alone, Sutton and Dr. Williams talk about when to escape. | ||
The Brigade Leader inspects the TARDIS console. The Doctor shows a few movements left over from residual energy | The Brigade Leader inspects the TARDIS console. The Doctor shows a few movements left over from residual energy, but the Brigade Leader still doesn't believe and Elizabeth asks to see some proof. The Doctor drains the energy storage unit to travel a few seconds into the future. He asks if the Brigade Leader is satisfied. The Brigade Leader wants to know if the Doctor can take anyone else with him, but he says he cannot, as to do so will create a dimensional paradox that would shatter the entire space-time continuum. The Brigade Leader says if the Doctor can save himself, he can save them, and they shall return to the main control area. | ||
Platoon Under Leader Benton is still keeping the resistance security forces in line despite the explosions around them. | Platoon Under Leader Benton is still keeping the resistance security forces in line despite the explosions around them. | ||
As | As Dr. Williams is working in the main control area, a voice calls to her over the loudspeaker. She alerts Sutton, who hears it too. The Brigade Leader, Elizabeth and the Doctor join them to hear Director Stahlmann's voice asking Dr. Williams to raise the drill-head area's heat shield as the manual controls are jammed with the heat. Dr. Williams goes to do so and the Doctor tries to stop her, but the Brigade Leader draws his gun and allows Dr. Williams to raise the heat shield — reasoning that if the Director has survived, he must have found a solution and they need him in the main control area. The heat shield opens halfway, and a figure in a protective suit pulls it the rest of the way. The figure pulls off his helmet to reveal the animalised Stahlmann beneath, and a group of others like him emerge from the drill-head area: the technicians Stahlmann earlier contaminated with the green goo. The creatures do not attack, as they are acclimatising to the change in temperature. Everyone tries to escape, but they are stopped by the creatures. Platoon Under Leader Benton enters and is immediately seized by the creatures. The animalised Stahlmann rubs a handful of green goo across Benton's face, and he screams in agony before collapsing to the floor. The Doctor pulls some wires out of the computer, and the heat shield closes. This creates a distraction to allow them to escape into the office. Sutton wants to save Platoon Under Leader Benton, but the Doctor forbids it as there's nothing that can be done: the creatures have made Benton one of them. Benton staggers around in pain as he begins to transform. | ||
Sutton is dismayed that he was not allowed to save Platoon Under Leader Benton. The Doctor says that nothing could have been done as the heat would have sped up | Sutton is dismayed that he was not allowed to save Platoon Under Leader Benton. The Doctor says that nothing could have been done as the heat would have sped up Benton's change; that is why he closed the heat shield. The Brigade Leader and Elizabeth tell Dr. Williams about the Doctor's "spacecraft". | ||
In the Doctor's | In the Doctor's universe, Sir Keith is on the way back from the ministry when he notices he is being taken a different route. The driver, Patterson, informs him that there is traffic. Sir Keith tries the car phone, but it isn't working. Sir Keith tells Patterson that the minister has suspended the drilling pending a full review. Sir Keith begins to become suspicious of Patterson, and he eventually confesses that Stahlman ordered him to take the long route home and stage a car breakdown. Sir Keith asks Patterson to return to the complex, but as he does, there is a loud screech of brakes as the pair are involved in a car accident... | ||
In the parallel universe, the creatures are clawing at the office door. | In the parallel universe, the creatures are clawing at the office door. | ||
Inside they are all discussing the revelations about the Doctor. They all believe him, with the exception of the Brigade Leader. The Doctor says he has a plan to get out of the office but is interrupted by one of the creatures breaking through the glass | Inside they are all discussing the revelations about the Doctor. They all believe him, with the exception of the Brigade Leader. The Doctor says he has a plan to get out of the office, but is interrupted by the arm of one of the creatures breaking through the door's glass panel. | ||
=== Episode 6 === | === Episode 6 === | ||
The Doctor uses a fire extinguisher to push the animalised humans back. The Doctor needs ten minutes to execute his plan to connect the TARDIS to the nuclear reactor. | The Doctor uses a fire extinguisher to push the animalised humans back. The Doctor needs ten minutes to execute his plan to connect the TARDIS to the nuclear reactor. Dr. Williams questions if there is any power running through the system. The Doctor checks the air conditioning system — it is working. Dr. Williams says it must have been switched to robot control; she would need to boost the output by resetting the emergency control, but the master switch in the next room needs to be fixed first. Sutton suddenly remembers that there is a huge amount of coolant in the adjacent room which they can use to hold off the creatures. The creatures break through, and they immediately put the plan into action. The Brigade Leader holds back the creatures with the fire extinguisher, while Sutton tries to access the coolant. The hose to the coolant has seized up, and the Doctor has to help. The Brigade Leader is surrounded, and his fire extinguisher has dried up. Just in time, Sutton has the coolant working and forces the creatures back. Sutton and the Doctor decide to stay and fix the master switch. | ||
Once outside, the Brigade Leader wants to abandon the Doctor and Sutton | Once outside, the Brigade Leader wants to abandon the Doctor and Sutton but Elizabeth and Dr. Williams say they intend to stay. | ||
The Doctor tells Sutton that he can go if he wants, but he refuses. Sutton asks the Doctor how he will convince them to stop drilling in his own universe. The Doctor says he may be able to convince Sir Keith. Sutton says he is dead, and the Doctor says he may still be alive in his own universe. | The Doctor tells Sutton that he can go if he wants, but he refuses. Sutton asks the Doctor how he will convince them to stop drilling in his own universe. The Doctor says he may be able to convince Sir Keith. Sutton says he is dead, and the Doctor says he may still be alive in his own universe. | ||
In the Doctor's universe, the Brigadier receives a phone call saying that Sir Keith has disappeared. Benton enters and says that Professor Stahlman is refusing to see the Brigadier and has insulted him. The Brigadier loses his temper and furiously orders Benton to bring Stahlman to him; even if it means carrying him! | |||
Liz is in the Doctor's hut, flicking switches | Liz is in the Doctor's hut, flicking control panel switches in an attempt to return the Doctor to his original timeline. The door rattles, Liz checks to see who it is and opens the door to reveal Sutton. He is curious about what has happened to the Doctor, seeing as nobody saw him leave. Sutton thinks that the Doctor blew himself up and that everyone is covering it up. Liz explains that there was some kind of accident, but won't be drawn on any other details. Sutton tells Liz about Sir Keith. | ||
Professor Stahlman is outraged at having been literally dragged away from his work by Benton and rails against the Brigadier. The Brigadier tells Stahlman of Sir Keith's disappearance and the scientist suggests an accident. The Brigadier says there has been no report of an accident. Stahlman suggests that Sir Keith might not have heard what he wanted to hear from the minister and taken himself off. The Brigadier says that, due to not having heard from the minister, he thinks that penetration-zero should be delayed due to Sir Keith's objections. Stahlman refuses. | |||
In the parallel universe, Sutton is still holding off the animalised humans. The Doctor has fixed the master switch | In the parallel universe, Sutton is still holding off the animalised humans. The Doctor has fixed the master switch, Sutton clears a path with the coolant, and they both escape, grabbing fire extinguishers as they go. | ||
Dr. Williams sees the Doctor and Sutton emerge. They all run off. | |||
Soon Bessie pulls up at the Control Centre. | Soon Bessie pulls up at the Control Centre. Dr. Williams immediately sets about fixing the computer. The Doctor and Sutton set off to get tools and cable. As they do, they feel the tremors of a distant earthquake and head off to Bessie. | ||
The animalised humans start emerging from the complex due to the fact it is warm enough outside for them now. | The animalised humans start emerging from the complex due to the fact it is warm enough outside for them now. | ||
The Brigade Leader loses his temper | The Brigade Leader loses his temper with Dr. Williams, telling her to hurry up, but she says shouting at her isn't helping. Elizabeth sides with Dr. Williams. The Brigade Leader explains that he has no intention of letting the Doctor escape alone. | ||
The complex is now covered with the animalised humans. | The complex is now covered with the animalised humans. | ||
The Doctor and Sutton have got back to the hut. Sutton is underwhelmed by the console. The Doctor asks him to fix the connector to the cable. Sutton warns him that if the entire output of the nuclear reactor is run through the cable, it will only last a few seconds. The Doctor assures him that | The Doctor and Sutton have got back to the hut. Sutton is underwhelmed by the console. The Doctor asks him to fix the connector to the cable. Sutton warns him that if the entire output of the nuclear reactor is run through the cable, it will only last a few seconds. The Doctor assures him that a few seconds is all he will need. | ||
The Brigade Leader asks | The Brigade Leader asks Dr. Williams how much longer she will be. She says that there is a problem with the relay circuits, and is attempting a double bypass. The Brigade Leader loses his temper again. Elizabeth turns on him. The Brigade Leader says he plans to hijack the TARDIS console and if the Doctor refuses to be persuaded, he will kill him. | ||
Sutton implores the Doctor to make sure he stops them from drilling and connects the cable. He says that, with luck, it should work. The Doctor says they don't need luck but skill. | Sutton implores the Doctor to make sure he stops them from drilling and connects the cable. He says that, with luck, it should work. The Doctor says they don't need luck but skill. | ||
Dr. Williams thinks she is ready. She pulls the lever and nothing happens; she says there must be a fault. The Brigade Leader is furious with Dr. Williams for wasting their time. She says she will try again, but it will involve re-wiring the whole system. | |||
Sutton and the Doctor are waiting for the circuit to be complete. Sutton says that, if those explosions reach the nuclear reactor, they are all done for. | Sutton and the Doctor are waiting for the circuit to be complete. Sutton says that, if those explosions reach the nuclear reactor, they are all done for. | ||
The Brigade Leader watches the shaft split open. The animalised Director enters. | The Brigade Leader watches the shaft split open. The animalised Director Stahlmann enters, and Dr. Williams and Elizabeth run out. The Brigade Leader shoots the animalised Stahlmann repeatedly until he falls to the floor. All three of them run off, pursued by the creatures. They are sporadically thrown to the ground by earthquakes. | ||
Back at the hut, Sutton is impatient, but the Doctor is resigned to the plan having not worked. Sutton sees the trio coming. | Back at the hut, Sutton is impatient, but the Doctor is resigned to the plan having not worked. Just then, Sutton sees the trio coming. Dr. Williams apologises for the plan not having worked. The Doctor says it is fine. The Brigade Leader is furious and says it is far from fine. Sutton and the Brigade Leader argue. The Brigade Leader pulls his gun on Sutton, who says he will be only speeding up his death. The Brigade Leader pulls the trigger, but there are no bullets in the gun. The pair fight, and the Doctor makes them stop — saying they don't want to end their lives "fighting like animals". They notice that Dr. Williams has gone back to the Control Centre to try to remedy the situation, and Sutton goes to help her. | ||
Dr. Williams is rewiring the computer when Sutton enters, furious. She asks what any risk to herself matters. The animalised Director Stahlman awakes, and Sutton attacks him with a fire extinguisher. As he does, Dr. Williams gets the circuit working. The pair run back to the hut. | |||
Elizabeth notices that the console is working | Elizabeth notices that the TARDIS console is working, and the Doctor says it is gaining power rapidly. The Brigade Leader pulls his gun and orders the Doctor to take them with him, firing the weapon in the air to prove it is now loaded. The Doctor says he wants to, but can't as to do so will cause a cosmic disaster. The Doctor says the Brigade Leader is going to have to shoot him. The Brigade Leader gives the Doctor a count of three before he fires, and then a gunshot rings out. The Brigade Leader falls dead to the floor, shot in the back. Elizabeth re-holsters her revolver; she is the one who fired the shot. She, Sutton and Dr. Williams implore the Doctor to leave now. | ||
A huge explosion shakes the complex | A huge explosion shakes the complex, and volcanic lava begins to flow from where the drill shaft was. Men and animalised humans run in terror. | ||
The Doctor says he cannot dematerialise as the power is too erratic. | The Doctor says he cannot dematerialise as the power is too erratic. Elizabeth, Sutton and Dr. Williams watch in terror as lava begins to flow towards the door of the hut... | ||
=== Episode 7 === | === Episode 7 === | ||
The Doctor | The Doctor lies prostrate and unconscious on the floor of the hut; his own hut, in his own universe. He is discovered by Liz, who calls for Benton to fetch the Brigadier. | ||
It is three hours and twenty two minutes until the drill | It is three hours and twenty-two minutes until the drill penetrates the Earth's crust. Professor Stahlman gives orders to boost the drilling. Petra is unsure as to the safety, but Stahlman orders it. Petra tells Sutton, who wants to confront Stahlman, but Petra stops him, saying that she will try first. | ||
Benton tells the Brigadier about the return | Benton tells the Brigadier about the Doctor's return. Sutton overhears. | ||
Professor Stahlman will not listen to Petra; he is strongly affected by a noise that emerges from the drill-head. Petra is worried for his health, but he says he merely has a [[headache]]. Sutton tries to persuade Stahlman but again he is blocked, and once more the noise has an effect on Stahlman. He storms off, leaving Petra and Sutton worried about his mental health. | |||
Liz is checking the Doctor's health. All is fine, and he is just in some kind of [[coma]]. The Brigadier wants to fetch a doctor, but Liz blocks him. | Liz is checking the Doctor's health. All is fine, and he is just in some kind of [[coma]]. The Brigadier wants to fetch a doctor, but Liz blocks him. | ||
Sutton warns | Sutton warns Professor Stahlman of an issue with the number two output pipe, but Stahlman ignores him. Sutton loses his temper, and Stahlman says that if he is so worried, he should leave. Sutton goes to leave when Petra stops him. Sutton tries to convince her to come with him, but she says she can't. They are interrupted by an explosion from the drill-head. | ||
The Brigadier is informed of the issue. The Doctor stirs. He mutters that the number two output pipe has blown. The Brigadier is stunned, as he has only just heard that information himself. Still in his coma, the Doctor mutters, "Reverse all systems immediately", before slipping back into unconsciousness. Liz goes to Central | The Brigadier is informed of the issue. The Doctor stirs. He mutters that the number two output pipe has blown. The Brigadier is stunned, as he has only just heard that information himself. Still in his coma, the Doctor mutters, "Reverse all systems immediately", before slipping back into unconsciousness. Liz goes to Central Control to tell them what the Doctor said. | ||
Professor Stahlman is struggling to keep everyone in their positions and is refusing to stop the drilling. Liz enters and asks Sutton and Petra what would happen if they reversed the systems. Sutton says it is not a bad idea. Petra says they would never get Stahlman to agree, but Liz says they should just do it. They all rush off. | |||
The Doctor stirs in his coma. | The Doctor stirs in his coma. | ||
Reversing all systems has worked; Liz says it was the Doctor's idea. | |||
Professor Stahlman is angry at Petra for not having run the plan past him. | |||
The Doctor awakens to the Brigadier and Liz | The Doctor awakens to the Brigadier and Liz, and tells the Brigadier he looks better with his moustache. He checks his pulse and is healthy. The Doctor tells Liz and the Brigadier where he has been: the TARDIS console didn't take him forward or back in time, but "sideways". They think he is still delirious. The Doctor asks the Brigadier, who he calls the Brigade Leader, if they have caught the animalised scientist, whether Professor Stahlman seems ill and the state of the drilling. There is a knock at the door. It is Sir Keith, who explains about his forced delay and the car accident. The Doctor is overjoyed to see he has survived his accident. Sir Keith tells the Brigadier that Stahlman is going to face some serious charges. The Doctor has realised that with an infinity of universes comes an infinity of choices, free will is not an illusion and patterns can be changed. The Doctor stops the Brigadier from calling a doctor for him, and tells Sir Keith what is going to happen. | ||
The Doctor bursts into Central Command and says that drilling must be stopped. | The Doctor bursts into Central Command and says that drilling must be stopped. Professor Stahlman orders the Brigadier to arrest him. The Doctor rushes to a computer and attacks it with a wrench. The Brigadier pulls him away and orders him to be taken to the sick bay. Sir Keith confronts Stahlman, who says he has no intention of going to see the minister until after drilling is complete. | ||
Petra tells | In the drill-head area, Petra tells Professor Stahlman that they will be switching to robot controls in forty-nine minutes. Stahlman says he feels cold and orders her to increase the temperature, before having some kind of attack that causes the scientists to look at him in shock. Stahlman then unexpectedly orders everyone to leave the area, saying he will finish the final phase of the operation alone. | ||
Sutton and Petra are shocked as to what | Sutton and Petra are shocked as to what Stahlman is doing. Just then, the drill-head area's heat shield is closed by Stahlman from inside. | ||
The Doctor uses karate to | The Doctor uses Venusian karate to knock out his UNIT guards before running off and hiding. The guards come to and run past him in his hiding place. The Doctor is approached by the animalised scientist and neutralises him with a fire extinguisher. | ||
Professor Stahlman looks at the green goo oozing from the drill-head, then grabs a handful of the substance with his disfigured green hand. He smears the goo onto his face, then screams in agony and collapses. | |||
Petra hears | Petra hears Stahlman's screams through the loudspeaker and is concerned for the Doctor. Sutton tells Sir Keith that they cannot get to Stahlman as he has locked the heat shield from the inside. | ||
In the drill-head area, Professor Stahlman is now fully animalised. | |||
The computer is advising that the drilling should be stopped. The Doctor re-enters just as the heat shield rises and the animalised Professor emerges. The | The computer is advising that the drilling should be stopped. The Doctor re-enters just as the heat shield rises and the animalised Professor Stahlman emerges. The Brigadier fires two shots from his revolver at the no-longer-human Stahlman (whether these have any effect is unclear), who attacks the Doctor with a chair; the Doctor and Sutton then blast Stahlman with fire extinguishers, killing him instantly. The Doctor orders that the drilling be stopped. Sutton says that they should cut off the power. Petra warns that this would cause the drill to disintegrate, but Sutton says that would be for the best. Petra cuts off the power, but the drilling continues. Sir Keith warns of the buffer controls, which cause the drill to slow rather than stop dead. This means the drilling will continue for five minutes — long enough for the drill to penetrate the Earth's crust. The Doctor and Sutton go into the drill-head area and discover the drill's servo-switches have been smashed by Stahlman. With one minute left, the Doctor begins to tinker with the wrecked switch unit. Everyone looks on, worried. With thirty-five seconds left, the Doctor and Sutton return, having stopped the drilling for good. Liz hugs the Doctor. The Doctor says to Sir Keith that the shaft should be filled in immediately, which he says he will arrange; while the Brigadier sends for a stretcher party to take away Professor Stahlman's body. | ||
Back in the hut, the Doctor and Liz are working on the TARDIS console. There is a | Back in the hut, the Doctor and Liz are working on the TARDIS console. There is a knock at the door. It is Sir Keith, accompanied by the Brigadier. He has come to say goodbye. Sir Keith says everyone is leaving as the project has been abandoned. The Doctor is told that he has one more day with the nuclear reactor before it is dismantled. Sir Keith also informs them all that Sutton and Petra left together. Once alone, Liz and the Brigadier ask why the Doctor still wants to use the nuclear reactor. The Doctor says that the console is now fully functional, and he can use it at will. The Brigadier scoffs at him, and the Doctor says he reminds him of the Brigade Leader. He bids goodbye to Liz before saying that he cannot stand another moment with the Brigadier, whom he describes as a "pompous, self-opinionated idiot". He flicks a few switches and disappears with the console; this time, Bessie remains in the hut. Liz turns to the Brigadier, cross that he has forced the Doctor to leave. Just then, there is a cough at the door. A rather bedraggled-looking Doctor stands at the door. He informs them he moved a few seconds forward in time and space, landing in the rubbish tip! The Doctor tries to smooth over his cross words to the Brigadier in an effort to get some UNIT soldiers to recover the console, which has landed in "a somewhat inaccessible position". Liz laughs. | ||
== Cast == | == Cast == | ||
| Line 327: | Line 329: | ||
* [[Liz Shaw]] / [[Elizabeth Shaw (Inferno Earth)|Section Leader Elizabeth Shaw]] — [[Caroline John]] | * [[Liz Shaw]] / [[Elizabeth Shaw (Inferno Earth)|Section Leader Elizabeth Shaw]] — [[Caroline John]] | ||
* [[Alistair Gordon Lethbridge-Stewart|Brigadier Lethbridge-Stewart]] / [[Alastair Lethbridge-Stewart|Brigade Leader Lethbridge-Stewart]] — [[Nicholas Courtney]] | * [[Alistair Gordon Lethbridge-Stewart|Brigadier Lethbridge-Stewart]] / [[Alastair Lethbridge-Stewart|Brigade Leader Lethbridge-Stewart]] — [[Nicholas Courtney]] | ||
* | * [[John Benton|Sergeant Benton]] / [[John Benton (Inferno Earth)|Platoon Under Leader Benton]] — [[John Levene]] | ||
* [[Eric Stahlman|Professor Stahlman]] / [[ | * [[Eric Stahlman|Professor Stahlman]] / [[Eric Stahlmann|Director Stahlmann]] - [[Olaf Pooley]] | ||
* [[Keith Gold|Sir Keith Gold]] — [[Christopher Benjamin]] | * [[Keith Gold|Sir Keith Gold]] — [[Christopher Benjamin]] | ||
* [[Petra Williams]] / [[Petra Williams (Inferno Earth)|Dr Williams]] - [[Sheila Dunn]] | * [[Petra Williams]] / [[Petra Williams (Inferno Earth)|Dr. Petra Williams]] - [[Sheila Dunn]] | ||
* [[Greg Sutton]] / [[Greg Sutton (Inferno Earth)|Greg Sutton]] - [[Derek Newark]] | * [[Greg Sutton]] / [[Greg Sutton (Inferno Earth)|Greg Sutton]] - [[Derek Newark]] | ||
* Private [[Latimer (Inferno)|Latimer]] - [[David Simeon]] | * [[Latimer (Inferno)|Private Latimer]] / [[Latimer (Inferno Earth)|Trooper Latimer]] - [[David Simeon]] | ||
* Private [[Wyatt]] - [[Derek Ware]] | * [[Wyatt (Inferno)|Private Wyatt]] / [[Wyatt (Inferno Earth)|Trooper Wyatt]] - [[Derek Ware]] | ||
* [[Harry Slocum]] - [[Walter Randall]] | * [[Harry Slocum]] - [[Walter Randall]] | ||
* [[John Bromley|Bromley]] - [[Ian Fairbairn]] | * [[John Bromley|Bromley]] / [[John Bromley (Inferno Earth)|Bromley]] - [[Ian Fairbairn]] | ||
* [[RSF sentry (Inferno Earth)|RSF Sentry]] - [[Roy Scammell]] | * [[RSF sentry (Inferno Earth)|RSF Sentry]] - [[Roy Scammell]] | ||
* [[Patterson (Inferno)|Patterson]] - [[Keith James]] | * [[Patterson (Inferno)|Patterson]] - [[Keith James]] | ||
* [[Primord]]s - [[Dave Carter]], [[Pat Gorman]], [[Walter Henry]], [[Philip Ryan]], [[Peter Thompson]] | * [[Primord]]s - [[Dave Carter]], [[Pat Gorman]], [[Walter Henry]], [[Philip Ryan]], [[Peter Thompson]] | ||
=== Uncredited cast === | |||
* Technicians - [[Sheila Knight]], [[Pat Matthews|Patricia Matthews]], [[Corinne Skinner]], [[Joan Harsant]], [[Valerie Bland]], [[Alan Clements]], [[Keith Norrish]], [[Richard Cooper (actor)|Richard Cooper]], [[Richard Lawrence]], [[Richard King]], [[Robert Birmingham]], [[Derek Hunt]], [[Michael Earl]], [[Norton Clark]], [[Bertie Green]], [[Keith Ashley]], [[June Gray]], [[Harry Tierney]], [[Natalia Lindley]], [[Marcelle Elliott]], [[Ronald Gough]], [[Judith Pollard]], [[Colin James]], [[Steve Tierney]], [[Sue Patterson]], [[Alistair Baine]], [[Alan Chuntz]] ([[DWM 305]], [[TCH 16]]) | |||
* RSF Soldiers - [[Roy Scammell]], [[Alan Chuntz]], [[Terry Walsh]], [[Billie Horrigan]], [[Roy Street]], [[Derek Martin]], [[Nick Hobbs]], [[Royston Farrell]], [[Les Conrad]] (TCH 16) | |||
* Stunt Double for Private [[Wyatt (Inferno Earth)|Wyatt]] - [[Roy Scammell]] (TCH 16) | |||
* Drivers - [[BG Heath]], [[Bruce Cox]] (TCH 16) | |||
* Stunt Double for the Doctor - [[Terry Walsh]] (TCH 16) | |||
* Countdown voice - [[Ian Fairbairn]] ([[DWM 305]]) | |||
* UNIT Soldiers - [[Alan Chuntz]], [[Ian Elliott]], [[Terry Walsh]], [[Derek Martin]] (TCH 16) | |||
* Loudspeaker Voice - [[Barry Letts]] (TCH 16) | |||
* Radio announcer's Voice - [[Jon Pertwee]] ''(overseas copies of episode five only)'' | |||
== Crew == | == Crew == | ||
* [[Writer]] - [[Don Houghton]] | * [[Writer]] - [[Don Houghton]] | ||
* Action / Stuntwork - [[HAVOC]] | * Action / Stuntwork - [[HAVOC (stunt team)|HAVOC]] | ||
* [[Assistant Floor Manager]] - [[Sue Hedden]] | * [[Assistant Floor Manager]] - [[Sue Hedden]] | ||
* [[Costumes]] - [[Christine Rawlins]] | * [[Costumes]] - [[Christine Rawlins]] | ||
| Line 353: | Line 365: | ||
* [[Script Editor]] - [[Terrance Dicks]] | * [[Script Editor]] - [[Terrance Dicks]] | ||
* [[Special Sounds]] - [[Brian Hodgson]] | * [[Special Sounds]] - [[Brian Hodgson]] | ||
* [[Studio Lighting]] - [[John Green]] | * [[Studio Lighting]] - [[John Green (lighting technician)|John Green]] | ||
* [[Studio Sound]] - [[John Staple]] | * [[Studio Sound]] - [[John Staple]] | ||
* [[Theme Arrangement]] - [[Delia Derbyshire]] | * [[Theme Arrangement]] - [[Delia Derbyshire]] | ||
| Line 359: | Line 371: | ||
* [[Visual Effects]] - [[Len Hutton]] | * [[Visual Effects]] - [[Len Hutton]] | ||
* [[Producer]] - [[Barry Letts]] | * [[Producer]] - [[Barry Letts]] | ||
* [[Director]] - [[Douglas Camfield]] | * [[Director (crew)|Director]] - [[Douglas Camfield]] | ||
=== Uncredited crew === | |||
* [[Visual effects assistant|Effects Assistant]] - [[Peter Logan]], [[Ian Scoones]] ([[INFO]]: ''Inferno'') | |||
* [[Floor assistant|Floor Assistant]] - [[Frank Mullan]] ([[INFO]]: ''Inferno'') | |||
* [[Make-up assistant|Make-Up Assistants]] - [[Judy Cain]], [[Sue Duckworth]], [[Irene Walls]] ([[INFO]]: ''Inferno'') | |||
* [[Design construction organiser|Design Construction Organiser]] - [[Colin Bowles]] ([[INFO]]: ''Inferno'') | |||
* [[Producer's secretary|Producer's Secretary]] - [[Sandra Brenholz]] ([[INFO]]: ''Inferno'') | |||
* [[Technical manager|Technical Managers]] - [[Ray Hider]], [[Lance Wood]] ([[INFO]]: ''Inferno'') | |||
* [[Film sound assistant|Film Sound Assistant]] - [[Jack Curtis]] ([[INFO]]: ''Inferno'') | |||
* [[Director's assistant|Director's Assistant]] - [[Sue Upton]] ([[INFO]]: ''Inferno'') | |||
* [[Film camera assistant|Film Camera Assistant]] - [[Hugh Miles]] ([[INFO]]: ''Inferno'') | |||
* [[Grams operator|Grams]] - [[Anthony Philpott|Tony Philpott]], [[Gerry Borrows]] ([[INFO]]: ''Inferno'') | |||
* [[Costume assistant|Costume Assistants]] - [[Terry Styles]], [[Pat Trigger]] ([[INFO]]: ''Inferno'') | |||
* [[Vision mixer|Vision Mixer]] - [[John Gorman]] ([[INFO]]: ''Inferno'') | |||
* [[Lighting cameraman|Lighting Cameraman]] - [[Mike Wilson]] ([[INFO]]: ''Inferno'') | |||
== | == Worldbuilding == | ||
=== Locations === | === Locations === | ||
* Sutton was flown in from [[Kuwait]]. | * Sutton was flown in from [[Kuwait]]. | ||
* The Inferno Project is being conducted at [[Eastchester]]. ''(The area is named only in overseas copies of episode five — see ''Story Notes'' section below)'' | |||
=== Individuals === | === Individuals === | ||
* The Doctor met [[King]] [[Edward VII]] in [[Paris]]. | * The Doctor states he was at [[Krakatoa]] during the eruption of [[1883]]. | ||
* The Doctor is seen using [[Venusian aikido]] here for the first time. | |||
* The Doctor met [[King]] [[Edward VII]] in [[Paris]]. | |||
* [[Latimer (Inferno Earth)|Latimer]] is one of the soldiers in the other universe. | |||
* [[Phillips (Inferno)|Phillips]] is working on the Inferno project. | |||
=== TARDIS === | === TARDIS === | ||
* The Doctor has removed the [[TARDIS console|console unit]] from the TARDIS and is running experiments with it. It is also demonstrated that the console itself can travel through [[space-time]] without the need of an outer shell. | * The Doctor has removed the [[TARDIS console|console unit]] from the TARDIS and is running experiments with it. It is also demonstrated that the console itself can travel through [[space-time]] without the need of an outer shell, but requires an external power source to achieve transit. | ||
=== Technology === | |||
* The siren indicating an emergency at the drillhead on the parallel Earth is higher pitched than that on N-Space Earth. A secondary siren, absent on the ''Warp I'' Earth, is a warbling electronic pulse activated in the event of a security breach. | |||
* On N-Space Earth the Brigadier has only a single white [[telephone]], a Type 712, on his desk. On the Inferno Earth it is joined by a black Type 706 telephone; the latter seems to be connected to a secure line exclusively for sensitive communications on a different circuit to the white telephone. The black telephone is equipped with an electronic buzzer instead of the standard bell normally fitted to that model of instrument. | |||
== Story notes == | == Story notes == | ||
* This story had the working titles of ''The Mo-Hole Project'', ''Operation: Mole-Bore'', ''The Mole-Bore'' and ''Project Inferno''. | * This story had the working titles of ''The Mo-Hole Project'', ''Operation: Mole-Bore'', ''The Mole-Bore'' and ''Project Inferno''. | ||
* This is the only season finale in the Third Doctor era to not be written by [[Robert Sloman]]. | |||
* The primordial mutant creatures are named "Primords" in the closing credits of episodes five and six and publicity material, but are left unnamed in the story's dialogue. | * The primordial mutant creatures are named "Primords" in the closing credits of episodes five and six and publicity material, but are left unnamed in the story's dialogue. | ||
* The opening credits for this serial were unique in that after the initial titles, the name and part number of the serial were superimposed on footage of a lava flow, with no music. Unique episode title cards were an occasional fixture of classic series episodes during the 60s (e.g. [[TV]]: ''[[The War Machines (TV story)|The War Machines]], [[The War Games (TV story)|The War Games]]''). ''Inferno'' would be the final story in the classic series to feature a unique title card. The practice would be briefly revived, albeit in the form of unique logos for the show title itself, in the Autumn 2012 half of [[BBC Wales]]' [[Series 7 (Doctor Who)|Series 7]]. | * The opening credits for this serial were unique in that after the initial titles, the name and part number of the serial were superimposed on footage of a lava flow, with no music. Unique episode title cards were an occasional fixture of classic series episodes during the 60s (e.g. [[TV]]: ''[[The War Machines (TV story)|The War Machines]], [[The War Games (TV story)|The War Games]]''). ''Inferno'' would be the final story in the classic series to feature a unique title card. The practice would be briefly revived, albeit in the form of unique logos for the show title itself, in the Autumn 2012 half of [[BBC Wales]]' [[Series 7 (Doctor Who 2005)|Series 7]]. | ||
* The footage used for these title cards was also used in ''[[The Enemy of the World (TV story)|The Enemy of the World]]'' and ''[[The Time Monster (TV story)|The Time Monster]]''. | * The footage of a volcano erupting used for these title cards was also used in ''[[The Enemy of the World (TV story)|The Enemy of the World]]'' and ''[[The Time Monster (TV story)|The Time Monster]]''. | ||
* The ''Radio Times'' programme listing for episode one was accompanied by a black and white rehearsal shot of the Doctor standing at the TARDIS console, with the accompanying caption "Knock, knock. Who's there? 5.15", while that for episode seven was accompanied by a black and white photograph of the mutated Director Stahlman, with the accompanying caption "Meeting the Primord. Dr. Who: 5.25". | * The ''[[Radio Times]]'' programme listing for episode one was accompanied by a black-and-white rehearsal shot of the Doctor standing at the TARDIS console, with the accompanying caption "Knock, knock. Who's there? 5.15" ''(original published text)'', while that for episode seven was accompanied by a black-and-white photograph of the mutated Director Stahlman, with the accompanying caption "Meeting the Primord. Dr. Who: 5.25". ''(original published text)'' | ||
* In spite of [[Douglas Camfield]] receiving sole credit as [[director]], the second studio recording block and studio blocks 3 and 4 were directed by producer [[Barry Letts]] after Camfield had a minor heart attack on 27 April 1970. Letts later stated that Camfield's preparations for episode | * In spite of [[Douglas Camfield]] receiving sole credit as [[Director (crew)|director]], the second studio recording block and studio blocks 3 and 4 were directed by producer [[Barry Letts]] after Camfield had a minor heart attack on 27 April 1970. Letts later stated that Camfield's preparations for episode three's studio recording were so meticulous that he just followed Camfield's existing camera script. For the other episodes, Letts worked to his own plans, which he had to hurriedly construct. In the end, Camfield directed all the [[location filming]], the studio recording for episodes one and two and designed the direction executed by Letts on episode three's studio recording. Nevertheless, Camfield remained credited as director, as BBC regulations at the time forbade the same person being credited as producer and director. | ||
* [[Derek Ware]] did not perform the scene where the mutated RSF [[Wyatt|Private Wyatt]] is shot and falls to his death from the top of one of the cooling towers, in case he was injured, as he was also needed for studio recording. | * [[Derek Ware]] did not perform the scene where the mutated RSF [[Wyatt (Inferno)|Private Wyatt]] is shot and falls to his death from the top of one of the cooling towers, in case he was injured, as he was also needed for studio recording. He was replaced by [[Roy Scammell]] who, curiously, also played the RSF sentry who fires the fatal shot. Ware stated in an interview that Scammell had already signed the contract to do the fall before Ware had been cast as Wyatt. | ||
* The role of [[Petra Williams|Petra]] was given to [[Sheila Dunn]] (Douglas Camfield's wife) after [[Kate O'Mara]] was not available to play the part. O'Mara was, years later, cast as | * The role of [[Petra Williams|Petra]] was given to [[Sheila Dunn]] ([[Douglas Camfield]]'s wife) after [[Kate O'Mara]] was not available to play the part. O'Mara was, years later, cast as {{O'Mara}}, a [[renegade Time Lord]]. | ||
* Episode six has a small damaged section on the tape, which the [[Doctor Who Restoration Team]] replaced by painstakingly recolouring the appropriate section of the existing 16mm black | * Episode six has a small damaged section on the tape, which the [[Doctor Who Restoration Team]] replaced by painstakingly recolouring the appropriate section of the existing 16mm black-and-white film [[telerecording]]s. | ||
* [[Caroline John]] enjoyed her role as [[Elizabeth Shaw (Inferno Earth)|Section Leader Elizabeth Shaw]] and said that it was fun playing "baddie" Liz. She also says she hated doing the scenes when she was playing the "goodie" version because it was boring compared to being an evil character. She was particularly upset though about the scene in which Shaw shoots [[Alistair Lethbridge-Stewart|Brigade Leader Lethbridge-Stewart]], as she was pregnant at the time. As a result, the scene was recorded with the weapon fired from | * [[Caroline John]] enjoyed her role as [[Elizabeth Shaw (Inferno Earth)|Section Leader Elizabeth Shaw]] and said that it was fun playing "baddie" Liz. She also says she hated doing the scenes when she was playing the "goodie" version because it was boring compared to being an evil character. She was particularly upset though about the scene in which Shaw shoots [[Alistair Lethbridge-Stewart|Brigade Leader Lethbridge-Stewart]], as she was pregnant at the time. As a result, the scene was recorded with the weapon fired from off-camera, after which Shaw was shown returning the gun to her holster. | ||
* [[Nicholas Courtney]] has also said he enjoyed playing the parallel version of the Brigadier. He called it his "favourite" in an interview with ''[[Doctor Who Magazine]]'' in 2009. The DWM staff remembered this by including it in [[DWM 436|his tribute issue]] as that month's "The Fact of Fiction". | * [[Nicholas Courtney]] has also said he enjoyed playing the parallel version of the Brigadier. He called it his "favourite" in an interview with ''[[Doctor Who Magazine]]'' in 2009. The DWM staff remembered this by including it in [[DWM 436|his tribute issue]] as that month's "The Fact of Fiction". | ||
* At ''Doctor Who'' fan events, Courtney frequently recounted an incident which occurred during shooting of the scene with the revelation of the Brigade Leader and his eye patch. The scene begins with Courtney having his back to the camera (and to all the other actors) before spinning around in his swivel chair to reveal the Brigade Leader's visage and eye patch. When the scene was shot, Courtney spun around to discover that all the other actors and crew members were also wearing eye patches. According to the story, he then proceeded to perform the entire scene as if nothing unusual had occurred. The "eye patch story" became so closely associated with Courtney that [[Steven Moffat]] wrote scenes in which "everybody was wearing an eye patch" into the 2011 episode ''[[The Wedding of River Song (TV story)|The Wedding of River Song]]'' as a tribute to Courtney, who had died earlier that year. ([[DWMSE 31]]) | * At ''Doctor Who'' fan events, [[Nicholas Courtney]] frequently recounted an incident which occurred during shooting of the scene with the revelation of the Brigade Leader and his eye patch. The scene begins with Courtney having his back to the camera (and to all the other actors) before spinning around in his swivel chair to reveal the Brigade Leader's visage and eye patch. When the scene was shot, Courtney spun around to discover that all the other actors and crew members were also wearing eye patches. According to the story, he then proceeded to perform the entire scene as if nothing unusual had occurred. The "eye patch story" became so closely associated with Courtney that [[Steven Moffat]] wrote scenes in which "everybody was wearing an eye patch" into the 2011 episode ''[[The Wedding of River Song (TV story)|The Wedding of River Song]]'' as a tribute to Courtney, who had died earlier that year. ([[DWMSE 31]]) | ||
* During the scenes set on the parallel Earth, | * During the scenes set on the parallel Earth, a black-and-white image of [[the Leader]] is seen on a ''UNITY IS STRENGTH'' poster in the Technical Store (the Doctor's hut on the regular Earth timeline) and as a large framed photograph on the wall of the Brigade Leader's office. The image used is that of visual effects designer [[Jack Kine]], in homage to {{w|Nineteen Eighty-Four (British TV programme)|the 1954 BBC adaptation}} of [[George Orwell]]'s ''[[Nineteen Eighty-Four]]'' where the face of Big Brother was Head of Television Design Roy Oxley (Kine had worked on the visual effects for that production). | ||
* ''Inferno'' marks the first | * ''Inferno'' marks the first ''Doctor Who'' story to be set in a [[parallel universe]]. | ||
* The scenes on top of the | * The scenes on top of the chemical tank in episode two were not easy for [[Jon Pertwee]], as he was afraid of heights. It took him fifteen minutes just to summon up the confidence to film the scene. | ||
* In episode three, during the chase scene on the parallel Earth, Bessie's bumper gashed open stuntman Alan Chuntz's leg as it passed. The gash was so severe that he had to go to A&E. | * In episode three, during the chase scene on the parallel Earth, Bessie's bumper gashed open stuntman [[Alan Chuntz]]'s leg as it passed as he jumped out of the way a fraction later than he was supposed to. The gash was so severe that he had to go to A&E. [[John Levene]] stated on the DVD commentary that "it was the worst wound [he]'d ever seen" and after [[Jon Pertwee]] saw the wound and learned he caused it, he became sick and almost couldn't carry on filming until a few hours later. Pertwee even went as far as buying Chuntz's wife a gift to apologise for the accident. | ||
* [[Olaf Pooley]] initially refused to put on the Primord costume, but eventually [[Barry Letts]] persuaded him to do it and Pooley was later glad that he did agree to wear it. | |||
* A ''[[Doctor Who Unbound]]'' story later touched on a narrative element of this story. According to ''[[Sympathy for the Devil (audio story)|Sympathy for the Devil]]'' — a narrative set in a different parallel universe — research into the possibilities of [[Stahlman's gas]] was still ongoing in [[1997]], the year that [[The Doctor (Sympathy for the Devil)|the Doctor]] in that universe's [[exile on Earth]] began. | * A ''[[Doctor Who Unbound]]'' story later touched on a narrative element of this story. According to ''[[Sympathy for the Devil (audio story)|Sympathy for the Devil]]'' — a narrative set in a different parallel universe — research into the possibilities of [[Stahlman's gas]] was still ongoing in [[1997]], the year that [[The Doctor (Sympathy for the Devil)|the Doctor]] in that universe's [[exile on Earth]] began. | ||
* This was the final story to feature the original TARDIS console prop. Having been in use since [[An Unearthly Child (TV story)|the show's first episode]] in 1963, the prop had gradually deteriorated over the years, with numerous bits and pieces falling off or being replaced. After this story aired, the prop was deemed unusable and junked. For the TARDIS console unit's next appearance in ''[[The Claws of Axos (TV story)|The Claws of Axos]]'', a new prop, designed by [[Kenneth Sharp]], was built. | * This was the final story to feature the original TARDIS console prop. Having been in use since [[An Unearthly Child (TV story)|the show's first episode]] in 1963, the prop had gradually deteriorated over the years, with numerous bits and pieces falling off or being replaced. After this story aired, the prop was deemed unusable and junked. For the TARDIS console unit's next appearance in ''[[The Claws of Axos (TV story)|The Claws of Axos]]'', a new prop, designed by [[Kenneth Sharp]], was built. | ||
* This was the last televised story to use stock music in lieu of an original incidental music score. Notably, | * This was the last televised story to use stock music in lieu of an original incidental music score. Notably, many of the stock pieces used were composed by [[Doctor Who theme]] arranger [[Delia Derbyshire]], making this the nearest she came to actually scoring an episode of the show. | ||
* | * The RSF soldiers wear American M1951 pattern military fatigues, French M1892/14 webbing equipment and are armed with Russian-designed SKS carbines. | ||
* Depending on personal opinion on ''[[Season 23 (Doctor Who 1963)|The Trial of a Time Lord]]'', this could be the last story to be longer than six episodes. It is also the last seven-part story. | |||
* A scene in the Brigade Leader's office with the parallel universe characters listening to a radio report about geological disasters was cut from the UK transmission of episode five, as the radio announcer was felt to be too recognizable as [[Jon Pertwee]] doing one of his famous funny voices. The scene also identified the area of the Inferno project as [[Eastchester]] — a name not mentioned anywhere else in the story. The scene was however retained for overseas screening, as it was thought audiences outside the UK wouldn't be familiar with Pertwee's comedy work. This scene appeared on the VHS release of the story in 1994 (presumably because the only colour copy of the serial at the time was an NTSC version returned from Canada), but for the later DVD releases it was removed and featured only as a separate deleted scene. | |||
* Another cut scene would have actually shown the death of the UNIT soldier mentioned by the Brigadier: Harry Slocum was to have come up behind him and strangled him to death. | |||
* [[Jon Pertwee]] would not follow [[Douglas Camfield]]'s directions and when the star argued with production assistant [[Chris D'Oyly John]], an irate Camfield descended from the production gallery, forcing Sheila Dunn to intervene and persuade Pertwee to comply. | |||
* Originally, Section Leader Shaw was to interrogate the Doctor in episode three, but [[Nicholas Courtney]], [[Douglas Camfield]] and [[Barry Letts]] thought that it should be the Brigade Leader. [[Caroline John]] wasn't happy about this. | |||
* [[Nicholas Courtney]] and [[Caroline John]] both named this as their favourite serial. | |||
* [[Jon Pertwee]] and [[Derek Newark]] had previously guest starred in a Season 5 episode of ''[[The Avengers]]'' (1961-69) called "From Venus with Love". | |||
* Discounting individual episode titles in [[Season 1 (Doctor Who 1963)|Seasons 1]] [[Season 2 (Doctor Who 1963)|to]] [[Season 3 (Doctor Who 1963)|3]], this is the first serial in which the title consists of only one word. | |||
* The Doctor makes a joking reference to [[Batman]]. Coincidentally, [[Jon Pertwee]]'s son [[Sean Pertwee]] would later play [https://en.wikipedia.org/wiki/Alfred_Pennyworth Alfred Pennyworth] in ''[https://en.wikipedia.org/wiki/Gotham_(TV_series) Gotham].'' | |||
* The unusual "triple arrow" symbol appearing on cap badges and buildings on the parallel Earth is almost certainly intended to resemble the {{w|broad arrow}}, a symbol used to denote government property in the real-world. The broad arrow image is strongly protected by Crown copyright and cannot be reproduced in any form without government permission. The set and costume designers likely did not consider it worthwhile to seek official approval, so devised an ''ersatz'' stand-in. | |||
* This story has the distinction of being ranked as ''[[Doctor Who Magazine]]'' readers' favourite [[Third Doctor]] story in all four of their major polls, in [[1998]], [[2009]], [[2014]], and [[2023]]. ([[DWM 590]]) | |||
* [[Barry Letts]] and [[Terrance Dicks]] didn't think the drilling plot was enough to carry seven episodes, so they added the parallel Earth plot. They also felt the story needed a monster, so they added the Primords. | |||
* Sir Keith Gold's surname was originally Mulvaney, then Rose. | |||
* Private Wyatt was originally named Peters. | |||
* One element removed from the storyline was the Doctor returning to the normal world while in possession of the missing microcircuit from the parallel universe's computer, and then using it to repair Stahlman's sabotage. | |||
* [[Barry Letts]] evisioned the Primords as being ape-like creatures. It was [[Douglas Camfield]] who suggested that they be like werewolves. | |||
* [[Don Houghton]] referred to the two universes as "Warp I" and "Warp II" in the script, while the Doctor's journey between worlds was described as "the Nightmare Warp". | |||
* The constant ambience at central control was always playing during shooting and not a post production sound effect. | |||
=== Ratings === | === Ratings === | ||
| Line 414: | Line 470: | ||
{{discontinuity}} | {{discontinuity}} | ||
* On the Nuclear Output Gauge in the Doctor's workshop, Mega-volts is spelled "Megga Volts". | * On the Nuclear Output Gauge in the Doctor's workshop, Mega-volts is spelled "Megga Volts". | ||
* In episode four, when the Doctor has been returned to the Brigade Leader's office, the door is shown to be open. The camera then focuses on the Brigade Leader and when it returns to the Doctor and Benton, the door is now closed. | |||
* During some shots of episode six when Sutton is holding off the Primords with coolant from a fire extinguisher, none is actually coming out of the nozzle. | * During some shots of episode six when Sutton is holding off the Primords with coolant from a fire extinguisher, none is actually coming out of the nozzle. | ||
* In episode seven, the dead Primord Stahlman has a little bit of human skin poking out of his neck. | * In episode seven, the dead Primord Stahlman has a little bit of human skin poking out of his neck. | ||
* Director Stahlman is | * Director Stahlman is shown to wear a nameplate that reads <small>STAHLMANN</small>, but he is credited on-screen and in ''Radio Times'' for episode five as "Director Stahlman". | ||
* In episode seven, | * In episode seven, when the Doctor is stopping the drill, [[Caroline John]]'s floor-marker (which indicates the spot where an actor must stand so as to be seen properly by the camera) is clearly visible. | ||
* The countdown announcements are read out every ten seconds. In the final episode, the last one heard before the Doctor and Sutton stop the drill is "zero minus fifty seconds"; therefore the timer should have been, approximately, forty-five seconds but the announcement afterwards declares that the drill was stopped at "zero minus thirty-five seconds". | |||
== Continuity == | == Continuity == | ||
* [[PROSE]]: ''[[Timewyrm: Revelation (novel)|Timewyrm: Revelation]]'' states that the [[ | * [[PROSE]]: ''[[Timewyrm: Revelation (novel)|Timewyrm: Revelation]]'' states that the [[The Leader|dictator]] was one of the alternative regenerations the [[Time Lord]]s offered to the Doctor in [[TV]]: ''[[The War Games (TV story)|The War Games]]''. | ||
* Liz Shaw does not feature in any subsequent serials, although an illusory image of her is seen in [[TV]]: ''[[The Five Doctors (TV story)|The Five Doctors]]''. The circumstances surrounding her departure from [[ | * Liz Shaw does not feature in any subsequent serials, although an illusory image of her is seen in [[TV]]: ''[[The Five Doctors (TV story)|The Five Doctors]]''. The circumstances surrounding her departure from [[UNIT]] are told in [[PROSE]]: ''[[The Scales of Injustice (novel)|The Scales of Injustice]]''. In [[TV]]: ''[[Terror of the Autons (TV story)|Terror of the Autons]]'', it is merely mentioned that Liz went back to [[Cambridge]]. | ||
* [[PROSE]]: ''[[Interference - Book One (novel)|Interference - Book One]]'' suggests that [[Stahlman's ooze]] is a result of the hole to the [[Spiral Yssgaroth]] at the centre of the [[Earth]]. | * [[PROSE]]: ''[[Interference - Book One (novel)|Interference - Book One]]'' suggests that [[Stahlman's ooze]] is a result of the hole to the [[Spiral Yssgaroth]] at the centre of the [[Earth]]. | ||
* [[PROSE]]: ''[[The Face of the Enemy (novel)|The Face of the Enemy]]'' is a sequel to ''Inferno'', revisiting the "alternate" world. | * [[PROSE]]: ''[[The Face of the Enemy (novel)|The Face of the Enemy]]'' is a sequel to ''Inferno'', revisiting the "alternate" world. | ||
* [[PROSE]]: | * [[PROSE]]: ''[[Ashes of the Inferno (short story)|Ashes of the Inferno]]'' is another sequel, dealing with the aftermath of the serial's events. | ||
* [[PROSE]]: ''[[Still Lives (short story)|Still Lives]]'' features a UNIT corporal who becomes affected by the events of this story. | * [[PROSE]]: ''[[Still Lives (short story)|Still Lives]]'' features a UNIT corporal who becomes affected by the events of this story. | ||
* The ooze's transformation of humans into [[Primord]]s is paralleled with [[the Wyrm]]'s creation of the [[Wyrm Caller]]s in [[AUDIO]]: ''[[The Adolescence of Time (audio story)|The Adolescence of Time]]''. | * The ooze's transformation of humans into [[Primord]]s is paralleled with [[the Wyrm]]'s creation of the [[Wyrm Caller]]s in [[AUDIO]]: ''[[The Adolescence of Time (audio story)|The Adolescence of Time]]''. | ||
* The [[Fourth Doctor]] later encountered [[Marshman|Marshmen]], creatures that shared the [[Primord]]s trait of being temporarily weakened by gas sprayed from a canister. However, unlike the Primords who were weakened by carbon dioxide in fire extinguisher spray, the Marshmen were weakened by oxygen from oxygen canisters. ([[TV]]: ''[[Full Circle (TV story)|Full Circle]]'') | |||
* In [[2007]], the Doctor travelled to [[Pete's World|another parallel universe]] in which there was a [[People's Republic of Great Britain|Republic of Great Britain]]. ([[TV]]: ''[[Rise of the Cybermen (TV story)|Rise of the Cybermen]]'' / ''[[The Age of Steel (TV story)|The Age of Steel]]'') | * In [[2007]], the Doctor travelled to [[Pete's World|another parallel universe]] in which there was a [[People's Republic of Great Britain|Republic of Great Britain]]. ([[TV]]: ''[[Rise of the Cybermen (TV story)|Rise of the Cybermen]]'' / ''[[The Age of Steel (TV story)|The Age of Steel]]'') | ||
* A sketch that washed up on the shores of Sumatra following the Krakatoa eruption was later shown to [[Rose Tyler]], depicting the [[Ninth Doctor]] in front of a volcano. ([[TV]]: ''[[Rose (TV story)|Rose]]'') | * A sketch that washed up on the shores of Sumatra following the Krakatoa eruption was later shown to [[Rose Tyler]], depicting the [[Ninth Doctor]] in front of a volcano. ([[TV]]: ''[[Rose (TV story)|Rose]]'') | ||
| Line 436: | Line 495: | ||
* By [[1973]], Sutton had befriended the [[First Doctor]]'s former companion [[Ian Chesterton]]. ([[PROSE]]: ''[[Byzantium! (novel)|Byzantium!]]'') | * By [[1973]], Sutton had befriended the [[First Doctor]]'s former companion [[Ian Chesterton]]. ([[PROSE]]: ''[[Byzantium! (novel)|Byzantium!]]'') | ||
* [[Jo Grant]] later mentioned the events of the Inferno Project in [[AUDIO]]: ''[[Gardeners' Worlds (audio story)|Gardeners' Worlds]]''. | * [[Jo Grant]] later mentioned the events of the Inferno Project in [[AUDIO]]: ''[[Gardeners' Worlds (audio story)|Gardeners' Worlds]]''. | ||
* In a [[parallel universe]] in which the [[ | * In a [[parallel universe]] in which the [[Unbound Doctor|Doctor]]'s [[exile on Earth]] did not begin until [[1997]], research into the possibilities of [[Stahlman's gas]] was still an ongoing project. ([[AUDIO]]: ''[[Sympathy for the Devil (audio story)|Sympathy for the Devil]]'') | ||
== Home video and audio releases == | == Home video and audio releases == | ||
| Line 449: | Line 508: | ||
Contents: | Contents: | ||
* Commentary by [[Nicholas Courtney]], [[Barry Letts]], [[Terrance Dicks]] and [[John Levene]]. | * Commentary by [[Nicholas Courtney]], [[Barry Letts]], [[Terrance Dicks]] and [[John Levene]]. | ||
* ''[[Can You Hear the Earth Scream?]]'' - A 35-minute documentary that looks at the making of ''Inferno''. With contributions from [[Caroline John]], Nicholas Courtney, John Levene, [[Ian Fairbairn]], Barry Letts, Terrance Dicks and [[Derek Ware]]. | * ''[[Can You Hear the Earth Scream? (documentary)|Can You Hear the Earth Scream?]]'' - A 35-minute documentary that looks at the making of ''Inferno''. With contributions from [[Caroline John]], Nicholas Courtney, John Levene, [[Ian Fairbairn]], Barry Letts, Terrance Dicks and [[Derek Ware]]. | ||
* ''[[The UNIT Family]]'' (Part One) - A 36-minute documentary that looks at the role of [[ | * ''[[The UNIT Family (documentary)|The UNIT Family]]'' (Part One) - A 36-minute documentary that looks at the role of [[UNIT]] in the world of ''Doctor Who'' through to the end of [[Jon Pertwee]]'s first year as the Doctor. | ||
* Deleted Scene - A 2-minute scene cut from the original UK transmission of episode five, but which was retained for overseas screening. | * Deleted Scene - A 2-minute scene cut from the original UK transmission of episode five, but which was retained for overseas screening. | ||
* Visual Effects Promo Film - An excerpt from a BBC Visual Effects Department showreel. | * Visual Effects Promo Film - An excerpt from a BBC Visual Effects Department showreel. | ||
| Line 467: | Line 526: | ||
=== DVD special edition === | === DVD special edition === | ||
''Inferno'' | ''Inferno'' was re-released as a special edition in [[2013 (releases)|2013]]. An update to the original in the same manner as the release of 'The Claws of Axos - SE', combining the luminance from the 16mm black-and-white film telerecordings with the colour from the Reverse Standards Converted 2" NTSC videotapes. | ||
==== Special Features: ==== | |||
===== Disc 1: ===== | |||
* Commentary with actors [[Nicholas Courtney]] ([[Alistair Gordon Lethbridge-Stewart|Brigadier]]) and [[John Levene]] ([[John Benton|Benton]]), producer [[Barry Letts]] and script editor [[Terrance Dicks]] | |||
* Production Information Subtitles | |||
* [[Easter Egg]]: VT countdown clock for episode seven. To access this hidden feature, select episode seven from the Episode Selection menu, then press rewind as soon as the title sequence begins, at which point the feature will play. | |||
===== Disc 2: ===== | |||
* ''[[Can You Hear the Earth Scream? (documentary)|Can You Hear the Earth Scream?]]'' - A 35-minute documentary that looks at the making of ''Inferno''. With contributions from [[Caroline John]], Nicholas Courtney, John Levene, [[Ian Fairbairn]], Barry Letts, Terrance Dicks and [[Derek Ware]] | |||
* ''[[Hadoke v Havoc (documentary)|Hadoke versus HAVOC]]'' - Presenter [[Toby Hadoke]] reunites surviving members of the [[HAVOC (stunt team)|HAVOC]] stunt team and trains with them to perform a stunt himself. Will he survive to become an honorary member of HAVOC? With stunt arranger Derek Ware and stunt men [[Roy Scammell]], [[Derek Martin]] and [[Stuart Fell]] | |||
* ''[[Lost in the Dark Dimension (documentary)|Doctor Forever! - Lost in the Dark Dimension]]'' - The penultimate instalment of the five part series looking at how ''[[Doctor Who]]'' was kept alive in the years between the end of the classic series and the beginning of the new. In this episode they look at the various attempts to bring the show back during that period. With then-current and former ''[[Doctor Who Magazine]]'' editors [[Tom Spilsbury]], [[John Freeman]] and [[Gary Russell]], former BBC range editor Steve Cole, actor [[David Burton]], writer [[Adrian Rigelsford]], director [[Graeme Harper]] and then-former executive producer [[Russell T Davies]]. Narrated by [[Zeb Soanes]] | |||
* ''[[The UNIT Family (documentary)|The UNIT Family - Part One]]'' - A 36-minute feature looking at the Earthbound Doctor's 'family' during his exipe to Earth and his new role as the [[UNIT]] scientific advisor | |||
* Visual Effects Promo Film - An excerpt from an early attempt to sell the experience and facilities of the BBC Visual Effects Department to new clients. This short film features model effects filming from the ''Doctor Who'' stories ''[[The Ambassadors of Death (TV story)|The Ambassadors of Death]]'' and ''Inferno'', a watertank sketch from Marty Amok featuring Marty Feldman, model shots from ''The Caves of Steel'' and the filming of the forced-perspective model pier for the explosive finale of the missing ''Doomwatch'' episode, ''Survival Code'' | |||
* Deleted Scene - A short scene which was never seen in the original BBC transmission of Episode 5, featuring [[Jon Pertwee]] as the voice of a radio presenter | |||
* ''[[The Pertwee Years|Pertwee Years]] Intro'' - A short introduction to the story's final episode from Jon Pertwee, originally presented as part of BBC Video's ''The Pertwee Years'' VHS release | |||
* ''[[Doctor Who Annual 1971|Doctor Who 1971 Annual]]'' (DVD-ROM) | |||
* ''[[Radio Times]]'' Billings - Articles and listings from ''Radio Times'' (DVD-ROM) | |||
* Photo Gallery - Production, design and publicity photos from the story | |||
* Coming Soon Trailer - ''[[The Mind of Evil (TV story)|The Mind of Evil]]'' | |||
* Easter Eggs: | |||
** Clean opening title backgrounds, including the special 'volcano' graphics used for this story. To access this hidden feature, press left at Next on the first page of the Main Menu to reveal a hidden ''Doctor Who'' logo. | |||
** ''[[Being David Burton (documentary)|Being David Burton]]'' – Actor David Burton talks at greater length about his career and alleged casting as the Doctor. To access this hidden feature, press left at ''Pertwee Years Intro'' to reveal a hidden ''Doctor Who'' logo. | |||
<gallery position="center" captionalign="center" hideaddbutton="true"> | |||
Inferno special edition.jpg|Special Edition DVD Region 2 | |||
Inferno dvd.jpg|Special Edition DVD Region 1 | |||
Inferno special edition australia dvd.jpg|Special Edition DVD Region 4 | |||
</gallery> | |||
=== Digital releases === | === Digital releases === | ||
This story is available: | This story is available: | ||
* for streaming through [[BritBox]] ([[US]]) as part of Season 7 of ''Classic Doctor Who''. | * for streaming through [[BritBox]] ([[US|Canada & US]]) as part of Season 7 of ''Classic Doctor Who''. | ||
=== Video release === | === Video release === | ||
The story was released as a double-cassette pack on VHS in the UK in episodic format in March 1994, including in episode five the scene not shown on the original UK transmission but retained for overseas screening (see ''DVD releases'' above). | |||
Although released in colour, black-and-white photographs from the story were — somewhat misleadingly — used on the rear sleeve. | |||
Episode seven was also included on the VHS documentary ''[[The Pertwee Years]]'' released in March 1992. | |||
<gallery position="center" captionalign="center" hideaddbutton="true"> | <gallery position="center" captionalign="center" hideaddbutton="true"> | ||
| Line 480: | Line 572: | ||
File:Inferno VHS US cover.jpg|US VHS Cover | File:Inferno VHS US cover.jpg|US VHS Cover | ||
File:Inferno VHS Australian cover.jpg|AUS VHS Cover | File:Inferno VHS Australian cover.jpg|AUS VHS Cover | ||
The pertwee years (2).jpg|The Pertwee Years | |||
</gallery> | </gallery> | ||
| Line 486: | Line 579: | ||
Bbcaudio121.jpg|BBC audio release | Bbcaudio121.jpg|BBC audio release | ||
</gallery> | </gallery> | ||
== Footnotes == | |||
{{reflist}} | |||
== External links == | == External links == | ||
* {{bbcepguideclassic|inferno/|Inferno}} | * {{bbcepguideclassic|inferno/|Inferno}} | ||
* {{radiotimes|2009-10-06/inferno|Inferno}} | |||
{{dwcast}} | {{dwcast}} | ||
{{dwrefguide|who_3d.htm|Inferno}} | {{dwrefguide|who_3d.htm|Inferno}} | ||
| Line 497: | Line 594: | ||
{{TitleSort}} | {{TitleSort}} | ||
[[Category:Doctor Who (1963) television stories]] | [[Category:Doctor Who (1963) television stories]] | ||
[[Category:Season 7 stories]] | [[Category:Season 7 stories]] | ||
[[Category:Seven part serials]] | [[Category:Seven part serials]] | ||
[[Category: | [[Category:Stories set in England]] | ||
[[Category:Stories set in parallel universes]] | [[Category:Stories set in parallel universes]] | ||
[[Category:Stories set in the 1970s]] | |||
[[Category:UNIT television stories]] | |||
[[es:Inferno]] | |||
[[fr:Inferno]] | |||
[[ru:Инферно]] | |||
Latest revision as of 11:38, 3 August 2024
- You may wish to consult
Inferno (disambiguation)for other, similarly-named pages.
Inferno was the fourth and final serial of season 7 of Doctor Who. It was the final regular appearance of Caroline John as Liz Shaw, although her departure is not depicted. It was also the first Doctor Who story to explore the concept of parallel universes.
Inferno was the first story in which producer Barry Letts had any say on development and commissioning. Director Douglas Camfield suffered a minor heart attack after completing the location filming and the studio scenes for episodes one and two. This left Letts to direct the studio scenes for the remaining five episodes.
Several possible stories were considered for the season finale. The Mists of Madness by Brian Wright and The Shadow People by Charlotte and Dennis Plimmer were two. However, Wright was unavailable, and the Plimmers abandoned the project after a pay dispute. This left the way open for The Mo-Hole Project, as it was then titled, by Don Houghton. The serial went through several name changes before becoming Inferno.
Houghton had based the drilling part of the story on real events. He had contacted the American Embassy to enquire about Project Mohole, a real world attempt to drill through the Earth's crust. Information on the project and why it was abandoned were not disclosed as such information was top secret. It was this secrecy that Houghton developed for his story.
Letts was worried when the first script draft arrived as he did not think there was enough in it to fill a seven-parter. Additions such as the Primords and scenes featuring Venusian aikido were made to suitably lengthen the script.
This was the final serial to rely solely on stock tracks for its incidental music; this had been done periodically throughout the programme's history to date, typically as a cost-saving manoeuvre.
Synopsis[[edit] | [edit source]]
UNIT is providing security cover at an experimental drilling project at Eastchester, designed to penetrate the Earth's crust and release a previously untapped source of energy. Soon, however, the drill head starts to leak an oily green liquid that transforms those who touch it into vicious primeval creatures with a craving for heat.
The Doctor is accidentally transported "sideways in time" by the partially repaired TARDIS control console into a parallel universe where the drilling project is at a more advanced stage. Thwarted by his friends' ruthless alter egos, he works to save both universes.
Plot[[edit] | [edit source]]
Episode 1[[edit] | [edit source]]
The Doctor drives Bessie into an area of a drilling complex marked RESTRICTED.

A maintenance worker named Harry Slocum enters a drilling unit nicknamed Inferno. He introduces himself to Sir Keith Gold and is told there is an issue with output pipe number two, which has been taken out of service. He is urged to fix it quickly, as Professor Stahlman does not want any delays. Stahlman is at loggerheads with Sir Keith and tells him he should never have stopped the output pipe for maintenance. He tells Sir Keith never to make a decision with regards to the drilling again, and to focus on running the project's canteen.
As Slocum is fixing the pipe, he sees a green goo emanating from the base. He touches it, it burns and he is horrified to see his hand turn green.
Sir Keith discusses Professor Stahlman with the scientist's personal assistant, Petra Williams. He confides that he has sent for an expert in oil rig mining, Greg Sutton, as he is nervous that there is no-one with real drilling expertise on the project.
As Slocum leaves, he seems entranced. He heads outside the complex and stumbles against a piece of scaffolding. A man rushes out to help him. With a growl, Slocum turns on the man and kills him with his wrench.
In a room inside the complex, Benton is hanging a picture in what is to be the temporary UNIT H.Q. The Brigadier enters and asks if there has been any sightings of Slocum. Benton says there hasn't been. The Doctor enters, and the Brigadier tells him of the murder. He shows him the wrench, which is still warm and was red hot when it was found. The Brigadier comments that trouble seems to follow the Doctor around, and he questions why he asked to be on this mission. The Doctor says that an opportunity to be at the first penetration of the Earth's crust was not to be turned down. He then heads off to do some experiments of his own.
Sutton has arrived and is bewildered at having been pulled over with such urgency. Sir Keith shows him around the complex, saying that the drill head is twenty miles deep. This has been achieved by having no pipes, the pipes visible containing coolant delivered to the drill bit. Instead, there is a robot drill that is fed by a cable from a nuclear reactor. Sutton asks what this is hoping to achieve. The project is aiming to pipe Stahlman's gas (named after the Professor, naturally), a powerful energy source trapped inside the Earth's crust since the dawn of time. Sir Keith begins to introduce Sutton to the staff. He tries to flirt with Petra and is snubbed. On being introduced to Professor Stahlman, the scientist is cold towards Sutton. Stahlman thinks that Sir Keith is trying to introduce as many experts into the project as he can to try to close it down, and counts the Doctor as one of these. Sir Keith introduces Sutton to the Doctor and asks his opinion on the project. He says that they should be heeding the warnings of the computers. As he leaves, he overhears Stahlman complaining about the experts to Petra. He causally, but loudly, points out a flaw in the mechanics to a nearby scientist, making Stahlman angry.
The Doctor pulls up to a small building being guarded by a UNIT soldier. He asks if there is any news about Slocum; he is told that there isn't. The Doctor uses a device to open the door to the building remotely and drives Bessie in. Liz is inside working on the TARDIS console. The Doctor hands over the figures from the computer and tells her of the murder. She already knows as the sentry told her. They discuss the real reason they are here: the Doctor wants to use the nuclear power to try to jump-start his TARDIS console. He wants a test run straight away. Liz starts flicking switches and positions herself by the main switch.
Slocum is skulking around the complex; he is now covered in hair and has claws. Slocum enters a building marked NUCLEAR REACTOR SWITCH ROOM, where a white-coated scientist called Bromley is on the telephone. Slocum approaches him from behind.
The Doctor says he is ready. Liz pulls the lever down. The machine registers 7 mega volts.
Slocum has knocked Bromley unconscious, and pulls the nuclear reactor's main switch down to maximum.
The console begins to shake. The Doctor says that there is too much power. Liz cannot do anything as the circuits are locked. With a rapidly sped-up TARDIS take-off sound, the console and the Doctor dematerialise.
The Doctor is in some kind of limbo and is in some pain as he and the console fly through the darkness. He flies off into the black void.
Liz uses a plank of wood to force the levers down.
The console reappears, followed by the Doctor a few seconds later. The Doctor is groggy, but fine, and is keen for another trial run. Liz tries to dissuade the Doctor, but he says he needs to know where he was and where he was going. An alarm goes off at the drill-head area. The Doctor and Liz hurry off to Bessie.
The complex is in lockdown as the drill-head area fills with smoke. Professor Stahlman argues with Sir Keith as to why he ordered the lockdown. Sir Keith implores Stahlman to shut off the power, but he refuses. Sutton says that if the power is stopped now, it will never be able to be restarted again. Petra is ordered to check the coolant. Sutton tries to stop her, saying that the pressure is too dangerous, but she doesn't care. The Doctor and Liz enter the area. The Doctor says that there has been a nuclear power surge. The Brigadier enters and says that there has been another murder. The Doctor goes to Professor Stahlman to give him his advice, but is told to stop wasting his time. The Doctor heads off with the Brigadier. Petra returns, saying that the controls are jammed with the heat. Sutton tries to stop her from heading off, but instead goes with her to help. They find Professor Stahlman trying to stop it manually, and Sutton helps.
The Doctor and the Brigadier go to examine the body. As they do, Slocum jumps up, growling.
Episode 2[[edit] | [edit source]]
The Doctor stops any UNIT forces from attacking.
Sutton has sorted the issue with the coolant. Professor Stahlman says the readings are too high, and is offended when Petra suggests they need the Doctor.
The Doctor tries to calm Slocum. A UNIT soldier, Private Wyatt, sneaks up on Slocum and prepares to attack.
Stahlman is trying to contact the Doctor by telephone.
The phone is ringing, but everyone ignores it. Slocum attacks Wyatt. Wyatt manages to shoot him twice. They wrestle, and then Slocum slumps to the floor.
Sir Keith wants to stop the drilling, but the Professor blocks it.
Slocum is wounded, but alive. The Doctor wants to turn off the switch but can't as it is too hot, so he borrows the Brigadier's gun and uses that. Slocum dies and as he slumps down, the wall he was leaning on is blackened and scorched. The Doctor answers the phone and tells Stahlman he has sorted everything.
Professor Stahlman tells his workers to return to their duties. Sutton is cross with him and says he is just asking for trouble; he tries to confide with Petra and implores her to try to persuade Stahlman.
The Doctor and the Brigadier examine the body. He was shot twice through the heart, but remained alive for several minutes. The Doctor marvels at his abnormal resistance and strength. The body is still hot. The attacked UNIT scientist and Private Wyatt are seemingly fine.
The Doctor and the Brigadier climb to the roof to discuss what is going on. The Doctor suggests that there is some kind of retrogression of body cells that causes the victim to turn into an animal. The Doctor says that it is a very slow process and wasn't complete with Slocum. The Brigadier asks if he has ever heard a noise like the one Slocum made. The Doctor says he has, at Krakatoa in 1883. The Brigadier asks if there is a link, but they are interrupted by a UNIT soldier, who reports that Wyatt has disappeared. The Brigadier and the soldier rush off to find him. The Doctor sees Wyatt high above on a walkway and pursues him. When the Doctor catches up, Wyatt is animalistic and approaches the Doctor, wielding his gun like a club. Wyatt swings too hard and throws himself off the edge of the walkway. The Doctor shouts for no-one to touch him.
The UNIT scientist emerges from the building in a trance.

Professor Stahlman wants to increase the drilling speed when Petra calls him into a room where Sir Keith and Sutton are examining something. They open a box and show Stahlman a vial of the green goo. Sir Keith says that it has defied analysis, and to do so is very tricky as the substance is too hot and does not cool down. The Doctor tries to suggest what it is, again mentioning Krakatoa. The Brigadier wants to talk to Professor Stahlman and Sir Keith, but the scientist is reluctant to comply. The Brigadier insists. Left alone, Liz and the Doctor discuss the substance. The Doctor says he wants to hear it as he thinks it will let off a scream. Liz asks him to come and look at one of the computers.
Professor Stahlman is callous and is not bothered about the deaths on the site; the Brigadier and Sir Keith plead with him to show more mercy. Stahlman says he has no time for these deaths nor any crazy theories of the Doctor's. The Doctor enters and asks if Professor Stahlman ever intends on paying heed to his computers. Stahlman insists that the computers are over-sensitive. The Doctor reacts angrily. Petra rushes in and says that the vial holding the green goo is about to break. Stahlman strides out and, against the Doctor's suggestions, takes the vial in his hands and puts it back into the box, ordering it to be deep frozen. Professor Stahlman makes it clear that his discussion with the Brigadier is over and that the computer is faulty. The Doctor shows Stahlman the computer and warns him that he should stop the drilling. Again, Stahlman says that the readings are inaccurate. The Doctor goes to leave to continue his work, and Stahlman tells him that he is having the nuclear power supply to the Doctor's hut disconnected. The Doctor tells Stahlman that he is being childish. Professor Stahlman tells Petra that they can up the work rate of the drill in twenty-five minutes. Petra asks if it is safe, but Stahlman disregards her. As Stahlman is left alone, he discovers that his hand has turned green.
The Doctor asks Liz to go back to their hut and test the tri-gamma circuits on the console. Subtly he flicks a switch on one of the computers and closes his hut back up.
Professor Stahlman opens the computer and removes a microcircuit. He finds a truncheon in the Brigadier's desk and goes to smash it. The Doctor stops him. Stahlman goes to do it again, and the Doctor uses Venusian aikido to paralyse him. The Brigadier breaks it up. Professor Stahlman leaves, saying that the Doctor is a madman. The Doctor tells the Brigadier what he saw. When they challenge Stahlman, the scientist accuses the Doctor of trying to sabotage the drilling. They check Stahlman's pockets, and he no longer has the microcircuit. As the Doctor leaves, he points out that the computer has already stopped working. Unseen, Professor Stahlman stamps on and destroys the microcircuit which he had dropped on the floor.
The Doctor returns to his hut. Liz has fixed the tri-gamma circuits. She asks why he asked her to do it, and he says he strongly believes that the console is fine; it is just the nuclear surge that ruined his test. Liz says she is relieved they can't test again. The Doctor sends Liz off to run some tests through the computer. As soon as the Doctor is alone, he busies himself with the console.
As Liz leaves, she is pursued by the animalistic form of what had once been Bromley.
Liz returns to find the computer broken. When she explains to the Brigadier why she is there, he says that the Doctor knew the computer wasn't functioning. Liz rushes over and sees that the switch to provide the nuclear power supply to the Doctor's hut is on; she and the Brigadier run off to the hut.
The Doctor hangs onto his TARDIS console as it begins to shake.
Professor Stahlman notices that the power is down, and runs over to the switch and switches the Doctor's supply off.
Liz and the Brigadier return the hut to see the Doctor, his console and Bessie dematerialise.
Episode 3[[edit] | [edit source]]
Liz tries to bring back the now disappeared Doctor, but there is no power. Wherever the Doctor is, he's trapped.
Liz and the Brigadier return to the base. The Brigadier orders Professor Stahlman to reconnect the power and explains why, but he refuses. Sir Keith threatens to tell the ministry about this and the new mining speeds; Stahlman tells him to do so. When Stahlman leaves, Sir Keith says he will go to London as soon as possible but can't leave Professor Stahlman to do as he pleases at this critical point of the drilling.
Professor Stahlman's hand is now bright green. As he puts on a pair of white gloves, he is seen by Petra, who tells him to get it checked. Stahlman tells her not to worry.
Liz berates the Brigadier for not showing concern over the Doctor. The Brigadier says he has many concerns of which the Doctor is one.
The Doctor awakes in what appears to be his hut, but his surroundings are somewhat altered. On the wall is a poster that reads UNITY IS STRENGTH along with a black-and-white photograph of a man with a thin moustache. His device does not open the door, so he forces it open. The hut's door has a sign reading TECHNICAL STORE with an unfamiliar logo on it. He drives Bessie out of the hut and pauses to close the door when he is shot at by soldiers. After protesting, he jumps aboard Bessie and drives off, pursued by the soldiers, who consider him a saboteur. He soon finds himself in a dead end where a soldier jumps aboard Bessie. The Doctor and the soldier fight as the Doctor drives. He manages to throw the soldier out of the car. He parks Bessie between some houses and hides in a bin. The pursuing soldiers run into the house, allowing the Doctor to escape. The Doctor sneaks onto a walkway above the compound and watches the soldiers look for him. He hears a snarl behind him, and one of the animalised humans approaches him. As he attacks, the Doctor uses a fire extinguisher to subdue him. This draws the attention of the soldiers, who continue to pursue him. Another animalised human approaches him, and the Doctor counters his attack with a wooden pole.
Below, the soldiers are ordered by their leader to shoot on sight. They see a figure above them and fire. The animalised human falls to the ground.
A uniformed female figure marches though the compound. The Doctor sees that it is Liz, only with a different haircut. The Doctor calls out to her and asks why she is wearing those clothes. The woman looks confused, then draws a gun on the Doctor and blows her whistle for backup. Soldiers arrive, and she orders them to take the Doctor away.
The Doctor is brought into the Brigadier's office, where he is met with a figure similar to the Brigadier, but has no moustache, sports an eyepatch and has a large scar by his eye. He asks how the Doctor got in. The Doctor responds quizzically and asks who he is. The man reveals himself to be Brigade Leader Lethbridge-Stewart, while the woman is Section Leader Elizabeth Shaw and the other man is Platoon Under Leader Benton. When the Brigade Leader asks who the Doctor is, the Doctor realises what has happened. He introduces himself as Doctor John Smith and says he is from a parallel space-time continuum. The Brigade Leader is unsure if he is mad or bluffing. The Doctor shows he has knowledge of the drill and the people running it, and wants to see Professor Stahlmann or Sir Keith. The Brigade Leader takes the Doctor to see Stahlmann.
On the way, the Doctor notices that the drilling is three hours and twenty minutes away from the core, much in advance of where the Doctor has come from. The Doctor is brought before Stahlmann, who is referred to here as the Director but, unlike his bearded counterpart in the Doctor's universe, is clean-shaven, wears dark-tinted glasses and white gloves. The Doctor asks to see Sir Keith, but Director Stahlmann tells him that Sir Keith was killed in a car accident twenty-four hours ago, while on his way to the ministry in London. The Doctor draws attention to the broken computer that was giving out warning signs before it broke down. The Director accuses the Doctor of having sabotaged it and calls him away. He turns to Dr. Petra Williams, the Assistant Director of the project, and asks her to continue the drilling. Sutton tells her that there is no pressure getting to the drill head. Dr. Williams says she is aware of this, and tells Stahlmann what Sutton told her. He refuses to decelerate. Once Stahlmann is left alone, he feels a pain in his hand. He takes off the glove, and the hand beneath is bright green all over and hairy.
The Doctor is being made to wait by the Brigade Leader. He asks what is going to happen to him and is told that he will be executed without trial under the Defence of the Republic Act 1943. When the Doctor asks about the Royal Family, he is told they were all executed. When the Doctor sits down and begins to tell a story about how he met Edward VII in Paris, he is forced to his feet by the soldiers. When he badmouths them, the Brigade Leader tells him he cannot insult the Republican Security Forces who have been brought here to protect the drilling. The Doctor says they will need protecting if the computer giving out danger signals or Harry Slocum's death is anything to go by. The Brigade Leader says he is showing the amount of knowledge that only a spy could possess. The Doctor insists that he has seen it all in his world. The phone rings, and the Brigade Leader rushes out. Elizabeth tells him that Central Records have returned no match for the Doctor; officially, he does not exist. This confuses the Brigade Leader as Central Records have never failed him before. They both interrogate the Doctor.
Dr. Williams is informed of a minor leak in the drill head. Sutton questions her and is frustrated when neither she nor the Director seem to be bothered. An alarm goes off.
Hearing the alarm, the Brigade Leader and Elizabeth rush out. The Doctor calls over the guard and immobilises him with karate.
Smoke and green goo are pouring out of the drill head. The Brigade Leader is ordering all of his men and all of the scientists to remain at their posts. During this chaos, the Doctor sneaks forward.
Sutton orders the scientists around, to no avail. Dr. Williams watches the reading increase. The scientists start to abandon their posts; the Brigade Leader threatens to shoot them. The Doctor has found a toolbox and is scrabbling around looking for a microcircuit. He is discovered by Platoon Under Leader Benton, who holds a gun to his head and remarks there is a firing squad outside waiting. The Doctor implores with Benton, saying that he knows how to stop all this. Benton is unmoved and asks "Are you coming with me quietly, or do I shoot you here and now?"
Episode 4[[edit] | [edit source]]
Elizabeth stops Benton. The Doctor thanks her, but she says that she only did so because it goes against procedure. The Doctor tries to buy time to fix the computer, and eventually Elizabeth allows it. The computer begins to work and assesses the problems. Director Stahlmann is angry that the Doctor has been allowed access to the computer, but Sutton and Elizabeth stick up for him.
Sutton and Director Stahlmann argue about the safety precautions. Dr. Williams starts to listen to the Doctor's theories. The Doctor says that the heat and the pressure is proving too much for the velocity of the drill and that the only way to counteract it is to produce a reverse vortex by reversing all the systems. Reluctantly, Stahlmann agrees, then sends the Doctor away. Elizabeth compliments the Doctor, and then asks where he came from. He repeats his story about the parallel universe. Elizabeth asks about the version of herself in the Doctor's universe, and he says that she is a scientist. Elizabeth says that there is no similarity, but when the Doctor asks if she ever contemplated being a scientist, she admits she studied physics at university. The Doctor points out that it is there where the two points diverged. Elizabeth is doubtful, but the Doctor encourages her to think for herself.
Dr. Williams and Sutton talk about the Doctor and his motivations for saving them. Sutton says he intends on cutting the drill down to minimum speed, regardless of what Director Stahlmann thinks. Dr. Williams tells Sutton that he needs to start towing the line a little more. Sutton refuses, despite knowing that those who disobey orders "disappear".
Elizabeth is told that the emergency is over, thanks to the Doctor. The Doctor warns Elizabeth about the dangers of the drilling operation.
Director Stahlmann asks Sutton for progress and is told all is well. Stahlmann tells Sutton he intends on increasing the drilling speed, but Sutton says that this is madness. Stahlmann threatens to have Sutton killed if he continues to disobey him.
The Brigade Leader and Elizabeth are firing questions at the Doctor. They ask him his name, who sent him, whether he is a saboteur, what organisation he works for, whether he is a traitor, how he gained access to the complex, who helped him and which of their enemies he is working with. The Doctor does not answer. Elizabeth warns him they have other methods of extracting this information and repeats the question. The Doctor says that he came on his own, by accident, and has slipped sideways through time. Elizabeth asks the Brigade Leader for permission to go to stage two interrogation. He blocks this, as he is fearful the Doctor will die before talking.
The Doctor hears the acceleration of the drilling and rises to try to stop it. The interrogation continues. Director Stahlmann enters, wanting to know what progress is being made. The Doctor draws attention to Stahlmann's gloves and challenges him to take them off. Stahlmann tries to brush over this, but the Brigade Leader asks him to. Stahlmann does so, and his hands are bandaged underneath. He says that he scorched them on a section of the drill-head. The Doctor begins babbling about the green goo and infection. The Brigade Leader orders the Doctor to be taken to the Security Centre and asks Elizabeth to supervise him into his cell. When they are alone, the Brigade Leader questions why Director Stahlmann is so concerned about the Doctor. The pair argue and Stahlmann leaves, saying he wants the Doctor "liquidated" by the end of the day.
Sutton and Dr. Williams conspire about Director Stahlmann. Sutton is questioning why he is continuing to up the speed of drilling. Dr. Williams appears convinced by Sutton.
The Doctor is escorted to his cell by Platoon Under Leader Benton. He notices he has a sleeping figure in the cell next to him. Platoon Under Leader Benton says he will be sleeping for some time, as he has been shot with a tranquilliser dart. Elizabeth comes to check on him. The Doctor refuses to be interrogated any more and lies down on the bed, until Platoon Under Leader Benton orders him to his feet at gunpoint. Again, Elizabeth asks who the Doctor is and how he came to the complex. The Doctor, again, tells the truth. Platoon Under Leader Benton asks for a moment alone with the Doctor to extract the information from him. Elizabeth sends all the guards away. She puts to him that he is a protester from a free speech group who is forming a demonstration and that if he confesses to that he will only get a few years in a labour camp. The Doctor refuses. Elizabeth says she will leave him to the Brigade Leader and leaves. Left alone, the Doctor tries to talk to the sleeping figure. After no response, he goes to sleep. A green hairy hand emerges from beneath the bedclothes.
Back in the Doctor's universe, the Brigadier tells Liz that the UNIT soldiers have searched the entire complex for the Doctor, to no avail. They will not extend their search beyond the complex. Liz is concerned that the Doctor could be anywhere in space or time. When the Brigadier says that the Doctor can look after himself, Liz warns that he is not indestructible.
Sir Keith asks Professor Stahlman if there are any problems or precautions with the drilling. He responds in the negative to both. Sir Keith says he is going to London and, unless he receives some kind of assurances, he will tell the minister of the unsafe practices being carried about by Stahlman, who says he has no intention of playing it safe. When Stahlman leaves, Sir Keith tells the Brigadier and Liz that he is not sure that the Minister will even listen, as he has been blinded by Stahlman's promises of free energy. Sir Keith has an ominous feeling about the whole thing.
In the parallel universe, the Doctor awakens to snarling from the sleeping figure in the next cell. He calls for the guard, who enters to investigate. He is attacked and killed by the animalised human who has emerged from under the bedclothes. The creature approaches the Doctor and bends the bars to enter the Doctor's cell. The Doctor flips his mattress onto the creature, knocking him over, and escapes via the creature's open cell, locking the door behind him. The Doctor runs into the complex and approaches a Land Rover. Surrounded by people and in an effort to hide, he gets into the back of the truck and it then drives off.
The drill is thirty-five minutes from penetrating the Earth's crust. Sutton asks Dr. Williams if everything is ready. Sutton has an ominous feeling about the whole thing and thinks they should be paying more attention to the computer.
The Doctor has found a pile of full protective suits in the back of the truck.
A guard discovers the carnage in the cell and sounds the alarm.
The truck draws up and the Doctor, now disguised in one of the protective suits, finds both soldiers and scientists waiting at the back of the vehicle. The Doctor tries the ploy of handing out the suits to the men, and it works.
The drill is three minutes from penetration, and Director Stahlmann stares intently at the readings.
The Doctor re-enters the compound with other similarly dressed men.
The drill is two minutes from penetration. The disaster crew is at action stations. The Doctor and the other men in protective suits enter the main area and line up. The Doctor sneaks away and begins to tamper with a computer. The drill is one minute from penetration. The Brigade Leader notices the out-of-line figure and calls to him, telling him to get back to his post. The Doctor unveils himself by removing his protective helmet and shouts that the countdown should be stopped. Director Stahlmann orders the Doctor to be shot, and the Brigade Leader draws his gun. Sutton protests. The Doctor warns that they are about to release forces that they've never dreamed of. The drill lets out a high-pitched whine. The Doctor angrily yells "Listen to that! That's the sound of this planet screaming out its rage!" Sutton attacks the Brigade Leader and implores the Doctor to run. Wherever the Doctor turns, he is blocked by resistance security forces. Stahlmann now has the Brigade Leader's gun and is pointing it at the Doctor. The countdown reaches zero...
Episode 5[[edit] | [edit source]]
The ground shakes as the countdown voice announces "penetration-zero", and everyone is thrown to to the floor. The technicians panic and abandon their posts in terror. The Brigade Leader attempts to stop them, but to no avail. The Doctor staggers to his feet and tries to stop Sutton, who has donned a spare protective suit taken from a wall locker, from going into the drill-head area. Director Stahlmann is attempting to enter as well; Sutton stops him and warns he should put a protective suit on before going in, but Stahlmann breaks free of Sutton's grip and rushes on inside ahead of the pair. The Doctor theorises that Stahlmann is not feeling the heat quite as much as they are.
Dr. Williams confirms that nothing can be controlled remotely.
Inside the drill-head area, there is a huge explosion, and the green goo bubbles out of the drill itself.
Sutton and the Doctor enter in their protective suits. Suddenly, Sutton is struck about the head by Director Stahlmann. Whilst Sutton is unconscious, Stahlmann removes his helmet before he and the Doctor have a fist fight. Director Stahlmann is winning when Sutton staggers to his feet and strikes the crazed scientist down with a metal pole before collapsing in the fumes. The Doctor helps Sutton out of the area and back into the main area. When the Doctor tells everyone what Director Stahlmann did, they want to go in there and save him; the Doctor comments that Stahlmann seems to like it in there. Sutton and the Doctor prepare to go back in when the drill-head area's heat shield is suddenly closed by Stahlmann from inside.
Inside, Director Stahlmann is purposely contaminating the unconscious technicians with the goo.
The Doctor asks how thick the heat shield is, and Sutton replies that it would stand up to a nuclear explosion. The Doctor warns that it will not be enough — saying that, compared to the energy unleashed from the Earth's core, a nuclear explosion would be little more than a summer breeze.
An explosion rocks the complex.
The Brigade Leader returns to see almost everybody has abandoned their post. Dr. Williams says that the computer is not working. The Brigade Leader reports of seismic tremors and earthquakes all over the country. The government have put him in control. Sutton asks if they have any plans to seal the shaft; the Brigade Leader says they do not. Sutton asks the Doctor if it is possible, but he says that no substance in the world is strong enough to withstand the unleashed energy. The pressure will only get worse until, in days or weeks, the Earth will vaporize. An animalised human has appeared behind them. The Brigade Leader goes to attack it, against the wishes of the Doctor. The Brigade Leader tries to shoot it, to no avail. The Doctor uses a fire extinguisher, which immediately kills it. The Doctor explains that the creatures can't stand the cold. Sutton wants to leave. Dr. Williams says she will accompany him. The Brigade Leader draws his gun on them. Platoon Under Leader Benton says he has found some resistance security forces. The Brigade Leader tells him to ensure nobody leaves the building.
Benton marshals his troops.
Dr. Williams is attempting to fix the computer. Sutton says there is no point and that they are all going to die. Dr. Williams says the whole complex needs re-wiring. Sutton says there is no chance of that as the government has abandoned them, but softens his tone when he sees how distressed Dr. Williams is. She now realises that it is the end; she and Sutton embrace. Sutton says he plans to leave and asks if Dr. Williams wants to come with him.
[In the Brigade Leader's office, the Doctor, the Brigade Leader, Elizabeth, Sutton and Dr. Williams listen to the radio as an announcer reports geological disturbances across the country.]
Elizabeth is losing her mind at the planet's imminent demise. The Doctor says they still have a chance to save the other world. The Brigade Leader is exasperated that the Doctor is still continuing with that story. The Doctor explains the concept of the TARDIS and the fact he could use their nuclear reactor to get it working. He explains that in his world the drilling is behind schedule, and he can stop it before it takes place. The Brigade Leader wants to take a look at the TARDIS. As they leave, Dr. Williams tells him that all systems are breaking down. Once left alone, Sutton and Dr. Williams talk about when to escape.
The Brigade Leader inspects the TARDIS console. The Doctor shows a few movements left over from residual energy, but the Brigade Leader still doesn't believe and Elizabeth asks to see some proof. The Doctor drains the energy storage unit to travel a few seconds into the future. He asks if the Brigade Leader is satisfied. The Brigade Leader wants to know if the Doctor can take anyone else with him, but he says he cannot, as to do so will create a dimensional paradox that would shatter the entire space-time continuum. The Brigade Leader says if the Doctor can save himself, he can save them, and they shall return to the main control area.
Platoon Under Leader Benton is still keeping the resistance security forces in line despite the explosions around them.
As Dr. Williams is working in the main control area, a voice calls to her over the loudspeaker. She alerts Sutton, who hears it too. The Brigade Leader, Elizabeth and the Doctor join them to hear Director Stahlmann's voice asking Dr. Williams to raise the drill-head area's heat shield as the manual controls are jammed with the heat. Dr. Williams goes to do so and the Doctor tries to stop her, but the Brigade Leader draws his gun and allows Dr. Williams to raise the heat shield — reasoning that if the Director has survived, he must have found a solution and they need him in the main control area. The heat shield opens halfway, and a figure in a protective suit pulls it the rest of the way. The figure pulls off his helmet to reveal the animalised Stahlmann beneath, and a group of others like him emerge from the drill-head area: the technicians Stahlmann earlier contaminated with the green goo. The creatures do not attack, as they are acclimatising to the change in temperature. Everyone tries to escape, but they are stopped by the creatures. Platoon Under Leader Benton enters and is immediately seized by the creatures. The animalised Stahlmann rubs a handful of green goo across Benton's face, and he screams in agony before collapsing to the floor. The Doctor pulls some wires out of the computer, and the heat shield closes. This creates a distraction to allow them to escape into the office. Sutton wants to save Platoon Under Leader Benton, but the Doctor forbids it as there's nothing that can be done: the creatures have made Benton one of them. Benton staggers around in pain as he begins to transform.
Sutton is dismayed that he was not allowed to save Platoon Under Leader Benton. The Doctor says that nothing could have been done as the heat would have sped up Benton's change; that is why he closed the heat shield. The Brigade Leader and Elizabeth tell Dr. Williams about the Doctor's "spacecraft".
In the Doctor's universe, Sir Keith is on the way back from the ministry when he notices he is being taken a different route. The driver, Patterson, informs him that there is traffic. Sir Keith tries the car phone, but it isn't working. Sir Keith tells Patterson that the minister has suspended the drilling pending a full review. Sir Keith begins to become suspicious of Patterson, and he eventually confesses that Stahlman ordered him to take the long route home and stage a car breakdown. Sir Keith asks Patterson to return to the complex, but as he does, there is a loud screech of brakes as the pair are involved in a car accident...
In the parallel universe, the creatures are clawing at the office door.
Inside they are all discussing the revelations about the Doctor. They all believe him, with the exception of the Brigade Leader. The Doctor says he has a plan to get out of the office, but is interrupted by the arm of one of the creatures breaking through the door's glass panel.
Episode 6[[edit] | [edit source]]
The Doctor uses a fire extinguisher to push the animalised humans back. The Doctor needs ten minutes to execute his plan to connect the TARDIS to the nuclear reactor. Dr. Williams questions if there is any power running through the system. The Doctor checks the air conditioning system — it is working. Dr. Williams says it must have been switched to robot control; she would need to boost the output by resetting the emergency control, but the master switch in the next room needs to be fixed first. Sutton suddenly remembers that there is a huge amount of coolant in the adjacent room which they can use to hold off the creatures. The creatures break through, and they immediately put the plan into action. The Brigade Leader holds back the creatures with the fire extinguisher, while Sutton tries to access the coolant. The hose to the coolant has seized up, and the Doctor has to help. The Brigade Leader is surrounded, and his fire extinguisher has dried up. Just in time, Sutton has the coolant working and forces the creatures back. Sutton and the Doctor decide to stay and fix the master switch.
Once outside, the Brigade Leader wants to abandon the Doctor and Sutton but Elizabeth and Dr. Williams say they intend to stay.
The Doctor tells Sutton that he can go if he wants, but he refuses. Sutton asks the Doctor how he will convince them to stop drilling in his own universe. The Doctor says he may be able to convince Sir Keith. Sutton says he is dead, and the Doctor says he may still be alive in his own universe.
In the Doctor's universe, the Brigadier receives a phone call saying that Sir Keith has disappeared. Benton enters and says that Professor Stahlman is refusing to see the Brigadier and has insulted him. The Brigadier loses his temper and furiously orders Benton to bring Stahlman to him; even if it means carrying him!
Liz is in the Doctor's hut, flicking control panel switches in an attempt to return the Doctor to his original timeline. The door rattles, Liz checks to see who it is and opens the door to reveal Sutton. He is curious about what has happened to the Doctor, seeing as nobody saw him leave. Sutton thinks that the Doctor blew himself up and that everyone is covering it up. Liz explains that there was some kind of accident, but won't be drawn on any other details. Sutton tells Liz about Sir Keith.
Professor Stahlman is outraged at having been literally dragged away from his work by Benton and rails against the Brigadier. The Brigadier tells Stahlman of Sir Keith's disappearance and the scientist suggests an accident. The Brigadier says there has been no report of an accident. Stahlman suggests that Sir Keith might not have heard what he wanted to hear from the minister and taken himself off. The Brigadier says that, due to not having heard from the minister, he thinks that penetration-zero should be delayed due to Sir Keith's objections. Stahlman refuses.
In the parallel universe, Sutton is still holding off the animalised humans. The Doctor has fixed the master switch, Sutton clears a path with the coolant, and they both escape, grabbing fire extinguishers as they go.
Dr. Williams sees the Doctor and Sutton emerge. They all run off.
Soon Bessie pulls up at the Control Centre. Dr. Williams immediately sets about fixing the computer. The Doctor and Sutton set off to get tools and cable. As they do, they feel the tremors of a distant earthquake and head off to Bessie.
The animalised humans start emerging from the complex due to the fact it is warm enough outside for them now.
The Brigade Leader loses his temper with Dr. Williams, telling her to hurry up, but she says shouting at her isn't helping. Elizabeth sides with Dr. Williams. The Brigade Leader explains that he has no intention of letting the Doctor escape alone.
The complex is now covered with the animalised humans.
The Doctor and Sutton have got back to the hut. Sutton is underwhelmed by the console. The Doctor asks him to fix the connector to the cable. Sutton warns him that if the entire output of the nuclear reactor is run through the cable, it will only last a few seconds. The Doctor assures him that a few seconds is all he will need.
The Brigade Leader asks Dr. Williams how much longer she will be. She says that there is a problem with the relay circuits, and is attempting a double bypass. The Brigade Leader loses his temper again. Elizabeth turns on him. The Brigade Leader says he plans to hijack the TARDIS console and if the Doctor refuses to be persuaded, he will kill him.
Sutton implores the Doctor to make sure he stops them from drilling and connects the cable. He says that, with luck, it should work. The Doctor says they don't need luck but skill.
Dr. Williams thinks she is ready. She pulls the lever and nothing happens; she says there must be a fault. The Brigade Leader is furious with Dr. Williams for wasting their time. She says she will try again, but it will involve re-wiring the whole system.
Sutton and the Doctor are waiting for the circuit to be complete. Sutton says that, if those explosions reach the nuclear reactor, they are all done for.
The Brigade Leader watches the shaft split open. The animalised Director Stahlmann enters, and Dr. Williams and Elizabeth run out. The Brigade Leader shoots the animalised Stahlmann repeatedly until he falls to the floor. All three of them run off, pursued by the creatures. They are sporadically thrown to the ground by earthquakes.
Back at the hut, Sutton is impatient, but the Doctor is resigned to the plan having not worked. Just then, Sutton sees the trio coming. Dr. Williams apologises for the plan not having worked. The Doctor says it is fine. The Brigade Leader is furious and says it is far from fine. Sutton and the Brigade Leader argue. The Brigade Leader pulls his gun on Sutton, who says he will be only speeding up his death. The Brigade Leader pulls the trigger, but there are no bullets in the gun. The pair fight, and the Doctor makes them stop — saying they don't want to end their lives "fighting like animals". They notice that Dr. Williams has gone back to the Control Centre to try to remedy the situation, and Sutton goes to help her.
Dr. Williams is rewiring the computer when Sutton enters, furious. She asks what any risk to herself matters. The animalised Director Stahlman awakes, and Sutton attacks him with a fire extinguisher. As he does, Dr. Williams gets the circuit working. The pair run back to the hut.
Elizabeth notices that the TARDIS console is working, and the Doctor says it is gaining power rapidly. The Brigade Leader pulls his gun and orders the Doctor to take them with him, firing the weapon in the air to prove it is now loaded. The Doctor says he wants to, but can't as to do so will cause a cosmic disaster. The Doctor says the Brigade Leader is going to have to shoot him. The Brigade Leader gives the Doctor a count of three before he fires, and then a gunshot rings out. The Brigade Leader falls dead to the floor, shot in the back. Elizabeth re-holsters her revolver; she is the one who fired the shot. She, Sutton and Dr. Williams implore the Doctor to leave now.
A huge explosion shakes the complex, and volcanic lava begins to flow from where the drill shaft was. Men and animalised humans run in terror.
The Doctor says he cannot dematerialise as the power is too erratic. Elizabeth, Sutton and Dr. Williams watch in terror as lava begins to flow towards the door of the hut...
Episode 7[[edit] | [edit source]]
The Doctor lies prostrate and unconscious on the floor of the hut; his own hut, in his own universe. He is discovered by Liz, who calls for Benton to fetch the Brigadier.
It is three hours and twenty-two minutes until the drill penetrates the Earth's crust. Professor Stahlman gives orders to boost the drilling. Petra is unsure as to the safety, but Stahlman orders it. Petra tells Sutton, who wants to confront Stahlman, but Petra stops him, saying that she will try first.
Benton tells the Brigadier about the Doctor's return. Sutton overhears.
Professor Stahlman will not listen to Petra; he is strongly affected by a noise that emerges from the drill-head. Petra is worried for his health, but he says he merely has a headache. Sutton tries to persuade Stahlman but again he is blocked, and once more the noise has an effect on Stahlman. He storms off, leaving Petra and Sutton worried about his mental health.
Liz is checking the Doctor's health. All is fine, and he is just in some kind of coma. The Brigadier wants to fetch a doctor, but Liz blocks him.
Sutton warns Professor Stahlman of an issue with the number two output pipe, but Stahlman ignores him. Sutton loses his temper, and Stahlman says that if he is so worried, he should leave. Sutton goes to leave when Petra stops him. Sutton tries to convince her to come with him, but she says she can't. They are interrupted by an explosion from the drill-head.
The Brigadier is informed of the issue. The Doctor stirs. He mutters that the number two output pipe has blown. The Brigadier is stunned, as he has only just heard that information himself. Still in his coma, the Doctor mutters, "Reverse all systems immediately", before slipping back into unconsciousness. Liz goes to Central Control to tell them what the Doctor said.
Professor Stahlman is struggling to keep everyone in their positions and is refusing to stop the drilling. Liz enters and asks Sutton and Petra what would happen if they reversed the systems. Sutton says it is not a bad idea. Petra says they would never get Stahlman to agree, but Liz says they should just do it. They all rush off.
The Doctor stirs in his coma.
Reversing all systems has worked; Liz says it was the Doctor's idea.
Professor Stahlman is angry at Petra for not having run the plan past him.
The Doctor awakens to the Brigadier and Liz, and tells the Brigadier he looks better with his moustache. He checks his pulse and is healthy. The Doctor tells Liz and the Brigadier where he has been: the TARDIS console didn't take him forward or back in time, but "sideways". They think he is still delirious. The Doctor asks the Brigadier, who he calls the Brigade Leader, if they have caught the animalised scientist, whether Professor Stahlman seems ill and the state of the drilling. There is a knock at the door. It is Sir Keith, who explains about his forced delay and the car accident. The Doctor is overjoyed to see he has survived his accident. Sir Keith tells the Brigadier that Stahlman is going to face some serious charges. The Doctor has realised that with an infinity of universes comes an infinity of choices, free will is not an illusion and patterns can be changed. The Doctor stops the Brigadier from calling a doctor for him, and tells Sir Keith what is going to happen.
The Doctor bursts into Central Command and says that drilling must be stopped. Professor Stahlman orders the Brigadier to arrest him. The Doctor rushes to a computer and attacks it with a wrench. The Brigadier pulls him away and orders him to be taken to the sick bay. Sir Keith confronts Stahlman, who says he has no intention of going to see the minister until after drilling is complete.
In the drill-head area, Petra tells Professor Stahlman that they will be switching to robot controls in forty-nine minutes. Stahlman says he feels cold and orders her to increase the temperature, before having some kind of attack that causes the scientists to look at him in shock. Stahlman then unexpectedly orders everyone to leave the area, saying he will finish the final phase of the operation alone.
Sutton and Petra are shocked as to what Stahlman is doing. Just then, the drill-head area's heat shield is closed by Stahlman from inside.
The Doctor uses Venusian karate to knock out his UNIT guards before running off and hiding. The guards come to and run past him in his hiding place. The Doctor is approached by the animalised scientist and neutralises him with a fire extinguisher.
Professor Stahlman looks at the green goo oozing from the drill-head, then grabs a handful of the substance with his disfigured green hand. He smears the goo onto his face, then screams in agony and collapses.
Petra hears Stahlman's screams through the loudspeaker and is concerned for the Doctor. Sutton tells Sir Keith that they cannot get to Stahlman as he has locked the heat shield from the inside.
In the drill-head area, Professor Stahlman is now fully animalised.
The computer is advising that the drilling should be stopped. The Doctor re-enters just as the heat shield rises and the animalised Professor Stahlman emerges. The Brigadier fires two shots from his revolver at the no-longer-human Stahlman (whether these have any effect is unclear), who attacks the Doctor with a chair; the Doctor and Sutton then blast Stahlman with fire extinguishers, killing him instantly. The Doctor orders that the drilling be stopped. Sutton says that they should cut off the power. Petra warns that this would cause the drill to disintegrate, but Sutton says that would be for the best. Petra cuts off the power, but the drilling continues. Sir Keith warns of the buffer controls, which cause the drill to slow rather than stop dead. This means the drilling will continue for five minutes — long enough for the drill to penetrate the Earth's crust. The Doctor and Sutton go into the drill-head area and discover the drill's servo-switches have been smashed by Stahlman. With one minute left, the Doctor begins to tinker with the wrecked switch unit. Everyone looks on, worried. With thirty-five seconds left, the Doctor and Sutton return, having stopped the drilling for good. Liz hugs the Doctor. The Doctor says to Sir Keith that the shaft should be filled in immediately, which he says he will arrange; while the Brigadier sends for a stretcher party to take away Professor Stahlman's body.
Back in the hut, the Doctor and Liz are working on the TARDIS console. There is a knock at the door. It is Sir Keith, accompanied by the Brigadier. He has come to say goodbye. Sir Keith says everyone is leaving as the project has been abandoned. The Doctor is told that he has one more day with the nuclear reactor before it is dismantled. Sir Keith also informs them all that Sutton and Petra left together. Once alone, Liz and the Brigadier ask why the Doctor still wants to use the nuclear reactor. The Doctor says that the console is now fully functional, and he can use it at will. The Brigadier scoffs at him, and the Doctor says he reminds him of the Brigade Leader. He bids goodbye to Liz before saying that he cannot stand another moment with the Brigadier, whom he describes as a "pompous, self-opinionated idiot". He flicks a few switches and disappears with the console; this time, Bessie remains in the hut. Liz turns to the Brigadier, cross that he has forced the Doctor to leave. Just then, there is a cough at the door. A rather bedraggled-looking Doctor stands at the door. He informs them he moved a few seconds forward in time and space, landing in the rubbish tip! The Doctor tries to smooth over his cross words to the Brigadier in an effort to get some UNIT soldiers to recover the console, which has landed in "a somewhat inaccessible position". Liz laughs.
Cast[[edit] | [edit source]]
- Dr. Who — Jon Pertwee
- Liz Shaw / Section Leader Elizabeth Shaw — Caroline John
- Brigadier Lethbridge-Stewart / Brigade Leader Lethbridge-Stewart — Nicholas Courtney
- Sergeant Benton / Platoon Under Leader Benton — John Levene
- Professor Stahlman / Director Stahlmann - Olaf Pooley
- Sir Keith Gold — Christopher Benjamin
- Petra Williams / Dr. Petra Williams - Sheila Dunn
- Greg Sutton / Greg Sutton - Derek Newark
- Private Latimer / Trooper Latimer - David Simeon
- Private Wyatt / Trooper Wyatt - Derek Ware
- Harry Slocum - Walter Randall
- Bromley / Bromley - Ian Fairbairn
- RSF Sentry - Roy Scammell
- Patterson - Keith James
- Primords - Dave Carter, Pat Gorman, Walter Henry, Philip Ryan, Peter Thompson
Uncredited cast[[edit] | [edit source]]
- Technicians - Sheila Knight, Patricia Matthews, Corinne Skinner, Joan Harsant, Valerie Bland, Alan Clements, Keith Norrish, Richard Cooper, Richard Lawrence, Richard King, Robert Birmingham, Derek Hunt, Michael Earl, Norton Clark, Bertie Green, Keith Ashley, June Gray, Harry Tierney, Natalia Lindley, Marcelle Elliott, Ronald Gough, Judith Pollard, Colin James, Steve Tierney, Sue Patterson, Alistair Baine, Alan Chuntz (DWM 305, TCH 16)
- RSF Soldiers - Roy Scammell, Alan Chuntz, Terry Walsh, Billie Horrigan, Roy Street, Derek Martin, Nick Hobbs, Royston Farrell, Les Conrad (TCH 16)
- Stunt Double for Private Wyatt - Roy Scammell (TCH 16)
- Drivers - BG Heath, Bruce Cox (TCH 16)
- Stunt Double for the Doctor - Terry Walsh (TCH 16)
- Countdown voice - Ian Fairbairn (DWM 305)
- UNIT Soldiers - Alan Chuntz, Ian Elliott, Terry Walsh, Derek Martin (TCH 16)
- Loudspeaker Voice - Barry Letts (TCH 16)
- Radio announcer's Voice - Jon Pertwee (overseas copies of episode five only)
Crew[[edit] | [edit source]]
- Writer - Don Houghton
- Action / Stuntwork - HAVOC
- Assistant Floor Manager - Sue Hedden
- Costumes - Christine Rawlins
- Designer - Jeremy Davies
- Film Cameraman - Fred Hamilton
- Film Editor - Martyn Day
- Film Sound - Graham Hare
- Make-Up - Marion Richards
- Production Assistant - Chris D'Oyly-John
- Script Editor - Terrance Dicks
- Special Sounds - Brian Hodgson
- Studio Lighting - John Green
- Studio Sound - John Staple
- Theme Arrangement - Delia Derbyshire
- Title Music - Ron Grainer
- Visual Effects - Len Hutton
- Producer - Barry Letts
- Director - Douglas Camfield
Uncredited crew[[edit] | [edit source]]
- Effects Assistant - Peter Logan, Ian Scoones (INFO: Inferno)
- Floor Assistant - Frank Mullan (INFO: Inferno)
- Make-Up Assistants - Judy Cain, Sue Duckworth, Irene Walls (INFO: Inferno)
- Design Construction Organiser - Colin Bowles (INFO: Inferno)
- Producer's Secretary - Sandra Brenholz (INFO: Inferno)
- Technical Managers - Ray Hider, Lance Wood (INFO: Inferno)
- Film Sound Assistant - Jack Curtis (INFO: Inferno)
- Director's Assistant - Sue Upton (INFO: Inferno)
- Film Camera Assistant - Hugh Miles (INFO: Inferno)
- Grams - Tony Philpott, Gerry Borrows (INFO: Inferno)
- Costume Assistants - Terry Styles, Pat Trigger (INFO: Inferno)
- Vision Mixer - John Gorman (INFO: Inferno)
- Lighting Cameraman - Mike Wilson (INFO: Inferno)
Worldbuilding[[edit] | [edit source]]
Locations[[edit] | [edit source]]
- Sutton was flown in from Kuwait.
- The Inferno Project is being conducted at Eastchester. (The area is named only in overseas copies of episode five — see Story Notes section below)
Individuals[[edit] | [edit source]]
- The Doctor states he was at Krakatoa during the eruption of 1883.
- The Doctor is seen using Venusian aikido here for the first time.
- The Doctor met King Edward VII in Paris.
- Latimer is one of the soldiers in the other universe.
- Phillips is working on the Inferno project.
TARDIS[[edit] | [edit source]]
- The Doctor has removed the console unit from the TARDIS and is running experiments with it. It is also demonstrated that the console itself can travel through space-time without the need of an outer shell, but requires an external power source to achieve transit.
Technology[[edit] | [edit source]]
- The siren indicating an emergency at the drillhead on the parallel Earth is higher pitched than that on N-Space Earth. A secondary siren, absent on the Warp I Earth, is a warbling electronic pulse activated in the event of a security breach.
- On N-Space Earth the Brigadier has only a single white telephone, a Type 712, on his desk. On the Inferno Earth it is joined by a black Type 706 telephone; the latter seems to be connected to a secure line exclusively for sensitive communications on a different circuit to the white telephone. The black telephone is equipped with an electronic buzzer instead of the standard bell normally fitted to that model of instrument.
Story notes[[edit] | [edit source]]
- This story had the working titles of The Mo-Hole Project, Operation: Mole-Bore, The Mole-Bore and Project Inferno.
- This is the only season finale in the Third Doctor era to not be written by Robert Sloman.
- The primordial mutant creatures are named "Primords" in the closing credits of episodes five and six and publicity material, but are left unnamed in the story's dialogue.
- The opening credits for this serial were unique in that after the initial titles, the name and part number of the serial were superimposed on footage of a lava flow, with no music. Unique episode title cards were an occasional fixture of classic series episodes during the 60s (e.g. TV: The War Machines, The War Games). Inferno would be the final story in the classic series to feature a unique title card. The practice would be briefly revived, albeit in the form of unique logos for the show title itself, in the Autumn 2012 half of BBC Wales' Series 7.
- The footage of a volcano erupting used for these title cards was also used in The Enemy of the World and The Time Monster.
- The Radio Times programme listing for episode one was accompanied by a black-and-white rehearsal shot of the Doctor standing at the TARDIS console, with the accompanying caption "Knock, knock. Who's there? 5.15" (original published text), while that for episode seven was accompanied by a black-and-white photograph of the mutated Director Stahlman, with the accompanying caption "Meeting the Primord. Dr. Who: 5.25". (original published text)
- In spite of Douglas Camfield receiving sole credit as director, the second studio recording block and studio blocks 3 and 4 were directed by producer Barry Letts after Camfield had a minor heart attack on 27 April 1970. Letts later stated that Camfield's preparations for episode three's studio recording were so meticulous that he just followed Camfield's existing camera script. For the other episodes, Letts worked to his own plans, which he had to hurriedly construct. In the end, Camfield directed all the location filming, the studio recording for episodes one and two and designed the direction executed by Letts on episode three's studio recording. Nevertheless, Camfield remained credited as director, as BBC regulations at the time forbade the same person being credited as producer and director.
- Derek Ware did not perform the scene where the mutated RSF Private Wyatt is shot and falls to his death from the top of one of the cooling towers, in case he was injured, as he was also needed for studio recording. He was replaced by Roy Scammell who, curiously, also played the RSF sentry who fires the fatal shot. Ware stated in an interview that Scammell had already signed the contract to do the fall before Ware had been cast as Wyatt.
- The role of Petra was given to Sheila Dunn (Douglas Camfield's wife) after Kate O'Mara was not available to play the part. O'Mara was, years later, cast as the First Rani, a renegade Time Lord.
- Episode six has a small damaged section on the tape, which the Doctor Who Restoration Team replaced by painstakingly recolouring the appropriate section of the existing 16mm black-and-white film telerecordings.
- Caroline John enjoyed her role as Section Leader Elizabeth Shaw and said that it was fun playing "baddie" Liz. She also says she hated doing the scenes when she was playing the "goodie" version because it was boring compared to being an evil character. She was particularly upset though about the scene in which Shaw shoots Brigade Leader Lethbridge-Stewart, as she was pregnant at the time. As a result, the scene was recorded with the weapon fired from off-camera, after which Shaw was shown returning the gun to her holster.
- Nicholas Courtney has also said he enjoyed playing the parallel version of the Brigadier. He called it his "favourite" in an interview with Doctor Who Magazine in 2009. The DWM staff remembered this by including it in his tribute issue as that month's "The Fact of Fiction".
- At Doctor Who fan events, Nicholas Courtney frequently recounted an incident which occurred during shooting of the scene with the revelation of the Brigade Leader and his eye patch. The scene begins with Courtney having his back to the camera (and to all the other actors) before spinning around in his swivel chair to reveal the Brigade Leader's visage and eye patch. When the scene was shot, Courtney spun around to discover that all the other actors and crew members were also wearing eye patches. According to the story, he then proceeded to perform the entire scene as if nothing unusual had occurred. The "eye patch story" became so closely associated with Courtney that Steven Moffat wrote scenes in which "everybody was wearing an eye patch" into the 2011 episode The Wedding of River Song as a tribute to Courtney, who had died earlier that year. (DWMSE 31)
- During the scenes set on the parallel Earth, a black-and-white image of the Leader is seen on a UNITY IS STRENGTH poster in the Technical Store (the Doctor's hut on the regular Earth timeline) and as a large framed photograph on the wall of the Brigade Leader's office. The image used is that of visual effects designer Jack Kine, in homage to the 1954 BBC adaptation of George Orwell's Nineteen Eighty-Four where the face of Big Brother was Head of Television Design Roy Oxley (Kine had worked on the visual effects for that production).
- Inferno marks the first Doctor Who story to be set in a parallel universe.
- The scenes on top of the chemical tank in episode two were not easy for Jon Pertwee, as he was afraid of heights. It took him fifteen minutes just to summon up the confidence to film the scene.
- In episode three, during the chase scene on the parallel Earth, Bessie's bumper gashed open stuntman Alan Chuntz's leg as it passed as he jumped out of the way a fraction later than he was supposed to. The gash was so severe that he had to go to A&E. John Levene stated on the DVD commentary that "it was the worst wound [he]'d ever seen" and after Jon Pertwee saw the wound and learned he caused it, he became sick and almost couldn't carry on filming until a few hours later. Pertwee even went as far as buying Chuntz's wife a gift to apologise for the accident.
- Olaf Pooley initially refused to put on the Primord costume, but eventually Barry Letts persuaded him to do it and Pooley was later glad that he did agree to wear it.
- A Doctor Who Unbound story later touched on a narrative element of this story. According to Sympathy for the Devil — a narrative set in a different parallel universe — research into the possibilities of Stahlman's gas was still ongoing in 1997, the year that the Doctor in that universe's exile on Earth began.
- This was the final story to feature the original TARDIS console prop. Having been in use since the show's first episode in 1963, the prop had gradually deteriorated over the years, with numerous bits and pieces falling off or being replaced. After this story aired, the prop was deemed unusable and junked. For the TARDIS console unit's next appearance in The Claws of Axos, a new prop, designed by Kenneth Sharp, was built.
- This was the last televised story to use stock music in lieu of an original incidental music score. Notably, many of the stock pieces used were composed by Doctor Who theme arranger Delia Derbyshire, making this the nearest she came to actually scoring an episode of the show.
- The RSF soldiers wear American M1951 pattern military fatigues, French M1892/14 webbing equipment and are armed with Russian-designed SKS carbines.
- Depending on personal opinion on The Trial of a Time Lord, this could be the last story to be longer than six episodes. It is also the last seven-part story.
- A scene in the Brigade Leader's office with the parallel universe characters listening to a radio report about geological disasters was cut from the UK transmission of episode five, as the radio announcer was felt to be too recognizable as Jon Pertwee doing one of his famous funny voices. The scene also identified the area of the Inferno project as Eastchester — a name not mentioned anywhere else in the story. The scene was however retained for overseas screening, as it was thought audiences outside the UK wouldn't be familiar with Pertwee's comedy work. This scene appeared on the VHS release of the story in 1994 (presumably because the only colour copy of the serial at the time was an NTSC version returned from Canada), but for the later DVD releases it was removed and featured only as a separate deleted scene.
- Another cut scene would have actually shown the death of the UNIT soldier mentioned by the Brigadier: Harry Slocum was to have come up behind him and strangled him to death.
- Jon Pertwee would not follow Douglas Camfield's directions and when the star argued with production assistant Chris D'Oyly John, an irate Camfield descended from the production gallery, forcing Sheila Dunn to intervene and persuade Pertwee to comply.
- Originally, Section Leader Shaw was to interrogate the Doctor in episode three, but Nicholas Courtney, Douglas Camfield and Barry Letts thought that it should be the Brigade Leader. Caroline John wasn't happy about this.
- Nicholas Courtney and Caroline John both named this as their favourite serial.
- Jon Pertwee and Derek Newark had previously guest starred in a Season 5 episode of The Avengers (1961-69) called "From Venus with Love".
- Discounting individual episode titles in Seasons 1 to 3, this is the first serial in which the title consists of only one word.
- The Doctor makes a joking reference to Batman. Coincidentally, Jon Pertwee's son Sean Pertwee would later play Alfred Pennyworth in Gotham.
- The unusual "triple arrow" symbol appearing on cap badges and buildings on the parallel Earth is almost certainly intended to resemble the broad arrow, a symbol used to denote government property in the real-world. The broad arrow image is strongly protected by Crown copyright and cannot be reproduced in any form without government permission. The set and costume designers likely did not consider it worthwhile to seek official approval, so devised an ersatz stand-in.
- This story has the distinction of being ranked as Doctor Who Magazine readers' favourite Third Doctor story in all four of their major polls, in 1998, 2009, 2014, and 2023. (DWM 590)
- Barry Letts and Terrance Dicks didn't think the drilling plot was enough to carry seven episodes, so they added the parallel Earth plot. They also felt the story needed a monster, so they added the Primords.
- Sir Keith Gold's surname was originally Mulvaney, then Rose.
- Private Wyatt was originally named Peters.
- One element removed from the storyline was the Doctor returning to the normal world while in possession of the missing microcircuit from the parallel universe's computer, and then using it to repair Stahlman's sabotage.
- Barry Letts evisioned the Primords as being ape-like creatures. It was Douglas Camfield who suggested that they be like werewolves.
- Don Houghton referred to the two universes as "Warp I" and "Warp II" in the script, while the Doctor's journey between worlds was described as "the Nightmare Warp".
- The constant ambience at central control was always playing during shooting and not a post production sound effect.
Ratings[[edit] | [edit source]]
- Episode 1 - 5.7 million viewers
- Episode 2 - 5.9 million viewers
- Episode 3 - 4.8 million viewers
- Episode 4 - 6.0 million viewers
- Episode 5 - 5.4 million viewers
- Episode 6 - 5.7 million viewers
- Episode 7 - 5.5 million viewers
Myths[[edit] | [edit source]]
- The parallel universe aspect of the story was added to the scripts at the production team's suggestion to ensure that there was sufficient material to fill seven episodes. (Though Terrance Dicks has claimed this in several documentaries, the parallel universe aspect was present as far back as Don Houghton's original story outline. It actually appears to have been the Primords who were added at the production team's suggestion.)
- This was Caroline John's last story as Liz as she was pregnant and could not return for the following season. (Although it is true that the actress was pregnant, Barry Letts was unaware of this when he decided against renewing her contract.)
Filming locations[[edit] | [edit source]]
- Kingsnorth Industrial Estate (formerly Berry Wiggins and Co Ltd), Hoo St Werburgh, Kent
- Ealing Television Film Studios, Ealing Green, Ealing
- BBC Television Centre, Shepherd's Bush, London
Production errors[[edit] | [edit source]]
- On the Nuclear Output Gauge in the Doctor's workshop, Mega-volts is spelled "Megga Volts".
- In episode four, when the Doctor has been returned to the Brigade Leader's office, the door is shown to be open. The camera then focuses on the Brigade Leader and when it returns to the Doctor and Benton, the door is now closed.
- During some shots of episode six when Sutton is holding off the Primords with coolant from a fire extinguisher, none is actually coming out of the nozzle.
- In episode seven, the dead Primord Stahlman has a little bit of human skin poking out of his neck.
- Director Stahlman is shown to wear a nameplate that reads STAHLMANN, but he is credited on-screen and in Radio Times for episode five as "Director Stahlman".
- In episode seven, when the Doctor is stopping the drill, Caroline John's floor-marker (which indicates the spot where an actor must stand so as to be seen properly by the camera) is clearly visible.
- The countdown announcements are read out every ten seconds. In the final episode, the last one heard before the Doctor and Sutton stop the drill is "zero minus fifty seconds"; therefore the timer should have been, approximately, forty-five seconds but the announcement afterwards declares that the drill was stopped at "zero minus thirty-five seconds".
Continuity[[edit] | [edit source]]
- PROSE: Timewyrm: Revelation states that the dictator was one of the alternative regenerations the Time Lords offered to the Doctor in TV: The War Games.
- Liz Shaw does not feature in any subsequent serials, although an illusory image of her is seen in TV: The Five Doctors. The circumstances surrounding her departure from UNIT are told in PROSE: The Scales of Injustice. In TV: Terror of the Autons, it is merely mentioned that Liz went back to Cambridge.
- PROSE: Interference - Book One suggests that Stahlman's ooze is a result of the hole to the Spiral Yssgaroth at the centre of the Earth.
- PROSE: The Face of the Enemy is a sequel to Inferno, revisiting the "alternate" world.
- PROSE: Ashes of the Inferno is another sequel, dealing with the aftermath of the serial's events.
- PROSE: Still Lives features a UNIT corporal who becomes affected by the events of this story.
- The ooze's transformation of humans into Primords is paralleled with the Wyrm's creation of the Wyrm Callers in AUDIO: The Adolescence of Time.
- The Fourth Doctor later encountered Marshmen, creatures that shared the Primords trait of being temporarily weakened by gas sprayed from a canister. However, unlike the Primords who were weakened by carbon dioxide in fire extinguisher spray, the Marshmen were weakened by oxygen from oxygen canisters. (TV: Full Circle)
- In 2007, the Doctor travelled to another parallel universe in which there was a Republic of Great Britain. (TV: Rise of the Cybermen / The Age of Steel)
- A sketch that washed up on the shores of Sumatra following the Krakatoa eruption was later shown to Rose Tyler, depicting the Ninth Doctor in front of a volcano. (TV: Rose)
- Also during the Krakatoa eruption, the Xylok which became Mr Smith was unearthed. (TV: The Lost Boy)
- Another great drilling project into the Earth's crust was started in the Welsh village of Cwmtaff in the year 2020. (TV: The Hungry Earth)
- The Eleventh Doctor later sang "La donna è mobile", again with altered lyrics, while in the shower in TV: The Lodger.
- In February 1970, the journalist James Stevens dismissed Greg Sutton's outlandish claim that a green slime from the centre of the Earth transformed scientists into wolf monsters during the Inferno Project. He described Sutton's story as sounding like the plot of a "science fiction potboiler". (PROSE: Who Killed Kennedy)
- After the failure of the Inferno Project, among other incidents, was publicised by James Stevens in his "Bad Science" series of articles in the Daily Chronicle, Harold Wilson's position as Prime Minister of the United Kingdom became untenable and the Labour Party lost the general election in June 1970 to the Conservatives, led by Edward Heath. (PROSE: Who Killed Kennedy)
- By 1973, Sutton had befriended the First Doctor's former companion Ian Chesterton. (PROSE: Byzantium!)
- Jo Grant later mentioned the events of the Inferno Project in AUDIO: Gardeners' Worlds.
- In a parallel universe in which the Doctor's exile on Earth did not begin until 1997, research into the possibilities of Stahlman's gas was still an ongoing project. (AUDIO: Sympathy for the Devil)
Home video and audio releases[[edit] | [edit source]]
DVD releases[[edit] | [edit source]]
This story was released as Doctor Who: Inferno.
Released:
- Region 2 - 19 June 2006
- Region 4 - 6 July 2006
- Region 1 - 5 September 2006
Contents:
- Commentary by Nicholas Courtney, Barry Letts, Terrance Dicks and John Levene.
- Can You Hear the Earth Scream? - A 35-minute documentary that looks at the making of Inferno. With contributions from Caroline John, Nicholas Courtney, John Levene, Ian Fairbairn, Barry Letts, Terrance Dicks and Derek Ware.
- The UNIT Family (Part One) - A 36-minute documentary that looks at the role of UNIT in the world of Doctor Who through to the end of Jon Pertwee's first year as the Doctor.
- Deleted Scene - A 2-minute scene cut from the original UK transmission of episode five, but which was retained for overseas screening.
- Visual Effects Promo Film - An excerpt from a BBC Visual Effects Department showreel.
- The Pertwee Years - Introduction - Jon Pertwee's original introduction to the final episode of this story.
- Radio Times Billings - Articles and listings from Radio Times (DVD-ROM PC/Mac).
- Doctor Who Annual 1971 (DVD-ROM).
Notes:
- Editing for the DVD release was completed by the Doctor Who Restoration Team.

Region 2 cover

Region 1 cover
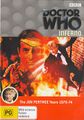
Region 4 cover


DVD special edition[[edit] | [edit source]]
Inferno was re-released as a special edition in 2013. An update to the original in the same manner as the release of 'The Claws of Axos - SE', combining the luminance from the 16mm black-and-white film telerecordings with the colour from the Reverse Standards Converted 2" NTSC videotapes.
Special Features:[[edit] | [edit source]]
Disc 1:[[edit] | [edit source]]
- Commentary with actors Nicholas Courtney (Brigadier) and John Levene (Benton), producer Barry Letts and script editor Terrance Dicks
- Production Information Subtitles
- Easter Egg: VT countdown clock for episode seven. To access this hidden feature, select episode seven from the Episode Selection menu, then press rewind as soon as the title sequence begins, at which point the feature will play.
Disc 2:[[edit] | [edit source]]
- Can You Hear the Earth Scream? - A 35-minute documentary that looks at the making of Inferno. With contributions from Caroline John, Nicholas Courtney, John Levene, Ian Fairbairn, Barry Letts, Terrance Dicks and Derek Ware
- Hadoke versus HAVOC - Presenter Toby Hadoke reunites surviving members of the HAVOC stunt team and trains with them to perform a stunt himself. Will he survive to become an honorary member of HAVOC? With stunt arranger Derek Ware and stunt men Roy Scammell, Derek Martin and Stuart Fell
- Doctor Forever! - Lost in the Dark Dimension - The penultimate instalment of the five part series looking at how Doctor Who was kept alive in the years between the end of the classic series and the beginning of the new. In this episode they look at the various attempts to bring the show back during that period. With then-current and former Doctor Who Magazine editors Tom Spilsbury, John Freeman and Gary Russell, former BBC range editor Steve Cole, actor David Burton, writer Adrian Rigelsford, director Graeme Harper and then-former executive producer Russell T Davies. Narrated by Zeb Soanes
- The UNIT Family - Part One - A 36-minute feature looking at the Earthbound Doctor's 'family' during his exipe to Earth and his new role as the UNIT scientific advisor
- Visual Effects Promo Film - An excerpt from an early attempt to sell the experience and facilities of the BBC Visual Effects Department to new clients. This short film features model effects filming from the Doctor Who stories The Ambassadors of Death and Inferno, a watertank sketch from Marty Amok featuring Marty Feldman, model shots from The Caves of Steel and the filming of the forced-perspective model pier for the explosive finale of the missing Doomwatch episode, Survival Code
- Deleted Scene - A short scene which was never seen in the original BBC transmission of Episode 5, featuring Jon Pertwee as the voice of a radio presenter
- Pertwee Years Intro - A short introduction to the story's final episode from Jon Pertwee, originally presented as part of BBC Video's The Pertwee Years VHS release
- Doctor Who 1971 Annual (DVD-ROM)
- Radio Times Billings - Articles and listings from Radio Times (DVD-ROM)
- Photo Gallery - Production, design and publicity photos from the story
- Coming Soon Trailer - The Mind of Evil
- Easter Eggs:
- Clean opening title backgrounds, including the special 'volcano' graphics used for this story. To access this hidden feature, press left at Next on the first page of the Main Menu to reveal a hidden Doctor Who logo.
- Being David Burton – Actor David Burton talks at greater length about his career and alleged casting as the Doctor. To access this hidden feature, press left at Pertwee Years Intro to reveal a hidden Doctor Who logo.

Special Edition DVD Region 2

Special Edition DVD Region 1

Special Edition DVD Region 4


Digital releases[[edit] | [edit source]]
This story is available:
- for streaming through BritBox (Canada & US) as part of Season 7 of Classic Doctor Who.
Video release[[edit] | [edit source]]
The story was released as a double-cassette pack on VHS in the UK in episodic format in March 1994, including in episode five the scene not shown on the original UK transmission but retained for overseas screening (see DVD releases above).
Although released in colour, black-and-white photographs from the story were — somewhat misleadingly — used on the rear sleeve.
Episode seven was also included on the VHS documentary The Pertwee Years released in March 1992.

UK VHS Cover
US VHS Cover
AUS VHS Cover
The Pertwee Years


.jpg)
Audio release[[edit] | [edit source]]

BBC audio release

Footnotes[[edit] | [edit source]]
External links[[edit] | [edit source]]
- Inferno at the BBC's official site
- Inferno at RadioTimes
- Inferno at BroaDWcast
- Inferno at the Doctor Who Reference Guide
- Inferno at Shannon Sullivan's A Brief History of Time (Travel)
- Inferno at The Locations Guide
| |||||||||||||||||||||||||||||||||||||||||