TARDIS control room/Gallery: Difference between revisions
(→TV) |
(→Comics) Tag: 2017 source edit |
||
| Line 236: | Line 236: | ||
Es'Cartrss of the Tactire.jpg|[[COMIC]]: ''[[The Forgotten (comic story)|The Forgotten]]'' | Es'Cartrss of the Tactire.jpg|[[COMIC]]: ''[[The Forgotten (comic story)|The Forgotten]]'' | ||
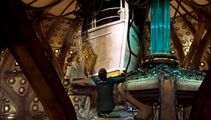
TARDIS staircase Laundro-Room of Doom.jpg|Doorway to the TARDIS staircase ([[COMIC]]: ''[[Laundro-Room of Doom (comic story)|Laundro-Room of Doom]]'') | TARDIS staircase Laundro-Room of Doom.jpg|Doorway to the TARDIS staircase ([[COMIC]]: ''[[Laundro-Room of Doom (comic story)|Laundro-Room of Doom]]'') | ||
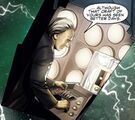
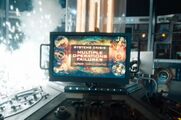
TARDIS control room panels.jpg|TARDIS control room panels ([[COMIC]]: ''[[The Lost Dimension (comic story)|The Lost Dimension]]'') | |||
</gallery> | </gallery> | ||
Revision as of 16:05, 23 April 2023
This page is a gallery of images depicting TARDIS control rooms.
The Doctor's control rooms

First Doctor
TV
The first takeoff. (TV: An Unearthly Child)

Studying the scanner. (TV: An Unearthly Child)
The Doctor opens the doors to prove they have travelled. (TV: An Unearthly Child)

The Doctor by the console during the malfunction of the fast return switch. (TV: The Edge of Destruction)

The Twelfth Doctor at the controls. (TV: Twice Upon a Time)


Comics
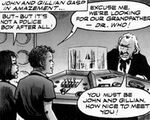
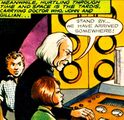
The first appearance of the Doctor and the TARDIS in the medium of comics, alongside his grandchildren John and Gillian. (COMIC: The Klepton Parasites)
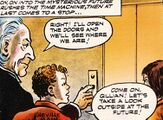
In a colour reprint of the story, the Doctor opens the TARDIS doors. (COMIC: The Klepton Parasites)

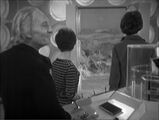
The Doctor, John, and Gillian look out of the TARDIS scanner. (COMIC: The Therovian Quest)

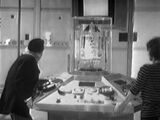
The Doctor at the TARDIS control console. (COMIC: Prisoners of Gritog)
The Doctor studies the TARDIS controls with John and Gillian. (COMIC: Prisoners of the Kleptons)
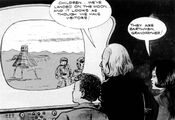
From within the TARDIS, the Doctor and his grandchildren watch the first men to walk on the Moon. (COMIC: Moon Landing)

The Doctor has John fetch his signal rockets. (COMIC: The Ordeals of Demeter)
The Eleventh Doctor visits his past self’s TARDIS. (COMIC: Hunters of the Burning Stone)
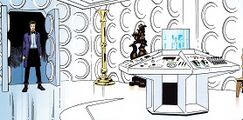
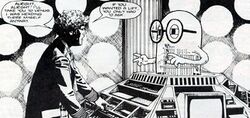
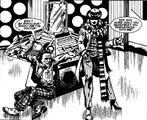
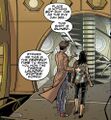
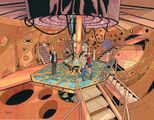
The Doctor pilots the TARDIS. (COMIC: The Lost Dimension)


Prose

PROSE: Doctor Who and the Daleks (2022)

Second Doctor
TV

The new Second Doctor. (TV: The Power of the Daleks)
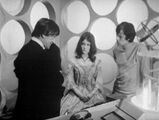
Introducing Victoria to the TARDIS. (TV: The Tomb of the Cybermen)

The Doctor in his TARDIS during his mission to Space Station Camera. (TV: The Two Doctors)


Third Doctor
TV

The Third Doctor and the Master repair the TARDIS. (TV: The Claws of Axos)

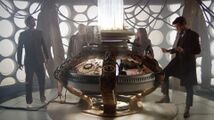
Two Doctors in the TARDIS. (TV: The Three Doctors)
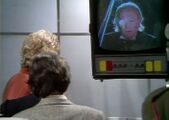
The First Doctor addresses his future selves via the scanner. (TV: The Three Doctors)


Fourth Doctor
TV
The Fourth Doctor at the controls with Sarah Jane. (TV: Planet of Evil)
The Doctor returning to the main control room with Leela, after a redecoration. (TV: The Invisible Enemy)
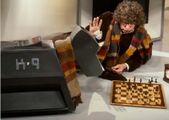
A game of chess beside the console. (TV: The Sun Makers)
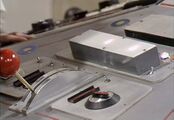
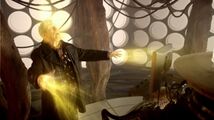
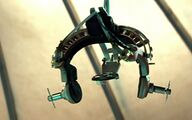
The randomiser, installed by the Doctor on the console to evade the Black Guardian. (TV: The Armageddon Factor)
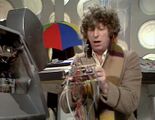
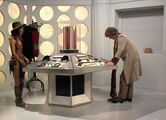
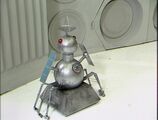
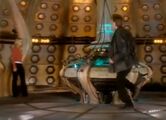
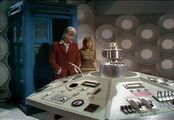
The Doctor works on K-9. (TV: Destiny of the Daleks)


Prose

Comics

The secondary control room
Television

Comics


Fifth to Seventh Doctor
TV
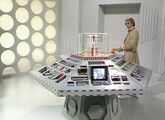
The Fifth Doctor admires the redecorated console. (TV: The Five Doctors)

The Sixth Doctor in the control room immediately after his regeneration. (TV: The Caves of Androzani)

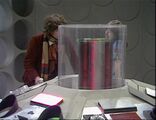
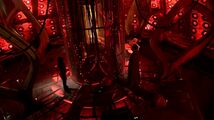
The TARDIS is invaded by Cybermen. (TV: Attack of the Cybermen)

The Doctor reads the manual. (TV: Vengeance on Varos
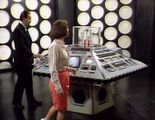
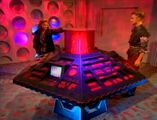
One companion leaves as another joins. (TV: Dragonfire)
An advertiser for the Psychic Circus visits. (TV: The Greatest Show in the Galaxy)


Comics

The Fifth Doctor at the controls. (COMIC: The Lost Dimension)
Frobisher hijacks the TARDIS. (COMIC: The Shape Shifter)
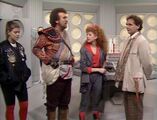
Peri with the Seventh Doctor (A Cold Day in Hell! graphic novel)
Identity theft. (COMIC: Who's That Girl!)
The TARDIS console shattered after the journey into humanity’s collective unconscious. COMIC: Ground Zero


Prose

Seventh Doctor's second control room
Comics


Prose

Illustrations

Concept art by Lee Sullivan (DWM 173)

CGI model by Gavin Rymill (DWM 532)


Seventh Doctor's third control room

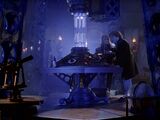
A design made by Mike Tucker of what a redesigned TARDIS might have looked like if the series had survived into season 27. (DWM 255)

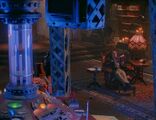
A four-foot model of this TARDIS was built in 1998 for DOC: The Take: 35 Years of Doctor Who, which told the story of why Doctor Who was canceled in 1989. The miniature set was green screened behind some of the presenters.

TARDIS shelves and spiral staircase. (COMIC: The Armageddon Gambit)

The Seal of Rassilon above the TARDIS doors. (COMIC: The Armageddon Gambit)

The console as it appeared in COMIC: Operation Volcano, taking extreme liberties to make it resemble newer TARDIS interiors.


.jpg)
Seventh Doctor's other control rooms
Comics

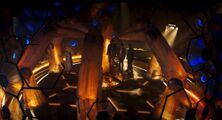
The TARDIS' round console. (COMIC: Final Genesis)

Alternate universe TARDIS

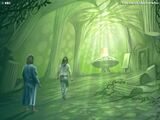
An apparent early form of the Victorian control room. (PROSE: Human Nature)

The console room reverted back to an older design. (PROSE: Head Games)


Eighth Doctor
Television
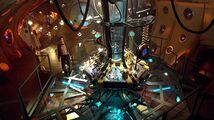
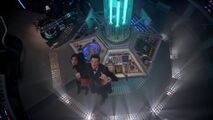
Console from above (TV: Doctor Who)
Chang Lee enters the TARDIS. (TV: Doctor Who)
Grace and the Doctor (TV: Doctor Who)
The Eighth Doctor relaxing (TV: Doctor Who)


Comics
Penny Chapman enters the TARDIS (COMIC: The Curious Tale of Spring-Heeled Jack)

The control room in John and Gillian's world (COMIC: The Land of Happy Endings)
The Eighth Doctor wakes up. (COMIC: The Land of Happy Endings)


Webcasts


Illustrations

With a little help from my friends illustration (DWM 272)


War console
TV

The War Doctor in his TARDIS on the last day of the Time War. (TV: The Day of the Doctor)
The War Doctor regenerates beside the console. (TV: The Day of the Doctor)
The Tenth Doctor’s TARDIS adopts the War Doctor’s interior design as it compensates for the three Doctors. (TV: The Day of the Doctor)


Comic

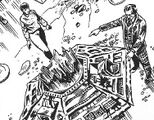
A young War Doctor at the controls. (COMIC: The Lost Dimension)

Coral console

The scanner. (TV: Aliens of London)

Blon Fel-Fotch Passameer-Day Slitheen holding Rose hostage. (TV: Boom Town)
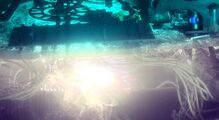
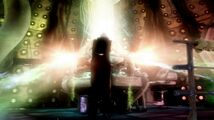
The TARDIS control console opens to reveal the heart of the TARDIS. (TV: Boom Town)
Rose looks into the heart of the TARDIS. (TV: The Parting of the Ways)
The Ninth Doctor regenerates beside the console. (TV: The Parting of the Ways)

The Tenth Doctor is born in the TARDIS. (TV: The Parting of the Ways)

The Doctor in the TARDIS immediately after his regeneration. (TV: Born Again)
The newly regenerated Tenth Doctor hops around the console. (TV: Born Again)

Rose in the TARDIS. (TV: School Reunion)
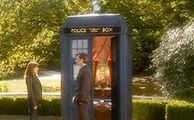
A view from outside. (TV: School Reunion)

Jackie in the TARDIS. (TV: Army of Ghosts)

Donna looks out of the doors. (TV: The Runaway Bride)
The Chameleon Arch. (TV: Human Nature)
The War Master regenerates in the TARDIS. (TV: Utopia)

The newly-regenerated Saxon Master stealing the TARDIS. (TV: Utopia)
Converted into a Paradox machine. (TV: The Sound of Drums)

Martha leaves. (TV: Last of the Time Lords)

Two Doctors. (TV: Time Crash)

Past and future working together. (TV: Time Crash)
The Titanic crashes into the TARDIS. (TV: Last of the Time Lords)

Donna in the TARDIS. (TV: Partners in Crime)
Davros on the scanner. (TV: The Stolen Earth)
The Tenth Doctor begins to regenerate. (TV: The Stolen Earth)
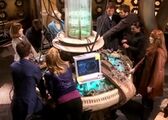
A fully manned TARDIS. (TV: Journey’s End)
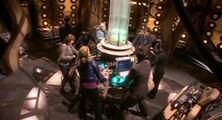
Towing the Earth home. (TV: Journey’s End)

The Doctor vows to defy his fate. (TV: The Waters of Mars)
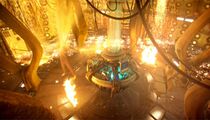
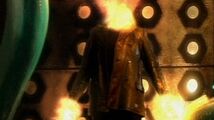
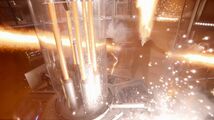
The Tenth Doctor’s regeneration destroys the console room. (TV: The End of Time)

The new Doctor in the burning room. (TV: The End of Time)

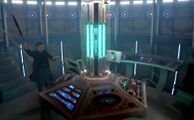
The control room archived. (TV: The Doctor’s Wife)


.jpg)


Comics
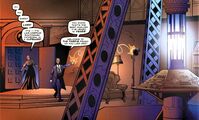
Doorway to the TARDIS staircase (COMIC: Laundro-Room of Doom)

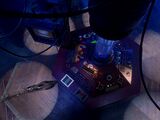
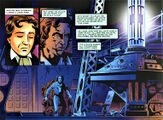
TARDIS control room panels (COMIC: The Lost Dimension)


Copper console
The Eleventh Doctor welcomes Amy aboard. (TV: The Eleventh Hour)
The Dream Lord lingers in the Doctor’s reflection on the console. (TV: Amy's Choice)
The Doctor receives a phone call. (TV: The Big Bang)
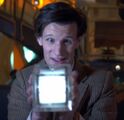
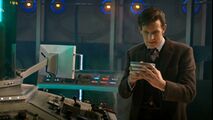
The Doctor gets a Hypercube. (TV: The Doctor’s Wife)

The TARDIS’ voice interface. (TV: Let's Kill Hitler)


Comics
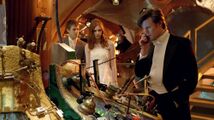
DW11 1 RIA cover

.jpg)


Other control room
Comics

TARDIS console from a design by Rob Semenoff (COMIC: Without a Paddle)

TARDIS roundels (COMIC: Without a Paddle)


Neon/Toyota console
The Eleventh Doctor in the control room. (TV: The Snowmen)

The time rotor. (TV: The Snowmen)
The scanner. (TV: The Snowmen)

Clara at the door. (TV: The Rings of Akhaten)

The Doctor tries to help Clara get along with the TARDIS. (TV: Journey to the Centre of the TARDIS)
The Doctor leads the Van Baalen brothers into the TARDIS. (TV: Journey to the Centre of the TARDIS)
The TARDIS holds the Doctor’s time stream in a alternate timeline. (TV: The Name of the Doctor)
The TARDIS interior shaking as UNIT collect the ship. (TV: The Day of the Doctor)
The Eleventh Doctor finishing fish fingers and custard in his dying moments. (TV: The Time of the Doctor)

Clara in the TARDIS as the Doctor prepares to regenerate. (TV: The Time of the Doctor)

The Twelfth Doctor immediately after his regeneration. (TV: The Time of the Doctor)

The Twelfth Doctor’s redecoration. (TV: Deep Breath)
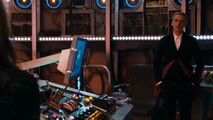
The Twelfth Doctor by the controls. (TV: Deep Breath)
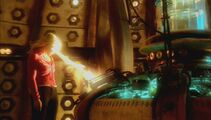
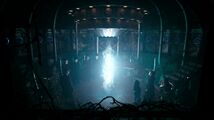
The Doctor activates siege mode. (TV: Flatline)

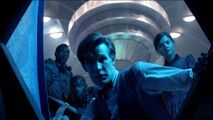
The TARDIS creates a new sonic screwdriver. (TV: Hell Bent)
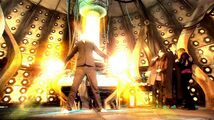
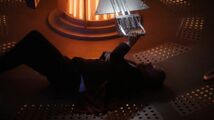
The Twelfth Doctor regenerates in the control room. (TV: Twice Upon a Time)
The TARDIS warns the newly-regenerated Thirteenth Doctor. (TV: Twice Upon a Time)


Comics

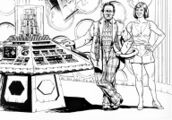
The Doctor at the controls, reunited with Ian and Barbara. (COMIC: Hunters of the Burning Stone)

.jpg)
Crystal console
TV
The Doctor welcomes her “fam” to the TARDIS. (TV: The Ghost Monument)

A Kerb!am Man in the TARDIS. (TV: Kerblam!)

Ryan saves his dad from being pulled out of the TARDIS. (TV: Resolution)

Nikola Tesla in the TARDIS. (TV: Nikola Tesla’s Night of Terror)


.jpg)


Others

The Fugitive Doctor's TARDIS TV: Fugitive of the Judoon

The Fugitive Doctor's TARDIS COMIC: Origins
The tertiary control room (PROSE: Nightshade)
.jpg)
.jpg)

The Monk's TARDIS

Vicki and Steven discover the First Monk’s ship. (TV: The Time Meddler)

The Monk trapped outside his shrunken control room. (TV: The Time Meddler)


The Master's TARDIS
The Third Doctor’s TARDIS inside the Master’s TARDIS. (TV: The Time Monster)

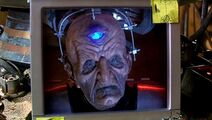
The Decayed Master inside the advanced TARDIS he used on Traken. (TV: The Keeper of Traken)
The Tremas Master’s TARDIS. (TV: Planet of Fire)

The Tremas Master in his TARDIS within the Matrix. (TV: The Ultimate Foe)

The Spy Master's TARDIS during the Master's Dalek Plan. (TV: The Power of the Doctor)


The Rani's TARDIS

The Sixth Doctor at the controls of the First Rani’s TARDIS. (TV: The Mark of the Rani)
The Rani’s TARDIS during her attempt to gather a menagerie. (TV: Dimensions in Time)

The Rani observes the First Doctor being “pickled in time” from her TARDIS. (TV: Dimensions in Time)


