Decayed Master
Check the behind the scenes section, the revision history and discussion page for additional comments on this article's title.
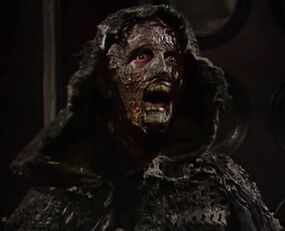
Having reached the end of his their original regeneration cycle in disputed circumstances, the Master was reduced to a skeletal, decayed state, taking to wearing ragged black robes to conceal the extent of his ghoulish disfigurement. Kept alive by sheer hatred, (TV: The Deadly Assassin [+]Loading...["The Deadly Assassin (TV story)"]) he engaged in various schemes to try and heal himself and extend his lifespan, from seeking new regenerations to possessing others' bodies. (TV: The Deadly Assassin [+]Loading...["The Deadly Assassin (TV story)"], The Keeper of Traken [+]Loading...["The Keeper of Traken (TV story)"], etc.)
Although he went on to find a new lease of life by stealing the body of Consul Tremas of Traken, (TV: The Keeper of Traken [+]Loading...["The Keeper of Traken (TV story)"]) some accounts suggested that the Tremas Master would go on to revert to his prior incarnation, (AUDIO: Dust Breeding [+]Loading...["Dust Breeding (audio story)"], PROSE: The Velvet Dark [+]Loading...["The Velvet Dark (short story)"]) with some even suggesting that further reversions occurred beyond the existence of the "Bruce" Master; (AUDIO: Mastermind [+]Loading...["Mastermind (audio story)"], Planet of Dust [+]Loading...["Planet of Dust (audio story)"]) whatever he tried, he would inevitably revert to his decayed thirteenth form sooner or later. By this account, only after suffering a conclusive end at the hands of the Ravenous and being gifted a new regeneration cycle would he finally shake it off and regenerate into a new, truly stable form. (AUDIO: Planet of Dust [+]Loading...["Planet of Dust (audio story)"])
Biography[[edit] | [edit source]]
Origins[[edit] | [edit source]]
- Main article: Twelfth Master's regeneration
Having regenerated into his thirteenth incarnation at an accelerated rate due to living a life "more rackety than the Doctor's", (PROSE: A Brief History of Time Lords [+]Loading...["A Brief History of Time Lords (novel)","A Brief History of Time Lords"]) that had constant pressure and danger, in addition to using some incarnations as disguises, (PROSE: Doctor Who and the Deadly Assassin [+]Loading...["Doctor Who and the Deadly Assassin (novelisation)","Doctor Who and the Deadly Assassin"]) the Master eventually found himself trapped as a wraith-like living cadaver, "horribly emaciated", for whom "no regeneration was possible". (TV: The Deadly Assassin [+]Loading...["The Deadly Assassin (TV story)","The Deadly Assassin"])
There were, however, multiple accounts of how this came about.
According to one account, the "UNIT era" Master drove his car into a wall in the mid-1970s. His charred remains were recovered by the human authorities, who identified him as the scientist Carl Thascales and declared him dead, never realising the Master's burned body still clung to life. (PROSE: Falls the Shadow [+]Loading...["Falls the Shadow (novel)","Falls the Shadow"])
By another account, the Decayed Master emerged as a result of Susan Foreman forcing the "UNIT era" Master out onto Tersurus and attacking him with the Tissue Compression Eliminator while he was holding the Daleks' matter transmuter, damaging him to the extent that regeneration could not repair the damage. (PROSE: Legacy of the Daleks [+]Loading...["Legacy of the Daleks (novel)","Legacy of the Daleks"])
According to Missy and the Thirteenth Doctor, the Master ended up in his rotting, lich-like state when he attempted to regenerate "one time too many" past the twelve-regeneration limit. (PROSE: Meet Missy! [+]Loading...["Meet Missy! (short story)"], The Doctor vs the Master [+]Loading...["The Doctor vs the Master (short story)"])
According to yet another set of accounts, the "UNIT era" Master began to regenerate after being injured in a temporal storm after an encounter with the Twelfth Doctor. Prior to his regeneration, his body was beginning to decay, yet he declared himself the master of life itself and attempted to regenerate to survive. (COMIC: Doorway to Hell [+]Loading...["Doorway to Hell (comic story)"]) Because he was suffering from an artron energy deficiency (PROSE: The Dead Travel Fast [+]Loading...["The Dead Travel Fast (short story)"]) as a result of the storm, his regeneration went wrong (COMIC: Doorway to Hell [+]Loading...["Doorway to Hell (comic story)"]) and his new incarnation was brought into existence already horribly scarred. Losing control of his TARDIS, he crashed on Earth, 1890, on the shore of Whitby. Bram Stoker saved him from drowning and retrieved his TARDIS. The Master then hypnotised Stoker and forced him first to carry the TARDIS in the ruins of the nearby Whitby Abbey, and then to hunt down for him little animals, whose life energy he sucked dry to sustain himself. Stoker however succeeded in resisting the Master's influence when he ordered him to bring to him a human life, and walked away. He then returned to stop the Master from taking the life of a young girl, and fought with him inside his TARDIS. During the fight, Stoker accidentally activated the dematerialisation circuits, sending the ship away. (PROSE: The Dead Travel Fast [+]Loading...["The Dead Travel Fast (short story)"])
Yet another account showed that the Thirteenth Master, as distinct from the "UNIT era" version, had enjoyed some span of existence in un-disfigured form before being injured in events involving his own future self. (AUDIO: The Two Masters [+]Loading...["The Two Masters (audio story)","The Two Masters"])
At war with his future[[edit] | [edit source]]
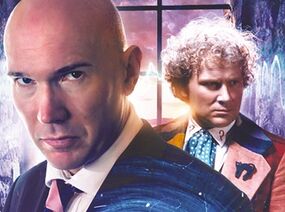
According to said account, the Master arrived on a Time Lord base on Tersurus with the intention of infiltrating their database. He encountered a future version of himself, who burned his body using a Malson Electrofield, leaving him a fraction above death. The future Master then signalled Gallifrey for Goth to arrive, but before he could arrive, the Cult of the Heretic switched the Master's mind with that of his future self. (AUDIO: The Two Masters [+]Loading...["The Two Masters (audio story)","The Two Masters"]) While he remembered being in great pain, the process left gaps in the Master's memory. He returned to a prison in the south of England, where a former incarnation had lured a Carmentine mind leech, and set up the Dominus Institute in order to lure the Doctor to him, planning to absorb his intellect. The Sixth Doctor made a deal with the mind leech, which agreed to take only the Doctor's short term memory. This was enough to sustain the Master (AUDIO: Vampire of the Mind [+]Loading...["Vampire of the Mind (audio story)","Vampire of the Mind"]) and allowed him to regain his memory of what had happened to him. The Decayed Master then hired the Transhuman Sisters of the Unholy Protocol and the Dragonhunters to kill his future self. (AUDIO: And You Will Obey Me [+]Loading...["And You Will Obey Me (audio story)","And You Will Obey Me"])
The act of having a Time Lord inhabiting the body of his past self led to the universe beginning to break down. Realising this, the Seventh Doctor encountered both of the Masters and persuaded them to return to their rightful bodies. Abandoning the Doctor on a ship that was set to crash into a hypergate, the two Masters stole his TARDIS and returned to the Cult's headquarters, where they killed all of the members and plotted to use the anomaly cage to remake reality in their image. They were stopped by the Doctor, who had escaped the crash in the Master's TARDIS: he used the cage to restore the universe, leaving it practically unchanged, apart from erasing the Masters' memories of the events and sending them back to their proper points in history. (AUDIO: The Two Masters [+]Loading...["The Two Masters (audio story)","The Two Masters"])
Revenge on Gallifrey[[edit] | [edit source]]
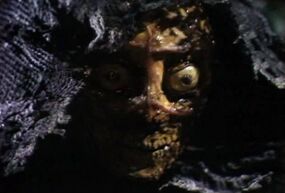
Goth collected the Decayed Master, who promised him power, and took him to Gallifrey. (PROSE: Legacy of the Daleks [+]Loading...["Legacy of the Daleks (novel)","Legacy of the Daleks"])
Whilst on Gallifrey, the Master made Goth, in line for the position of Lord President of the High Council of Time Lords, into his slave, continuing to promise him power. The Master also took over the Matrix, and realised that the Eye of Harmony resided beneath the Panopticon. He believed he could use the Sash of Rassilon to protect himself from the raw power of the Eye and channel that energy to renew himself.
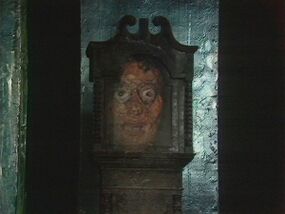
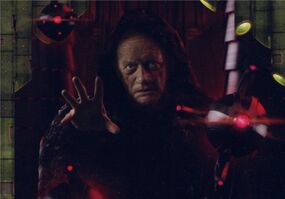
With a telepathic summons and a vision of the future created by the Matrix, the Master lured the Fourth Doctor to Gallifrey, seemingly to prevent the murder of the then-serving Lord President. The Doctor failed and ended up on trial for the President's murder. The Master had Goth enter the Matrix to kill the Doctor within the virtual realm, but he eventually failed, and the Master faked his death with an injection. After Goth died, the Master revealed himself and stole the Sash to enact his scheme, refusing to listen to the Doctor's plea that as the Sash was damaged in the assassination his plan would not work. The Doctor defeated the Master in physical combat and, as a result, the Master fell into a crevice created by a localised earthquake. He gained access to his TARDIS in the confusion and escaped, (TV: The Deadly Assassin [+]Loading...["The Deadly Assassin (TV story)","The Deadly Assassin"]) having been able to convert the energy from the Eye of Harmony and partially heal himself. (AUDIO: Trail of the White Worm [+]Loading...["Trail of the White Worm (audio story)","Trail of the White Worm"])
Targeting Jago and Litefoot[[edit] | [edit source]]
The Master followed the Doctor's TARDIS from Gallifrey, but was knocked off course passing through the transduction barrier. (AUDIO: Masterpiece [+]Loading...["Masterpiece (audio story)","Masterpiece"]) The Master landed on Earth, London, in the 1890s. He asked the locals if he could speak to someone in authority, and Inspector Quick was the first on the scene. The Master wasted no time in hypnotising Quick for his goals, (AUDIO: The Museum of Curiosities [+]Loading...["The Museum of Curiosities (audio story)","The Museum of Curiosities"]) giving him several tasks to carry out on his behalf. (AUDIO: Jago & Son [+]Loading...["Jago & Son (audio story)","Jago & Son"]) The Master walked the streets of London, concealing himself with a mask and walking with a cane. He spoke to Maurice Ravel, interested in a watch he carried with the Prydonian Seal on it. The Master later learned that Jago and Litefoot were the Doctor's contacts in the time period, and intended to visit them. (AUDIO: Maurice [+]Loading...["Maurice (audio story)","Maurice"]) The Master had Quick bring him a sample of Jago and Litefoot's DNA, planning to poison them so that they would summon the Doctor to help them. (AUDIO: The Woman in White [+]Loading...["The Woman in White (audio story)","The Woman in White"])
As he became more frail, the Master planned to use the Doctor's artron energy in order to heal his form. He travelled to the Red Tavern and spoke to Ellie Higson, hypnotising her so that he could learn of Jago and Litefoot, and reverted her metabolism to its natural state, causing her to lose control of her vampiric hunger. Jago and Litefoot learned of the location of the Master's lair with the help of Madame Sosostris and encountered the Master there. Sosostris' assistant revealed himself to be the Sixth Doctor. The Master activated a machine to drain the life energy of Jago and Litefoot, before absorbing the Doctor's artron energy. The Doctor reversed the flow of the machine and the Master's life began to be drained. After the Doctor smashed his equipment, the Master slipped into his TARDIS and escaped. (AUDIO: Masterpiece [+]Loading...["Masterpiece (audio story)","Masterpiece"])
Surviving in the universe[[edit] | [edit source]]
With his TARDIS still in the form of a clock, the Master attempted to steal Iris Wildthyme's body, (PROSE: The Scarlet Shadow [+]Loading...["The Scarlet Shadow (short story)","The Scarlet Shadow"]) and was captured by the Sild. (PROSE: Harvest of Time [+]Loading...["Harvest of Time (novel)","Harvest of Time"])
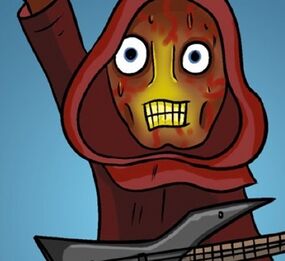
The Decayed Master was greeted by a female incarnation of himself known as "Missy", who had developed a plan to form a band to hypnotise viewers of Battle of the Bands Beyond the Stars [+]Loading...["Battle of the Bands Beyond the Stars"]. His next incarnation, an incarnation possessing the body of a man named Bruce and an incarnation going by the name "Saxon" all joined in the plan, and the team spent "decades" practicing. (COMIC: The Five Masters [+]Loading...["The Five Masters (comic story)","The Five Masters"]) He played the electric guitar. After unveiling their presence to the Twelfth Doctor and Clara Oswald, (COMIC: The Abominable Showmen [+]Loading...["The Abominable Showmen (comic story)","The Abominable Showmen"]) the Masters prepared for their performance. However, the "Tremas" Master began to fight with Missy over the control of her device, believing that he alone could hold the universe in his grasp. The Decayed Master joined in the struggle, declaring that his future selves were idiots. The five were quickly disqualified, seemingly destroying them. (COMIC: The Five Masters [+]Loading...["The Five Masters (comic story)","The Five Masters"])
First meeting with River Song[[edit] | [edit source]]

Posing as a Sun God, the Master forced the Therians to build a solar relais to prevent night from falling on Chasca Minor. After finding their worship boring, he ordered them to build him a tomb and seal him in it, as he entered a stasis chamber to await the Doctor. As he slept in the chamber, his tomb was removed from Chasca Minor and placed inside a museum on Chasca Major, where the Master was awakened by River Song and Luke Sullieman. Realising what had happened, the Master persuaded River to return him to Chasca Minor and retrieve his TARDIS in exchange for a chance to investigate the local ziqqurat.
Once they arrived on Chasca Minor, the Master began killing River's companions in order to both distract the Therians and pass the booby traps in the ziqqurat. Once the solar relais was deactivated, allowing night to fall, the Master still needed his solar capacitor to power his TARDIS, so agreed to help River escape from the planet in exchange for her help. However, River left the capacitor with the Therians, allowing them to revert their evolution and become people again, and abandoned the Master to their mercy. (AUDIO: Animal Instinct [+]Loading...["Animal Instinct (audio story)","Animal Instinct"])
Fighting the Fourth Doctor[[edit] | [edit source]]
Metamorphosis [+]Loading...["Metamorphosis (audio story)","Metamorphosis"] needs to be added.
The Master plotted to capture the Z-battery that the Third Doctor left on Earth to repair his TARDIS during his exile. The Master's plan was to use the Z-radiation within the battery, combined with the O-radiation which permeated Oseidon, to create powerful ZO-radiation which the Master could use to renew himself. For his plot, the Master entered into an alliance with the Kraals, and created two robot duplicates; one to pose as Kraal Chief Scientist Tyngworg, (AUDIO: The Oseidon Adventure [+]Loading...["The Oseidon Adventure (audio story)","The Oseidon Adventure"]) and a second to search for genetically engineered alien worm in Derbyshire. In Derbyshire, he spent his time living underneath Hugh Spindleton's house. He offered Leela to the worm, but the worm didn't want to eat her. Knowing that the Doctor was near, he advanced his plans and wanted to capture him. He mused why the worm wanted the Doctor. He activated the worm by generating a lightning storm. (AUDIO: Trail of the White Worm [+]Loading...["Trail of the White Worm (audio story)","Trail of the White Worm"])
The Master wanted to kill the Doctor with his TCE. He was arrested by Grimnal, but rescued by Leela, and they both went to Oseidon. The duplicate that stayed on Oseidon destroyed the one from Earth. The Doctor defeated the Master by using a Master android duplicate that he had constructed to kidnap the real Master, and take him away in his own TARDIS before his plan could be fulfilled. (AUDIO: The Oseidon Adventure [+]Loading...["The Oseidon Adventure (audio story)","The Oseidon Adventure"])
The Master then posed as Inspector Efendi of the Intergalactic insurance agency so that he could find spaceships full of gold bullion. He then employed the Salonu to steal this gold, which attracted the attention of the Doctor and Leela to investigate. The Master then used the telepathic abilities of the Salonu to influence Leela into thinking that she was the Master's assassin and that he was the great Xoanon who desired the death of the Doctor. The Salonu Prime, with the help of the Doctor, noticed the Master's influence and undid the conditioning. (AUDIO: The Evil One [+]Loading...["The Evil One (audio story)","The Evil One"])
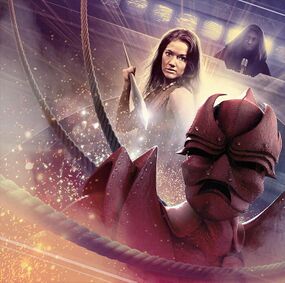
Shandar of the Rocket Men invited the Master on his ship the Asteroid, where the Master saw the Doctor was Shandar's prisoner. When he confronted the Doctor, the Master used his Tissue Compression Eliminator on him, and apparently killed him, but he realised he had only destroyed a duplicate. The real Doctor was in fact pretending to be Oskin, and used that guise to bring down the force field around the ship, and used K9 Mark I to stall the Master's TARDIS once it had passed the force field so that the slaves on board the Asteroid could be freed. The Master overrode K9's tampering and kidnapped Leela after she had left the Doctor. (AUDIO: Requiem for the Rocket Men [+]Loading...["Requiem for the Rocket Men (audio story)","Requiem for the Rocket Men"])
Charming the participants' owners with fine dining, the Master became the huntmaster of the Death Match, and used Leela as his champion. The Master said all that he was doing was reviving an old Gallifreyan past-time and sent the Doctor into the Game. He then set the endgame protocols which meant every contestant had an hour to live. Kastrella worked out that his plan was to wipe out the heads of major armies using his game to do this. He indulged her in killing all her rivals. After the Doctor reversed the command Matrix, he was to be killed as part of the endgame and would only live if he killed Kastrella. (AUDIO: Death Match [+]Loading...["Death Match (audio story)","Death Match"])
The Master attempted to rend asunder the constellation of Mandus using a segment of the Key to Time, but was defeated by the Doctor. (PROSE: Cold Fusion [+]Loading...["Cold Fusion (novel)","Cold Fusion"]) On Kendrax, the Master attempted to ally himself with the Daleks and the Cybermen, but his plan was foiled by Romana II. (PROSE: Special Occasions: 1. The Not-So-Sinister Sponge [+]Loading...["Special Occasions: 1. The Not-So-Sinister Sponge (short story)","Special Occasions: 1. The Not-So-Sinister Sponge"]) He also entered a pact with the Embodiment of Gris, but found himself again bested by the Doctor. (PROSE: Cold Fusion [+]Loading...["Cold Fusion (novel)","Cold Fusion"])
Grasping at life[[edit] | [edit source]]
- Main article: Decayed Master's possession of Tremas
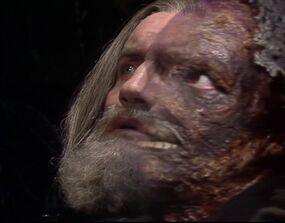
The Master was drawn to and became stranded on the planet Traken, the centre of the Traken Union, in a TARDIS configured into the sculpture-shaped Melkur. He plotted to take over the Source also located on the planet Traken, the power behind the Traken Union, and use it to restore himself. To this end, over a period of years, he won over Kassia, who later married Tremas and became stepmother to Nyssa. His plans were thwarted by the Doctor and Adric when the Keeper of Traken summoned them, having sensed something of his machinations. With the help of Tremas and Nyssa, the Doctor removed the Master from the Source. However, with some of the Keeper's powers lingering, the Master was able to merge with Tremas, (TV: The Keeper of Traken [+]Loading...["The Keeper of Traken (TV story)","The Keeper of Traken"]) regenerating himself into a new body. (AUDIO: The Light at the End [+]Loading...["The Light at the End (audio story)","The Light at the End"])
A new body at last[[edit] | [edit source]]
- Main article: The Master (The Keeper of Traken)
Having managed to replace his decaying Time Lord body with that of the Trakenite Tremas, the Master continued to face off against the Doctor. The circumstances of this stolen body's end vary across accounts. According to one account, the Master survived in this stolen form until he faced trial at the hands of the Dalek Prelature. (PROSE: The Eight Doctors [+]Loading...["The Eight Doctors (novel)","The Eight Doctors"]) Another account indicated that the Master, having allied himself with the Tzun Confederacy, received a new regenerative cycle and achieved a new body before facing trial. (PROSE: First Frontier [+]Loading...["First Frontier (novel)","First Frontier"], The Novel of the Film [+]Loading...["The Novel of the Film (novelisation)","The Novel of the Film"]) According to yet another account, however, the Master was stripped of his Trakenite form by the Warp Core. (AUDIO: Dust Breeding [+]Loading...["Dust Breeding (audio story)","Dust Breeding"])
Reduced to decay[[edit] | [edit source]]
- Main article: Destruction of Tremas' body
Now reduced to his decaying form, the Master collected four Krill eggs with the intention of awakening the Warp Core from its slumber and exhausting it, so that he could draw it into his TARDIS to be his slave. The Master then used a mask to disguise his deformity and followed the Warp Core as it arrived on Duchamp 331. Under the alias "Mr. Seta", the Master funded Madame Salvadori's trip to Duchamp 331.
There, the Master unleashed the Krill upon the passengers, hypnotising Salvadori's aide, Klemp, in the process. Revealing his true identity, the Master kept Salvadori alive, before encountering the Seventh Doctor. When the Core arrived, the Master tried to ally with it, but it dismissed him, leading him to ordering Klemp to kill Salvadori, but Klemp's loyalty was too strong, so the Master killed him. The Doctor escaped to his TARDIS, and attempted to gain control of the Warp Core through his TARDIS's telepathic circuits, while the Master used his TARDIS to fight of the Doctor's influence, and gain control of it. After it and the planet was destroyed, the Master was flung through time and space. (AUDIO: Dust Breeding [+]Loading...["Dust Breeding (audio story)","Dust Breeding"])
The Doctor later made a deal with Death for the Master to have ten years of peace and sanity, at the end of which the Doctor had to kill him. To this end, Death transformed the Master into "John Smith", an ordinary physician on the colony world of Perfugium with no memory of his past. Smith was taken in by Wolstonecroft, and inherited his house when Wolstonecroft died, and became emotionally involved with Jacqueline Schaeffer. The Master remained active in Smith's subconscious, but was unable to influence the world around him.
At the end of the allotted time, the Doctor arrived to kill Smith, but strove to avoid fulfilling his side of the bargain. Death herself was present at these events, disguised as Smith's maid, and manipulated events so that the Master would become dominant once more. Her endgame was for Smith to make a decision that would ensure he remained in control; to kill Victor Schaeffer or allow Jacqueline to die by her husband's hand, but Smith was unable to kill Victor, (AUDIO: Master [+]Loading...["Master (audio story)","Master"]) and became the Master again as a result. (PROSE: The Tramp's Story [+]Loading...["The Tramp's Story (short story)","The Tramp's Story"])
Ace recruited the Master to help her save the universe from the Doctor, rescuing him from being buried alive by angry locals on a planet. He helped her recruit Garundel, Finsey, and Kane for her team, though their attempt to recruit Vienna Salvatori failed due to an attack of Dark Citizens. He led their team to the vaults on Gallifrey and remained behind as they entered the Dark Gate, pretending to defect to the Doctor's side and opening the Seventh Door to let Ace, Melanie Bush, Hex Schofield, Sally Morgan and Bernice Summerfield enter the Capitol from the Matrix. He acquired a new regeneration cycle and was abandoned by the Mother on Skaro to be captured by the Daleks. (AUDIO: The Last Day [+]Loading...["The Last Day (audio story)"])
The Deathworm Morphant[[edit] | [edit source]]
- Main article: The Master (The TV Movie)
After being executed by the Dalek Prelature, the Master used a Deathworm Morphant to ensure his survival by possessing the body of San Francisco ambulance driver Bruce Gerhardt. The Master, knowing that this body would not last long, hatched a scheme to steal the body of the Eighth Doctor, only to fall into the Eye of Harmony. (TV: Doctor Who [+]Loading...["Doctor Who (TV story)","Doctor Who"]) As the Eye of Harmony tried to break him down into pure energy, the Master managed to ride the energy into a spare room, which the Doctor's TARDIS then ejected into the Time Vortex to protect the Doctor. (AUDIO: The Lifeboat and the Deathboat [+]Loading...["The Lifeboat and the Deathboat (audio story)","The Lifeboat and the Deathboat"]) Though his stolen body was initially re-energised by the Eye, (AUDIO: Day of the Master [+]Loading...["Day of the Master (audio story)","Day of the Master"]) which enabled him to make an ultimately failed attempt to escape to the 23rd century, (AUDIO: Faustian [+]Loading...["Faustian (audio story)","Faustian"], Vengeance [+]Loading...["Vengeance (audio story)","Vengeance"]) the Master was eventually broken down into atoms due to being trapped in Vortex and left as a disembodied essence. (AUDIO: Passion [+]Loading...["Passion (audio story)","Passion"])
The Holder of the Glory[[edit] | [edit source]]
- Main article: The Master (The Fallen)
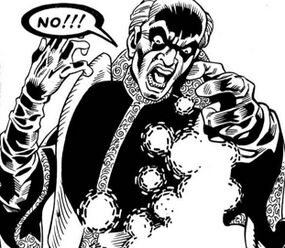
Nearing his ultimate destruction, the Master was rescued from the Vortex by a being named Esterath, the controller of the Glory, the focal point of the Omniverse. After gliding over the many realities throughout the Omniversal Spectrum for what he described as seeming like "centuries", the Master was resurrected into the body of a recently deceased vagrant on the streets of 2001 Brixton. Some weeks afterwards, due to a symbiotic link he had formed with the Doctor's TARDIS when it consumed part of his essence after he passed through the Eye of Harmony, the Master was transported onto the Moon during one of the Doctor's adventures. The Master subsequently used this link to trail the Doctor for some time without his enemy suspecting. The Doctor's companion Kroton, after becoming the controller of the Glory, cleansed the TARDIS of the Master's influence and placed the Master somewhere that he could not escape. The Master declared he would survive and return. (COMIC: The Glorious Dead [+]Loading...["The Glorious Dead (comic story)","The Glorious Dead"])
Escape from the Eye[[edit] | [edit source]]
Once more trapped within the Eye of Harmony, the Master eventually escaped by influencing the dreams of Edward Grainger to unravel the Doctor's timeline, by killing Edward Grainger whilst he was an infant in 1906. (PROSE: Forgotten [+]Loading...["Forgotten (short story)","Forgotten"]) Though his Morphant form had long since sublimated to a gaseous state, the Master was still capable of using its powers to possess new bodies. (AUDIO: Mastermind [+]Loading...["Mastermind (audio story)","Mastermind"]) However, while in the body of Sir George Steer, he was stopped by an older Edward Grainger from 2006 and Violet after being hit with a rolling pin and being removed from George. (PROSE: Prologue to The Centenarian [+]Loading...["Prologue to The Centenarian (short story)","Prologue to The Centenarian"]) The Master then managed to evade the Doctor's detection, and possessed the body of a human named Richard. (PROSE: Forgotten [+]Loading...["Forgotten (short story)","Forgotten"])
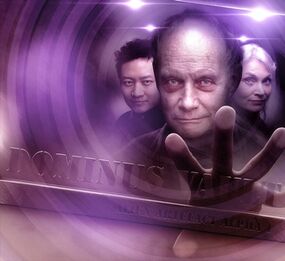
After possessing Richard, the Master killed Violet out of revenge. However, the Master discovered his possession had caused the host body to decay at an accelerated rate, so he was forced to steal more bodies to prolong his survival. Realising that the First World War was rapidly approaching, the Master decided to migrate to America to avoid the conflict and boarded a ship to go there in 1912. Ironically, he had boarded the RMS Titanic, unaware of its eventual fate, and escaped in a lifeboat when it sank.
Arriving in New York City, the Master took possession of a member of the Hudson Dusters, quickly becoming the leader of the gang and calling himself "Don Maestro". After twenty years of living in his current body, he occupied the body of his host's son, Michael, and moved to Las Vegas where he owned a casino. He accumulated money to fund experiments towards the elongation of the lifespan of his host body. Fearing the eventual decay of his body, the Master used his money to buy a penthouse to isolate himself from infection. After years living in isolation, his host's son confronted him with the knowledge that he had possessed both his father and his grandfather in some way. He then trapped the Master in the penthouse.
After UNIT were alerted to the presence of penthouse, they discovered the Master in a comatose state. He was imprisoned in the UNIT Vault, awakening every five years for one hour, before returning to a coma. After fifteen years living in the Vault, the Master awoke for a third time and was interrogated by UNIT officers Ruth Matheson and Charlie Sato. However, he managed to hypnotise both of them and escape his imprisonment. Discovering that UNIT had recovered his TARDIS from a sealed tomb in the Valley of the Kings, he used it to escape from the Vault. (AUDIO: Mastermind [+]Loading...["Mastermind (audio story)","Mastermind"])
The Master contacted Earth from the planet Glox from his TARDIS, disguised as a sound studio. The Master recounted how, over the centuries he systematically infiltrated and destroyed Glox's society by distorting their concept of sustainability, beginning as an academic, before moving into agri-business and growing Chorn to destroy the ecosystem, and eventually became the President's right hand man, before displacing him and becoming the Gloxian Empire's leader. As he told humans about how he brought Glox's civilisation to its ruin, he implanted into the listener a telepathic order via an earworm he had developed on Glox, intending to possess one of them. When the Fourth Doctor discovered his hideout, the Master ordered one of the listeners to connect telepathically to his TARDIS and become a replica of him; he then sent him out to face the security of the place and be killed in his place, while he escaped. (AUDIO: I Am The Master [+]Loading...["I Am The Master (audio story)","I Am The Master"])
The final end[[edit] | [edit source]]
- Main article: Resurrection of the Master
After arriving on the planet Parrak in search of the tomb of one of Rassilon's leading engineers named Artron, the Master used his TARDIS to extract all water on the planet's surface throughout its history to use as an incentive for his workforce to keep obeying his rule. His overall plan was to use the Tomb of Artron to revive himself, using the unlimited regenerative energy Artron had discovered on Kolstan.
Nearing the end of his life and getting increasingly more desperate, the Master allied himself with the Eleven, with the intention of betraying him once the tomb was opened. However, the Eleven had used the Master to gain access to Artron's matrix brain, which he used to lead the Ravenous to the Eighth Doctor. Upon the Ravenous' arrival, they took great interest in the Master, believing that the flavour of all of his lives was superior to that of the Doctor's. The Ravenous feasted on him and the Master finally died, his body being left on Parrak. (AUDIO: Planet of Dust [+]Loading...["Planet of Dust (audio story)","Planet of Dust"])
However, when the Celestial Intervention Agency requested the "Bruce" Master, the "War" Master and Missy to return Artron's brain print to Parrak to help fuel the technology to grant new regenerative cycles to Time Lords, the Masters used the technology for themselves as part of the deal, and resurrected the corpse of the dead Master, giving him a new body and regeneration cycle in the process. (AUDIO: Day of the Master [+]Loading...["Day of the Master (audio story)","Day of the Master"])
Post-mortem[[edit] | [edit source]]
While his essence had eventually escaped through the Time Vortex, (COMIC: The Glorious Dead [+]Loading...["The Glorious Dead (comic story)","The Glorious Dead"]; PROSE: Forgotten [+]Loading...["Forgotten (short story)","Forgotten"]) an "echo" of the Master remained imprisoned inside the Doctor's TARDIS. In the singularity of the Eye of Harmony, the Master commanded infinite power, but could only wield it from within the confines of the Eye. The Master became externally perceived as a Great Black Eye beyond time, which frightened the Time Lords of Ulysses' era. He was worshipped as a god in the post-War Kingdom of Beasts (PROSE: The Gallifrey Chronicles [+]Loading...["The Gallifrey Chronicles (novel)","The Gallifrey Chronicles"]) and poisoned the Eighth Doctor's second heart. (PROSE: The Adventuress of Henrietta Street [+]Loading...["The Adventuress of Henrietta Street (novel)","The Adventuress of Henrietta Street"])
Shortly after his defeat in San Francisco, the Master laid a final trap for the Doctor, leaving a crystalline structure on the Eye that would give the Doctor amnesia. However, the Doctor was subconsciously guided by Rassilon to recover his memories by visiting his previous seven selves. (PROSE: The Eight Doctors [+]Loading...["The Eight Doctors (novel)","The Eight Doctors"]) Whilst exploring the Eighth Doctor's TARDIS, River Song thought she heard an American screaming from within the walls. (GAME: The Eternity Clock [+]Loading...["The Eternity Clock (video game)","The Eternity Clock"])
During his imprisonment, the Doctor came to speak to the Master where he dwelled in a room with his face on a screen. The Master spoke to the Doctor in the room on several occasions, telling him that he was an "old friend". After the defeat of the Council of Eight, the Doctor spoke to him about the death of Miranda Dawkins and if it was worth the cost of him saving the universe. (PROSE: Sometime Never... [+]Loading...["Sometime Never... (novel)","Sometime Never..."])
The Master later appeared to the Doctor within a mirror in the TARDIS, where he asked the Doctor what was going on inside his head. The Doctor was unable to answer the question before the image in the mirror returned to that of the Doctor's reflection. (PROSE: The Deadstone Memorial [+]Loading...["The Deadstone Memorial (novel)","The Deadstone Memorial"])
The Master had a longer conversation with the Doctor from within the Eye of Harmony. The Master showed the Doctor a vision of Marnal's investigation of the Shoal. When the Doctor pressed him about what happened to Gallifrey, the Master teased him with offers to bring it back and to return his memories. The Master then became angry over the circumstances of his imprisonment. He threatened to use all of his power to detonate a fusion device and have his revenge. The Doctor sealed up the Eye of Harmony before he had the chance to carry out his plan. (PROSE: The Gallifrey Chronicles [+]Loading...["The Gallifrey Chronicles (novel)","The Gallifrey Chronicles"])
During the War in Heaven, Father Kreiner killed and decapitated either the original Master or a clone created as part of the Time Lords' War-time hatchling projects. (PROSE: Interference - Book One [+]Loading...["Interference - Book One (novel)","Interference - Book One"])
Other realities[[edit] | [edit source]]
Alternate timeline[[edit] | [edit source]]
Discovering that the Celestial Intervention Agency were gathering illegal Vess weapons, the Master blackmailed their agent, Straxus, into handing over a conceptual bomb. The Master then visited Bob Dovie and, after killing his family, planted the device into his head. When Dovie saw the inside of the Doctor's TARDIS, his refusal to believe in it caused the Doctor's TARDIS to explode, causing its timeline to begin to collapse. With the Doctor's timeline collapsing along with the TARDIS's, the Doctor's first eight incarnations joined forces to avert the detonation of the bomb, before the First Doctor erased the events from history. (AUDIO: The Light at the End [+]Loading...["The Light at the End (audio story)","The Light at the End"])
The Warrior’s universe[[edit] | [edit source]]
In the Warrior's universe, where the Fourth Doctor succeeded in his mission to destroy the Dalek incubators, which caused that universe to destabilize and the Time War to break out before it was supposed to (AUDIO: Dust Devil [+]Loading...["Dust Devil (audio story)","Dust Devil"]), the Master was initially a person without the disfigured look, and successfully executed several schemes, until he was brought on the Warrior's trial by Narvin as a witness in a timeline, where the unified forces of Thals and Kaleds successfully developed time travel with the help of a Time Ring, that the Doctor left behind, and conquered Gallifrey. While the Master was being questioned, a future memory of the Master who looked differently from the one physically present and claimed to have fought many fights shoulder to shoulder with the Warrior, was telepathically communicating with the Warrior about how he can escape the trial. The Master was eventually exterminated by the Twin Dalek, and the timeline where trial took place was aborted by the Warrior, who sealed that timeline into a Carrisent Particum. (AUDIO: Aftershocks [+]Loading...["Aftershocks (audio story)","Aftershocks"]).
Later the Master manipulated this universe's version of Xoanon to go mad and crash the ship on Mordee, resulting in its crew's separation into two tribes - Tesh and Sevateem. The Master manipulated Leela into pairbonding with a Tesh member, and accelerated her pregnancy, resulting a birth of twins. He took the twins away, intending to use them for his next scheme, leaving Leela devastated, as Xoanon collapsed (AUDIO: Who Am I? [+]Loading...["Who Am I? (audio story)","Who Am I?"]).
As the Warrior and the Master were sent on a mission to find the temporal weapon, that caused serious temporal distortions in the Time Vortex, their TARDIS crash-landed on this universe's version of Marinus. On a planet they found themselves in a city surrounded by a huge wall, where everything was moving without any stops, and then encountered Horol, who took 15% of their proposed lifespan as a fine. They unsuccessfully tried to take off, but then decided to outrun Horol with the help of Otia. Eventually they were separated, the Warrior was captured by Horol, and the Master drove the tram through the wall, burning and disfiguring himself in the resulting crash. The Master eventually formed a resistance in the desert outside the city, and later orchestrated an attack on Horol, successfully overthrowing her after freeing the Warrior. They understood, that Horol was the weapon they were looking for, and that they were the ones who created it, as the TARDIS landed on her, infusing her with unstable temporal energy. After Horol was defeated, the Warrior locked the Master in the vault, claiming that he was no use for him anymore, and took off. The TARDIS's take off completely destabilized the planet, resulting in its total destruction, presumably killing the Master in the process (AUDIO: Time Killers [+]Loading...["Time Killers (audio story)","Time Killers"]).
The Master was later resurrected multiple times in unknown circumstances (AUDIO: The Key To Key To Time [+]Loading...["The Key To Key To Time (audio story)","The Key To Key To Time"]).
Psychological profile[[edit] | [edit source]]
Personality[[edit] | [edit source]]
While he originally approached a situation with youthful arrogance, (AUDIO: The Two Masters [+]Loading...["The Two Masters (audio story)","The Two Masters"]) the Decayed Master preoccupied his time with finding a way to regenerate following his disfigurement and the loss of his own ability to regenerate forcing him to face his imminent death. With his mobility and capabilities of camouflage decreased, he was often forced to hide his involvement in his plans until the very moment victory was within his grasp. (TV: The Deadly Assassin [+]Loading...["The Deadly Assassin"], The Keeper of Traken [+]Loading...["The Keeper of Traken"])
Blaming him for his predicament, (PROSE: The Dead Travel Fast [+]Loading...["The Dead Travel Fast (short story)","The Dead Travel Fast"]) the Decayed Master felt a stronger hatred towards the Doctor than before, specifically guiding the Fourth Doctor back to Gallifrey so he could be framed for the President's assassination and executed in disgrace, (TV: The Deadly Assassin [+]Loading...["The Deadly Assassin"]) wished to personally kill a companion of the Doctor, (AUDIO: The Two Masters [+]Loading...["The Two Masters (audio story)","The Two Masters"]) and once hatched a plan that would have destroyed all the Doctors and unravelled the Web of Time simply for his revenge against the Doctor. (AUDIO: The Light at the End [+]Loading...["The Light at the End"]) He also disliked being compared to the Doctor. (AUDIO: Animal Instinct [+]Loading...["Animal Instinct (audio story)","Animal Instinct"]) Despite the animosity, the Master was able to have a civil conversation with the Doctor when it suited him, (AUDIO: Death Match [+]Loading...["Death Match (audio story)","Death Match"]) and showed shades of bitterness when he learned River Song was the Doctor's wife. (AUDIO: Animal Instinct [+]Loading...["Animal Instinct (audio story)","Animal Instinct"])
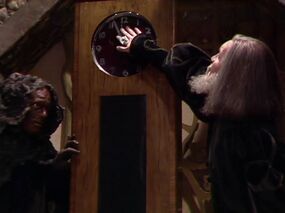
While he claimed that nothing he ever did "[was] ever pointless", (AUDIO: The Light at the End [+]Loading...["The Light at the End"]) and that he only killed for "power", (AUDIO: The Two Masters [+]Loading...["The Two Masters (audio story)","The Two Masters"]) this incarnation of the Master seemed more comfortable with killing people just for the sake of it, (AUDIO: The Light at the End [+]Loading...["The Light at the End"]) showing a sadistic pleasure when he resorted to killing, (TV: The Keeper of Traken [+]Loading...["The Keeper of Traken"]) and even destroyed the planet Raskalar for amusement. (AUDIO: Death Match [+]Loading...["Death Match (audio story)","Death Match"]) However, the Seventh Doctor recalled how the Decayed Master was "generally a serious sort", remembering how he was "cold and cruel." (AUDIO: The Two Masters [+]Loading...["The Two Masters (audio story)","The Two Masters"]) The Master believed the best way to spread evil was to "simplify and distort" well intentioned ideas. (AUDIO: I Am the Master)
Leela claimed that this incarnation was "raw" and "honest", as he "did not seem to hide [himself] away" or "disguise [his] hate". (AUDIO: The Devil You Know [+]Loading...["The Devil You Know (audio story)","The Devil You Know"])
Skills[[edit] | [edit source]]
In his degenerated state, the Master's telepathic capabilities and willpower grew stronger, with the Master proclaiming that "only [his] hate [kept him] alive". He was able to launch a telepathic message to the Doctor from Gallifrey to the Doctor's TARDIS, (TV: The Deadly Assassin [+]Loading...["The Deadly Assassin"]) and, once he became the Keeper of Traken, the Master forced Tremas to kill Neman through sheer willpower, and also paralysed the Doctor to make him watch. (TV: The Keeper of Traken [+]Loading...["The Keeper of Traken"]) However, he was unable to hypnotise the Proto-Time Lord River Song. (AUDIO: Animal Instinct [+]Loading...["Animal Instinct (audio story)","Animal Instinct"])
Meticulous in his schemes, the Decayed Master planned for every imaginable obstacle and put in place a counter for it. (AUDIO: Trail of the White Worm [+]Loading...["Trail of the White Worm"], The Oseidon Adventure [+]Loading...["The Oseidon Adventure"]) He was willing to be patient with his plans, waiting inside his TARDIS for years to slowly seduce Kassia. (TV: The Keeper of Traken [+]Loading...["The Keeper of Traken"])
Despite his frail body, the Decayed Master was an admirable fighter, able to trade equal blows with the Fourth Doctor, (TV: The Deadly Assassin [+]Loading...["The Deadly Assassin"]) stand his ground in a brawl with his other incarnations, (COMIC: The Five Masters [+]Loading...["The Five Masters (comic story)","The Five Masters"]) and face off with Bram Stoker while suffering Artron decay. (PROSE: The Dead Travel Fast [+]Loading...["The Dead Travel Fast (short story)","The Dead Travel Fast"])
Appearance[[edit] | [edit source]]

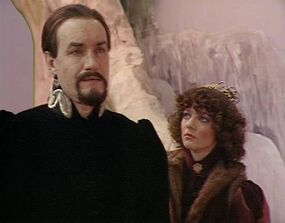
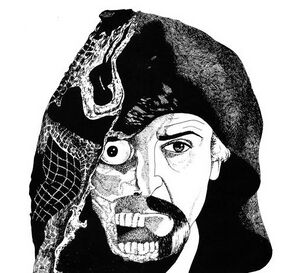
The Master came to resemble a deformed corpse, (TV: The Deadly Assassin [+]Loading...["The Deadly Assassin (TV story)","The Deadly Assassin"]) with brown eyes. (TV: The Keeper of Traken [+]Loading...["The Keeper of Traken (TV story)","The Keeper of Traken"]) However, after absorbing some energy from the Eye of Harmony, (TV: The Deadly Assassin [+]Loading...["The Deadly Assassin (TV story)","The Deadly Assassin"]) he became less "putrescent". (AUDIO: Trail of the White Worm [+]Loading...["Trail of the White Worm (audio story)","Trail of the White Worm"]) With his decayed body, the Master would experience almost unendurable pain. (AUDIO: The Two Masters [+]Loading...["The Two Masters (audio story)","The Two Masters"])
By the time of his death, the Master had continued to rot away, and had begun wearing a hooded cloak to conceal himself and was covered in bandages, with the Eleven comparing him to a mummy. (AUDIO: Planet of Dust [+]Loading...["Planet of Dust (audio story)","Planet of Dust"])
He was described by Spandrell as being "emaciated", (TV: The Deadly Assassin [+]Loading...["The Deadly Assassin (TV story)","The Deadly Assassin"]) with Bob Dovie describing him as looking "burned." (AUDIO: The Light at the End [+]Loading...["The Light at the End (audio story)","The Light at the End"]) The Fourth Doctor described him as "a cowled cadaver", (AUDIO: Requiem for the Rocket Men [+]Loading...["Requiem for the Rocket Men (audio story)","Requiem for the Rocket Men"]) while River Song described him as the "crispy-looking Master". (AUDIO: Animal Instinct [+]Loading...["Animal Instinct (audio story)","Animal Instinct"]) Missy remembered her wraith-like thirteenth incarnation as being "the Yucky One". (PROSE: Meet Missy! [+]Loading...["Meet Missy! (short story)","Meet Missy!"]) Mikey compared his appearance to E.T. (AUDIO: And You Will Obey Me [+]Loading...["And You Will Obey Me (audio story)","And You Will Obey Me"]) Ace commented that "Mr. Seta", after he had lost Tremas' body to the Warp Core, had a "face like a dropped pizza". (AUDIO: Dust Breeding [+]Loading...["Dust Breeding (audio story)","Dust Breeding"])
Clothing[[edit] | [edit source]]
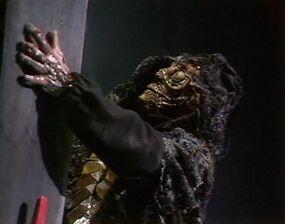
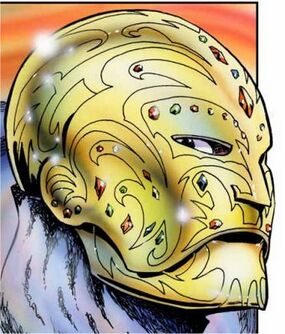
To hide his disfigurement, the Master took to wearing a rotting hooded cloak. (TV: The Deadly Assassin [+]Loading...["The Deadly Assassin (TV story)","The Deadly Assassin"]) Whilst in Victorian London, he wore a mask in public to conceal his decaying appearance, and also used a cane to aid his frail body. (AUDIO: Maurice [+]Loading...["Maurice (audio story)","Maurice"]) While claiming to be "Mr. Seta", the Master wore an ornate, bejewelled golden mask. (AUDIO: Dust Breeding [+]Loading...["Dust Breeding (audio story)","Dust Breeding"])
When trapped on Earth in the 20th century, the Master wore whatever his hosts wore normally, to avoid detection. He discovered each body he possessed would inevitably revert to a decayed appearance, despite his best efforts to prolong them. (AUDIO: Mastermind [+]Loading...["Mastermind (audio story)","Mastermind"])
The Master was briefly given a perception filter by Missy to hide his decaying appearance making him appear, in his own words, "handsome". He deactivated it at the suggestion of the Bruce Master, prompting Kitty to scream. (AUDIO: Masterful [+]Loading...["Masterful (audio story)","Masterful"])
Other references[[edit] | [edit source]]
During his initial confrontation with the "Tremas" Master, the Fourth Doctor saw the Decayed Master as he appeared on Gallifrey calling out to him amongst other enemies before he fell from the Pharos Project, resulting in the Fourth Doctor's regeneration. (TV: Logopolis [+]Loading...["Logopolis (TV story)","Logopolis"])
Shaw Taylor acknowledged the Decayed Master as the second of the Master's three known "regenerations", between the "UNIT era" Master and the "Tremas" Master. (TV: Police 5: The Master [+]Loading...["Police 5: The Master (TV story)","Police 5: The Master"])
As recorded in the Masterplan Journal [+]Loading...["Masterplan Journal"] left behind by Missy, the "Saxon" Master had deemed there to be no room for "Mister Charcoal Grill" when he carved the image of his current self along with "Beardy One", "Beardy Two" and "Wizard of Oz" into Mount Rushmore during the Year That Never Was. (PROSE: The Secret Diary of the Master [+]Loading...["The Secret Diary of the Master (short story)","The Secret Diary of the Master"])
Whilst trapped in the Matrix by the Spy Master, the Thirteenth Doctor remembered, amongst many others, the Decayed Master as he appeared on Gallifrey in order to break out of the computer system. (TV: The Timeless Children [+]Loading...["The Timeless Children (TV story)","The Timeless Children"], TV: The Deadly Assassin [+]Loading...["The Deadly Assassin (TV story)","The Deadly Assassin"])
Behind the scenes[[edit] | [edit source]]
- During the final shot of the Master in The Deadly Assassin [+]Loading...["The Deadly Assassin (TV story)","The Deadly Assassin"], the Master was considerably less decayed than he was during the rest of the story. It was apparently the intention that, having received enough energy from the Eye of Harmony, the Master was beginning to regenerate. However, this scene was omitted from the novelisation and was thus forgotten by the time of the production of The Keeper of Traken [+]Loading...["The Keeper of Traken (TV story)","The Keeper of Traken"]. The Master's apparently healthier appearance in the latter would be explained in Trail of the White Worm [+]Loading...["Trail of the White Worm (audio story)","Trail of the White Worm"], which establishes that the Master partially healed himself in The Deadly Assassin.
- It is unclear whether this incarnation of the Master is the same incarnation portrayed by Roger Delgado or a subsequent incarnation. While earlier accounts tended to favour the idea that the incarnation was simply a significantly deformed version of the Delgado Master (PROSE: Legacy of the Daleks [+]Loading...["Legacy of the Daleks (novel)","Legacy of the Daleks"], The Dead Travel Fast [+]Loading...["The Dead Travel Fast (short story)","The Dead Travel Fast"]), more recent accounts have favoured the idea that the incarnation is distinct from his predecessor. (AUDIO: The Two Masters [+]Loading...["The Two Masters (audio story)","The Two Masters"], Masterful [+]Loading...["Masterful (audio story)","Masterful"])
- The identity of "Weng-Chiang" in The Talons of Weng-Chiang [+]Loading...["The Talons of Weng-Chiang (TV story)","The Talons of Weng-Chiang"] was initially intended to be that of the Master rather than Magnus Greel. These plans were abandoned when producer Philip Hinchcliffe decided that he didn't want to have the Master revealed as "the secret villain" so soon after The Deadly Assassin [+]Loading...["The Deadly Assassin (TV story)","The Deadly Assassin"]. Alan Barnes has pointed out several clues in the story that still point to the original plan: the "time cabinet" and Greel referring to Leela as "the first morsel to feed my regeneration". (DWM 475)
- The behind-the-scenes book A Celebration: Two Decades Through Time and Space [+]Loading...["A Celebration: Two Decades Through Time and Space"] (1983) had a feature entitled The Two Regenerations of the Master, also referring to The Two Faces of the Master, namely the Delgado Master and the Ainley Master. From a production standpoint, Delgado was identified as the "first Master", whilst Ainley was designated as both the "second incarnation" and the "second regeneration" of the Master, though the feature does also acknowledge the interim "twelfth and final regeneration" portrayed by Peter Pratt and Geoffrey Beevers.
- When initially pitching The Curse of Fatal Death [+]Loading...["The Curse of Fatal Death (TV story)","The Curse of Fatal Death"], Steven Moffat deliberately linked his story treatment to the gap between "the Roger Delgado-faced Master running away at the end of Frontier in Space [+]Loading...["Frontier in Space (TV story)","Frontier in Space"] and Peter Pratt's cowled and rotted-faced incarnation turning up in The Deadly Assassin [+]Loading...["The Deadly Assassin (TV story)","The Deadly Assassin"]." This was eventually abandoned, with the Master instead walking off into the distance with the freshly regenerated Doctor.[1]
- His first audio appearance in Dust Breeding [+]Loading...["Dust Breeding (audio story)","Dust Breeding"] was originally intended to be a story starring the "Tremas" Master. The Trakenite body being stripped away was written in due to Big Finish Productions' inability to negotiate a suitable contract with Anthony Ainley. (REF: The Audio Scripts: Volume Two)
- Amongst the names used by the Master in the parallel universe of Exile [+]Loading...["Exile (audio story)","Exile"] are Peter and Geoffrey, a reference to Peter Pratt and Geoffrey Beevers.
- Battles in Time [+]Loading...["Battles in Time"] released a card for The Deadly Assassin Master, distinguished from other incarnations by the title "The Master (Emaciated Form)".
- A figurine of the "Emaciated Master" as seen in The Deadly Assassin was released with issue 49 of Doctor Who: Figurine Collection [+]Loading...["Doctor Who: Figurine Collection"].
- In the story of Doctor Who: Legacy [+]Loading...["Legacy (video game)","Doctor Who: Legacy"], the Saxon Master retrieves the "Decaying Master", appearing as he did in The Deadly Assassin, from the collapsing reality as he assembles his other incarnations.
- In The Planet of Dust & Other Stories [+]Loading...["The Planet of Dust & Other Stories"], Beevers gave an audio reading of the Doctor Who Annuals' story The Creation of Camelot [+]Loading...["The Creation of Camelot (short story)","The Creation of Camelot"], which featured a "generic" bearded Master, raising the possibility of this Master as a pre-decay version of the Thirteenth Master.
- Geoffrey Beevers' incarnation of the Master was named the "Decayed Master" in the script for The Two Masters [+]Loading...["The Two Masters (audio story)"] in order to distinguish him from the New Master played by Alex Macqueen. In the scene in which he is injured by his future self, he is refered to as the "Pre-Decayed Master".
- "The Decaying Master" was the internal name used to distinguish Beevers' Master in Masterful [+]Loading...["Masterful (audio story)","Masterful"], as revealed in the behind-the-scenes track for its release.
FASA[[edit] | [edit source]]
The Doctor Who Role Playing Game [+]Loading...["The Doctor Who Role Playing Game"] by FASA, which admits to taking liberties with the source material in its opening pages, gives a rundown of the Master's first thirteen incarnations in "The Master" supplement book, which was similar to (but not entirely consistent with) the in-universe biography given for the Master in FASA's own CIA File Extracts [+]Loading...["CIA File Extracts (novel)","CIA File Extracts"].
According to the book, the Master could control the form of his incarnations, and frequently used the same face. The Master appeared in a constant, bearded aristocrat form until his fifth incarnation became a renegade and regenerated into an "average" clean-shaven form, becoming known as the Monk in his sixth and seventh incarnations. When the Monk was exposed, the Master chose a new disguise and assumed a bearded appearance similar but distinct to his initial form. Though the Master's thirteenth incarnation retained his familiar form, it changed when injuries brought him to the brink of death without the ability to regenerate. Whilst the Master's iron will refused to accept annihilation, his body began to decay, becoming hideous and skeletal with his face a noseless, grinning death's head cloaked in shards of rotting flesh. The Master's voice, once resonant and commanding, was reduced to a hissing rasp, and he retained little control over his dying frame, which was covered with a black cloak and hood. Even so, his intellect remained undimmed and he eventually seized the body of Tremas, which he wore through his fourteenth and fifteenth incarnations.
External links[[edit] | [edit source]]
Footnotes[[edit] | [edit source]]
| |||||||||||||||||||||||
