The Underwater Menace (TV story): Difference between revisions
Mentuhotep I (talk | contribs) (added a reference) |
Gingerfool (talk | contribs) mNo edit summary |
||
| (53 intermediate revisions by 23 users not shown) | |||
| Line 2: | Line 2: | ||
{{real world}} | {{real world}} | ||
{{ImageLinkTV}} | {{ImageLinkTV}} | ||
{{Infobox Story | {{Infobox Story SMW | ||
|image = FishPeopleDouble.jpg | |image = FishPeopleDouble.jpg | ||
|novelisation = The Underwater Menace (novelisation) | |novelisation = The Underwater Menace (novelisation) | ||
|series = [[Doctor Who television stories|''Doctor Who'' television stories]] | |series = [[Doctor Who television stories|''Doctor Who'' television stories]] | ||
|season number = Season 4 | |season number = Season 4 (Doctor Who 1963)| | ||
|season serial number = 5 | |season serial number = 5 | ||
|story number = 32 | |story number = 32 | ||
|doctor = Second Doctor | |doctor = Second Doctor | ||
|companions = [[Polly Wright|Polly]], [[Ben Jackson|Ben]], [[Jamie McCrimmon|Jamie]] | |companions = [[Polly Wright|Polly]], [[Ben Jackson|Ben]], [[Jamie McCrimmon|Jamie]] | ||
|enemy = [[ | |enemy = [[Professor]] [[Zaroff]] | ||
|setting = [[Atlantis]], | |setting = [[Atlantis]], [[vernal equinox]], c. [[1970]]{{note|Polly finds a 1968 Olympics bracelet and estimates the year to be 1970. However, in the short story ''[[Iris Wildthyme y Señor Cientocinco contra Los Monstruos del Fiesta]]'', Iris receives a 1968 Olympics bracelet and plans to visit Atlantis. This further complicates the setting of the story.}} | ||
|writer = | |writer = Geoffrey Orme | ||
|director = [[Julia Smith]] | |director = [[Julia Smith]] | ||
|producer = [[Innes Lloyd]] | |producer = [[Innes Lloyd]] | ||
|epcount = 4 | |epcount = 4 | ||
|broadcast date = | |broadcast date = 14 January - 4 February 1967 | ||
|network = | |network = BBC1 | ||
|format = 4x25-minute episodes | |format = 4x25-minute episodes | ||
|serial production code = [[List of production codes|GG]] | |serial production code = [[List of production codes|GG]] | ||
| Line 25: | Line 25: | ||
|clip = Doctor Who The Underwater Menace (TV Soundtrack) | |clip = Doctor Who The Underwater Menace (TV Soundtrack) | ||
|bts = BFI screen long missing Doctor Who episodes | |bts = BFI screen long missing Doctor Who episodes | ||
|thwr = 154 | |||
}}{{you may|The Underwater Menace (reference book)|n1=the reference book of the same name}} | }}{{you may|The Underwater Menace (reference book)|n1=the reference book of the same name}} | ||
'''''The Underwater Menace''''' was the fifth serial of [[Season 4 (Doctor Who 1963)|season 4]] of ''[[Doctor Who]]''. | |||
{{as of|2024}}, its second episode is the earliest surviving [[Second Doctor]] [[telerecording]] known to exist. Currently, only episodes two and three survive in full. | |||
This was originally meant to be [[Patrick Troughton]]'s second story and the third story of season four. This was partly due to the story's originally-intended director, [[Hugh David]], believing the story to be too ambitious for the ''Doctor Who'' budget. ([[DCOM]]: ''[[A Fishy Tale (documentary)|A Fishy Tale]]'') | |||
The two [[missing episode]]s, now [[animated episode|animated]], along with the surviving episodes two and three, were released on [[DVD]], [[Blu-ray]] and [[Steelbook]] in both colour and black-and-white on [[13 November (releases)|13 November]] [[2023 (releases)|2023]].<ref>https://www.doctorwho.tv/news-and-features/missing-adventure-the-underwater-menace-to-be-animated-in-2023</ref> | |||
== Synopsis == | == Synopsis == | ||
| Line 61: | Line 65: | ||
=== Episode 2 === | === Episode 2 === | ||
Whilst being shown round a [[laboratory]], the Doctor fiddles with the lighting, which affects the operating room. This stalls the procedure. Damon storms up to the laboratory, demanding to know why Zaroff is draining so much power. Zaroff shows Damon he has a separate generator. Whilst the two argue, the Doctor fuses the generator, plunging the operating room into darkness. The two doctors leave Polly to see what is going on. Ara sneaks in and frees Polly — taking her to the caves. | Whilst being shown round a [[laboratory]], the Doctor fiddles with the lighting, which affects the operating room. This stalls the procedure. Damon storms up to the laboratory, demanding to know why Zaroff is draining so much power. Zaroff shows Damon he has a separate generator. Whilst the two argue, the Doctor fuses the generator, plunging the operating room into darkness. The two doctors leave Polly to see what is going on. Ara sneaks in and frees Polly — taking her to the caves. | ||
[[File:Second Doctor in Zaroff's lab UnderwaterMenace.jpg|thumb|The Doctor in Zaroff's lab as Damon confronts Zaroff.]] | [[File:Second Doctor in Zaroff's lab UnderwaterMenace.jpg|thumb|The Doctor in Zaroff's lab as Damon confronts Zaroff.]] | ||
Damon is furious with the Doctor, and even Zaroff agrees it is best if the Doctor stays with him. Zaroff explains to the Doctor that he plans to core into the centre of the Earth and drain the water away so as to render Atlantis accessible by land. The Doctor realises it will blow the planet apart and Zaroff concedes that this is an issue, before stating that will be his final testament. | Damon is furious with the Doctor, and even Zaroff agrees it is best if the Doctor stays with him. Zaroff explains to the Doctor that he plans to core into the centre of the Earth and drain the water away so as to render Atlantis accessible by land. The Doctor realises it will blow the planet apart and Zaroff concedes that this is an issue, before stating that will be his final testament. | ||
Down in the mines, Ben and Jamie meet [[Sean (The Underwater Menace)|Sean]] and [[Jacko]]. They are immediately ingratiated into their gang when Jamie helps them hide a [[compass]] from the dictatorial foreman. They explain that they are going to use the compass for a breakout plan. | Down in the mines, Ben and Jamie meet [[Sean (The Underwater Menace)|Sean]] and [[Jacko]]. They are immediately ingratiated into their gang when Jamie helps them hide a [[compass]] from the dictatorial foreman. They explain that they are going to use the compass for a breakout plan. | ||
The Doctor discovers that Polly has been freed and escapes from Zaroff's lab by creating a chemical reaction that causes a stultifying effect on those that breathe in the fumes. | The Doctor discovers that Polly has been freed and escapes from Zaroff's lab by creating a chemical reaction that causes a stultifying effect on those that breathe in the fumes. | ||
Sean and Jacko explain that they have found an underground shaft which they will use to escape. Ben and Jamie will join them. An alarm sounds in the mine, which means the group is going to separate. The four decide to slip away in this process. | Sean and Jacko explain that they have found an underground shaft which they will use to escape. Ben and Jamie will join them. An alarm sounds in the mine, which means the group is going to separate. The four decide to slip away in this process. | ||
The Doctor has sneaked into the cave system. He encounters Ara, who tells him Polly is safe. While they talk they overhear a priest called [[Ramo]] talking to Damon. The Doctor discovers that Ramo also mistrusts Zaroff. The Doctor asks Ara to distract Damon so he can talk to Ramo privately. Ara approaches Damon and tells him that she saw Polly in the marketplace. Damon falls for it, and the Doctor approaches Ramo. He goes to call out, but the Doctor convinces him that he has important information regarding Zaroff. They go somewhere private to discuss. | The Doctor has sneaked into the cave system. He encounters Ara, who tells him Polly is safe. While they talk they overhear a priest called [[Ramo]] talking to Damon. The Doctor discovers that Ramo also mistrusts Zaroff. The Doctor asks Ara to distract Damon so he can talk to Ramo privately. Ara approaches Damon and tells him that she saw Polly in the marketplace. Damon falls for it, and the Doctor approaches Ramo. He goes to call out, but the Doctor convinces him that he has important information regarding Zaroff. They go somewhere private to discuss. | ||
The party of escapees decide to split up to find the best way through the mines. | The party of escapees decide to split up to find the best way through the mines. | ||
At the temple, the Doctor shows Ramo what Zaroff intends to do using a jug and a fire as props. Ramo is convinced and says he will summon him to an audience with the supreme leader Thous but warns the Doctor that Thous is a strong advocate of Zaroff's and it won't be easy to convince him. | At the temple, the Doctor shows Ramo what Zaroff intends to do using a jug and a fire as props. Ramo is convinced and says he will summon him to an audience with the supreme leader Thous but warns the Doctor that Thous is a strong advocate of Zaroff's and it won't be easy to convince him. | ||
[[File:Second Doctor and Ramo UnderwaterMenace.jpg|left|thumb|The Doctor and Ramo, confronted by Zaroff.]] | [[File:Second Doctor and Ramo UnderwaterMenace.jpg|left|thumb|The Doctor and Ramo, confronted by Zaroff.]] | ||
Jacko joins up with Sean and Ben to say that Jamie has slipped down a cliff edge. Sean goes on to see if there's a better means of escape while Jacko and Ben go back to help Jamie. | Jacko joins up with Sean and Ben to say that Jamie has slipped down a cliff edge. Sean goes on to see if there's a better means of escape while Jacko and Ben go back to help Jamie. | ||
Back at the temple, Ramo gives the Doctor some ceremonial robes in order to get him close to Thous. As soon as they leave, Polly leaves from her hiding place. As she does, a secret door in the temple opens and Ben, Jamie, Sean and Jacko emerge. | Back at the temple, Ramo gives the Doctor some ceremonial robes in order to get him close to Thous. As soon as they leave, Polly leaves from her hiding place. As she does, a secret door in the temple opens and Ben, Jamie, Sean and Jacko emerge. | ||
Once alone, the Doctor and Ramo explain Zaroff's plan to Thous. He asks to be left alone to consider his options. | Once alone, the Doctor and Ramo explain Zaroff's plan to Thous. He asks to be left alone to consider his options. | ||
Ara returns to feed the refugees but is interrupted by people entering the temple. Everyone except Ara hides in the secret compartment. | Ara returns to feed the refugees but is interrupted by people entering the temple. Everyone except Ara hides in the secret compartment. | ||
The Doctor and Ramo are summoned to the temple. Thous says he has considered both their opinions. Just then, Zaroff and his guards enter and Thous tells Zaroff to do with them what he will. | The Doctor and Ramo are summoned to the temple. Thous says he has considered both their opinions. Just then, Zaroff and his guards enter and Thous tells Zaroff to do with them what he will. | ||
=== Episode 3 === | === Episode 3 === | ||
The Doctor tries to protect Ramo by telling them that he was led astray by him, but Ramo stands up for himself and states he has always hated and mistrusted Zaroff. The Doctor and Ramo are led away to be fed to the [[shark]]s. When left alone with Thous, Zaroff promises him that the Doctor's stories were untrue. | The Doctor tries to protect Ramo by telling them that he was led astray by him, but Ramo stands up for himself and states he has always hated and mistrusted Zaroff. The Doctor and Ramo are led away to be fed to the [[shark]]s. When left alone with Thous, Zaroff promises him that the Doctor's stories were untrue. | ||
The Doctor and Ramo are brought by Lolem and the other priests to the idol of Amdo. They are about to be beheaded as a sacrifice and fed to the sharks when a voice issues from the statue of Amdo, commanding all present to bow their heads. The Doctor, recognising the voice as Polly's, escapes with Ramo and meets up with his friends in the secret enclave in the temple. On rising from their prayer and finding the Doctor and Ramo gone, Lolem claims it to be a miracle. The statue has a mouthpiece on the inside designed for people to sound like their words are emanating from the idol. | |||
[[File:Second Doctor Atlantis market UnderwaterMenace.jpg|thumb|The Doctor, hiding in the Atlantis market in disguise.]] | [[File:Second Doctor Atlantis market UnderwaterMenace.jpg|thumb|The Doctor, hiding in the Atlantis market in disguise.]] | ||
Zaroff tells Thous that his plans will come to fruition in two days' time. Lolem enters and tells Zaroff and Thous of the "miracle". Zaroff is scathing of Lolem's stupidity and orders Atlantis searched despite the doubts of Thous. | Zaroff tells Thous that his plans will come to fruition in two days' time. Lolem enters and tells Zaroff and Thous of the "miracle". Zaroff is scathing of Lolem's stupidity and orders Atlantis searched despite the doubts of Thous. | ||
Inside the idol, the Doctor makes his plans: Sean and Jacko will convince the fish people to stop supplying the perishable plankton to Atlantis, and the rest will kidnap Zaroff. The Doctor and Polly disguise themselves as regular Atlantis shoppers in the marketplace whilst Jamie and Ben disguise themselves as guards. Avoiding the real guards, the four of them trick Zaroff away from his guards and into the temple where he is captured. | Inside the idol, the Doctor makes his plans: Sean and Jacko will convince the fish people to stop supplying the perishable plankton to Atlantis, and the rest will kidnap Zaroff. The Doctor and Polly disguise themselves as regular Atlantis shoppers in the marketplace whilst Jamie and Ben disguise themselves as guards. Avoiding the real guards, the four of them trick Zaroff away from his guards and into the temple where he is captured. | ||
Meanwhile, Sean insults the fish people until they are in such a state of disarray that they agree to stop production to get back at Zaroff, the man Sean blames for their current state of servitude. | Meanwhile, Sean insults the fish people until they are in such a state of disarray that they agree to stop production to get back at Zaroff, the man Sean blames for their current state of servitude. | ||
Zaroff taunts the Doctor, saying that without him the plan will still go ahead. The Doctor doubts this, stating that Zaroff's egomaniacal ways would stand in the way of such a hands-off approach. Zaroff becomes enraged by this and falls into a fit. The Doctor takes Ben and Jamie to the laboratory to check on Zaroff's progress while Polly and Ramo guard Zaroff. A service is going on outside, so the Doctor and his companions hide until it is finished. | Zaroff taunts the Doctor, saying that without him the plan will still go ahead. The Doctor doubts this, stating that Zaroff's egomaniacal ways would stand in the way of such a hands-off approach. Zaroff becomes enraged by this and falls into a fit. The Doctor takes Ben and Jamie to the laboratory to check on Zaroff's progress while Polly and Ramo guard Zaroff. A service is going on outside, so the Doctor and his companions hide until it is finished. | ||
Inside the idol, Zaroff repents his behaviour and begs Ramo to help him up so he can pray with him. Ramo consents after convincing from Polly. This is a trick, and a scuffle breaks out between the two. Eventually, Zaroff stabs Ramo and disappears into the cave system with Polly as his hostage. | Inside the idol, Zaroff repents his behaviour and begs Ramo to help him up so he can pray with him. Ramo consents after convincing from Polly. This is a trick, and a scuffle breaks out between the two. Eventually, Zaroff stabs Ramo and disappears into the cave system with Polly as his hostage. | ||
Once the service has finished, the Doctor decides Jamie should go back and ask Ramo for directions. As he turns back, he meets the mortally injured Ramo, who mutters about Polly's abduction before dying. The Doctor sends Jamie after Polly whilst he and Ben go on to the laboratory. | Once the service has finished, the Doctor decides Jamie should go back and ask Ramo for directions. As he turns back, he meets the mortally injured Ramo, who mutters about Polly's abduction before dying. The Doctor sends Jamie after Polly whilst he and Ben go on to the laboratory. | ||
Jamie catches up with Polly and overpowers Zaroff. A fight breaks out between them. Zaroff appears to have the upper hand when Sean and Jacko join the fight. Zaroff runs off into the cave system. Polly decides they need Ara to help reunite them the Doctor. | Jamie catches up with Polly and overpowers Zaroff. A fight breaks out between them. Zaroff appears to have the upper hand when Sean and Jacko join the fight. Zaroff runs off into the cave system. Polly decides they need Ara to help reunite them the Doctor. | ||
Back at the council chamber, Thous is informed by Damon of the revolt of the fish people. He agrees to enter discussions with them. Zaroff enters and overrules this, saying that any dissenting fish people will be killed. Thous says | Back at the council chamber, Thous is informed by Damon of the revolt of the fish people. He agrees to enter discussions with them. Zaroff enters and overrules this, saying that any dissenting fish people will be killed. Finally realising that the Doctor was right about Zaroff, Thous says the scientist has no right to overrule him and orders that his experiment be halted immediately. But Zaroff merely laughs and shoots Thous, and then orders his two guards to kill Thous's guards — which they do. He then vows "Nothing in the world can stop me now!" | ||
=== Episode 4 === | === Episode 4 === | ||
| Line 122: | Line 126: | ||
Jacko and Sean hear the noise and decide it's time to leave. Damon joins their gang, lamenting the ruination of his life's work. As they escape, the temple is destroyed. Thous is distressed that Lolem was in there, but they are forced to push on. | Jacko and Sean hear the noise and decide it's time to leave. Damon joins their gang, lamenting the ruination of his life's work. As they escape, the temple is destroyed. Thous is distressed that Lolem was in there, but they are forced to push on. | ||
Zaroff, concerned by the fluctuations caused by the Doctor, brings the mission forward. It will commence in five minutes. The Doctor enters and explains to the technicians and guards Zaroff's true plan. They desert him. Zaroff | Zaroff, concerned by the fluctuations caused by the Doctor, brings the mission forward. It will commence in five minutes. The Doctor enters and explains to the technicians and guards Zaroff's true plan. They desert him. Zaroff operates a control and a cage-like grille descends so he and the main control area are isolated from the rest of the laboratory; Zaroff says that the Doctor and Ben will never get to him. As time passes, Ben hears the sea approaching and makes to leave. To make life harder for Zaroff, the Doctor cuts off his light supply. Zaroff is forced to raise the grille and comes out from the control area, armed, to switch the lights back on. Ben suddenly returns and heads for the main control area, where he quickly operates the control for the grille and gets out again before it comes down. Ben and the Doctor escape while Zaroff, cut off from his control area, desperately reaches through the grille to try to operate the detonation control. But it's no good: the control is just beyond Zaroff's reach. | ||
The Doctor wants to go back to save Zaroff, but there is a rockfall blocking the way to the laboratory. | The Doctor wants to go back to save Zaroff, but there is a rockfall blocking the way to the laboratory. | ||
[[File:DeathOfProfZaroff.png|thumb|The death of Professor Zaroff.]] | |||
The water rises in Zaroff's laboratory. As the dial on his experiment drops to zero, he descends into the water. | The water rises in Zaroff's laboratory. As the dial on his experiment drops to zero, he descends into the water. | ||
| Line 134: | Line 138: | ||
As Ben and the Doctor make their way up to the land, Ben wonders if Polly has survived. | As Ben and the Doctor make their way up to the land, Ben wonders if Polly has survived. | ||
On land, Polly and Jamie sit disconsolate, until the Doctor and Ben emerge from the | On land, Polly and Jamie sit disconsolate, until the Doctor and Ben emerge from the caves. They head to the TARDIS. Jacko and Sean emerge onto the beach and are puzzled to see a police box there. They look on in bemusement as the police box | ||
dematerialises before their eyes. | |||
In the TARDIS, Jamie admits that, without having a clue what's going on, he is enjoying himself. The crew mock the Doctor for not being able to control the TARDIS. He says that this isn't true and to prove it he will take them to Mars. He flicks a switch and the TARDIS begins to careen out of control. | In the TARDIS, Jamie admits that, without having a clue what's going on, he is enjoying himself. The crew mock the Doctor for not being able to control the TARDIS. He says that this isn't true and to prove it he will take them to [[Mars]]. He flicks a switch and the TARDIS begins to careen out of control. | ||
== Cast == | == Cast == | ||
| Line 191: | Line 196: | ||
* [[Doctor Who theme|Title Music]] - [[Ron Grainer]] | * [[Doctor Who theme|Title Music]] - [[Ron Grainer]] | ||
== | === Animation Team === | ||
* Character Design - [[Martin Geraghty]] | |||
* Costume Researcher & Colour Artist - [[Carmel Imelda Walsh]] | |||
* Storyboard Artists | |||
** [[Justin Exley]] | |||
** [[Scott Gray (Storyboards)|Scott Gray]] | |||
** [[Studio 35]] | |||
** [[Fernando Yache]] | |||
* Lead Location Designer - [[Fran Johnson]] | |||
* Background Design | |||
** [[Mark Bird]] | |||
** [[Nathan Hudson]] | |||
** [[Sarah Walsh]] | |||
* 2D Animation & 2D Rigging | |||
** [[Simon Testro-Lead]] | |||
** [[Dorota Makarzec]] | |||
* 2D Animation Lead & Storyboard Artist - [[Gaia Satya Matteucci]] | |||
* 2D Animation | |||
** [[Thomas Bland]] | |||
** [[Dorota Makarzec]] | |||
** [[Paul McNulty]] | |||
** [[Pamela Poltronieri]] | |||
** [[Giada Strinati]] | |||
** [[Simon Testro-Lead]] | |||
** [[Elena Veronelli]] | |||
* Compositing & VFX - [[Archaine Ltd]] | |||
* Production & Animatic Assistant - [[Robert Gill (Production)|Robert Gill]] | |||
* Offline Editing - [[Nick Currey]] | |||
* Editing - [[Johnathan Ogle]] | |||
* Doctor Who Consultants | |||
** [[Toby Hadoke]] | |||
** [[Charles Norton]] | |||
* Sound Restoration & Remastering - [[Mark Ayres]] | |||
* Mastering - [[Peter Crocker]] | |||
* Grading & QAR - [[The Ark]] | |||
* With Thanks to [[Garaham Strong|Graham Strong]], [[John Kelly (producer)|John Kelly]], [[Matthew Woodcock]] | |||
* Production & finance Co-ordinator - [[Zoe Colman]] | |||
* Business & Legal Affairs | |||
** [[Linda Duncan]] | |||
** [[Bhav Sian]] | |||
* Production Finance - [[Esther Onifade]] | |||
* Consumer Products - [[Fiona Ball]] | |||
* Executive Producers | |||
** [[Paul Hembury]] | |||
** [[Rebecca Richmond]] | |||
* Directed & Produced by [[AnneMarie Walsh]] | |||
== Worldbuilding == | |||
* The [[Second Doctor]] [[deduce]]s that he and his [[companion]]s are not in [[Britain]] because of a [[Volcano|volcanic]] rock he found that was [[25000000 (number)|25 million]] [[year]]s old. | * The [[Second Doctor]] [[deduce]]s that he and his [[companion]]s are not in [[Britain]] because of a [[Volcano|volcanic]] rock he found that was [[25000000 (number)|25 million]] [[year]]s old. | ||
* As they land, Polly hopes it is [[1966]] [[Chelsea]], Ben wants to avoid the [[Dalek]]s and the Doctor wishes to see prehistoric monsters. | * As they land, Polly hopes it is [[1966]] [[Chelsea]], Ben wants to avoid the [[Dalek]]s and the Doctor wishes to see prehistoric monsters. | ||
| Line 200: | Line 252: | ||
* This story had the working titles of ''The Fish People'', ''Under the Sea'' (also referred to as ''Doctor Who'' ''Under the Sea'') and ''Atlanta''. | * This story had the working titles of ''The Fish People'', ''Under the Sea'' (also referred to as ''Doctor Who'' ''Under the Sea'') and ''Atlanta''. | ||
* Only episodes two and three of this four-part story exist in the [[BBC Archives]] as [[telerecording|16mm black & white film telerecordings]]. | * Only episodes two and three of this four-part story exist in the [[BBC Archives]] as [[telerecording|16mm black & white film telerecordings]]. | ||
* Since [[Jamie McCrimmon|Jamie]] isn't actually shown inside [[the TARDIS]] in ''[[The Highlanders (TV story)|The Highlanders]]'', | * Since [[Jamie McCrimmon|Jamie]] isn't actually shown inside [[the TARDIS]] in ''[[The Highlanders (TV story)|The Highlanders]]'', episode one of this story has his "bigger on the inside" moment. | ||
* Episode one of this serial concludes a run of twelve missing episodes, which begins with episode four of ''[[The Tenth Planet (TV story)|The Tenth Planet]]''. As of 2020, this is the longest run of missing episodes. | * Episode one of this serial concludes a run of twelve missing episodes, which begins with episode four of ''[[The Tenth Planet (TV story)|The Tenth Planet]]''. As of 2020, this is the longest run of missing episodes. | ||
* At the end of episode three, Professor Zaroff utters the timeless line, "Nothing in the world can stop me now!" [[Davros]] and the [[Fifth Doctor]] would say similar lines in ''[[Journey's End (TV story)|Journey's End]]'' and ''[[The Caves of Androzani (TV story)|The Caves of Androzani]]'' respectively. | * At the end of episode three, Professor Zaroff utters the timeless line, "Nothing in the world can stop me now!" [[Davros]] and the [[Fifth Doctor]] would say similar lines in ''[[Journey's End (TV story)|Journey's End]]'' and ''[[The Caves of Androzani (TV story)|The Caves of Androzani]]'' respectively. | ||
* According to [[Anneke Wills]] on the DVD commentary, the main cast didn't | * According to [[Anneke Wills]] on the [[DVD]] commentary, the main cast didn't get on with director [[Julia Smith]]: "We would mess around, and she would get more and more like a schoolteacher, so we got naughtier and naughtier. Pat would call her a 'miserable old bitch', but that's what we were like. We had power, we were the main actors. Otherwise, most of the directors we got on really well with. Only Julia had a bad time with us. We made her life a misery." | ||
* In the opening TARDIS scene, Polly, Ben and the Doctor are each heard "thinking" about where they would like to land next in a rare example of internal monologue. This was achieved by pre-recording the actors' voices and playing them back during the making of the episode. | * In the opening TARDIS scene, Polly, Ben and the Doctor are each heard "thinking" about where they would like to land next in a rare example of internal monologue. This was achieved by pre-recording the actors' voices and playing them back during the making of the episode. | ||
* Zaroff was at one point assisted by a female scientist called Steen. | * Zaroff was at one point assisted by a female scientist called Steen. | ||
* Originally, there was a character named Ebon, but it was then decided to merge her with Ara. | * Originally, there was a character named Ebon, but it was then decided to merge her with Ara. | ||
* At one point, it was decided that Ara would take Nola's role. | |||
* In an early draft of the story, Zaroff's motivation to blow up the Earth stemmed from his being driven mad by the deaths of his wife and children in a car crash. | * In an early draft of the story, Zaroff's motivation to blow up the Earth stemmed from his being driven mad by the deaths of his wife and children in a car crash. | ||
* While ''[[The War Machines (TV story)|The War Machines]]'' still remains the only time in the history of the classic series where the Doctor is referred to explicitly as "Doctor Who" (although the term also features in ''An Unearthly Child'' and ''The Gunfighters''), the Doctor's note to Zaroff in the first episode is signed "Dr. W", making this the second closest the Doctor has ever come to referring to himself as "Doctor Who" until the [[Twelfth Doctor]] used it in ''[[World Enough and Time (TV story)|World Enough and Time]]''. | * While ''[[The War Machines (TV story)|The War Machines]]'' still remains the only time in the history of the classic series where the Doctor is referred to explicitly as "Doctor Who" (although the term also features in ''[[An Unearthly Child (TV story)|An Unearthly Child]]'' and ''[[The Gunfighters (TV story)|The Gunfighters]]''), the Doctor's note to Zaroff in the first episode is signed "Dr. W", making this the second closest the Doctor has ever come to referring to himself as "Doctor Who" until the [[Twelfth Doctor]] used it in ''[[World Enough and Time (TV story)|World Enough and Time]]''. | ||
* Since its original discovery by [[Ian Levine]] following an audit of the BBC Archives in 1977, episode three was thought to be the earliest surviving episode from the Patrick Troughton era, until episode two was recovered on [[19 September (production)|19 September]] [[2011 (production)|2011]]. | * Since its original discovery by [[Ian Levine]] following an audit of the BBC Archives in 1977, episode three was thought to be the earliest surviving episode from the [[Patrick Troughton]] era, until episode two was recovered on [[19 September (production)|19 September]] [[2011 (production)|2011]]. | ||
* This was the first story about the lost city [[Atlantis]]. | * This was the first ''Doctor Who'' story about the lost city [[Atlantis]]. | ||
* One music cue from this story exists, entitled "The Fish People". | * One music cue from this story exists, entitled "The Fish People". | ||
* This is the final story in which the Second Doctor wears his [[stovepipe hat]]. It makes its last on-screen appearance during the closing TARDIS interior scene of episode four, when it is worn by Polly (as shown in [[John Cura]]'s [[tele-snaps]]). | * This is the final story in which the Second Doctor wears his [[stovepipe hat]]. It makes its last on-screen appearance during the closing TARDIS interior scene of episode four, when it is worn by Polly (as shown in [[John Cura]]'s [[tele-snaps]]). It was also the last story to show the Second Doctor’s fondness for disguises. | ||
* [[Hugh David]] was originally offered the chance to direct this story but he turned it down as he felt it was too expensive for the show's budget. ([[DCOM]]: [[A Fishy Tale]]) | * [[Hugh David]] was originally offered the chance to direct this story but he turned it down as he felt it was too expensive for the show's budget. He directed ''[[The Highlanders (TV story)|The Highlanders]]'' instead. ([[DCOM]]: [[A Fishy Tale]]) | ||
* [[Patrick Troughton]] was reputedly particularly unhappy about the production. He is reported to have described the show as having "ridiculous costumes and make-up of the Fish People". | * [[Patrick Troughton]] was reputedly particularly unhappy about the production. He is reported to have described the show as having "ridiculous costumes and make-up of the Fish People". | ||
* [[Innes Lloyd]] disliked the story, admitting that "it did look like something from a '50s American 'B' movie". | * [[Innes Lloyd]] disliked the story, admitting that "it did look like something from a '50s American 'B' movie". | ||
* [[Anneke Wills]] was unhappy that Polly was reduced to being a damsel in distress; she and the rest of the cast particularly disliked the infamous scene where Jamie slaps her to break her out of a mental breakdown. | * [[Anneke Wills]] was unhappy that Polly was reduced to being a damsel in distress; she and the rest of the cast particularly disliked the infamous scene where Jamie slaps her to break her out of a mental breakdown. | ||
* [[Michael Craze]] said of the story: "You just knew it was a dodo. The whole thing was badly conceived — tatty old scripts and costumes and everything. It ended up as a pantomime. [[Julia Smith]] was so emotionally charged that she'd burst into tears at anything." | * [[Michael Craze]] said of the story: "You just knew it was a dodo. The whole thing was badly conceived — tatty old scripts and costumes and everything. It ended up as a pantomime. [[Julia Smith]] was so emotionally charged that she'd burst into tears at anything." | ||
* [[Bernard Lodge]]'s new title sequence that featured [[Patrick Troughton]]'s face was going to be debut in this story. It was held off until ''[[The Macra Terror (TV story)|The Macra Terror]]''. | |||
* Now that he was a main character, [[Frazer Hines]] decided to begin modulating the Highland lilt he had employed in ''[[The Highlanders (TV story)|The Highlanders]]'', achieving a more conventional Scots accent. | |||
* Many of the “swimming” shots were actually performed in mid-air using Kirby wires. | |||
* The serial was intially abandoned due to being over-ambitious and replaced by [[William Emms]]' ''[[The Imps (unproduced TV story)|The Imps]],'' which [[Julia Smith]] was going to direct''.'' When that serial was abandoned due to Emms making slow progress, it was decided to resurrect ''The Underwater Menace'' because there were no other scripts available. | |||
* The script was written before it was known that Jamie would be a main companion. [[Geoffrey Orme]] didn't have time to re-write the script to accomodate, so Jamie generally shared dialogue originally written for either Ben or Polly. | |||
* The scene of Polly about to operated on to be turned into a fish person sparked an angry letter from Mrs N Safford, of the National Society for the Welfare of Children in Hospitals, who was concerned that it would scare children with upcoming surgeries, who might become convinced that they would wake up to find themselves transformed into monsters. [[Innes Lloyd]] refuted this argument, noting that the fantastical nature of the series made it clear to viewers that the story's events were not realistic. | |||
=== Ratings === | === Ratings === | ||
| Line 237: | Line 296: | ||
{{discontinuity}} | {{discontinuity}} | ||
* At the start of episode three, the director's voice can be heard. | * At the start of episode three, the director's voice can be heard. | ||
* During the underwater scene in episode three, the Kirby wires holding up the Fish People are clearly visible. | * During the "underwater" scene in episode three, the Kirby wires holding up the "swimming" Fish People are clearly visible. | ||
* When Zaroff fires his pistol at the end of episode three, there is a sound effect, but no evident smoke, recoil, or discharged cartridge. The gun also changes from a Walther to a Beretta between episodes three and four. | * When Zaroff fires his pistol at the end of episode three, there is a sound effect, but no evident smoke, recoil, or discharged cartridge. The gun also changes from a Walther to a Beretta between episodes three and four. | ||
* In episode three, after the kidnapping of Zaroff and just before he collapses, the Doctor is seen wearing an earring (part of his disguise from earlier that evidently | * In episode three, after the kidnapping of Zaroff and just before he collapses, the Doctor is seen wearing an earring (part of his Atlantean disguise from earlier that Troughton evidently forgot to remove). In the next scene after Zaroff collapses and the group splits up, the earring is no longer visible. | ||
* At the end of episode three, Zaroff utters "Nothing in the world can stop me now!" with eager excitement, but at the beginning of episode four, the line is uttered in a different tone. | * At the end of episode three, Zaroff utters "Nothing in the world can stop me now!" with eager excitement, but at the beginning of episode four, the line is uttered in a different tone. ''(This error is corrected in the 2023 animated reconstruction of episode four, which reuses the take from the end of episode three.)'' | ||
* In episode two, when the Doctor is trying to convince Ramo about Zaroff, an extra | * In episode two, when the Doctor is trying to convince Ramo about Zaroff, an extra is clearly visible behind him. Funnily enough, the extra plays a guard who is looking for the Doctor. | ||
== Continuity == | == Continuity == | ||
| Line 248: | Line 307: | ||
== Home video and audio releases == | == Home video and audio releases == | ||
=== DVD releases === | === DVD releases === | ||
==== 2004 ==== | |||
* Episode three, then the only episode of the story known to exist, was released alongside the existing footage from episodes one, two and four on the ''[[Lost in Time (DVD box set)|Lost in Time]]'' [[DVD]] in [[2004 (releases)|2004]]. Editing of episode three's DVD release was completed by the [[Doctor Who Restoration Team]]. | |||
==== 2015 ==== | |||
* A DVD release comprising episodes two and three plus animated reconstructions of episodes one and four was planned for release in [[2014 (releases)|2014]]. It was postponed when the studio providing animation ceased trading and was cancelled in [[2015 (production)|2015]] despite having special features and DVD cover art completed. This left episode two as the only episode of ''Doctor Who'' to exist in the BBC archive and not be released in any format on home video. The story was finally released, with [[telesnap]] reconstructions of episodes one and four (which were minus reconstructed opening title sequences, explanatory text captions, surviving clips and closing credit caption roller), on [[26 October (releases)|26 October]] [[2015 (releases)|2015]]. | |||
::Special Features: | |||
* Commentary: [[Patrick Troughton]]'s son [[Michael Troughton|Michael]] (Episode 1), actors [[Frazer Hines]] ([[Jamie McCrimmon|Jamie]]), [[Anneke Wills]] ([[Polly Wright|Polly]]), [[Catherine Howe]] ([[Ara]]), Special Sounds Supervisor [[Brian Hodgson]] and Floor Assistant [[Quentin Mann]] (Episode 2 & 3), and archival material from [[Patrick Troughton]], Directors [[Julia Smith]] and [[Hugh David]], and Producer [[Innes Lloyd]] (Episode 4). Moderated by [[Toby Hadoke]]. | * Commentary: [[Patrick Troughton]]'s son [[Michael Troughton|Michael]] (Episode 1), actors [[Frazer Hines]] ([[Jamie McCrimmon|Jamie]]), [[Anneke Wills]] ([[Polly Wright|Polly]]), [[Catherine Howe]] ([[Ara]]), Special Sounds Supervisor [[Brian Hodgson]] and Floor Assistant [[Quentin Mann]] (Episode 2 & 3), and archival material from [[Patrick Troughton]], Directors [[Julia Smith]] and [[Hugh David]], and Producer [[Innes Lloyd]] (Episode 4). Moderated by [[Toby Hadoke]]. | ||
* ''[[A Fishy Tale]]'' - A look back at the making of this controversial story with [[Anneke Wills]], [[Frazer Hines]], [[Catherine Howe]], Assistant Floor manager [[Gareth Gwenlan]], Production Assistant [[Berry Butler]] and writer [[Robert Shearman]]. Narrated by [[Peter Davison]] | * ''[[A Fishy Tale]]'' - A look back at the making of this controversial story with [[Anneke Wills]], [[Frazer Hines]], [[Catherine Howe]], Assistant Floor manager [[Gareth Gwenlan]], Production Assistant [[Berry Butler]] and writer [[Robert Shearman]]. Narrated by [[Peter Davison]] | ||
* ''[[The Television Centre of the Universe - Part Two]]'' - A documentary | * ''[[The Television Centre of the Universe (documentary)|The Television Centre of the Universe - Part Two]]'' - A documentary starring Yvette Fielding (formerly of [[Blue Peter]]). Featuring [[Peter Davison]], [[Janet Fielding]] and [[Mark Strickson]] as they continue their tour of BBC Centre in the making of ''Doctor Who'' episodes through the classic series. | ||
* [[Missing episode|Censor Clips]] - Two sequences edited out of broadcasts in Australia. This is the only surviving footage of Episode 1 ([[Damon (The Underwater Menace)|Damon]] attempting to turn [[Polly Wright|Polly]] into a fish person- 12 seconds) & Episode 4 (Professor [[Zaroff]] drowning in his laboratory- 3 seconds) | * [[Missing episode|Censor Clips]] - Two sequences edited out of broadcasts in [[Australia]]. This is the only surviving footage of Episode 1 ([[Damon (The Underwater Menace)|Damon]] attempting to turn [[Polly Wright|Polly]] into a fish person- 12 seconds) & Episode 4 (Professor [[Zaroff]] drowning in his laboratory- 3 seconds) | ||
* Photo Gallery | * Photo Gallery | ||
* Digitally Remastered picture & sound quality | * Digitally Remastered picture & sound quality | ||
<gallery position="center" captionalign="center" hideaddbutton="true"> | <gallery position="center" captionalign="center" hideaddbutton="true"> | ||
The Underwater Menace UK DVD Cover.jpg|Region 2 DVD cover | |||
The underwater menace.jpg|Region 1 DVD cover | |||
Underwater menace australia dvd.jpg|Region 4 DVD cover | |||
</gallery> | |||
==== 2023 Animated Edition ==== | |||
A fully animated recreation of the story, with both black-and-white and colour versions, was released alongside the surviving episodes on DVD in the UK on [[13 November (releases)|13 November]] [[2023 (releases)|2023]] and on Blu-Ray in the US on [[9 January (releases)|9 January]] [[2024 (releases)|2024]]. Additionally a Blu-ray and Steelbook edition was released in the UK. | |||
All the special features from the 2015 release except ''[[The Television Centre of the Universe (documentary)|The Television Centre of the Universe - Part Two]]'' were carried over. | |||
::Special Features: | |||
* Episode Reconstructions (updated from initial release) - Surviving film frames and set photographs are brought together with the original unedited audio, newly shot material and restored film recordings of episodes 2 and 3, to reconstruct the original now lost live-action production of {{'}}''The Underwater Menace''{{'}}, as seen by viewers of [[BBC One|BBC 1]] in 1967. Available to watch with (or without) an optional narration track by Anneke Wills (same as CD soundtrack release). | |||
* Commentary (moderated by Toby Hadoke): | |||
** Episode 1 (reconstruction) - Michael Troughton (son of Patrick Troughton) | |||
** Episode 2 (live-action) - Original cast members Anneke Wills (Polly), Frazer Hines (Jamie) and Catherine Howe (Ara), studio floor assistant Quentin Mann and the [[BBC Radiophonic Workshop]]'s Brian Hodgson | |||
** Episode 3 (live-action) - Original cast members Anneke Wills (Polly), Frazer Hines (Jamie) and Catherine Howe (Ara), studio floor assistant Quentin Mann and the BBC Radiophonic Workshop's Brian Hodgson | |||
** Episode 4 (reconstruction) - (Archive recordings of) original cast member Patrick Troughton ([[Second Doctor|the Doctor]]), director Julia Smith and producer Innes Lloyd. | |||
* ''A Fishy Tale - The Making of {{'}}The Underwater Menace{{'}}'' - Cast and crew recall the making of {{'}}''The Underwater Menace''{{'}} in this 2014 documentary. With actors Anneke Wills, Frazer Hines and Catherine Howe, assistant floor manager Gareth Gwenlan, production assistant Berry Butler and 2005 series writer Robert Shearman. Narrated by Peter Davison. | |||
* Australian Censor Clips - When {{'}}''The Underwater Menace''{{'}} was broadcast on Australian television in late 1967, a number of sections of footage were removed from the serial, on the grounds that they were judged unsuitable for younger viewers. The removed sections (from all four episodes) are presented here in full, together with the censor's original cutting notes. | |||
* ''The Man from Miditz'' - More than two years before starring together in ''[[Doctor Who]]'', Patrick Troughton and [[Joseph Fürst]] acted alongside one another in this [[BBC Two|BBC 2]] drama from ''[[Quatermass (series)|Quatermass]]'' director Rudolph Cartier. Also featured in the drama are numerous other faces from ''Doctor Who'', including [[Bernard Archard]] ({{'}}''[[The Power of the Daleks (TV story)|The Power of the Daleks]]''{{'}}), [[Laurence Payne]] ({{'}}''[[The Two Doctors (TV story)|The Two Doctors]]''{{'}}), [[John Bennett (actor)|John Bennett]] ({{'}}''[[The Talons of Weng-Chiang (TV story)|The Talons of Weng-Chiang]]''{{'}}) and [[Derek Francis]] ({{'}}''[[The Romans (TV story)|The Romans]]''{{'}}). The story editor was ''Doctor Who'' producer [[John Wiles]]. The broadcast master of this episode was never maintained by the BBC. The presentation here has been painstakingly reassembled using an unedited cutting room print and original music tracks preserved in the archives of the BBC Radiophonic Workshop. Due to the nature of the material, picture and sound quality will vary. | |||
* Frazer Hines Introduction - In 1998, the third episode of {{'}}''The Underwater Menace''{{'}} was included as a bonus on the ''[[The Missing Years]]'' VHS tape from BBC Video. The episode was prefaced by a specially-shot introduction from Frazer Hines, who played Jamie in the story. Previously included on the 2004 ''[[Lost in Time (DVD box set)|Lost in Time]]'' DVD box set. | |||
* BBC News Report - A BBC South Today news report on the recovery of the previously lost episode 2 of {{'}}''The Underwater Menace''{{'}} in 2011. | |||
* BBC Radio Solent Report - A BBC local radio report from 2011 on the recovery of episode 2 of {{'}}''The Underwater Menace''{{'}}. With thanks to [[Richard Latto]]. | |||
* Photo Gallery - A collection of photographs from the original 1967 production of {{'}}''The Underwater Menace''{{'}}, a number never published before. | |||
* Animation Gallery - A collection of production art from the new 2023 animation of {{'}}''The Underwater Menace''{{'}}, including character designs and concept sketches. | |||
* ROM Content - All four camera scripts from the original 1967 production of {{'}}''The Underwater Menace''{{'}} (and {{'}}''The Man from Miditz''{{'}}) together with the original BBC PasB documentation and ''[[Radio Times]]'' listings. | |||
<gallery position="center" captionalign="center" hideaddbutton="true"> | |||
The Underwater Menace Animated DVD.jpg|Region 2 Special Edition DVD cover | |||
The Underwater Menace Animated Blu-ray.jpg|Region 2 Special Edition Blu-ray cover | |||
The Underwater Menace Animated Steelbook.jpg|Region 2 Special Edition Steelbook cover | |||
</gallery> | </gallery> | ||
=== Digital releases === | === Digital releases === | ||
After a DVD release of [[26 October (releases)|26 October]] [[2015 (releases)|2015]], the same version was released: | After a DVD release of [[26 October (releases)|26 October]] [[2015 (releases)|2015]], the same version was released: | ||
* as a stand-alone season of ''Doctor Who: The Classic Series'' in [[iTunes]] stores: first in [[Australia]] and the [[UK]]; later in [[Canada]] and the [[US]]. The season also includes the documentaries ''A Fishy Tale'' and ''Television Centre of the Universe'' ([[The Television Centre of the Universe | * as a stand-alone season of ''Doctor Who: The Classic Series'' in [[iTunes]] stores: first in [[Australia]] and the [[UK]]; later in [[Canada]] and the [[US]]. The season also includes the documentaries ''A Fishy Tale'' and ''Television Centre of the Universe'' ([[The Television Centre of the Universe (documentary)|parts 1]] and [[The Television Centre of the Universe (documentary)|2]]), as well as a photo gallery | ||
* on [[Amazon (service)|Amazon Video]] in the UK as Season 32 of ''Doctor Who (Classic)'' series, which also includes the documentaries ''A Fishy Tale'' and ''Television Centre of the Universe'' (parts 1 and 2), as well as a photo gallery. | * on [[Amazon (service)|Amazon Video]] in the UK as Season 32 of ''Doctor Who (Classic)'' series, which also includes the documentaries ''A Fishy Tale'' and ''Television Centre of the Universe'' (parts 1 and 2), as well as a photo gallery. | ||
* [[Google Play]] lists this as "Season 8" of "Classic Doctor Who", and contains the same special features as the Amazon Video release. | * [[Google Play]] lists this as "Season 8" of "Classic Doctor Who", and contains the same special features as the Amazon Video release. | ||
| Line 272: | Line 363: | ||
<gallery position="center" captionalign="center" hideaddbutton="true"> | <gallery position="center" captionalign="center" hideaddbutton="true"> | ||
File:UnderwaterMenace_iTunes_UK.jpg|iTunes cover | File:UnderwaterMenace_iTunes_UK.jpg|iTunes cover | ||
</gallery> | |||
=== VHS releases === | |||
The third episode of ''The Underwater Menace'' was included as a bonus on the 1998 ''[[The Missing Years]]'' VHS tape from BBC Video. This tape was included in ''[[The Ice Warriors (TV story)|The Ice Warriors Collection]]'' in the UK and Australia, and the 2000 ''[[The Edge of Destruction (TV story)|The Edge of Destruction]] and [[The Pilot Episode|Dr. Who: The Pilot Episode]]'' VHS in the US. The episode was prefaced by a specially-shot introduction from Frazer Hines, who played Jamie in the story. | |||
Released: | |||
:* [[UK]] Release: [[November (releases)|November]] [[1998 (releases)|1998]] | |||
::PAL - [[BBC Video]] BBCV6766 | |||
:* [[Australia]] Release: [[December (releases)|December]] [[1998 (releases)|1998]] | |||
::PAL - [[BBC Video]] | |||
:* [[US]] Release: [[October (releases)|October]] [[2000 (releases)|2000]] | |||
::NTSC - [[Warner Video]] E1497 (2 tapes) (re-issued as E1578 in [[2003 (releases)|2003]]) | |||
<gallery position="center" captionalign="center" hideaddbutton="true"> | |||
File:BBC_SPECIAL_The_Missing_Years_Video.jpg|UK VHS | |||
File:The_Ice_Warriors_VHS_Australian_cover.jpg| Australia VHS | |||
File:The_Edge_of_Destruction_2001_VHS_US.jpg|US VHS | |||
</gallery> | </gallery> | ||
=== Audio releases === | === Audio releases === | ||
* This story's soundtrack was released on CD by BBC Audio, with linking narration by [[Anneke Wills]], on [[7 February (releases)|7 February]] [[2005 (releases)|2005]]. | * This story's soundtrack was released on CD by BBC Audio, with linking narration by [[Anneke Wills]], on [[7 February (releases)|7 February]] [[2005 (releases)|2005]]. | ||
* The story was re-released on [[4 August (releases)|4 August]] [[2011 (releases)|2011]] as part of the box set ''[[Doctor Who: The Lost TV Episodes - Collection Three]]''. | * The story was re-released on [[4 August (releases)|4 August]] [[2011 (releases)|2011]] as part of the box set ''[[The Lost TV Episodes - Collection Three|Doctor Who: The Lost TV Episodes - Collection Three]]''. | ||
* The story was released again on Vinyl by Demon Records, also with the Anneke Wills narration, on [[29 May (releases)|29 May]] [[2020 (releases)|2020]]. | * The story was released again on Vinyl by Demon Records, also with the Anneke Wills narration, on [[29 May (releases)|29 May]] [[2020 (releases)|2020]]. | ||
| Line 295: | Line 403: | ||
== Footnotes == | == Footnotes == | ||
=== Notes === | |||
{{notelist}} | |||
=== References === | |||
{{reflist}} | {{reflist}} | ||
{{DWTV}} | {{DWTV}} | ||
{{TitleSort}} | {{TitleSort}} | ||
| Line 307: | Line 419: | ||
[[Category:Four part serials]] | [[Category:Four part serials]] | ||
[[Category:BFI-exhibited television stories]] | [[Category:BFI-exhibited television stories]] | ||
[[Category:Fish people | [[Category:Fish people sources]] | ||
[[Category:Television stories that use Delia Derbyshire's 1st theme]] | [[Category:Television stories that use Delia Derbyshire's 1st theme]] | ||
[[Category:Stories with missing episodes]] | [[Category:Stories with missing episodes]] | ||
[[Category:Doctor Who animated television stories]] | |||
[[de:The Underwater Menace]] | [[de:The Underwater Menace]] | ||
Latest revision as of 11:32, 3 August 2024
- You may be looking for the reference book of the same name.
The Underwater Menace was the fifth serial of season 4 of Doctor Who.
As of 2024[update], its second episode is the earliest surviving Second Doctor telerecording known to exist. Currently, only episodes two and three survive in full.
This was originally meant to be Patrick Troughton's second story and the third story of season four. This was partly due to the story's originally-intended director, Hugh David, believing the story to be too ambitious for the Doctor Who budget. (DCOM: A Fishy Tale)
The two missing episodes, now animated, along with the surviving episodes two and three, were released on DVD, Blu-ray and Steelbook in both colour and black-and-white on 13 November 2023.[1]
Synopsis[[edit] | [edit source]]
The TARDIS arrives on an extinct volcanic island. Before long, the travellers are captured and taken into the depths of the Earth, where they find a hidden civilisation — the lost city of Atlantis.
The Atlanteans worship a goddess named Amdo and use fish people — men and women operated upon so that they can breathe under the sea — to farm the plankton-based food on which they survive. A deranged scientist, Professor Zaroff, has convinced them that he can raise their city from the sea, but actually, he plans to drain the ocean into the Earth's molten core so that the resultant superheated steam will cause the planet to explode.
The travellers meet up with two shipwreck survivors, Sean and Jacko, who persuade the fish people to rebel and stop work. The Doctor eventually foils Zaroff's plan, but only by breaking down the sea walls and flooding the city. Zaroff drowns, but everyone else escapes.
Plot[[edit] | [edit source]]
Episode 1[[edit] | [edit source]]
Jamie is blown away by the interior and the workings of the TARDIS. The Doctor quotes Robert Burns to him — which confuses him further due to the fact that Burns wouldn't be born until ten years after Jamie left in the TARDIS. The TARDIS materialises on a volcanic island.
The crew explore their surroundings; Ben, Polly and Jamie climb up a shallow hill for a better vantage whilst the Doctor begins to investigate the rocks to give him a clue as to their whereabouts.
As the three companions climb, Polly thinks she sees something in the distance, but Ben and Jamie say she must be imagining it. Polly decides to wait for the boys as she is running out of breath. They leave her on a ledge to return for her when they reach the top. She begins to explore and finds a bracelet that she examines very closely before beginning to explore a nearby cave. Here she is confronted by robed figures. She screams, which alerts Jamie and Ben. They return back to the cave and begin to explore. They are ambushed by the robed figures, who then capture them and put them in a small room where Polly is tied up. They discuss what to do until the door opens again and the Doctor is thrown in with them. Once all four are together, the room begins to descend like an elevator. The companions suffer difficulty in breathing, nausea and a strange taste in their mouths before they fall unconscious.
They awake later in a compression chamber. The Doctor wonders what time period they are in and Polly takes a stab at the 1970s. When challenged, she reveals the bracelet which is a souvenir from the 1968 Olympics in Mexico, alluding to the fact that it must be some point after that. A guard armed with a spear enters and Polly and Jamie try to communicate with him but to no avail. He gesticulates with his spear, indicating that they should go down a corridor.
They are taken to a dining hall and given a dinner of plankton. The armed guard is hostile towards a serving girl called Ara, whom the Doctor sticks up for. Lolem, a priest, arrives and says that their goddess Amdo prophesied visitors falling from the sky before one of their festivals. He orders his guards to seize the four travellers in preparation for their sacrifice. As they are dragged away, the Doctor says he has something important he needs to say. Lolem humours him and says he has five minutes whilst his friends are dragged away. The Doctor says that Professor Zaroff, who he has deduced to be there, would be very disappointed if he heard that Lolem had killed him. When questioned as to how he knew Zaroff was there, the Doctor states that only he could produce such delicious food from plankton. Lolem says that this changes nothing and that the Doctor will still die. The Doctor asks for him to send a note to Zaroff. Lolem forbids this, but the Doctor smuggles the note to Ara and asks her to deliver it.
The companions have been led into a temple surrounded by a moat of shark-infested water. Ben, Polly and Jamie are tied up and placed on ramps that tilt into the water. The Doctor is led into the temple, tied up and placed on the fourth ramp. The ramps slowly begin to lift. The four victims try to cling on as best they can.
Ara goes to Zaroff's quarters and is forbidden entry. She then asks to see someone called Damon. Damon is given the note which reads, "Vital secret will die with me. Dr W." Damon immediately gives the note to Zaroff, who rushes out and stops the ceremony and orders the Doctor to be released. Initially, his companions are to be consigned to their fate, but the Doctor tells Zaroff that he will not tell his secret whilst his friends are in danger. They are sent to the labour controller while Zaroff and the Doctor speak privately. It is revealed that Zaroff faked his own death, allowing the world to think he was assassinated or kidnapped in a plot between East and West Germany. The Doctor flatters him so much that when he admits that he has no secret, Zaroff praises him for his sense of humour and allows him to live.
Damon is in charge of the labour and sends Jamie and Ben to the mines. When left alone with Polly, he slightly intimidates her before showing her Zaroff's plans. Outside are farmers who have been given plastic gills in order to farm food under the water. Polly marvels at this but blanches when she discovers that this is the fate that Damon has in mind for her.
The Doctor and Zaroff talk and the Doctor deduces that they are in the lost city of Atlantis. Zaroff reveals that, in return for raising Atlantis, he was allowed to practice his experiments in the city. Ara comes and informs the Doctor of Damon's plans for Polly. The Doctor tells Ara to go back to Polly, watch over her and, if she has a chance, to get her away from Damon.
However, it seems too late as Polly is on the cusp of being anaesthetised by Damon.
Episode 2[[edit] | [edit source]]
Whilst being shown round a laboratory, the Doctor fiddles with the lighting, which affects the operating room. This stalls the procedure. Damon storms up to the laboratory, demanding to know why Zaroff is draining so much power. Zaroff shows Damon he has a separate generator. Whilst the two argue, the Doctor fuses the generator, plunging the operating room into darkness. The two doctors leave Polly to see what is going on. Ara sneaks in and frees Polly — taking her to the caves.

Damon is furious with the Doctor, and even Zaroff agrees it is best if the Doctor stays with him. Zaroff explains to the Doctor that he plans to core into the centre of the Earth and drain the water away so as to render Atlantis accessible by land. The Doctor realises it will blow the planet apart and Zaroff concedes that this is an issue, before stating that will be his final testament.
Down in the mines, Ben and Jamie meet Sean and Jacko. They are immediately ingratiated into their gang when Jamie helps them hide a compass from the dictatorial foreman. They explain that they are going to use the compass for a breakout plan.
The Doctor discovers that Polly has been freed and escapes from Zaroff's lab by creating a chemical reaction that causes a stultifying effect on those that breathe in the fumes.
Sean and Jacko explain that they have found an underground shaft which they will use to escape. Ben and Jamie will join them. An alarm sounds in the mine, which means the group is going to separate. The four decide to slip away in this process.
The Doctor has sneaked into the cave system. He encounters Ara, who tells him Polly is safe. While they talk they overhear a priest called Ramo talking to Damon. The Doctor discovers that Ramo also mistrusts Zaroff. The Doctor asks Ara to distract Damon so he can talk to Ramo privately. Ara approaches Damon and tells him that she saw Polly in the marketplace. Damon falls for it, and the Doctor approaches Ramo. He goes to call out, but the Doctor convinces him that he has important information regarding Zaroff. They go somewhere private to discuss.
The party of escapees decide to split up to find the best way through the mines. At the temple, the Doctor shows Ramo what Zaroff intends to do using a jug and a fire as props. Ramo is convinced and says he will summon him to an audience with the supreme leader Thous but warns the Doctor that Thous is a strong advocate of Zaroff's and it won't be easy to convince him.

Jacko joins up with Sean and Ben to say that Jamie has slipped down a cliff edge. Sean goes on to see if there's a better means of escape while Jacko and Ben go back to help Jamie.
Back at the temple, Ramo gives the Doctor some ceremonial robes in order to get him close to Thous. As soon as they leave, Polly leaves from her hiding place. As she does, a secret door in the temple opens and Ben, Jamie, Sean and Jacko emerge.
Once alone, the Doctor and Ramo explain Zaroff's plan to Thous. He asks to be left alone to consider his options. Ara returns to feed the refugees but is interrupted by people entering the temple. Everyone except Ara hides in the secret compartment.
The Doctor and Ramo are summoned to the temple. Thous says he has considered both their opinions. Just then, Zaroff and his guards enter and Thous tells Zaroff to do with them what he will.
Episode 3[[edit] | [edit source]]
The Doctor tries to protect Ramo by telling them that he was led astray by him, but Ramo stands up for himself and states he has always hated and mistrusted Zaroff. The Doctor and Ramo are led away to be fed to the sharks. When left alone with Thous, Zaroff promises him that the Doctor's stories were untrue.
The Doctor and Ramo are brought by Lolem and the other priests to the idol of Amdo. They are about to be beheaded as a sacrifice and fed to the sharks when a voice issues from the statue of Amdo, commanding all present to bow their heads. The Doctor, recognising the voice as Polly's, escapes with Ramo and meets up with his friends in the secret enclave in the temple. On rising from their prayer and finding the Doctor and Ramo gone, Lolem claims it to be a miracle. The statue has a mouthpiece on the inside designed for people to sound like their words are emanating from the idol.

Zaroff tells Thous that his plans will come to fruition in two days' time. Lolem enters and tells Zaroff and Thous of the "miracle". Zaroff is scathing of Lolem's stupidity and orders Atlantis searched despite the doubts of Thous.
Inside the idol, the Doctor makes his plans: Sean and Jacko will convince the fish people to stop supplying the perishable plankton to Atlantis, and the rest will kidnap Zaroff. The Doctor and Polly disguise themselves as regular Atlantis shoppers in the marketplace whilst Jamie and Ben disguise themselves as guards. Avoiding the real guards, the four of them trick Zaroff away from his guards and into the temple where he is captured.
Meanwhile, Sean insults the fish people until they are in such a state of disarray that they agree to stop production to get back at Zaroff, the man Sean blames for their current state of servitude.
Zaroff taunts the Doctor, saying that without him the plan will still go ahead. The Doctor doubts this, stating that Zaroff's egomaniacal ways would stand in the way of such a hands-off approach. Zaroff becomes enraged by this and falls into a fit. The Doctor takes Ben and Jamie to the laboratory to check on Zaroff's progress while Polly and Ramo guard Zaroff. A service is going on outside, so the Doctor and his companions hide until it is finished.
Inside the idol, Zaroff repents his behaviour and begs Ramo to help him up so he can pray with him. Ramo consents after convincing from Polly. This is a trick, and a scuffle breaks out between the two. Eventually, Zaroff stabs Ramo and disappears into the cave system with Polly as his hostage.
Once the service has finished, the Doctor decides Jamie should go back and ask Ramo for directions. As he turns back, he meets the mortally injured Ramo, who mutters about Polly's abduction before dying. The Doctor sends Jamie after Polly whilst he and Ben go on to the laboratory.
Jamie catches up with Polly and overpowers Zaroff. A fight breaks out between them. Zaroff appears to have the upper hand when Sean and Jacko join the fight. Zaroff runs off into the cave system. Polly decides they need Ara to help reunite them the Doctor.
Back at the council chamber, Thous is informed by Damon of the revolt of the fish people. He agrees to enter discussions with them. Zaroff enters and overrules this, saying that any dissenting fish people will be killed. Finally realising that the Doctor was right about Zaroff, Thous says the scientist has no right to overrule him and orders that his experiment be halted immediately. But Zaroff merely laughs and shoots Thous, and then orders his two guards to kill Thous's guards — which they do. He then vows "Nothing in the world can stop me now!"
Episode 4[[edit] | [edit source]]
The Doctor and Ben discover the bodies left by Zaroff. The two guards are dead, but Thous is wounded. They decide to take him back to the temple.
Jacko and Sean are unsure as to what to do — they are tempted to leave the Doctor to it. The Doctor returns with Thous and announces his plans. He informs them he is to flood Atlantis to stop Zaroff. He orders Jacko and Sean to move the people while he and Ben will begin the process.
Zaroff hears that workers are leaving their post due to the shortage of food — they are having to go and scavenge their own food.
Ben and the Doctor sneak into the generating station by Ben, dressed as a guard, pretending that the Doctor is his prisoner. Once inside, they knock out the scientist and make the reactor overload before heading off to Zaroff's laboratory.
Lost in the cave system, Jamie and Polly see one of the cave walls glowing luminously due to the radiation. As the wall begins to degrade, water begins to flood in. The pair need to make it to land, but the path they choose leads to a dead end.
Jacko and Sean hear the noise and decide it's time to leave. Damon joins their gang, lamenting the ruination of his life's work. As they escape, the temple is destroyed. Thous is distressed that Lolem was in there, but they are forced to push on.
Zaroff, concerned by the fluctuations caused by the Doctor, brings the mission forward. It will commence in five minutes. The Doctor enters and explains to the technicians and guards Zaroff's true plan. They desert him. Zaroff operates a control and a cage-like grille descends so he and the main control area are isolated from the rest of the laboratory; Zaroff says that the Doctor and Ben will never get to him. As time passes, Ben hears the sea approaching and makes to leave. To make life harder for Zaroff, the Doctor cuts off his light supply. Zaroff is forced to raise the grille and comes out from the control area, armed, to switch the lights back on. Ben suddenly returns and heads for the main control area, where he quickly operates the control for the grille and gets out again before it comes down. Ben and the Doctor escape while Zaroff, cut off from his control area, desperately reaches through the grille to try to operate the detonation control. But it's no good: the control is just beyond Zaroff's reach.
The Doctor wants to go back to save Zaroff, but there is a rockfall blocking the way to the laboratory.

The water rises in Zaroff's laboratory. As the dial on his experiment drops to zero, he descends into the water.
In the cave, Polly and Jamie reach a ledge and Polly gives up, but Jamie convinces her to continue climbing. Soon enough, they reach the surface. Jamie tells to Polly that it is unlikely the Doctor and Ben have survived.
Also safe, Ara, Thous and Damon think the Doctor dead. Thous wants to raise a stone for him in the new temple, but Damon says there will be no temples or Fish People in the new Atlantis. He says superstition caused the trouble with Zaroff, and the restoration of Atlantis will be a memorial to the Doctor.
As Ben and the Doctor make their way up to the land, Ben wonders if Polly has survived.
On land, Polly and Jamie sit disconsolate, until the Doctor and Ben emerge from the caves. They head to the TARDIS. Jacko and Sean emerge onto the beach and are puzzled to see a police box there. They look on in bemusement as the police box dematerialises before their eyes.
In the TARDIS, Jamie admits that, without having a clue what's going on, he is enjoying himself. The crew mock the Doctor for not being able to control the TARDIS. He says that this isn't true and to prove it he will take them to Mars. He flicks a switch and the TARDIS begins to careen out of control.
Cast[[edit] | [edit source]]
- Dr. Who - Patrick Troughton
- Ben Jackson - Michael Craze
- Polly - Anneke Wills
- Jamie McCrimmon - Frazer Hines
- Professor Zaroff - Joseph Fürst
- Ara - Catherine Howe
- Ramo - Tom Watson
- Lolem - Peter Stephens
- Damon - Colin Jeavons
- Damon's Assistant - Gerald Taylor
- Overseer - Graham Ashley
- Zaroff's guard - Tony Handy
- Jacko - Paul Anil
- Sean - P. G. Stephens
- Thous - Noel Johnson
- Nola - Roma Woodnutt
Uncredited cast[[edit] | [edit source]]
- Atlantean Guards - Michael Earl, Dean Hardy, Derek Hunt, Keith Ashley, Sonnie Willis, Ronald Gough
- Atlantean Priests - Denis Redwood, David Waterman, Leonard Kingston, Peter Stockbridge, Laurence Archer, Reg Cranfield, Bob Raymond, Fred Davis, Darell Richards, Stanley Jacomb, Gordon Lang, Hein Viljoen, Royston Farrell, John Adams, Alex Donald, Tony Douglas
- Child Priests - Anthony Kemp, Gary O'Brien, Samuel Burleigh, Shane Younger
- Zaroff's Guards - Alex Donald, Tony Douglas
- Medical Orderlies - Denis Redwood, David Waterman, Leonard Kingston
- Fish People - Cathy Ash, Judy Nicholls, Mary McMillan, Tony Starr
- Half-Fish People - Perin Lewis, Alex Donald, Nigel Clayton, Derek Calder, Tony Starr
- Miners - Alan Vicars, Robin Scott, Royston Farrell, Denis Redwood, David Waterman, Dean Hardy, Keith Ashley, Gordon Lang, Hein Viljoen
- Executioner Priest - Bill Burridge
- Men in Market - Peter Stockbridge, Reg Cranfield, John Adams
- Women in Market - Marguerite Young, Mary Wheeler
- Voices/Overseer at Generating Station - Ralph Watson
- Refugee Priest - Jimmy Mac
- Atlantean Children - Gary O'Brien, Edmund O'Dwyer
- Atlantean Refugees - Marguerite Young, Mary Wheeler, Philip Joste, Robin Scott, Royston Farrell (all DWM 209)
Crew[[edit] | [edit source]]
- Assistant Floor Manager - Gareth Gwenlan
- Costumes - Sandra Reid, Juanita Waterson
- Designer - Jack Robinson
- Fight Arranger - Derek Ware
- Film Cameraman - Alan Jonas
- Film Editor - Eddie Wallstab
- Incidental Music - Dudley Simpson
- Make-Up - Gillian James
- Producer - Innes Lloyd
- Production Assistant - Norman Stewart
- Script Editor - Gerry Davis
- Special Sounds - Brian Hodgson
- Studio Lighting - George Summers
- Studio Sound - Bryan Forgham
- Theme Arrangement - Delia Derbyshire
- Title Music - Ron Grainer
Animation Team[[edit] | [edit source]]
- Character Design - Martin Geraghty
- Costume Researcher & Colour Artist - Carmel Imelda Walsh
- Storyboard Artists
- Lead Location Designer - Fran Johnson
- Background Design
- 2D Animation & 2D Rigging
- 2D Animation Lead & Storyboard Artist - Gaia Satya Matteucci
- 2D Animation
- Compositing & VFX - Archaine Ltd
- Production & Animatic Assistant - Robert Gill
- Offline Editing - Nick Currey
- Editing - Johnathan Ogle
- Doctor Who Consultants
- Sound Restoration & Remastering - Mark Ayres
- Mastering - Peter Crocker
- Grading & QAR - The Ark
- With Thanks to Graham Strong, John Kelly, Matthew Woodcock
- Production & finance Co-ordinator - Zoe Colman
- Business & Legal Affairs
- Production Finance - Esther Onifade
- Consumer Products - Fiona Ball
- Executive Producers
- Directed & Produced by AnneMarie Walsh
Worldbuilding[[edit] | [edit source]]
- The Second Doctor deduces that he and his companions are not in Britain because of a volcanic rock he found that was 25 million years old.
- As they land, Polly hopes it is 1966 Chelsea, Ben wants to avoid the Daleks and the Doctor wishes to see prehistoric monsters.
- Jacko calls Jamie "Jock".
- The Doctor eats plankton.
Story notes[[edit] | [edit source]]
- This story had the working titles of The Fish People, Under the Sea (also referred to as Doctor Who Under the Sea) and Atlanta.
- Only episodes two and three of this four-part story exist in the BBC Archives as 16mm black & white film telerecordings.
- Since Jamie isn't actually shown inside the TARDIS in The Highlanders, episode one of this story has his "bigger on the inside" moment.
- Episode one of this serial concludes a run of twelve missing episodes, which begins with episode four of The Tenth Planet. As of 2020, this is the longest run of missing episodes.
- At the end of episode three, Professor Zaroff utters the timeless line, "Nothing in the world can stop me now!" Davros and the Fifth Doctor would say similar lines in Journey's End and The Caves of Androzani respectively.
- According to Anneke Wills on the DVD commentary, the main cast didn't get on with director Julia Smith: "We would mess around, and she would get more and more like a schoolteacher, so we got naughtier and naughtier. Pat would call her a 'miserable old bitch', but that's what we were like. We had power, we were the main actors. Otherwise, most of the directors we got on really well with. Only Julia had a bad time with us. We made her life a misery."
- In the opening TARDIS scene, Polly, Ben and the Doctor are each heard "thinking" about where they would like to land next in a rare example of internal monologue. This was achieved by pre-recording the actors' voices and playing them back during the making of the episode.
- Zaroff was at one point assisted by a female scientist called Steen.
- Originally, there was a character named Ebon, but it was then decided to merge her with Ara.
- At one point, it was decided that Ara would take Nola's role.
- In an early draft of the story, Zaroff's motivation to blow up the Earth stemmed from his being driven mad by the deaths of his wife and children in a car crash.
- While The War Machines still remains the only time in the history of the classic series where the Doctor is referred to explicitly as "Doctor Who" (although the term also features in An Unearthly Child and The Gunfighters), the Doctor's note to Zaroff in the first episode is signed "Dr. W", making this the second closest the Doctor has ever come to referring to himself as "Doctor Who" until the Twelfth Doctor used it in World Enough and Time.
- Since its original discovery by Ian Levine following an audit of the BBC Archives in 1977, episode three was thought to be the earliest surviving episode from the Patrick Troughton era, until episode two was recovered on 19 September 2011.
- This was the first Doctor Who story about the lost city Atlantis.
- One music cue from this story exists, entitled "The Fish People".
- This is the final story in which the Second Doctor wears his stovepipe hat. It makes its last on-screen appearance during the closing TARDIS interior scene of episode four, when it is worn by Polly (as shown in John Cura's tele-snaps). It was also the last story to show the Second Doctor’s fondness for disguises.
- Hugh David was originally offered the chance to direct this story but he turned it down as he felt it was too expensive for the show's budget. He directed The Highlanders instead. (DCOM: A Fishy Tale)
- Patrick Troughton was reputedly particularly unhappy about the production. He is reported to have described the show as having "ridiculous costumes and make-up of the Fish People".
- Innes Lloyd disliked the story, admitting that "it did look like something from a '50s American 'B' movie".
- Anneke Wills was unhappy that Polly was reduced to being a damsel in distress; she and the rest of the cast particularly disliked the infamous scene where Jamie slaps her to break her out of a mental breakdown.
- Michael Craze said of the story: "You just knew it was a dodo. The whole thing was badly conceived — tatty old scripts and costumes and everything. It ended up as a pantomime. Julia Smith was so emotionally charged that she'd burst into tears at anything."
- Bernard Lodge's new title sequence that featured Patrick Troughton's face was going to be debut in this story. It was held off until The Macra Terror.
- Now that he was a main character, Frazer Hines decided to begin modulating the Highland lilt he had employed in The Highlanders, achieving a more conventional Scots accent.
- Many of the “swimming” shots were actually performed in mid-air using Kirby wires.
- The serial was intially abandoned due to being over-ambitious and replaced by William Emms' The Imps, which Julia Smith was going to direct. When that serial was abandoned due to Emms making slow progress, it was decided to resurrect The Underwater Menace because there were no other scripts available.
- The script was written before it was known that Jamie would be a main companion. Geoffrey Orme didn't have time to re-write the script to accomodate, so Jamie generally shared dialogue originally written for either Ben or Polly.
- The scene of Polly about to operated on to be turned into a fish person sparked an angry letter from Mrs N Safford, of the National Society for the Welfare of Children in Hospitals, who was concerned that it would scare children with upcoming surgeries, who might become convinced that they would wake up to find themselves transformed into monsters. Innes Lloyd refuted this argument, noting that the fantastical nature of the series made it clear to viewers that the story's events were not realistic.
Ratings[[edit] | [edit source]]
- Episode one - 8.3 million viewers
- Episode two - 7.5 million viewers
- Episode three - 7.1 million viewers
- Episode four - 7.0 million viewers
Myths[[edit] | [edit source]]
- Joseph Furst adopted an outrageous East European accent in his portrayal of Zaroff. (Furst used his natural speaking voice.)
Filming locations[[edit] | [edit source]]
- Winspit Quarry, Worth Matravers, Dorset (Exploring island and discovering Atlantis entrance)
- Winspit Beach, Worth Matravers, Dorset (TARDIS lands on beach)
- Ealing Television Film Studios, Ealing Green, Ealing
- Riverside Studios, Hammersmith, London
Production errors[[edit] | [edit source]]
- At the start of episode three, the director's voice can be heard.
- During the "underwater" scene in episode three, the Kirby wires holding up the "swimming" Fish People are clearly visible.
- When Zaroff fires his pistol at the end of episode three, there is a sound effect, but no evident smoke, recoil, or discharged cartridge. The gun also changes from a Walther to a Beretta between episodes three and four.
- In episode three, after the kidnapping of Zaroff and just before he collapses, the Doctor is seen wearing an earring (part of his Atlantean disguise from earlier that Troughton evidently forgot to remove). In the next scene after Zaroff collapses and the group splits up, the earring is no longer visible.
- At the end of episode three, Zaroff utters "Nothing in the world can stop me now!" with eager excitement, but at the beginning of episode four, the line is uttered in a different tone. (This error is corrected in the 2023 animated reconstruction of episode four, which reuses the take from the end of episode three.)
- In episode two, when the Doctor is trying to convince Ramo about Zaroff, an extra is clearly visible behind him. Funnily enough, the extra plays a guard who is looking for the Doctor.
Continuity[[edit] | [edit source]]
- Azal implied that the Dæmons were connected to the sinking of Atlantis; (TV: The Dæmons) Atlantis was destroyed by the Chronovore when the Third Doctor was there. (TV: The Time Monster)
Home video and audio releases[[edit] | [edit source]]
DVD releases[[edit] | [edit source]]
2004[[edit] | [edit source]]
- Episode three, then the only episode of the story known to exist, was released alongside the existing footage from episodes one, two and four on the Lost in Time DVD in 2004. Editing of episode three's DVD release was completed by the Doctor Who Restoration Team.
2015[[edit] | [edit source]]
- A DVD release comprising episodes two and three plus animated reconstructions of episodes one and four was planned for release in 2014. It was postponed when the studio providing animation ceased trading and was cancelled in 2015 despite having special features and DVD cover art completed. This left episode two as the only episode of Doctor Who to exist in the BBC archive and not be released in any format on home video. The story was finally released, with telesnap reconstructions of episodes one and four (which were minus reconstructed opening title sequences, explanatory text captions, surviving clips and closing credit caption roller), on 26 October 2015.
- Special Features:
- Commentary: Patrick Troughton's son Michael (Episode 1), actors Frazer Hines (Jamie), Anneke Wills (Polly), Catherine Howe (Ara), Special Sounds Supervisor Brian Hodgson and Floor Assistant Quentin Mann (Episode 2 & 3), and archival material from Patrick Troughton, Directors Julia Smith and Hugh David, and Producer Innes Lloyd (Episode 4). Moderated by Toby Hadoke.
- A Fishy Tale - A look back at the making of this controversial story with Anneke Wills, Frazer Hines, Catherine Howe, Assistant Floor manager Gareth Gwenlan, Production Assistant Berry Butler and writer Robert Shearman. Narrated by Peter Davison
- The Television Centre of the Universe - Part Two - A documentary starring Yvette Fielding (formerly of Blue Peter). Featuring Peter Davison, Janet Fielding and Mark Strickson as they continue their tour of BBC Centre in the making of Doctor Who episodes through the classic series.
- Censor Clips - Two sequences edited out of broadcasts in Australia. This is the only surviving footage of Episode 1 (Damon attempting to turn Polly into a fish person- 12 seconds) & Episode 4 (Professor Zaroff drowning in his laboratory- 3 seconds)
- Photo Gallery
- Digitally Remastered picture & sound quality

Region 2 DVD cover
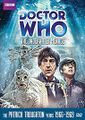
Region 1 DVD cover
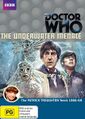
Region 4 DVD cover


2023 Animated Edition[[edit] | [edit source]]
A fully animated recreation of the story, with both black-and-white and colour versions, was released alongside the surviving episodes on DVD in the UK on 13 November 2023 and on Blu-Ray in the US on 9 January 2024. Additionally a Blu-ray and Steelbook edition was released in the UK.
All the special features from the 2015 release except The Television Centre of the Universe - Part Two were carried over.
- Special Features:
- Episode Reconstructions (updated from initial release) - Surviving film frames and set photographs are brought together with the original unedited audio, newly shot material and restored film recordings of episodes 2 and 3, to reconstruct the original now lost live-action production of 'The Underwater Menace', as seen by viewers of BBC 1 in 1967. Available to watch with (or without) an optional narration track by Anneke Wills (same as CD soundtrack release).
- Commentary (moderated by Toby Hadoke):
- Episode 1 (reconstruction) - Michael Troughton (son of Patrick Troughton)
- Episode 2 (live-action) - Original cast members Anneke Wills (Polly), Frazer Hines (Jamie) and Catherine Howe (Ara), studio floor assistant Quentin Mann and the BBC Radiophonic Workshop's Brian Hodgson
- Episode 3 (live-action) - Original cast members Anneke Wills (Polly), Frazer Hines (Jamie) and Catherine Howe (Ara), studio floor assistant Quentin Mann and the BBC Radiophonic Workshop's Brian Hodgson
- Episode 4 (reconstruction) - (Archive recordings of) original cast member Patrick Troughton (the Doctor), director Julia Smith and producer Innes Lloyd.
- A Fishy Tale - The Making of 'The Underwater Menace' - Cast and crew recall the making of 'The Underwater Menace' in this 2014 documentary. With actors Anneke Wills, Frazer Hines and Catherine Howe, assistant floor manager Gareth Gwenlan, production assistant Berry Butler and 2005 series writer Robert Shearman. Narrated by Peter Davison.
- Australian Censor Clips - When 'The Underwater Menace' was broadcast on Australian television in late 1967, a number of sections of footage were removed from the serial, on the grounds that they were judged unsuitable for younger viewers. The removed sections (from all four episodes) are presented here in full, together with the censor's original cutting notes.
- The Man from Miditz - More than two years before starring together in Doctor Who, Patrick Troughton and Joseph Fürst acted alongside one another in this BBC 2 drama from Quatermass director Rudolph Cartier. Also featured in the drama are numerous other faces from Doctor Who, including Bernard Archard ('The Power of the Daleks'), Laurence Payne ('The Two Doctors'), John Bennett ('The Talons of Weng-Chiang') and Derek Francis ('The Romans'). The story editor was Doctor Who producer John Wiles. The broadcast master of this episode was never maintained by the BBC. The presentation here has been painstakingly reassembled using an unedited cutting room print and original music tracks preserved in the archives of the BBC Radiophonic Workshop. Due to the nature of the material, picture and sound quality will vary.
- Frazer Hines Introduction - In 1998, the third episode of 'The Underwater Menace' was included as a bonus on the The Missing Years VHS tape from BBC Video. The episode was prefaced by a specially-shot introduction from Frazer Hines, who played Jamie in the story. Previously included on the 2004 Lost in Time DVD box set.
- BBC News Report - A BBC South Today news report on the recovery of the previously lost episode 2 of 'The Underwater Menace' in 2011.
- BBC Radio Solent Report - A BBC local radio report from 2011 on the recovery of episode 2 of 'The Underwater Menace'. With thanks to Richard Latto.
- Photo Gallery - A collection of photographs from the original 1967 production of 'The Underwater Menace', a number never published before.
- Animation Gallery - A collection of production art from the new 2023 animation of 'The Underwater Menace', including character designs and concept sketches.
- ROM Content - All four camera scripts from the original 1967 production of 'The Underwater Menace' (and 'The Man from Miditz') together with the original BBC PasB documentation and Radio Times listings.
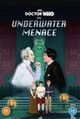
Region 2 Special Edition DVD cover
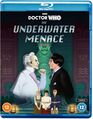
Region 2 Special Edition Blu-ray cover
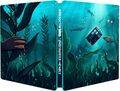
Region 2 Special Edition Steelbook cover


Digital releases[[edit] | [edit source]]
After a DVD release of 26 October 2015, the same version was released:
- as a stand-alone season of Doctor Who: The Classic Series in iTunes stores: first in Australia and the UK; later in Canada and the US. The season also includes the documentaries A Fishy Tale and Television Centre of the Universe (parts 1 and 2), as well as a photo gallery
- on Amazon Video in the UK as Season 32 of Doctor Who (Classic) series, which also includes the documentaries A Fishy Tale and Television Centre of the Universe (parts 1 and 2), as well as a photo gallery.
- Google Play lists this as "Season 8" of "Classic Doctor Who", and contains the same special features as the Amazon Video release.
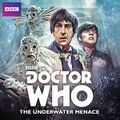
iTunes cover

VHS releases[[edit] | [edit source]]
The third episode of The Underwater Menace was included as a bonus on the 1998 The Missing Years VHS tape from BBC Video. This tape was included in The Ice Warriors Collection in the UK and Australia, and the 2000 The Edge of Destruction and Dr. Who: The Pilot Episode VHS in the US. The episode was prefaced by a specially-shot introduction from Frazer Hines, who played Jamie in the story.
Released:
-
- PAL - BBC Video BBCV6766
- PAL - BBC Video
- NTSC - Warner Video E1497 (2 tapes) (re-issued as E1578 in 2003)
UK VHS
Australia VHS
US VHS


Audio releases[[edit] | [edit source]]
- This story's soundtrack was released on CD by BBC Audio, with linking narration by Anneke Wills, on 7 February 2005.
- The story was re-released on 4 August 2011 as part of the box set Doctor Who: The Lost TV Episodes - Collection Three.
- The story was released again on Vinyl by Demon Records, also with the Anneke Wills narration, on 29 May 2020.
CD Release

The Lost TV Episodes - Collection Three

Vinyl Record release


External links[[edit] | [edit source]]
- The Underwater Menace at the BBC's official site
- The Underwater Menace at RadioTimes
- The Underwater Menace at BroaDWcast
- BBC - Doctor Who - Classic Series - Photonovel - The Underwater Menace on the BBC website
- The Underwater Menace at the Doctor Who Reference Guide
- The Underwater Menace at Shannon Sullivan's A Brief History of Time (Travel)
- The Underwater Menace at The Locations Guide
Footnotes[[edit] | [edit source]]
Notes[[edit] | [edit source]]
- ↑ Polly finds a 1968 Olympics bracelet and estimates the year to be 1970. However, in the short story Iris Wildthyme y Señor Cientocinco contra Los Monstruos del Fiesta, Iris receives a 1968 Olympics bracelet and plans to visit Atlantis. This further complicates the setting of the story.