The Web of Fear (TV story): Difference between revisions
(Undo revision 417638 by 94.8.255.217 (talk)) |
Gingerfool (talk | contribs) mNo edit summary |
||
| (588 intermediate revisions by more than 100 users not shown) | |||
| Line 1: | Line 1: | ||
{{Infobox | {{title dab away}} | ||
{{real world}} | |||
image= | {{ImageLinkTV}} | ||
series=[[Doctor Who | {{Infobox Story SMW | ||
number= | |image = Robotic Yeti.jpg | ||
story number= 41| | |series = [[Doctor Who television stories|''Doctor Who'' television stories]] | ||
doctor= | |season number = Season 5 (Doctor Who 1963)| | ||
companions= [[Jamie McCrimmon]] | |season serial number = 5 | ||
enemy= [[ | |story number = 41 | ||
|doctor = Second Doctor | |||
|companions = [[Jamie McCrimmon|Jamie]], [[Victoria Waterfield|Victoria]] | |||
director= [[Douglas Camfield]] | | |featuring = Anne Travers | ||
producer= [[Peter Bryant]]| | |featuring2 = Alistair Gordon Lethbridge-Stewart{{!}}Lethbridge-Stewart | ||
broadcast date= | |featuring3 = Gwynfor Evans{{!}}Evans | ||
format= | |featuring4 = Edward Travers | ||
production code= [[List of production codes|QQ]]| | |featuring5 = Ben Knight{{!}}Knight | ||
|featuring6 = Harold Chorley{{!}}Chorley | |||
next | |enemy = The [[Great Intelligence]] | ||
}} | |setting = [[London Underground]], circa [[1975]]<ref>Other sources disagree on the precise date of this story. See: [[Dating protocol]] and [[UNIT dating controversy]] for more information</ref> | ||
|writer = Mervyn Haisman, Henry Lincoln | |||
|director = [[Douglas Camfield]] | |||
|producer = [[Peter Bryant]] | |||
|novelisation = Doctor Who and the Web of Fear (novelisation) | |||
|epcount = 6 | |||
|broadcast date = 3 February - 9 March 1968 | |||
|network = BBC1 | |||
|format = 6x25-minute episodes | |||
|serial production code = [[List of production codes|QQ]] | |||
|prev = The Enemy of the World (TV story) | |||
|next = Fury from the Deep (TV story) | |||
|trailer = The Web of Fear Trailer - Doctor Who - BBC | |||
|clip = Yeti attack! - The Web of Fear - Doctor Who - BBC | |||
|clip2 = The Doctor defeats the Great Intelligence *SPOILERS* - Doctor Who - BBC | |||
|clip3 = The Doctor reactivates a Yeti Sphere - Doctor Who - BBC | |||
|audio commentary = https://soundcloud.com/fantompublishing/who-talk-the-web-of-fear-episode-one-sample | |||
|thwr = 154 | |||
}} | |||
'''''The Web of Fear''''' was the fifth serial of [[Season 5 (Doctor Who 1963)|season 5]] of ''[[Doctor Who]]''. It saw the return of the [[Great Intelligence]] and its robotic [[Robot Yeti|Yeti]], as well as Professor [[Edward Travers]]. Perhaps most notably, however, it featured the first appearance of Colonel — later Brigadier — [[Brigadier Alistair Gordon Lethbridge-Stewart|Lethbridge-Stewart]], played by [[Nicholas Courtney]]. [[UNIT]], however, was not introduced until his next appearance, in ''[[The Invasion (TV story)|The Invasion]]''. | |||
For over forty years, all but episode one of the [[serial]] were [[Missing episode|missing from the BBC archive]]. In October 2013, episodes two, four, five and six, as well as the entirety of ''[[The Enemy of the World (TV story)|The Enemy of the World]]'' (which had been missing five of its six episodes) were returned, having been located in [[Nigeria]]. Episode three currently remains missing (though see [[The Web of Fear (TV story)#Story notes|Story notes]] below), with the BBC's only record being [[tele-snaps]] and an off-air soundtrack recording. | |||
The story was given a new release on [[16 August (releases)|16 August]] [[2021 (releases)|2021]] on [[DVD]], [[Blu-ray]] and as an exclusive [[Steelbook]], with this release containing an animation of the missing third episode in black-and-white and in colour. A [[Advisory Announcement (trailer)|new trailer]] was also released, featuring the Doctor in a [[London Underground]] tunnel speaking directly to the audience, though this is actually an animation of the trailer that aired at the end of ''The Enemy of the World'' which currently exists only as audio.<ref> https://www.doctorwho.tv/news/?article=the-web-of-fear-new-animation#_</ref> | |||
The | |||
[[ | |||
The | == Synopsis == | ||
[[the Doctor's TARDIS|The TARDIS]] narrowly avoids becoming engulfed in a [[the Web|cobwebby substance]] in space. It arrives in the [[London Underground]] railway system, the [[tunnel]]s of which are being overrun by the mysterious web, produced by the [[Great Intelligence]]'s [[robot Yeti]]. | |||
The | The [[time travel]]lers learn this crisis was precipitated when Professor Travers, whom they first met in the Himalayas some thirty years earlier, accidentally caused one of the Yeti to be reactivated, opening the way for the Intelligence to invade again. | ||
The | The travellers work alongside army forces — led initially by Captain Knight, and then by Colonel Lethbridge-Stewart — as they battle the alien menace, hampered by one of their number under the Intelligence's influence acting as a traitor in their midst. | ||
==Plot== | == Plot == | ||
=== Episode 1 === | |||
[[ | [[File:Explosion_at_Charring_Cross.jpg|thumb|The Doctor is thrown from the platform.]] | ||
The TARDIS continues in [[The Enemy of the World (TV story)|flight with the doors open]], while the evil [[Ramón Salamander|Salamander]] has been ejected into the space-time vortex. Jamie flings himself onto the console and activates the door control, nearly being sucked out himself. With the doors safely closed and everyone safe, the Doctor moves to operate the controls, saying it will be very unpleasant for Salamander floating around in the vortex. Jamie mocks him for not being able to properly control the TARDIS. The Doctor intends to prove him wrong. | |||
In the home of Julius Silverstein, amidst his private collection of artefacts, Anne Travers returns from America to meet with her agitated father, Professor Travers. Travers pleads with Silverstein to let him take (or buy) back the Yeti he sold to him thirty years ago, stating that it is dangerous. Silverstein refuses and starts to argue with Travers. The Professor claims to have recently reactivated a [[control sphere]], which has since disappeared. Anne suspects his senility is playing tricks on him. She takes her father away at Silverstein's urging. As Silverstein closes his home for the night, the control sphere breaks through a window and reconnects with the Yeti. As it metamorphoses into a glowing-eyed monster, Silverstein is attacked; he cowers in terror. | |||
In the TARDIS, Jamie tries to convince the Doctor that a light on the console is flashing; the Doctor dismisses it. The Doctor tells Jamie that the light only flashes when they are landing. Victoria notices the light too, and when the Doctor finally sees it for himself, the machine emits landing sounds. Strangely, the scanner reveals they are suspended in space, and, as they watch, the scanner picture (and the TARDIS itself) is enveloped by a web-like substance. | |||
In an underground fortress, Captain Knight is being interviewed about an apparently fallen comrade, Colonel [[Spencer Pemberton|Pemberton]], by Harold Chorley of London Television. As the interview concludes, Professor Travers is ushered in. Knight is badgered by the Professor. He explains that Anne asked for him to be brought in. When Knight leaves, the Professor begins badgering Chorley. Chorley attempts to interview him about the "scientific section" and finding "a solution to the problem", to which Travers opines that the whole of London, if not the whole of England, might be completely wiped out. | |||
The Doctor has rigged up a device. As the web lessens, he plugs it into the console and throws the switch on the device. The TARDIS emits a screeching sound and lurches, knocking the Doctor and his colleagues to the floor. The Doctor announces he has landed the ship about half a mile away from where they were expected, eluding their captors for the moment. The TARDIS having landed, they emerge in a dark tunnel with bars on the edge. Jamie suspects it's a prison, while the Doctor speculates it may be the dungeon of a castle. As they explore, they find a trench and a fire extinguisher. They then discover a sign revealing they are in the [[London Underground]] station at [[Covent Garden]]. They head to the surface. The entrance gate to the station at the top of the stairs is closed. When Jamie attempts to rouse a sleeping newspaper seller just outside, the man falls, dead and covered with web, revealing a news banner which reads "Londoners Flee! Menace Spreads!" Returning to the platform, Jamie hastily jumps onto the tracks. The Doctor quickly and thankfully ascertains that the current which would have electrocuted Jamie is off. The three walk along the tracks into the tunnel, noticing that trains have not been running for some time. They discover a power cable and are forced to hide as three soldiers (Staff Sergeant Arnold, Corporal Blake, and Craftsman Weams) appear, letting out more cable from a large spool. The Doctor asks his friends to follow the soldiers at a distance while he finds where the cables lead. | |||
The soldiers stop for a rest. As Jamie and Victoria pursue them, Victoria is startled by walking into a cobweb and cannot stifle a scream. The soldiers, upon hearing this, ambush and capture Jamie and Victoria. | |||
The Doctor reaches the [[Charing Cross tube station|Charing Cross]] platform, on which several crates of explosives are connected to the cables. As he investigates, he hears a familiar beeping sound. He ducks onto the tracks and hides under the platform as a Yeti emerges. | |||
Corporal Lane cannot raise communications with a truck at [[Holborn]]. Anne enters with a repaired blast recorder, and Knight is only too pleased to give her a hand. Chorley enters, complaining of Professor Travers' obstructiveness, but is ushered out by Knight. | |||
Meanwhile, the Doctor must sit tight as a second Yeti arrives on the platform. Both Yeti cover the explosives in web, using a strange kind of gun. | |||
===Production errors=== | As Knight continues to set his cap at Anne Travers, Arnold returns with the cables ready to connect for the demolition job and reports the two captured youngsters. Knight is entirely nonplussed, but Anne pushes to make sure there's no one else in the tunnel before it's blown up. Arnold takes Jamie and Victoria into the common room and questions them. Jamie makes a snap decision to deny they were with anyone else. Knight comes down to check, at which point Arnold says that the coast is clear, and Knight rushes off. Jamie asks what all that was about, and Arnold tells them. Victoria immediately explains about the Doctor. | ||
However, it is too late — Knight has triggered the bomb. | |||
With the Yeti gone, the Doctor is closely examining the web-covered crates. As the bombs are detonated, the boxes glow and flash from underneath the web. The Doctor is thrown from the platform. | |||
=== Episode 2 === | |||
Jamie and Victoria wait in their makeshift prison (the common room at the fortress), Jamie beating himself up for risking the Doctor's life. | |||
Arnold reports to Knight about the Doctor. Arnold is dispatched to investigate as Weams reports that the blast recorder that Anne repaired isn't working: it hasn't recorded a blast. Weams suggests sabotage by the Doctor, and Knight goes to interrogate the youngsters further. As Knight, Anne, and Chorley question Jamie and Victoria, Jamie in turn tries to get someone to tell them where they are and what's going on. Weams interrupts to report contact is reestablished with Holborn, but it sounds like they're in trouble. Knight asks if it's a Yeti and leaves with Weams. Jamie overhears the word "Yeti" and looks askance at Victoria. Lane reports firing heard at Holborn. They overhear what sounds like a Yeti attack, and the line goes dead. Knight collects some soldiers and goes out to investigate; Chorley elects to stay behind. | |||
Arnold and Corporal Blake discover at Charing Cross the explosives' shattered crates covered in web. With no sign of the Doctor, they note the distinct lack of any blast damage. | |||
[[File:Blake_and_Arnold_at_Charring_Cross.jpg|thumb|left|Corporal Blake and Staff Sergeant Arnold discover the wrecked ammo crates at Charing Cross.]] | |||
Back at the fortress, Travers is working on a control sphere when Anne tells him of the new arrivals who know so much about the Yeti — even the fact that they are robots, something that has been suppressed from the public. Travers rushes off. | |||
Jamie and Victoria suspect it must have been the [[Great Intelligence]] that attempted to capture them in space. Travers bursts in and questions them, but Victoria recognises the 40-years-older man whom they met in [[Tibet]] in [[1935]]. Jamie and Travers soon follow suit. Jamie and Victoria explain the danger that the Doctor is in. Travers takes Jamie to find out any news about the Doctor, while Victoria is left to explain to Anne how all this is possible. They rush upstairs to find Arnold. Arnold tells Jamie and Travers what he knows and his suspicions about the Doctor. Travers stands up for the Doctor. Jamie goads Arnold into taking him out in search of the Doctor. | |||
Victoria has just about convinced Anne of the veracity of their story when Chorley enters and picks up his typewriter, in its case, to work on a story about the Doctor. Anne regards him with contempt, calling him a "sensation-monger" working for the "gutter press." Chorley presses Victoria for more information and tells her that Jamie has gone back into the tunnels. | |||
On the way back from Holborn, Knight and Private [[Thompson (The Web of Fear)|Thompson]] construct a barricade across the tunnel from explosives recovered from the dead ammo detail. Lane and Privates [[O'Brien (The Web of Fear)|O'Brien]] and Cocksey perform a rear-guard action but are attacked by Yeti. As they gradually retreat towards the barricade, [[Cocksey]] tries to attack a Yeti but is beaten to death by it. O'Brien's [[rifle]] jams and he is smothered in web, soon dead. Arnold and Jamie meet Thompson, Knight, and Lane. The Yetis use their web guns to cover the explosives. Knight tries to shoot the barricade to blow up the tunnel; the blast is contained by the web, which pulsates and then allows the Yeti to pass through. They are trapped by Yeti from the other end of the tunnel and are held prisoner. | |||
Anne questions Travers on whether she believes the story of the Doctor and his TARDIS before speculating on the curious fact that every time he's met the Yeti, he's met the Doctor — eventually stating that he must be embroiled somehow. Before he can refute this assertion, Victoria returns with [[tea]], having overheard the conversation. She quickly excuses herself, after which Professor Travers convinces Anne of the Doctor's innocence. | |||
The soldiers and Jamie are discussing how to escape from the Yeti when a mysterious beeping noise sounds and the Yeti wander off, seemingly forgetting about their prisoners. Jamie wants to follow them but is convinced otherwise. | |||
Weams and Blake discuss the Yeti. One believes they are [[alien]]s, whilst the other thinks they must be part of some kind of [[bacteria]]l weapon. They also talk how to stop a Yeti: a bullet directly between the eyes, or a [[grenade]]. Their attention is soon drawn to an electronic illuminated map board in the Ops Room, where they see that the web fungus is advancing through the tunnels for the first time in three weeks. They bring Travers, Anne, and Chorley to see, and Chorley again starts to blame the Doctor and his colleagues for this sudden burst. Blake notices that there's no sign of Victoria in the fortress. She has slipped away into the underground tunnels to find the Doctor and tell him of Anne's suspicions. Chorley says this proves his belief. | |||
As Jamie, Arnold, Knight, and company return through the tunnels, they hear someone approaching; oddly, the man is singing in Welsh. They ambush the soldier, who presents himself as Evans, the driver of the ammunition truck to Holborn. He reports seeing the web advancing and a Yeti carrying a glass-like pyramid at [[King's Cross tube station]] moving ahead of the web. Jamie excitedly tells the men that if they destroyed that, it would knock out the Intelligence, and he insists on going there and continuing the search for the Doctor. Evans volunteers to go with him as the rest of the men return to the fortress, but as Jamie thanks Evans, Evans assures him that he'll escape the first chance he gets. Consulting a map, they decide to move to [[Tower Hill tube station|Tower Hill]]. | |||
Travers is beating down arguments for evacuation of the base, predominantly led by Chorley, when Knight and his party arrive at the fortress and are brought up to date. Knight shuts down any talk of escape. All of the [[Circle line]] has been consumed by the web now, with the exception of [[Monument tube station|Monument]]. | |||
As they arrive at Monument, Evans stops Jamie. They hear a dull noise echoing through the tunnel. They look up to see the web approaching. They double back only to find more of the web cutting off their escape. As they await their death, they hear a screeching noise and are forced to cover their ears. | |||
=== Episode 3 === | |||
Out of the web advances a Yeti carrying a small [[pyramid]]. Jamie gets Evans to shoot the pyramid, which makes the pyramid explode, but to no avail, as the Yeti is still mobile and the web continues to advance. They make a dash for an archway and escape. | |||
Meanwhile, Victoria finds the Doctor in the tunnels, accompanied by a [[Alistair Gordon Lethbridge-Stewart|Colonel Lethbridge-Stewart]]. She tells the Colonel about the fortress at [[Goodge Street tube station|Goodge Street]], and, at his prompting, tells the Doctor about the presence of Travers and his apparent suspicions about the Doctor. The Colonel escorts them to the fortress. | |||
With the Circle Line completely cut off and the fortress hemmed in, Knight is informed of the return of the Doctor and Victoria and the arrival of the Colonel. Knight goes down to talk to his new guests. | |||
[[File:Colonel.jpg|thumb|"Lethbridge-Stewart, I presume?"]] | |||
In the common room, the Doctor calms Victoria and says that the Colonel hasn't harmed him in any way. When Knight enters, the Colonel presents his papers of authorisation and tells Knight that he is Colonel Pemberton's replacement. The Colonel was part of the attacked ammunition party at Holborn, and Knight mentions to him that driver Evans survived also, still not quite certain if his new C.O. is the real thing. Travers bursts in and, after a happy reunion, takes the Doctor and Victoria to the lab. The Colonel questions who is actually in charge of the base. | |||
Once away from army ears, the Doctor tries to confirm that suspicions are not focused on him, as Victoria had suggested. Travers rubbishes this, and Anne owns up to it being an idle thought of her own. They muse about the Great Intelligence and its reasons for trapping the TARDIS, while Victoria worries about Jamie. | |||
Meanwhile, Jamie and Evans arrive at [[St Paul's tube station]]. | |||
At the same time, Chorley is arguing with Arnold about trying to escape, saying his reports to the outside world are important. Arnold dismisses any thought of getting through the web but says there is a door that leads directly up to the surface. Chorley goes to investigate. | |||
In the lab, Travers tells the Doctor about reactivating a control sphere, which must have allowed the Great Intelligence to zone back in on the spheres and the Yeti. Knight collects them all for a briefing to be given in the common room. Victoria asks if there is any news on Jamie; Knight is sorry that there isn't. | |||
Evans plans to escape at the next station, [[Chancery Lane]], hoping to find his [[lorry]] and get out of town. Jamie argues with him as they walk through the tunnels, but Evans separates from him. | |||
At the briefing, the Colonel discuss the arrival of a mysterious mist in London: anyone who goes inside the mist never comes out again. The mist completely interferes with [[radio]] and other communications. The Colonel also explains how the mist led to the fungus and then, two days later, the Yeti. The Doctor and Travers note the new appearance of the Yeti compared to their adventures in Tibet. Anne reports that she and her father believe they could jam transmissions from the Intelligence but need more equipment. Chorley bursts in, clearly agitated that he was not told about this briefing, and argues that an exit to the surface, mentioned by Arnold, could allow a [[helicopter]] to airlift them out. The Colonel dismisses him, and his attempts to pull rank as a member of the press are met with scorn. Chorley leaves to question Weams in the Ops Room about tall buildings in this area, including the [[Post Office Tower]]. Weams leads him to a map to show him the position of the Tower but sees the further development of the fungus and leaves to tell the Colonel about another advance of the Web. | |||
Jamie sees Evans approaching, hides, and surprises him. Evans pretends that he had a moment of conscience, but then admits the gates at Chancery Lane were locked. They make their way back to the fortress. | |||
The Colonel decides to give Chorley a liaison job, coordinating things (and tucked safely out of the way in the common room), while the rest get to some real work. The Doctor suggests buying some time by blowing up the tunnel at Goodge Street and sealing themselves in. He plans to set off the explosives on a baggage trolley as it rolls down the tracks, therefore avoiding any Yeti attempts to cocoon it. The Doctor and Travers set to work on a detonator. | |||
Meanwhile, someone in the fortress unlocks the main door, leaving the base open and vulnerable. | |||
In the lab, Victoria recognises the model Yeti that Anne shows her (as she saw in Tibet), but as the Doctor comes in, Anne realises that one of the models is missing. The Doctor is clearly concerned by this. | |||
Someone changes the base on the stolen model Yeti, then places it on the floor. It begins to beep. In response to the signal, a Yeti in a nearby tunnel comes to life and moves off. | |||
Travers has constructed the mechanism for the detonator. Victoria points out that Jamie will be trapped outside the fortress if their plan succeeds. | |||
The main door slowly opens and a Yeti walks in. The Yeti moves towards the model Yeti and breaks the lock to the explosives store. | |||
The Doctor is running through the plan with the Colonel when Arnold comes in and reports the opening of the main door. Another soldier reports finding a broken padlock and a model of a Yeti outside the explosives store. They rush off to investigate. Weams picks up the model Yeti. | |||
The Doctor and his army friends listen at the door and hear nothing. They open it to see a bright luminous web rendering their explosives futile. | |||
Anne and Travers console Victoria, who is still worried about Jamie. Travers speculates that Jamie may be far safer than any of them are. | |||
Arnold reports to the Colonel that the fortress is still Yeti-free. The Colonel decides to take a group of men to Holborn to see if any explosives are still usable; both the Doctor and the Colonel suspect this is a waste of time but know they must check. The Colonel will leave the Doctor four men. The Doctor announces that someone inside the base must be in league with the Yeti, citing the evidence of this latest precision attack. | |||
Victoria foolishly tells Chorley about how she's worried the explosion may cut them off from the TARDIS and Jamie. Chorley, not knowing about the tunnel which would trap him in here, finds the temptation of the TARDIS too much. As the Doctor arrives, Chorley leaves surreptitiously. The Doctor soon discovers her gaffe and also discovers they are locked in the common room. | |||
Chorley meets Jamie and Evans, safely arrived at the fortress, and they tell him the Colonel's party has gone to Holborn. Chorley leaves the base. Jamie and Evans hear the banging from the Common Room. Jamie releases the Doctor and Victoria, and he and the Doctor leave in pursuit of Chorley. | |||
As Travers and Anne work in the lab, they hear a scream. Travers goes to investigate and soon finds Weams dead in the Ops Room, a Yeti model lying beside him. As Travers picks it up, a Yeti roars from behind him... | |||
=== Episode 4 === | |||
Travers tries to run but is attacked. Anne appears, and just as she sees her father on the ground, she too is struck down. The Yeti drag away the Professor. | |||
The Doctor, Jamie, Victoria, and Evans are en route to Convent Garden, trying to intercept Chorley, who the Doctor suspects will attempt to use the TARDIS to escape from the Underground. | |||
The Colonel and Arnold meet up with Knight, who reports running into the web a mere 100 yards from Holborn. Arnold notes that it was as if the Intelligence knew what they were up to. Knight suggests attempting another route, via Piccadilly, and the Colonel leads the party there. | |||
The Doctor and his party run into more of the web before reaching Covent Garden, but he cannot be sure if Chorley made it to the TARDIS before the web arrived. He collects a sample of the web in Evans' [[tobacco]] tin (casually discarding the tobacco inside, much to Evans' irritation). The web pulsates and releases a shrill noise, but the Doctor manages to get a sample. | |||
[[File:Barred_by_the_Web.jpg|thumb|left|The crew are barred by fungus from Covent Garden.]] | |||
Arnold and Blake are investigating a tunnel, and just after Blake's return to the main party, the Doctor and party find Arnold. Arnold then reports back to the Colonel as the rest return to the fortress to experiment on the web. | |||
The Doctor and company discover the main door hanging off its hinges and soon discover web-covered furniture, equipment — and bodies. They discover Anne in the lab and rouse her from unconsciousness. She is soon hysterical as she tells of her father's fate, and Jamie and Victoria help her to the common room. The Doctor speculates on why Travers wasn't killed — he believes they must have some use for him. Upon their return the Doctor tells the Colonel and Knight about what has happened. Evans is drafted by Arnold to help with the bodies, and on his exit, he greets the Colonel, whose memory is refreshed about the lorry driver to Holborn. The Doctor and the Colonel are summoned by Blake to the Ops Room, where more stations are being overtaken by the web as it advances towards Goodge Street. The Colonel muses about the Doctor's suggestion of a traitor in their midst. Knight and the Colonel suspect Travers having some sort of involvement, whilst the Doctor suspects Chorley. The Doctor tries to explain what exactly the Great Intelligence is, that he and his friends are time-travellers,and that their police-box-shaped craft is at Covent Garden. Knight responds with derision, but the Colonel accepts the Doctor's story. He asks the Doctor if the TARDIS could help them escape. The Doctor said it could but he needs to finish the work that Travers started. Jamie enters to take the Doctor to Anne, who is asking for him. Despite Knight's strong doubts, the Colonel decides to try to rescue the Doctor's craft. Knight wonders if this is a trap set up by the Doctor. | |||
The Doctor explains that the only way to find Travers is to find the central control source. The Doctor wonders why the Yetis chose to attack now, and Anne tells the Doctor that Travers was about to connect a controlling unit to the sphere. The Doctor demands that Anne shows him the sphere. | |||
Anne shows the Doctor a contraption she has made that controls the sphere but won't override the Intelligence's commands. The Doctor says they can fix that. Evans enters, giving the Doctor the model Yeti found by Weams' body, as per Arnold's instructions. The Doctor is horrified to be given it, and Evans denies any wrongdoing, as Anne realises all the other models are gone. Evans indignantly hands over his tobacco tin filled with web, for fear of being accused of wrong doing again. | |||
The Colonel's plan gets underway: he and his party will attempt to reach Covent Garden station on the ground, while Arnold, Lane, and Evans will attempt to meet them underground via a baggage trolley, using it to carry the TARDIS back to the fortress; Knight is ordered to remain on duty at the fortress. | |||
Meanwhile, the Doctor attempts to observe the web in the tin, but the tin is empty; the Doctor's suspicion of Evans grows. Arnold is also suspicious of Evans and warns him not to try and escape from his party. The Doctor informs Knight of Evans' potential involvement. The Doctor wants Knight to accompany them to the surface to obtain vital equipment needed to upgrade the controlling unit that is to be attached to the control sphere. He is initially unsure, but a bit of gentle persuasion from Anne sees him yield. | |||
Arnold's party come up against a web barrier near Covent Garden, and Lane puts himself forward when Evans refuses to volunteer, to attempt to get through the web on the trolley with Arnold. The two men don respirator masks. Evans pays out a rope attached to the wagon as they go deeper into the web, but the two men scream as they enter, the web pulsating with light. Evans fearfully pulls at the rope, and the trolley emerges, with Lane's web-covered body sprawled out on it. Arnold is gone. | |||
On street-level, the Colonel and his men arrive at Covent Garden but find Yeti waiting for them. After ducking into a builder's yard, the Yeti find another way in, and the men open fire to no effect. However, their hand [[grenade]]s prove very effective, felling a great number of the robots. The Yeti also smash down the main gate and force the men across the yard, killing some soldiers as they advance. Three men trapped behind a trader's cart are pinned down and killed by web guns. The bazooka is also employed to good use and another soldier is killed before the remaining troops retreat into a warehouse. | |||
Knight stands outside a nearby electrical shop, M. Thompson & Son Electricians, listening to the distant gun fire while the Doctor collects supplies. Knight goes in to hurry the Doctor when two Yeti appear in the doorway, felling Knight. The Doctor finds a model Yeti in Knight's pocket. | |||
Once back in the base, the Doctor shows the model to Jamie, who puzzles over who must have planted it. Evans, again, protests his innocence. The Doctor speculates where the other models might be. | |||
In the warehouse, Corporal Blake and the colonel have run out of ammo. They climb above some boxes. Blake is grabbed by a Yeti and is killed. The Colonel, the only survivor, runs back to the fortress. | |||
The Doctor dismantles the model Yeti as he and Anne start work with their new equipment. Victoria and Jamie are discussing who the traitor might be, (Jamie suspects Chorley) when the Colonel staggers in and tells them of the fate of his men. Evans reports the fact that his party was all wiped out too. Suddenly the Doctor shushes the room when he registers a faint beeping sound. He realises the Colonel has the last model Yeti planted on him by the traitor. Suddenly, two Yeti burst into the room, accompanied by a possessed-looking Travers. | |||
=== Episode 5 === | |||
[[File:Travers_is_the_Intelligence.jpg|thumb|right|"I...am...the Intelligence..." Professor Travers is possessed.]] | |||
The Great Intelligence speaks through the possessed Travers, saying the trap laid for the Doctor was so that it could possess him and his unsurpassed mind. It has created a machine that will drain all past knowledge from the Doctor's mind, leaving his body unharmed and his mind wiped clean, but he must submit willingly. If the Doctor gives himself over to the Great Intelligence, all deaths will stop — both in the tunnels and in London. To ensure his submission, Travers takes Victoria hostage and leaves, giving the Doctor twenty minutes to decide. A Yeti remains outside the lab door, so Jamie cannot go after Victoria despite his anger, but the Doctor persuades everyone that the Intelligence cannot harm her or Travers if it is to obtain the Doctor's cooperation. Evans asks the Colonel why they don't just give the Doctor over to the Intelligence so they can all go home. | |||
Travers and the Yeti take Victoria through the tunnels, Victoria subtly dropping her [[necklace]] on the track. | |||
As the Doctor, the Colonel, Jamie and Anne discuss their options, Jamie and Evans come to loggerheads about the Welshman's insistence they hand the Doctor over. The Doctor sides with Evans and says he will hand himself over if he can't think of a plan. Evans discovers that a Yeti is no longer guarding them. The Colonel takes Evans and Jamie to search the base, while Anne and the Doctor work again on the control sphere and box. | |||
Jamie wants to go up top to overtake the Yeti and ambush them. The Colonel is sceptical but complies when Jamie intends on going himself. Evans is to stay and guard the Doctor and Anne. | |||
The Doctor has made a breakthrough regarding the control box and turns his attention to the sphere. | |||
The Colonel and Jamie open the door to the surface and find the web pulsating beyond. The Colonel holds it off while Jamie opens a fire exit. The Colonel rushes away, allowing the web to creep in. | |||
Meanwhile, the Doctor reactivates a control sphere just as Jamie returns to them, telling them of their situation. The Colonel and Jamie are dubious about the merits of the Doctor and Anne's work but are persuaded to leave them alone as they return to work on the control box. | |||
Evans confronts the two men, claiming they must be working for the Intelligence: it did say it had another pair of hands working for it. Jamie dismisses his accusation, claiming it must have been Chorley. The Colonel and Jamie try their luck in the tunnel, ignoring Evans' show of ill-discipline | |||
At [[Piccadilly Circus]] station, the Intelligence speaks through the air, orders Travers to release Victoria, and then releases him from possession. It promises the pair that it will reveal itself to them soon. As Travers recovers his wits, they try to escape from the Yeti on the platform, only to run into another. | |||
The Doctor and Anne successfully use the box to control the sphere, but only at short range; they set to work on reprogramming the sphere itself. The next objective is to set it to work verbally. Anne reminds him he only has twelve minutes left. | |||
The Colonel and Jamie make their way through the tunnel. Jamie is now hostile to the Colonel, suspecting him to be affiliated with the Great Intelligence. Jamie discovers Victoria's necklace on the tracks in the tunnel and continues after her. | |||
At Piccadilly, now guarded by two Yeti, Staff Sergeant Arnold appears and, avoiding sight of the Yeti, tells Travers and Victoria he will try to get back to base. | |||
Evans is startled by the appearance of a control sphere at his feet, but the Doctor stops him before he tries to shoot it. It is now under the Doctor's control. The Doctor and Anne leave for the tunnels, heading towards [[Warren Street tube station|Warren Street]] to try to find a Yeti in which to put their control sphere and control. Evans refuses to join them. | |||
The Colonel and Jamie meet up with a shaken Arnold. He cannot remember anything after entering the web. Despite Jamie's protests, he and the Colonel take him back to the base. | |||
At a signal, the Yeti shepherd Travers and Victoria and move them along the platform. | |||
In the Ops Room, Evans is hiding behind the electronically illuminated map board of the underground system, having heard something approaching. The Colonel, Jamie, and Arnold enter. Evans is shocked and speechless at seeing Arnold again. When Evans explains where the Doctor and Anne have gone, the Colonel and Jamie go out after them. | |||
The Doctor and Anne encounter a wall of fungus, and as they examine it, they discover a Yeti is behind it. The Doctor hastily gets out the control box and — at dangerously close range — the Yeti freezes. They quickly replace its control sphere with theirs, and soon the Yeti is obeying the Doctor's commands. | |||
Evans has dressed Arnold's head-wound, but as Evans returns the medical gear to the lab, he yells out in fear to Arnold; the wall of the laboratory is bulging, and it soon gives way as the mist, the precursor to the web, spills into the room. | |||
=== Episode 6 === | |||
Arnold and Evans abandon the base as it is engulfed by the web. Arnold wants to warn the others, but Evans deserts him, fearful of the web. Arnold angrily shouts after him. | |||
The Doctor and Anne, in the tunnel with their controlled Yeti, decide not to tell anyone else about their success. The Doctor orders the Yeti to wait for them to leave, then resume acting for the Intelligence until he says otherwise. The Yeti obeys, and they leave. | |||
Jamie and the Colonel meet up with the Doctor and Anne, who are surprised to hear that Travers and Victoria are at Piccadilly, and that Arnold (who is still alive) told them so. The Doctor and Anne deny that their technology worked and that they must return to HQ as the Doctor's twenty minutes are almost up. | |||
The Doctor's Yeti reactivates after ninety seconds and is soon joined by two more Yeti who move off together into the tunnels. | |||
Arnold is soon found by the party, and he tells the Colonel that the H.Q. has been swamped by web. No sooner are they all together than they are surrounded by the three Yetis. | |||
In another tunnel, Evans successfully hides from a Yeti, but two more find and capture him, despite his best attempts at trying to talk his way out of it. | |||
The Doctor and his colleagues are being led through the tunnels by two Yeti. Arnold asks the Colonel to create a distraction. The Colonel pretends to hurt his ankle and Arnold escapes from the Yeti. | |||
Travers and Victoria are led into the Booking Hall at Piccadilly Station, where they discover a large glass pyramid; inside the pyramid is a smaller upside-down pyramid which forms a seat. Travers explains that this is the machine the Intelligence has created to drain the Doctor's mind. Victoria spots a figure lurking in the shadows, but it runs off before they can see who it is. As they discuss the Doctor's future, the Intelligence speaks to them through a speaker on the wall, insisting on their cooperation and non-interference. Travers wrings his hands at having brought this onto the world thanks to his curiosity. | |||
[[File:Travers_and_Victoria_Hostages.jpg|thumb|left|Travers and Victoria are held hostage at Picadilly Circus.]] | |||
As the main party is guarded on the Piccadilly platform, the Doctor explains to Jamie about the controlled Yeti. He gives Jamie a microphone to use to call the controlled Yeti to him — hopefully, it will be the right one. | |||
A frightened Harold Chorley finds Arnold and tells him his stories of the surface, the Yeti, fear, and the strange machine at Piccadilly station, including the Yeti and their two prisoners, for it was he that Victoria saw lurking in the shadows. A suspicious Arnold wonders how he could possibly have survived all this time and tells Chorley to come with him. | |||
Anne suggests the Doctor use his control box in order to escape, but the Doctor tells Anne there's no point in trying to escape now as he must meet the Intelligence face to face. The Colonel says that the Yetis have not noticed Jamie's disappearance and asks the Doctor if he's going to give himself up, for the good of everyone, including his friends. Before he answers, Evans is brought in. The Colonel tries to reprimand Evans for abandonment, but Evans says he was trying to save Travers and Victoria. Two Yeti start to move the Doctor away towards the Booking Hall, and he insists that his friends don't struggle or resist. As they leave, Jamie pops his head out from a large metal bin. | |||
In a passageway, a Yeti approaches the Doctor carrying some kind of headset, and as it begins to lower it onto his head, he switches on his control box and the two Yeti become motionless. He takes the headset from the Yeti, makes some rapid adjustments to the circuits, and puts it on his head. He turns off the control box and the Yeti lead him away. | |||
Anne is reunited with her father and the inner sanctum of the Great Intelligence. A worried Victoria asks about the Doctor and Jamie. | |||
Back on the platform, Jamie is speaking into the microphone, attempting to bring the controlled Yeti to him. A Yeti appears, but though Jamie is unable to make it follow further commands, it does not harm him, but moves off back into the tunnels. As Jamie turns to leave, a Yeti is behind him. | |||
Most of the group are now gathered in the Booking Hall, as the Doctor is ushered in, wearing the headset. As the Doctor again warns his friends away from interference, the Intelligence is heard thanking him for his cooperation. The Colonel yells out at the Intelligence to show itself, but it says that will happen soon enough. Chorley emerges, and the entire assembly gasps, thinking him to be the Great Intelligence. He desperately protests his innocence, exclaiming the identity of the real "traitor," Staff Sergeant Arnold. | |||
The possessed Arnold appears now wearing a metallic headset, stating that it, the Great Intelligence, has manifested itself in his lifeless body. The Great Intelligence informs the Doctor's friends that it has no intention of letting them leave unscathed. Jamie is brought in by a Yeti, and all the survivors are present. Arnold orders Jamie to stand by the Doctor when, suddenly, a Yeti grabs Jamie by the throat. The Doctor protests and refuses further cooperation until Jamie is released, and Arnold orders the Yeti to release him with the threat that if the Doctor doesn't comply Jamie will be killed. | |||
The Doctor is instructed to submit to the Intelligence, and he does so willingly and sits in the pyramid. The Great Intelligence connects a lead inside the pyramid to the Doctor's headset. As the Great Intelligence announces the beginning of the transfer, Jamie yells out for the controlled Yeti to attack. First, it attacks its comrades — in the ensuing confusion the other Yeti attack each other and the Colonel, who is knocked to the floor. The controlled Yeti then proceeds to throttle Arnold at the order of Jamie. As the transfer continues, the Doctor vociferously resists Jamie's attempts to rescue him. Anne and Prof. Travers assist Jamie as he pulls the Doctor, who is yelling and pleading to leave him in the pyramid, and soon the Doctor is free. Jamie pulls the wiring out of the pyramid, which explodes. | |||
The Yetis are disabled, and Arnold is killed. As the smoke clears and congratulations are exchanged, the Doctor is furious and despondent at Jamie and the others. Becoming calmer, the Doctor explains that he had altered the circuits so that instead of the Intelligence draining his mind, he would have drained the Intelligence. Thus, instead of them putting an end to its evil, the Intelligence has simply been repelled into space and is free once more. They find Arnold's blackened husk of a body. Despite this, the Colonel and Anne are calling the Doctor a hero, and Chorley wants to make him a household name on his television programme. That's all he needs to hear: he gathers Jamie and Victoria and, after hasty goodbyes, heads to Covent Garden and the TARDIS. | |||
The Doctor and his friends are lost in the tunnel. Jamie says there is no real rush, but the Doctor says they need to be safe before the [[train]]s start running again. | |||
== Cast == | |||
* [[Second Doctor|Dr. Who]] - [[Patrick Troughton]] | |||
* [[Jamie McCrimmon]] - [[Frazer Hines]] | |||
* [[Victoria Waterfield]] - [[Deborah Watling]] | |||
* [[Edward Travers|Professor Edward Travers]] - [[Jack Watling]] | |||
* [[Alistair Gordon Lethbridge-Stewart|Colonel Lethbridge-Stewart]] - [[Nicholas Courtney]] | |||
* [[Anne Travers]] - [[Tina Packer]] | |||
* [[Julius Silverstein]] - [[Frederick Schrecker]] | |||
* [[A Lane|Corporal Lane]] - [[Rod Beacham]] | |||
* [[Nicholas Blake|Corporal Blake]] - [[Richardson Morgan]] | |||
* [[Ben Knight|Captain Knight]] - [[Ralph Watson]] | |||
* [[Harold Chorley]] - [[Jon Rollason]] | |||
* [[Albert Arnold|Staff Sgt. Arnold]] - [[Jack Woolgar]] | |||
* [[Stephen Weams|Craftsman Weams]] - [[Stephen Whittaker]] | |||
* [[Soldier 1 (The Web of Fear)|Soldier]] - [[Bernard G. High]] | |||
* [[Robot Yeti|Yeti]] - [[John Levene]], [[John Lord]], [[Gordon Stothard]], [[Colin Warman]], [[Jeremy King]], [[Roger Jacombs]] | |||
* [[O'Brien (The Web of Fear)|Soldier]] - [[Joseph O'Connell]] | |||
* Driver [[Gwynfor Evans|Evans]] - [[Derek Pollitt]] | |||
=== Uncredited cast === | |||
* Corpse of Newspaper Seller - [[Bert Sims]] | |||
* Soldiers - [[Maurice Brooks]], [[James Jordan (extra)|James Jordan]], [[David Hacquet]], [[Peter Adams]] | |||
* Feet of Colonel Lethbridge-Stewart - [[Maurice Brooks]] | |||
* Soldiers at [[Covent Garden]] - [[Terry Walsh]], [[Derek Martin]], [[Derek Ware|Douglas Kirk]], [[Philip Ryan]], [[Tim Condren]] | |||
* [[Great Intelligence]] Voice - [[Jack Woolgar]] (all [[DWM 235]]) | |||
== Crew == | |||
* [[Assistant Floor Manager]] - [[Roselyn Parker]] | |||
* [[Costumes]] - [[Martin Baugh]] | |||
* [[Designer (crew)|Designer]] - [[David Myerscough-Jones]] | |||
* [[Fight Arranger]] - [[Derek Ware]] | |||
* [[Film Cameraman]] - [[Alan Jonas]] | |||
* [[Film Cameraman]] - [[Jimmy Court]] | |||
* [[Film Editor]] - [[Philip Barnikel]] | |||
* [[Film Editor]] - [[Colin Hobson]] | |||
* [[Studio Lighting|Lighting]] - [[Clive Leighton]] | |||
* [[Make-Up]] - [[Sylvia James]] | |||
* [[Producer]] - [[Peter Bryant]] | |||
* [[Production Assistant]] - [[Gareth Gwenlan]] | |||
* [[Script Editor]] - [[Derrick Sherwin]] | |||
* [[Studio Sound|Sound]] - [[Ray Angel]] | |||
* [[Special Sounds]] - [[Brian Hodgson]] | |||
* [[Theme Arrangement]] - [[Delia Derbyshire]] | |||
* [[Doctor Who theme|Title Music]] - [[Ron Grainer]] | |||
* [[Visual Effects]] - [[Ron Oates]] | |||
=== Animation Team === | |||
* Animation by [[Shapeshifter]] | |||
* Head of Studio Production - [[David Devjak]] | |||
* Pipeline TD and IT development - [[Conor Hodder]] | |||
* Technical Artist - [[Andrés Romero]] | |||
* Asset Development and Animation - [[Chris Downey]] | |||
* Track Read - [[Ian Spruce]] | |||
* Animators | |||
** [[Michael Puglisi]] | |||
** [[Hannah Lyn Walker]] | |||
** [[Caitlin Cao]] | |||
* Art Director - [[Selina Fenech]] | |||
* Concept Art by [[AE Media]], [[Singapore]] | |||
* Compositing and Grading by [[Thaumaturgy]] | |||
* Script Supervisor - [[Mark B. Oliver]] | |||
* Sound Restoration and Mastering - [[Mark Ayres]] | |||
* With Thanks to | |||
** [[Graham Strong]] | |||
* Opening Titles - [[Rob Ritchie]] | |||
* Special Thanks to | |||
** [[Richard Bignell]] | |||
** [[Lee Binding]] | |||
** [[David Butler]] | |||
** [[Joshua Campbell]] | |||
** [[Peter Crocker]] | |||
** [[Persephone Devjak]] | |||
** [[Martin Geraghty]] | |||
** [[Toby Hadoke]] | |||
** [[Paul Hembury]] | |||
** [[Clayton Hickman]] | |||
** [[Mark Humphries]] | |||
** [[Sue Malden]] | |||
** [[Luke Marcatili]] | |||
** [[Pete McTighe]] | |||
** [[Julia Mercer]] | |||
** [[Philip Morris]] | |||
** [[Richard Narramore]] | |||
** [[Conor O'Reilly]] | |||
** [[Andrew Pixley]] | |||
** [[Joshua Reh]] | |||
** [[Frank Reuter]] | |||
** [[Adrian Salmon]] | |||
** [[Peter Ware (editor)|Peter Ware]] | |||
* QAR - The Ark | |||
* Business and Legal Affairs - [[Linda Duncan]] | |||
* Production Finance - [[Aisha Bhatti]] | |||
* Consumer Products | |||
** [[Fiona Ball]] | |||
** [[Rebecca Richmond]] | |||
* Associate Producer - [[Damian Shanahan]] | |||
* Line Producer - [[Chloe Grech]] | |||
* Motion Capture Artist and Director - [[Adam Boys]] | |||
* Executive Producers for [[Big Finish Creative]] | |||
** [[Jason Haigh-Ellery]] | |||
** [[Mark B. Oliver]] | |||
** [[Gary Russell]] | |||
* Executive Producer for [[BBC Studios]] - [[Russell Minton]] | |||
== Worldbuilding == | |||
* [[Temple tube station]] and [[Liverpool Street tube station]] are two of the locations that have fallen to the Yeti. | |||
* Colonel Lethbridge-Stewart replaces Colonel [[Spencer Pemberton|Pemberton]] as leader of the operation. | |||
* The Doctor plays "[[The Skye Boat Song]]" on the [[the Doctor's recorder|recorder]]. | |||
* [[Langley (The Web of Fear)|Langley]] is one of the soldiers killed. | |||
* Corporal Blake refers to the army in the Underground as "a right old [[Fred Karno]]'s Army". {{w|Fred Karno}} was a music hall performer and "Fred Karno's Army" was a term for the volunteer brigades in [[World War I]], impyling they were chaotic and disorganised. | |||
== Story notes == | |||
* This story directly follows on from ''[[The Enemy of the World (TV story)|The Enemy of the World]]''. The Doctor is seen to have first a plaster, then a scar on his left cheek in episode one, from a wound he sustained in that story. | |||
* Only episodes one, two, four, five and six of this six-part story exist in the [[BBC Archives]] as [[telerecording|16mm black & white film telerecordings]]. | |||
** Episode three is the only [[missing episode]] known definitively to have an existing copy, but not in the BBC Archives. It was recovered along with the other episodes in Nigeria, but was apparently stolen by a station employee and sold to a private collector — likely due to its high value as the first appearance of the Brigadier. <ref> https://www.doctorwhonews.net/2015/09/whatever-happened-to-web-of-fear-3.html</ref> | |||
* This story acts as a sequel to ''[[The Abominable Snowmen (TV story)|The Abominable Snowmen]]'', which also featured Yeti, the Great Intelligence, and Professor Travers. | |||
* [[Patrick Troughton]] appears only in the reprise of episode two, as he was on holiday during the week it was recorded. As a result, the first meeting between the Doctor and Lethbridge-Stewart happens off-screen before episode three. | |||
* [[Nicholas Courtney]] was originally cast in the role of Captain Knight while [https://en.wikipedia.org/wiki/David_Langton David Langton] was cast as Colonel Lethbridge-Stewart. However, Langton gave up the role to accept another more attractive offer of work, and so Courtney was given the role of Lethbridge-Stewart and [[Ralph Watson]] was cast as Knight. | |||
* To promote this story, a [[Advisory Announcement (trailer)|specially shot trailer]] featuring the Doctor in the [[London Underground]] talking to the audience about the upcoming Yeti adventure was featured at the end of ''The Enemy of the World'' episode six. The trailer is included on the BBC Audio release of that story, and is currently known to exist only as an audio recording. The trailer was later animated and featured on the animated release of this story. | |||
* This is [[Peter Bryant]]'s first story as full-time producer. | |||
* [[Desmond Cullum-Jones]] was supposed to play a commissionaire, but the part was dropped in rewrites. ([[DWM 235]]) | |||
* It is stated that this story takes place approximately 40 years after ''[[The Abominable Snowmen (TV story)|The Abominable Snowmen]]'' adventure in Tibet, which it states took place in 1935. | |||
* Professor Travers is once again portrayed by [[Deborah Watling]]'s father, [[Jack Watling]]. Deborah recalled that the sight of her dad in old-age makeup made her blow several takes by laughing. | |||
* The original plan was to film in the London Undergrond, specifically in Aldwych and Covent Garden stations, but London Transport demanded and exorbitant fee and indicated that filming would be restricted to just a handful of overnight hours. It was decided to recreate London Underground on studio sets. The recreations were so realistic, the BBC apparently received a letter of complaint from London Transport, claiming filming had been done on their property without permission. | |||
* The scene in Julius Silverstein's house originally took place in [[Natural History Museum|the Natural History Museum]], but they declined permission for the BBC to film there. | |||
* The closing credits for each episode except episode six were rolled against an image of the pulsing web. | |||
* Once again, the scripts did not describe the Yeti in any great detail so costume designer [[Martin Baugh]] kept the same basic design that he created for the creatures in ''[[The Abominable Snowmen (TV story)|The Abominable Snowmen]] ''but altered them slightly so they would not look the exact same for two consecutive stories. | |||
* During the interview between Harold Chorley and Captain Knight in episode one, it is mentioned that the army task force's commanding officer, who has been killed in an earlier Yeti attack, was Colonel [[Spencer Pemberton|Pemberton]]. This was an in-joke referring to former story editor [[Victor Pemberton]], who worked with [[Mervyn Haisman]] and [[Henry Lincoln]] on ''[[The Abominable Snowmen (TV story)|The Abominable Snowmen]]''. | |||
* Another in-joke features in the official BBC reconstruction and animated version of episode three, when Driver Evans takes a chocolate bar from a platform vending machine. The bar's wrapper is shown to read "[[Camfield's Fairy Milk Chocolate]]" — a reference to director [[Douglas Camfield]] and to comply with the BBC's policy of not displaying brand named products on screen. As episode three has yet to be recovered, it remains unknown as to whether the wrapper was shown in detail on-screen and what name it bore. Bearing in mind the vending machine was unbranded, it is likely the wrapper was likewise. | |||
* Episode one, then the only episode of the story known to exist, was shown, along with ''[[The Abominable Snowmen (TV story)|The Abominable Snowmen]]'' episode two, as part of [[BSB's Doctor Who Weekend]] in September 1990, under the banner of ''[[The Yeti Rarities]]''. | |||
* The surviving episode one (at the time the only episode known to exist) was repeated on [[BBC Four]] on 26 June 2004 as part of a night about cult television of the 1960s. Other programmes that night included a documentary about the [[BBC Radiophonic Workshop]], and an episode of [[Verity Lambert]]'s series ''[https://en.wikipedia.org/wiki/Adam_Adamant_Lives! Adam Adamant Lives]''. | |||
* Episode one was also repeated on BBC Four as part of the BBC's [[London Underground]] night on 18 March 2007. | |||
* Episodes two and four to six were revealed to have been returned to the BBC on 11 October 2013.<ref>http://www.mirror.co.uk/tv/tv-news/doctor-who-nine-lost-episodes-2358386</ref> | |||
* The year in which ''The Web of Fear'' takes place is not directly stated in the story. The most information given on the matter is in part two, when Edward Travers says that it has been about 40 years since he met the Doctor in [[1935]]. A number of ''Doctor Who'' stories in other media have placed the event of the story to an exact year. | |||
** The novel ''[[Who Killed Kennedy (novel)|Who Killed Kennedy]]'' states that this story takes place in [[August]] [[1966]], one month after the events of ''[[The War Machines (TV story)|The War Machines]]'' and ''[[The Faceless Ones (TV story)|The Faceless Ones]]''. | |||
** The [[Downtime (novelisation)|novelisation of ''Downtime'']], the novel ''[[Revolution Man (novel)|Revolution Man]]'', and the mockumentary ''[[Global Conspiracy? (home video)|Global Conspiracy?]]'' all contain minor references to the events of ''The Web of Fear'' occurring in [[1968]]. | |||
** It is a central fact in the ''[[Lethbridge-Stewart (series)|Lethbridge-Stewart]]'' series of novels that ''The Web of Fear'' took place in [[February]] [[1969]]. | |||
** The short story ''[[The Enfolded Time (short story)|The Enfolded Time]]'' offers a date which is most accurate to the actual story: [[March]] [[1975]]. It also states that both February 1969 and March 1975 are accurate, depending on the individual, a result of twenty years of history being condensed into ten due to the Doctor's frequent visits to Earth. | |||
** A ''UNIT Chronology'' article in the [[DWMS Winter 1991|1991 Doctor Who Magazine Winter Special]], written in an in-universe style, dates the events to 1971, seemingly taking its cue from the fact that ''[[The Invasion (TV story)|The Invasion]]'', said to occur four years later, was placed in 1975 by contemporary publicity material. | |||
* The Yeti appear again briefly in the television story ''[[The Five Doctors (TV story)|The Five Doctors]]'' and the novel ''[[Downtime (novelisation)|Downtime]]''. | |||
* The Great Intelligence next appears in ''[[The Snowmen (TV story)|The Snowmen]]'', which is a prequel to this story. In it, the [[Eleventh Doctor]] shows the Great Intelligence a lunchbox with a map of the [[London Underground]] in [[1967]], and calls the Underground "a key strategic weakness in metropolitan living". | |||
* The attack at Holborn, and events that lead to the Doctor and Lethbridge-Stewart meeting, are dramatised in the short story ''[[The Ambush! (short story)|The Ambush!]]'', which serves as a prelude to the [[Lethbridge-Stewart (series)|Lethbridge-Stewart]] series of novels that take place only weeks after ''The Web of Fear''. | |||
* [[Ralph Watson]], who played [[Ben Knight|Knight]], kept one of the Yeti models from this story. | |||
* A poster for the film ''[[In the Heat of the Night]]'' is seen on the wall of one of the tube stations in episode six, though to avoid "product placement," the title ''Block-Busters'' was substituted. | |||
* [[Deborah Watling]] was fond of recalling one of the many pranks that befell her. One scene required the Doctor, Jamie and Travers to search for her and Jamie was supposed to find Victoria's handkerchief. For one take, [[Frazer Hines]] picked up a pair of knickers and said, "These are Victoria's, she must have gone this way!" [[Patrick Troughton]] took them and said, "Yes, they are, aren't they? Yes, she must". Then [[Jack Watling]] took them and said, "How do you know they're hers?" This prompted the crew to burst out laughing. | |||
* This would be the final serial in which 35mm film would be used for location filming. Starting with the next story, 16mm film would be used instead. | |||
* Several props were reused from ''[[The Abominable Snowmen (TV story)|The Abominable Snowmen]]'', including control spheres and model Yeti. | |||
* Harold Chorley was originally a Member of Parliament who was accompanying Colonel Lethbridge-Stewart on a fact-finding mission. | |||
* At one stage, Arnold survived the climax and it was revealed that he was actually a museum commissionaire who had been attacked by the first of the revived Yeti and then dominated by the Great Intelligence. | |||
* This was originally meant to be the finale to season five, but it was pushed back when ''[[Fury from the Deep (TV story)|Fury from the Deep]]'' needed re-writes. | |||
* [https://en.wikipedia.org/wiki/Nicholas_Selby Nicholas Selby] was sought for the role of Col. Lethbridge-Stewart. | |||
* The Yeti were re-designed for their re-appearance, partially because the original costumes had deteriorated in storage and partially because [[Douglas Camfield]] felt that they lacked menace. They now sported long claws and large glowing eyes, and were more compact than their predecessors. [[Brian Hodgson]] developed a roar for the once silent creatures. One original Yeti appears as a model in Silverstein's collection. | |||
* In Col. Lethbridge-Stewart's first scene, [[Maurice Brooks]] doubled for [[Nicholas Courtney]] to avoid having to hire the actor for an extra week. | |||
=== Ratings === | |||
* Episode 1 - 7.2 million viewers | |||
* Episode 2 - 6.8 million viewers | |||
* Episode 3 - 7.0 million viewers | |||
* Episode 4 - 8.4 million viewers | |||
* Episode 5 - 8.0 million viewers | |||
* Episode 6 - 8.3 million viewers | |||
=== Myths === | |||
* One of the sound effects the Radiophonic Workshop recorded to create the Yeti's roar was the sound of a toilet flushing. (''[[Brian Hodgson]] confirmed on the documentary, [[Going Underground: The Making of The Web of Fear (documentary)|Going Underground]], that this was "the figment of someone's imagination".)'' | |||
=== Filming locations === | |||
* Old Brewer's Yard, Shelton Street, London (UNIT hide in warehouses) | |||
* Shelton Street, Covent Garden, London (Yeti attack UNIT) | |||
* BBC Television Centre (Puppet Theatre) | |||
* [[Ealing Television Film Studios]], Ealing Green, Ealing | |||
* [[Lime Grove Studios|Lime Grove Studios (Studio D)]], Lime Grove, London | |||
=== Production errors === | |||
===== Original Production ===== | |||
{{discontinuity}} | {{discontinuity}} | ||
*The Yeti | * In episode one, right before the Doctor activates his device for escaping from the web, he pushes a lever on the TARDIS console up; as soon as he lets go, gravity pulls it back down again. | ||
* | * When the Doctor shines his torch on the "Covent Garden" sign on the wall of the station, he first shines it on the "o" of 'Covent', missing the "C", but still reads it as "Covent". | ||
* In episode two, when the soldiers are shooting at the advancing Yeti, there is a moment where the tunnel is completely dark and then it suddenly becomes lighter. | |||
* As Captain Knight flirts with Anne Travers in episode one, a pencil (or something) is heard falling to the floor. | |||
* The credits of episode two misspells script editor Derrick Sherwin's first name as "Derek". | |||
* Whenever the Colonel fires his pistol in episode four, sometimes there is a flash from the barrel and sometimes there isn't. | |||
* When Travers appears at the end of episode four, he stands a little behind the two Yeti so that only his head is visible, his arms are by his side and no one else says anything. But in the reprise at the beginning of episode five, he steps further forward, his left hand is pointing forward and the Doctor, Victoria, Anne and the Colonel all make different exclamations. | |||
* After Victoria is taken hostage in episode five, Jamie tries to go after her. When he opens and closes the door, the wall shakes visibly. | |||
* When the Doctor is tinkering with the wires inside the helmet, the Yeti's hand on his shoulder briefly moves; even though the Yeti is supposed to have been switched off due to the control box. | |||
* At several moments during the final battle in episode six, the zips are visible on the Yeti's backs. | |||
===== Animated Version ===== | |||
* Just after Travers places the detonator on the table, his hand and the Doctor's hand pass through each other. | |||
* In the scene where Chorley is talking to Victoria, there are a few moments where the animation and soundtrack are not synchronized together properly — e.g. when Chorley sits down, his chair is heard moving just ''after'' he has sat down. | |||
== Continuity == | |||
* An [[Archibald Hamish Lethbridge-Stewart]] was previously encountered by the [[First Doctor]] who, just prior to [[First Doctor's regeneration|his regeneration]], assured him that he would check up on his family. At that point, the Doctor was in the company of a [[Twelfth Doctor|future incarnation]], who was well aware that he would make good on that promise. ([[TV]]: ''[[Twice Upon a Time (TV story)|Twice Upon a Time]]'') | |||
* The Doctor next sees Colonel Lethbridge-Stewart as [[Brigadier Lethbridge-Stewart]]. The events of the Underground were the catalyst behind the creation of [[UNIT]]. ([[TV]]: ''[[The Invasion (TV story)|The Invasion]]'') | |||
* The [[Seventh Doctor]] later tells Ace about the Yeti incursion in the London Underground. ([[TV]]: ''[[Remembrance of the Daleks (TV story)|Remembrance of the Daleks]]'') | |||
* These events were explained by the government's cover story that there had been a major nerve gas leak. ([[PROSE]]: ''[[Who Killed Kennedy (novel)|Who Killed Kennedy]]'') It was also explained that bears had escaped from London Zoo, to account for the Yeti presence. ([[PROSE]]: ''[[The Forgotten Son (novel)|The Forgotten Son]]''; [[AUDIO]]: ''[[Time of the Intelligence (audio story)|Time of the Intelligence]]'') | |||
* The Doctor and companions go to London in search of Professor Travers, only to find that he has gone to America with daughter Anne. ([[TV]]: ''[[The Invasion (TV story)|The Invasion]]'') | |||
* Following its encounters with the [[Eleventh Doctor]], the Intelligence travelled back in time and makes use of the leftover Yeti and technology two weeks after this story. ([[TV]]: ''[[The Name of the Doctor (TV story)|The Name of the Doctor]]'', [[PROSE]]: ''[[The Forgotten Son (novel)|The Forgotten Son]]'') | |||
* An [[Inferno Earth|alternate reality]] existed in which Britain was a fascist state known as the [[Republic of Great Britain]]. The Great Intelligence's takeover attempt was thwarted by [[Koschei (Inferno Earth)|Koschei]], a benevolent version of [[the Master]], who sacrificed his [[The Master's TARDIS|TARDIS]] to destroy the web. ([[PROSE]]: ''[[The Face of the Enemy (novel)|The Face of the Enemy]]'') | |||
* In an alternative reality, Lethbridge-Stewart died and the Intelligence won. In this timeline, it subsumed Anne Travers and spread its influence throughout Southern England. ([[PROSE]]: ''[[Legacies (short story)|Legacies]]'') | |||
* The [[Third Doctor]] later had his own [[London Underground]] adventure with the Brigadier. ([[COMIC]]: ''[[Secret of the Tower (comic story)|Secret of the Tower]]'') | |||
* Anne Travers was a protégée of [[Rachel Jensen|Professor Rachel Jensen]] at the [[University of Cambridge]]. ([[PROSE]]: ''[[The Scales of Injustice (novel)|The Scales of Injustice]]'') | |||
* The Brigadier was unaware that Jamie was from [[1746]] until he was told as much by [[Polly Wright]] in [[2009]]. ([[AUDIO]]: ''[[The Three Companions (audio story)|The Three Companions]]'') | |||
* Sir [[Toby Kinsella]] coordinated the government response the Yeti invasion and as such became connected to the Great Intelligence in a similar manner to Travers. ([[AUDIO]]: ''[[Time of the Intelligence (audio story)|Time of the Intelligence]]'') | |||
* A control sphere was later retrieved by the [[Ninth Doctor]] from [[Mornington Crescent]] [[Mornington Crescent tube station|tube station]] in [[1999]]. ([[PROSE]]: ''[[Have You Seen This Man? (short story)|Have You Seen This Man?]]'') | |||
== | == Home video and audio releases == | ||
=== DVD release === | |||
Episode one, the only episode of the story then known to exist, was released on the ''[[Lost in Time (DVD box set)|Lost in Time]]'' DVD box set on 1 November 2004, along with what was then the only surviving footage from episodes two, four and five. | |||
== | <gallery position="center" captionalign="center" hideaddbutton="true"> | ||
File:Lostintime.jpg|Lost in Time (Region 2) | |||
File:Lost in Time Australian Region 4.jpg|Lost in Time (Region 4) | |||
File:Lostna-collection.jpg|Lost in Time (Region 1) Full Set | |||
File:Lostna-troughton.jpg|Lost in Time (Region 1) - Troughton Box | |||
Lost in Time 2.jpg|Lost in Time (Region 4) (re release) | |||
</gallery> | |||
Released: | Released: | ||
*Region 2 [[ | * Region 2 - [[1 November (releases)|1 November]] [[2005 (releases)|2004]] | ||
::PAL - [[BBC DVD]] BBCDVD1353 | ::PAL - [[BBC DVD]] BBCDVD1353 | ||
*Region 4 [[ | * Region 4 - [[2 December (releases)|2 December]] 2004 | ||
*Region 1 [[ | * Region 1 - [[2 November (releases)|2 November]] 2004 | ||
::NTSC - [[Warner Video]] E2082 (Troughton 2 disc set) / E2083 (Box set) | ::NTSC - [[Warner Video]] E2082 (Troughton 2 disc set) / E2083 (Box set) | ||
<gallery> | A Standard Edition DVD was released in the UK on [[24 February (releases)|24 February]] [[2014 (releases)|2014]] and in the US on [[22 April (releases)|22 April]] 2014<ref>http://www.tvshowsondvd.com/news/Doctor-Web-of-Fear/19389</ref>. It featured a reconstruction of the missing episode three, which comprised of [[John Cura]]'s [[tele-snaps]] linked up to the original soundtrack recording. Unlike previous ''Doctor Who'' DVDs, this release contained no commentaries, information text or other special features, merely the restored episodes and a trailer for ''[[The Enemy of the World (TV story)|The Enemy of the World]]''. It was also released in a limited edition slipcase that came with a t-shirt which was available from the BBC Shop UK. | ||
<gallery position="center" captionalign="center" hideaddbutton="true"> | |||
Doctor_Who_The_Web_Of_Fear_UK_DVD_Cover.jpg|Region 2 cover | |||
Doctor Who The Web Of Fear UK DVD Slipcase.jpg|Region 2 Limited Edition slipcase cover | |||
Doctor_Who_The_Web_Of_Fear_US_DVD_Cover.jpg|Region 1 cover | |||
WebofFearAUS.jpeg|Region 4 cover | |||
</gallery> | |||
The story was released as a Special Edition on DVD, Blu-ray and as an exclusive Steelbook in the UK on [[16 August (releases)|16 August]] [[2021 (releases)|2021]] and on Special Edition DVD in the US on [[1 February (releases)|1 February]] [[2022 (releases)|2022]], with the missing episode three represented with animation in colour and black-and-white, with the tele-snap reconstruction as a bonus feature. | |||
==== Special Features ==== | |||
* Commentary (moderated by [[Toby Hadoke]] except where noted): | |||
** Episode 1 - Actors [[Ralph Walton]] ([[Ben Knight|Captain Knight]]), [[Frazer Hines]] ([[Jamie McCrimmon|Jamie]]) and [[Tina Packer]] ([[Anne Travers]]) | |||
** Episode 1 - Actor [[Deborah Watling]] ([[Victoria Waterfield|Victoria]]) and story editor [[Derrick Sherwin]] moderated by [[Gary Russell]] in 2004 | |||
** Episode 2 - Studio cameraman [[Roger Bunce]] and special sound designer [[Brian Hodgson]] | |||
** Episode 3 - Motion Capture artist and director [[Adam Boys]] and head of studio production ([[Shapeshifter]]) [[David Devjak]] | |||
** Episode 4 - Actors Ralph Watson, [[John Levene]] ([[Robot Yeti|Yeti]]) and stuntman [[Derek Martin]] (Soldier) | |||
** Episode 5 - Frazer Hines and Tina Packer. | |||
** Episode 6 - Frazer Hines, make-up designer [[Sylvia James]] and [[Tim Woolgar]], son of actor [[Jack Woolgar]] ([[Albert Arnold|Staff Sgt Arnold]]) | |||
* ''[[The Missing Years]]'' - A 1998 documentary concerning the loss and recovery of episodes of {{'}}''[[Doctor Who]]''{{'}} presented by Frazer Hines and Deborah Watling and featuring film collectors [[Gordon Hendry]], [[David Stead]] and [[Ian Levine]], former BBC archive selector [[Sue Malden]], film researcher [[Damian Shanahan]] and journalist [[Jan Vincent-Rudzki]]. A 2004 update also features film collector [[Bruce Grenville]] with [[Paul Scoones]] and [[Neil Lambess]] who were involved in the recovery of the 1965 episode {{'}}''[[The Crusade (TV story)#The Lion (1)|The Lion]]''{{'}}. | |||
* ''The Web of Fear'': A reconstruction of Episode 3 from off-screen Tele-snaps and soundtrack recordings. | |||
* Photo Gallery - Images from the BBC Photo Library and on-set photographs taken by design assistant [[Tony Cornell]], stuntman [[Tim Condren]] and others, accompanied by sound effects and music for the serial by Brian Hidgson. | |||
* ''[[Going Underground: The Making of The Web of Fear (documentary)|Going Underground: Making 'The Web of Fear']]'' - Actors Frazer Hines (Jamie), John Levine (Yeti), Derek Martin (Soldier), Tina Packer (Anne Travers) and Ralph Watson (Captain Knight) with radiophonic sound designer Brian Hodgson, make-up designer Sylvia James and Tim Woolgar (son of actor Jack Woolgar (Staff Sgt Arnold)) recall the production of this serial. | |||
* ''[[Shapeshifter Animation Process (documentary)|Shapeshifter Animation Process]]'' - The pitch video for {{'}}''The Web of Fear''{{'}} in which Shapeshifter Managing Director David Devjak discusses the motion capture technique and its potential for recreating missing episodes. | |||
* Trailer - An animated recreation of the specially-made section of a trailer for the serial as aired on [[BBC One|BBC-1]] on 27th January 1968. | |||
* ''[[The Many Voices of Jack Woolgar (featurette)|The Many Voices of Jack Woolgar]]'' - Jack Woolgar's recording's of his own experiments with different voices for the [[Great Intelligence|Intelligence's]] dialogue and his accent as Staff Sgt Arnold. | |||
* Scripts - A full set of camera scripts and {{'}}''[[Radio Times]]''{{'}} cuttings for {{'}}''The Web of Fear''{{'}} in PDF format accessible via a computer DVD or Blu-Ray ROM drive. | |||
<gallery position="center" captionalign="center" hideaddbutton="true"> | |||
Doctor_Who_The_Web_Of_Fear_Special_Edition_UK_DVD_Cover.jpg|Special Edition Region 2 cover | |||
Doctor_Who_The_Web_Of_Fear_Special_Edition_US_DVD_Cover.jpg|Special Edition Region 1 cover | |||
WebofFearAUSSE.jpg|Special Edition Region 4 cover | |||
Doctor_Who_The_Web_Of_Fear_Special_Edition_UK_Blu-ray_Cover.jpg|Region B Blu-ray cover | |||
Doctor_Who_The_Web_of_Fear_Limited_Edition_UK_Blu-ray_Steelbook_Cover.jpg|Region B Blu-ray Steelbook | |||
</gallery> | </gallery> | ||
=== | === Digital releases === | ||
The | * On Friday, [[11 October (releases)|11 October]] [[2013 (releases)|2013]], following a press announcement the day before, the previously existing episode one and all the newly discovered in [[Nigeria]] episodes of this story were released in [[iTunes]] stores ([[Australia]], [[Canada]], [[France]], [[Germany]], [[UK]] and [[US]]) as ''Doctor Who: The Classic Series'' collection ''Lost Episodes: Doctor Who: The Web of Fear'' with the still missing episode three reconstructed using stills and the original soundtrack. | ||
* It has also been added to [[Amazon (service)|Amazon Video]] (UK) as Season 41 of ''Doctor Who (Classic)'' series. | |||
* ''The Web of Fear'' is available for streaming through [[BritBox]] (US) as part of Season 5 of ''Classic Doctor Who''.<gallery position="center" captionalign="center" hideaddbutton="true"> | |||
File:Web_of_Fear_iTunes.jpg|''Lost Episodes: The Web of Fear'' original iTunes cover | |||
File:Web_of_Fear_2 iTunes cover.jpg|''Lost Episodes: The Web of Fear'' second iTunes cover | |||
</gallery> | |||
=== VHS releases === | |||
Episode one, the only episode of the story then known to exist at the time, was released alongside ''[[The Faceless Ones (TV story)|The Faceless Ones]]'' episodes one and three and the remaining episodes of ''[[The Reign of Terror (TV story)|The Reign of Terror]]'' as part of a two-cassette release entitled ''Doctor Who: The Reign of Terror''. This release marked the final time any of the show's material was made available on the VHS format. | |||
Released: | Released: | ||
*[[UK]] [[November]] [[2003]] | * [[UK]] [[November (releases)|November]] [[2003 (releases)|2003]] | ||
::PAL - [[BBC Video]] BBCV7335 | ::PAL - [[BBC Video]] BBCV7335 | ||
*[[US]] [[October]] | * [[US]] [[October (releases)|October]] 2003 | ||
::NTSC - [[Warner Video]] E1853 | ::NTSC - [[Warner Video]] E1853 | ||
Notes: The [[US]] release was also located in [[The End of the Universe Collection]]. | Notes: The [[US]] release was also located in ''[[The End of the Universe Collection]]''. | ||
* Editing of the surviving episodes for VHS and DVD release was completed by the [[Doctor Who Restoration Team]]. | |||
<gallery position="center" captionalign="center" hideaddbutton="true"> | |||
File:Reignbox.jpg|Reign of Terror Boxed Set (UK release) | |||
File:Webfacelessnew.jpg|Web of Fear VHS cover - inside Reign of Terror Boxed Set (UK release) | |||
File:Reign of terror bbcvideo-1066-us.jpg|Reign of Terror (US release) | |||
The Reign of Terror The Faceless Ones The Web of Fear VHS box set Australian cover.jpg|AUS VHS Cover | |||
</gallery> | |||
* | === Audio releases === | ||
* The soundtrack was released on CD, with linking narration by [[Frazer Hines]], on [[6 March (releases)|6 March]] [[2000 (releases)|2000]]. It has been re-released in two box sets, first in the ''[[Yeti Attack]]'' set (with ''[[The Abominable Snowmen (TV story)|The Abominable Snowmen]]'', released [[7 July (releases)|7 July]] [[2003 (releases)|2003]]), and second as part of the ''[[The Lost TV Episodes - Collection Five|Doctor Who: The Lost TV Episodes - Collection Five]]'' set (released [[2 August (releases)|2 August]] [[2012 (releases)|2012]]). | |||
<gallery> | <gallery position="center" captionalign="center" hideaddbutton="true"> | ||
The Web of Fearcd (2).jpg|CD release | |||
Bbccd-yetiattack.jpg|''Yeti Attack'' box set | |||
The Lost TV Episodes 5.jpg|The Lost TV Episodes - Collection Five | |||
</gallery> | </gallery> | ||
== | === Commentary === | ||
[[ | * An unofficial commentary to the story, moderated by [[Toby Hadoke]], was released by [[Fantom Films]] in [[November (releases)|November]] [[2015 (releases)|2015]] under the title ''[[Who Talk]], ''on CD and download.'' ''The commentary brought together [[Deborah Watling]], [[Ralph Watson]], [[Derek Martin]], [[John Levene]], [[Sylvia James]] and [[Roger Bunce]], with a commentary for the third episode provided by [[Sue Malden]]. | ||
== Footnotes == | |||
{{Reflist}} | |||
== External links == | == External links == | ||
*{{bbcepguideclassic|weboffear/|The Web of Fear}} | * {{bbcepguideclassic|weboffear/|The Web of Fear}} | ||
*{{dwrefguide|who_2q.htm|The Web of Fear}} | * {{radiotimes|2009-07-06/the-web-of-fear|The Web of Fear}} | ||
*{{briefhistory|serials/qq.html|The Web of Fear}} | {{dwcast}} | ||
*{{locguide|weboffear|The Web of Fear}} | {{dwrefguide|who_2q.htm|The Web of Fear}} | ||
{{ | * {{briefhistory|serials/qq.html|The Web of Fear}} | ||
{{ | * {{locguide|weboffear|The Web of Fear}} | ||
[[Category: | |||
[[Category: | == Footnotes == | ||
[[Category: | {{reflist}} | ||
[[Category:Brigadier Lethbridge-Stewart | {{DWTV}} | ||
[[Category:Stories set in the London Underground | {{Great Intelligence stories}} | ||
[[Category: | {{TitleSort}} | ||
[[Category:Animated missing episodes]] | |||
[[Category:Doctor Who (1963) television stories]] | |||
[[Category:1968 television stories]] | |||
[[Category:Brigadier Lethbridge-Stewart television stories]] | |||
[[Category:Stories set in the London Underground]] | |||
[[Category:Stories with missing episodes]] | |||
[[Category:Season 5 stories]] | [[Category:Season 5 stories]] | ||
[[Category:Yeti television stories]] | |||
[[Category:Stories set in 1966]] | |||
[[Category:Stories set in 1968]] | |||
[[Category:Stories set in 1969]] | |||
[[Category:Stories set in 1975]] | |||
[[Category:Six part serials]] | |||
[[Category:Great Intelligence television stories]] | |||
[[Category:Doctor Who animated television stories]] | |||
[[es:The Web of Fear]] | |||
[[fr:The Web of Fear]] | |||
[[ru:Сеть страха]] | |||
Latest revision as of 11:33, 3 August 2024
The Web of Fear was the fifth serial of season 5 of Doctor Who. It saw the return of the Great Intelligence and its robotic Yeti, as well as Professor Edward Travers. Perhaps most notably, however, it featured the first appearance of Colonel — later Brigadier — Lethbridge-Stewart, played by Nicholas Courtney. UNIT, however, was not introduced until his next appearance, in The Invasion.
For over forty years, all but episode one of the serial were missing from the BBC archive. In October 2013, episodes two, four, five and six, as well as the entirety of The Enemy of the World (which had been missing five of its six episodes) were returned, having been located in Nigeria. Episode three currently remains missing (though see Story notes below), with the BBC's only record being tele-snaps and an off-air soundtrack recording.
The story was given a new release on 16 August 2021 on DVD, Blu-ray and as an exclusive Steelbook, with this release containing an animation of the missing third episode in black-and-white and in colour. A new trailer was also released, featuring the Doctor in a London Underground tunnel speaking directly to the audience, though this is actually an animation of the trailer that aired at the end of The Enemy of the World which currently exists only as audio.[2]
Synopsis[[edit] | [edit source]]
The TARDIS narrowly avoids becoming engulfed in a cobwebby substance in space. It arrives in the London Underground railway system, the tunnels of which are being overrun by the mysterious web, produced by the Great Intelligence's robot Yeti.
The time travellers learn this crisis was precipitated when Professor Travers, whom they first met in the Himalayas some thirty years earlier, accidentally caused one of the Yeti to be reactivated, opening the way for the Intelligence to invade again.
The travellers work alongside army forces — led initially by Captain Knight, and then by Colonel Lethbridge-Stewart — as they battle the alien menace, hampered by one of their number under the Intelligence's influence acting as a traitor in their midst.
Plot[[edit] | [edit source]]
Episode 1[[edit] | [edit source]]

The TARDIS continues in flight with the doors open, while the evil Salamander has been ejected into the space-time vortex. Jamie flings himself onto the console and activates the door control, nearly being sucked out himself. With the doors safely closed and everyone safe, the Doctor moves to operate the controls, saying it will be very unpleasant for Salamander floating around in the vortex. Jamie mocks him for not being able to properly control the TARDIS. The Doctor intends to prove him wrong.
In the home of Julius Silverstein, amidst his private collection of artefacts, Anne Travers returns from America to meet with her agitated father, Professor Travers. Travers pleads with Silverstein to let him take (or buy) back the Yeti he sold to him thirty years ago, stating that it is dangerous. Silverstein refuses and starts to argue with Travers. The Professor claims to have recently reactivated a control sphere, which has since disappeared. Anne suspects his senility is playing tricks on him. She takes her father away at Silverstein's urging. As Silverstein closes his home for the night, the control sphere breaks through a window and reconnects with the Yeti. As it metamorphoses into a glowing-eyed monster, Silverstein is attacked; he cowers in terror.
In the TARDIS, Jamie tries to convince the Doctor that a light on the console is flashing; the Doctor dismisses it. The Doctor tells Jamie that the light only flashes when they are landing. Victoria notices the light too, and when the Doctor finally sees it for himself, the machine emits landing sounds. Strangely, the scanner reveals they are suspended in space, and, as they watch, the scanner picture (and the TARDIS itself) is enveloped by a web-like substance.
In an underground fortress, Captain Knight is being interviewed about an apparently fallen comrade, Colonel Pemberton, by Harold Chorley of London Television. As the interview concludes, Professor Travers is ushered in. Knight is badgered by the Professor. He explains that Anne asked for him to be brought in. When Knight leaves, the Professor begins badgering Chorley. Chorley attempts to interview him about the "scientific section" and finding "a solution to the problem", to which Travers opines that the whole of London, if not the whole of England, might be completely wiped out.
The Doctor has rigged up a device. As the web lessens, he plugs it into the console and throws the switch on the device. The TARDIS emits a screeching sound and lurches, knocking the Doctor and his colleagues to the floor. The Doctor announces he has landed the ship about half a mile away from where they were expected, eluding their captors for the moment. The TARDIS having landed, they emerge in a dark tunnel with bars on the edge. Jamie suspects it's a prison, while the Doctor speculates it may be the dungeon of a castle. As they explore, they find a trench and a fire extinguisher. They then discover a sign revealing they are in the London Underground station at Covent Garden. They head to the surface. The entrance gate to the station at the top of the stairs is closed. When Jamie attempts to rouse a sleeping newspaper seller just outside, the man falls, dead and covered with web, revealing a news banner which reads "Londoners Flee! Menace Spreads!" Returning to the platform, Jamie hastily jumps onto the tracks. The Doctor quickly and thankfully ascertains that the current which would have electrocuted Jamie is off. The three walk along the tracks into the tunnel, noticing that trains have not been running for some time. They discover a power cable and are forced to hide as three soldiers (Staff Sergeant Arnold, Corporal Blake, and Craftsman Weams) appear, letting out more cable from a large spool. The Doctor asks his friends to follow the soldiers at a distance while he finds where the cables lead.
The soldiers stop for a rest. As Jamie and Victoria pursue them, Victoria is startled by walking into a cobweb and cannot stifle a scream. The soldiers, upon hearing this, ambush and capture Jamie and Victoria.
The Doctor reaches the Charing Cross platform, on which several crates of explosives are connected to the cables. As he investigates, he hears a familiar beeping sound. He ducks onto the tracks and hides under the platform as a Yeti emerges.
Corporal Lane cannot raise communications with a truck at Holborn. Anne enters with a repaired blast recorder, and Knight is only too pleased to give her a hand. Chorley enters, complaining of Professor Travers' obstructiveness, but is ushered out by Knight.
Meanwhile, the Doctor must sit tight as a second Yeti arrives on the platform. Both Yeti cover the explosives in web, using a strange kind of gun.
As Knight continues to set his cap at Anne Travers, Arnold returns with the cables ready to connect for the demolition job and reports the two captured youngsters. Knight is entirely nonplussed, but Anne pushes to make sure there's no one else in the tunnel before it's blown up. Arnold takes Jamie and Victoria into the common room and questions them. Jamie makes a snap decision to deny they were with anyone else. Knight comes down to check, at which point Arnold says that the coast is clear, and Knight rushes off. Jamie asks what all that was about, and Arnold tells them. Victoria immediately explains about the Doctor.
However, it is too late — Knight has triggered the bomb.
With the Yeti gone, the Doctor is closely examining the web-covered crates. As the bombs are detonated, the boxes glow and flash from underneath the web. The Doctor is thrown from the platform.
Episode 2[[edit] | [edit source]]
Jamie and Victoria wait in their makeshift prison (the common room at the fortress), Jamie beating himself up for risking the Doctor's life.
Arnold reports to Knight about the Doctor. Arnold is dispatched to investigate as Weams reports that the blast recorder that Anne repaired isn't working: it hasn't recorded a blast. Weams suggests sabotage by the Doctor, and Knight goes to interrogate the youngsters further. As Knight, Anne, and Chorley question Jamie and Victoria, Jamie in turn tries to get someone to tell them where they are and what's going on. Weams interrupts to report contact is reestablished with Holborn, but it sounds like they're in trouble. Knight asks if it's a Yeti and leaves with Weams. Jamie overhears the word "Yeti" and looks askance at Victoria. Lane reports firing heard at Holborn. They overhear what sounds like a Yeti attack, and the line goes dead. Knight collects some soldiers and goes out to investigate; Chorley elects to stay behind.
Arnold and Corporal Blake discover at Charing Cross the explosives' shattered crates covered in web. With no sign of the Doctor, they note the distinct lack of any blast damage.

Back at the fortress, Travers is working on a control sphere when Anne tells him of the new arrivals who know so much about the Yeti — even the fact that they are robots, something that has been suppressed from the public. Travers rushes off.
Jamie and Victoria suspect it must have been the Great Intelligence that attempted to capture them in space. Travers bursts in and questions them, but Victoria recognises the 40-years-older man whom they met in Tibet in 1935. Jamie and Travers soon follow suit. Jamie and Victoria explain the danger that the Doctor is in. Travers takes Jamie to find out any news about the Doctor, while Victoria is left to explain to Anne how all this is possible. They rush upstairs to find Arnold. Arnold tells Jamie and Travers what he knows and his suspicions about the Doctor. Travers stands up for the Doctor. Jamie goads Arnold into taking him out in search of the Doctor.
Victoria has just about convinced Anne of the veracity of their story when Chorley enters and picks up his typewriter, in its case, to work on a story about the Doctor. Anne regards him with contempt, calling him a "sensation-monger" working for the "gutter press." Chorley presses Victoria for more information and tells her that Jamie has gone back into the tunnels.
On the way back from Holborn, Knight and Private Thompson construct a barricade across the tunnel from explosives recovered from the dead ammo detail. Lane and Privates O'Brien and Cocksey perform a rear-guard action but are attacked by Yeti. As they gradually retreat towards the barricade, Cocksey tries to attack a Yeti but is beaten to death by it. O'Brien's rifle jams and he is smothered in web, soon dead. Arnold and Jamie meet Thompson, Knight, and Lane. The Yetis use their web guns to cover the explosives. Knight tries to shoot the barricade to blow up the tunnel; the blast is contained by the web, which pulsates and then allows the Yeti to pass through. They are trapped by Yeti from the other end of the tunnel and are held prisoner.
Anne questions Travers on whether she believes the story of the Doctor and his TARDIS before speculating on the curious fact that every time he's met the Yeti, he's met the Doctor — eventually stating that he must be embroiled somehow. Before he can refute this assertion, Victoria returns with tea, having overheard the conversation. She quickly excuses herself, after which Professor Travers convinces Anne of the Doctor's innocence.
The soldiers and Jamie are discussing how to escape from the Yeti when a mysterious beeping noise sounds and the Yeti wander off, seemingly forgetting about their prisoners. Jamie wants to follow them but is convinced otherwise.
Weams and Blake discuss the Yeti. One believes they are aliens, whilst the other thinks they must be part of some kind of bacterial weapon. They also talk how to stop a Yeti: a bullet directly between the eyes, or a grenade. Their attention is soon drawn to an electronic illuminated map board in the Ops Room, where they see that the web fungus is advancing through the tunnels for the first time in three weeks. They bring Travers, Anne, and Chorley to see, and Chorley again starts to blame the Doctor and his colleagues for this sudden burst. Blake notices that there's no sign of Victoria in the fortress. She has slipped away into the underground tunnels to find the Doctor and tell him of Anne's suspicions. Chorley says this proves his belief.
As Jamie, Arnold, Knight, and company return through the tunnels, they hear someone approaching; oddly, the man is singing in Welsh. They ambush the soldier, who presents himself as Evans, the driver of the ammunition truck to Holborn. He reports seeing the web advancing and a Yeti carrying a glass-like pyramid at King's Cross tube station moving ahead of the web. Jamie excitedly tells the men that if they destroyed that, it would knock out the Intelligence, and he insists on going there and continuing the search for the Doctor. Evans volunteers to go with him as the rest of the men return to the fortress, but as Jamie thanks Evans, Evans assures him that he'll escape the first chance he gets. Consulting a map, they decide to move to Tower Hill.
Travers is beating down arguments for evacuation of the base, predominantly led by Chorley, when Knight and his party arrive at the fortress and are brought up to date. Knight shuts down any talk of escape. All of the Circle line has been consumed by the web now, with the exception of Monument.
As they arrive at Monument, Evans stops Jamie. They hear a dull noise echoing through the tunnel. They look up to see the web approaching. They double back only to find more of the web cutting off their escape. As they await their death, they hear a screeching noise and are forced to cover their ears.
Episode 3[[edit] | [edit source]]
Out of the web advances a Yeti carrying a small pyramid. Jamie gets Evans to shoot the pyramid, which makes the pyramid explode, but to no avail, as the Yeti is still mobile and the web continues to advance. They make a dash for an archway and escape.
Meanwhile, Victoria finds the Doctor in the tunnels, accompanied by a Colonel Lethbridge-Stewart. She tells the Colonel about the fortress at Goodge Street, and, at his prompting, tells the Doctor about the presence of Travers and his apparent suspicions about the Doctor. The Colonel escorts them to the fortress.
With the Circle Line completely cut off and the fortress hemmed in, Knight is informed of the return of the Doctor and Victoria and the arrival of the Colonel. Knight goes down to talk to his new guests.

In the common room, the Doctor calms Victoria and says that the Colonel hasn't harmed him in any way. When Knight enters, the Colonel presents his papers of authorisation and tells Knight that he is Colonel Pemberton's replacement. The Colonel was part of the attacked ammunition party at Holborn, and Knight mentions to him that driver Evans survived also, still not quite certain if his new C.O. is the real thing. Travers bursts in and, after a happy reunion, takes the Doctor and Victoria to the lab. The Colonel questions who is actually in charge of the base.
Once away from army ears, the Doctor tries to confirm that suspicions are not focused on him, as Victoria had suggested. Travers rubbishes this, and Anne owns up to it being an idle thought of her own. They muse about the Great Intelligence and its reasons for trapping the TARDIS, while Victoria worries about Jamie.
Meanwhile, Jamie and Evans arrive at St Paul's tube station.
At the same time, Chorley is arguing with Arnold about trying to escape, saying his reports to the outside world are important. Arnold dismisses any thought of getting through the web but says there is a door that leads directly up to the surface. Chorley goes to investigate.
In the lab, Travers tells the Doctor about reactivating a control sphere, which must have allowed the Great Intelligence to zone back in on the spheres and the Yeti. Knight collects them all for a briefing to be given in the common room. Victoria asks if there is any news on Jamie; Knight is sorry that there isn't.
Evans plans to escape at the next station, Chancery Lane, hoping to find his lorry and get out of town. Jamie argues with him as they walk through the tunnels, but Evans separates from him.
At the briefing, the Colonel discuss the arrival of a mysterious mist in London: anyone who goes inside the mist never comes out again. The mist completely interferes with radio and other communications. The Colonel also explains how the mist led to the fungus and then, two days later, the Yeti. The Doctor and Travers note the new appearance of the Yeti compared to their adventures in Tibet. Anne reports that she and her father believe they could jam transmissions from the Intelligence but need more equipment. Chorley bursts in, clearly agitated that he was not told about this briefing, and argues that an exit to the surface, mentioned by Arnold, could allow a helicopter to airlift them out. The Colonel dismisses him, and his attempts to pull rank as a member of the press are met with scorn. Chorley leaves to question Weams in the Ops Room about tall buildings in this area, including the Post Office Tower. Weams leads him to a map to show him the position of the Tower but sees the further development of the fungus and leaves to tell the Colonel about another advance of the Web.
Jamie sees Evans approaching, hides, and surprises him. Evans pretends that he had a moment of conscience, but then admits the gates at Chancery Lane were locked. They make their way back to the fortress.
The Colonel decides to give Chorley a liaison job, coordinating things (and tucked safely out of the way in the common room), while the rest get to some real work. The Doctor suggests buying some time by blowing up the tunnel at Goodge Street and sealing themselves in. He plans to set off the explosives on a baggage trolley as it rolls down the tracks, therefore avoiding any Yeti attempts to cocoon it. The Doctor and Travers set to work on a detonator.
Meanwhile, someone in the fortress unlocks the main door, leaving the base open and vulnerable.
In the lab, Victoria recognises the model Yeti that Anne shows her (as she saw in Tibet), but as the Doctor comes in, Anne realises that one of the models is missing. The Doctor is clearly concerned by this.
Someone changes the base on the stolen model Yeti, then places it on the floor. It begins to beep. In response to the signal, a Yeti in a nearby tunnel comes to life and moves off.
Travers has constructed the mechanism for the detonator. Victoria points out that Jamie will be trapped outside the fortress if their plan succeeds.
The main door slowly opens and a Yeti walks in. The Yeti moves towards the model Yeti and breaks the lock to the explosives store.
The Doctor is running through the plan with the Colonel when Arnold comes in and reports the opening of the main door. Another soldier reports finding a broken padlock and a model of a Yeti outside the explosives store. They rush off to investigate. Weams picks up the model Yeti.
The Doctor and his army friends listen at the door and hear nothing. They open it to see a bright luminous web rendering their explosives futile.
Anne and Travers console Victoria, who is still worried about Jamie. Travers speculates that Jamie may be far safer than any of them are.
Arnold reports to the Colonel that the fortress is still Yeti-free. The Colonel decides to take a group of men to Holborn to see if any explosives are still usable; both the Doctor and the Colonel suspect this is a waste of time but know they must check. The Colonel will leave the Doctor four men. The Doctor announces that someone inside the base must be in league with the Yeti, citing the evidence of this latest precision attack.
Victoria foolishly tells Chorley about how she's worried the explosion may cut them off from the TARDIS and Jamie. Chorley, not knowing about the tunnel which would trap him in here, finds the temptation of the TARDIS too much. As the Doctor arrives, Chorley leaves surreptitiously. The Doctor soon discovers her gaffe and also discovers they are locked in the common room.
Chorley meets Jamie and Evans, safely arrived at the fortress, and they tell him the Colonel's party has gone to Holborn. Chorley leaves the base. Jamie and Evans hear the banging from the Common Room. Jamie releases the Doctor and Victoria, and he and the Doctor leave in pursuit of Chorley.
As Travers and Anne work in the lab, they hear a scream. Travers goes to investigate and soon finds Weams dead in the Ops Room, a Yeti model lying beside him. As Travers picks it up, a Yeti roars from behind him...
Episode 4[[edit] | [edit source]]
Travers tries to run but is attacked. Anne appears, and just as she sees her father on the ground, she too is struck down. The Yeti drag away the Professor.
The Doctor, Jamie, Victoria, and Evans are en route to Convent Garden, trying to intercept Chorley, who the Doctor suspects will attempt to use the TARDIS to escape from the Underground.
The Colonel and Arnold meet up with Knight, who reports running into the web a mere 100 yards from Holborn. Arnold notes that it was as if the Intelligence knew what they were up to. Knight suggests attempting another route, via Piccadilly, and the Colonel leads the party there.
The Doctor and his party run into more of the web before reaching Covent Garden, but he cannot be sure if Chorley made it to the TARDIS before the web arrived. He collects a sample of the web in Evans' tobacco tin (casually discarding the tobacco inside, much to Evans' irritation). The web pulsates and releases a shrill noise, but the Doctor manages to get a sample.

Arnold and Blake are investigating a tunnel, and just after Blake's return to the main party, the Doctor and party find Arnold. Arnold then reports back to the Colonel as the rest return to the fortress to experiment on the web.
The Doctor and company discover the main door hanging off its hinges and soon discover web-covered furniture, equipment — and bodies. They discover Anne in the lab and rouse her from unconsciousness. She is soon hysterical as she tells of her father's fate, and Jamie and Victoria help her to the common room. The Doctor speculates on why Travers wasn't killed — he believes they must have some use for him. Upon their return the Doctor tells the Colonel and Knight about what has happened. Evans is drafted by Arnold to help with the bodies, and on his exit, he greets the Colonel, whose memory is refreshed about the lorry driver to Holborn. The Doctor and the Colonel are summoned by Blake to the Ops Room, where more stations are being overtaken by the web as it advances towards Goodge Street. The Colonel muses about the Doctor's suggestion of a traitor in their midst. Knight and the Colonel suspect Travers having some sort of involvement, whilst the Doctor suspects Chorley. The Doctor tries to explain what exactly the Great Intelligence is, that he and his friends are time-travellers,and that their police-box-shaped craft is at Covent Garden. Knight responds with derision, but the Colonel accepts the Doctor's story. He asks the Doctor if the TARDIS could help them escape. The Doctor said it could but he needs to finish the work that Travers started. Jamie enters to take the Doctor to Anne, who is asking for him. Despite Knight's strong doubts, the Colonel decides to try to rescue the Doctor's craft. Knight wonders if this is a trap set up by the Doctor.
The Doctor explains that the only way to find Travers is to find the central control source. The Doctor wonders why the Yetis chose to attack now, and Anne tells the Doctor that Travers was about to connect a controlling unit to the sphere. The Doctor demands that Anne shows him the sphere.
Anne shows the Doctor a contraption she has made that controls the sphere but won't override the Intelligence's commands. The Doctor says they can fix that. Evans enters, giving the Doctor the model Yeti found by Weams' body, as per Arnold's instructions. The Doctor is horrified to be given it, and Evans denies any wrongdoing, as Anne realises all the other models are gone. Evans indignantly hands over his tobacco tin filled with web, for fear of being accused of wrong doing again.
The Colonel's plan gets underway: he and his party will attempt to reach Covent Garden station on the ground, while Arnold, Lane, and Evans will attempt to meet them underground via a baggage trolley, using it to carry the TARDIS back to the fortress; Knight is ordered to remain on duty at the fortress.
Meanwhile, the Doctor attempts to observe the web in the tin, but the tin is empty; the Doctor's suspicion of Evans grows. Arnold is also suspicious of Evans and warns him not to try and escape from his party. The Doctor informs Knight of Evans' potential involvement. The Doctor wants Knight to accompany them to the surface to obtain vital equipment needed to upgrade the controlling unit that is to be attached to the control sphere. He is initially unsure, but a bit of gentle persuasion from Anne sees him yield.
Arnold's party come up against a web barrier near Covent Garden, and Lane puts himself forward when Evans refuses to volunteer, to attempt to get through the web on the trolley with Arnold. The two men don respirator masks. Evans pays out a rope attached to the wagon as they go deeper into the web, but the two men scream as they enter, the web pulsating with light. Evans fearfully pulls at the rope, and the trolley emerges, with Lane's web-covered body sprawled out on it. Arnold is gone.
On street-level, the Colonel and his men arrive at Covent Garden but find Yeti waiting for them. After ducking into a builder's yard, the Yeti find another way in, and the men open fire to no effect. However, their hand grenades prove very effective, felling a great number of the robots. The Yeti also smash down the main gate and force the men across the yard, killing some soldiers as they advance. Three men trapped behind a trader's cart are pinned down and killed by web guns. The bazooka is also employed to good use and another soldier is killed before the remaining troops retreat into a warehouse.
Knight stands outside a nearby electrical shop, M. Thompson & Son Electricians, listening to the distant gun fire while the Doctor collects supplies. Knight goes in to hurry the Doctor when two Yeti appear in the doorway, felling Knight. The Doctor finds a model Yeti in Knight's pocket.
Once back in the base, the Doctor shows the model to Jamie, who puzzles over who must have planted it. Evans, again, protests his innocence. The Doctor speculates where the other models might be.
In the warehouse, Corporal Blake and the colonel have run out of ammo. They climb above some boxes. Blake is grabbed by a Yeti and is killed. The Colonel, the only survivor, runs back to the fortress.
The Doctor dismantles the model Yeti as he and Anne start work with their new equipment. Victoria and Jamie are discussing who the traitor might be, (Jamie suspects Chorley) when the Colonel staggers in and tells them of the fate of his men. Evans reports the fact that his party was all wiped out too. Suddenly the Doctor shushes the room when he registers a faint beeping sound. He realises the Colonel has the last model Yeti planted on him by the traitor. Suddenly, two Yeti burst into the room, accompanied by a possessed-looking Travers.
Episode 5[[edit] | [edit source]]

The Great Intelligence speaks through the possessed Travers, saying the trap laid for the Doctor was so that it could possess him and his unsurpassed mind. It has created a machine that will drain all past knowledge from the Doctor's mind, leaving his body unharmed and his mind wiped clean, but he must submit willingly. If the Doctor gives himself over to the Great Intelligence, all deaths will stop — both in the tunnels and in London. To ensure his submission, Travers takes Victoria hostage and leaves, giving the Doctor twenty minutes to decide. A Yeti remains outside the lab door, so Jamie cannot go after Victoria despite his anger, but the Doctor persuades everyone that the Intelligence cannot harm her or Travers if it is to obtain the Doctor's cooperation. Evans asks the Colonel why they don't just give the Doctor over to the Intelligence so they can all go home.
Travers and the Yeti take Victoria through the tunnels, Victoria subtly dropping her necklace on the track.
As the Doctor, the Colonel, Jamie and Anne discuss their options, Jamie and Evans come to loggerheads about the Welshman's insistence they hand the Doctor over. The Doctor sides with Evans and says he will hand himself over if he can't think of a plan. Evans discovers that a Yeti is no longer guarding them. The Colonel takes Evans and Jamie to search the base, while Anne and the Doctor work again on the control sphere and box.
Jamie wants to go up top to overtake the Yeti and ambush them. The Colonel is sceptical but complies when Jamie intends on going himself. Evans is to stay and guard the Doctor and Anne.
The Doctor has made a breakthrough regarding the control box and turns his attention to the sphere.
The Colonel and Jamie open the door to the surface and find the web pulsating beyond. The Colonel holds it off while Jamie opens a fire exit. The Colonel rushes away, allowing the web to creep in.
Meanwhile, the Doctor reactivates a control sphere just as Jamie returns to them, telling them of their situation. The Colonel and Jamie are dubious about the merits of the Doctor and Anne's work but are persuaded to leave them alone as they return to work on the control box.
Evans confronts the two men, claiming they must be working for the Intelligence: it did say it had another pair of hands working for it. Jamie dismisses his accusation, claiming it must have been Chorley. The Colonel and Jamie try their luck in the tunnel, ignoring Evans' show of ill-discipline
At Piccadilly Circus station, the Intelligence speaks through the air, orders Travers to release Victoria, and then releases him from possession. It promises the pair that it will reveal itself to them soon. As Travers recovers his wits, they try to escape from the Yeti on the platform, only to run into another.
The Doctor and Anne successfully use the box to control the sphere, but only at short range; they set to work on reprogramming the sphere itself. The next objective is to set it to work verbally. Anne reminds him he only has twelve minutes left.
The Colonel and Jamie make their way through the tunnel. Jamie is now hostile to the Colonel, suspecting him to be affiliated with the Great Intelligence. Jamie discovers Victoria's necklace on the tracks in the tunnel and continues after her.
At Piccadilly, now guarded by two Yeti, Staff Sergeant Arnold appears and, avoiding sight of the Yeti, tells Travers and Victoria he will try to get back to base.
Evans is startled by the appearance of a control sphere at his feet, but the Doctor stops him before he tries to shoot it. It is now under the Doctor's control. The Doctor and Anne leave for the tunnels, heading towards Warren Street to try to find a Yeti in which to put their control sphere and control. Evans refuses to join them.
The Colonel and Jamie meet up with a shaken Arnold. He cannot remember anything after entering the web. Despite Jamie's protests, he and the Colonel take him back to the base.
At a signal, the Yeti shepherd Travers and Victoria and move them along the platform.
In the Ops Room, Evans is hiding behind the electronically illuminated map board of the underground system, having heard something approaching. The Colonel, Jamie, and Arnold enter. Evans is shocked and speechless at seeing Arnold again. When Evans explains where the Doctor and Anne have gone, the Colonel and Jamie go out after them.
The Doctor and Anne encounter a wall of fungus, and as they examine it, they discover a Yeti is behind it. The Doctor hastily gets out the control box and — at dangerously close range — the Yeti freezes. They quickly replace its control sphere with theirs, and soon the Yeti is obeying the Doctor's commands.
Evans has dressed Arnold's head-wound, but as Evans returns the medical gear to the lab, he yells out in fear to Arnold; the wall of the laboratory is bulging, and it soon gives way as the mist, the precursor to the web, spills into the room.
Episode 6[[edit] | [edit source]]
Arnold and Evans abandon the base as it is engulfed by the web. Arnold wants to warn the others, but Evans deserts him, fearful of the web. Arnold angrily shouts after him.
The Doctor and Anne, in the tunnel with their controlled Yeti, decide not to tell anyone else about their success. The Doctor orders the Yeti to wait for them to leave, then resume acting for the Intelligence until he says otherwise. The Yeti obeys, and they leave.
Jamie and the Colonel meet up with the Doctor and Anne, who are surprised to hear that Travers and Victoria are at Piccadilly, and that Arnold (who is still alive) told them so. The Doctor and Anne deny that their technology worked and that they must return to HQ as the Doctor's twenty minutes are almost up.
The Doctor's Yeti reactivates after ninety seconds and is soon joined by two more Yeti who move off together into the tunnels.
Arnold is soon found by the party, and he tells the Colonel that the H.Q. has been swamped by web. No sooner are they all together than they are surrounded by the three Yetis.
In another tunnel, Evans successfully hides from a Yeti, but two more find and capture him, despite his best attempts at trying to talk his way out of it.
The Doctor and his colleagues are being led through the tunnels by two Yeti. Arnold asks the Colonel to create a distraction. The Colonel pretends to hurt his ankle and Arnold escapes from the Yeti.
Travers and Victoria are led into the Booking Hall at Piccadilly Station, where they discover a large glass pyramid; inside the pyramid is a smaller upside-down pyramid which forms a seat. Travers explains that this is the machine the Intelligence has created to drain the Doctor's mind. Victoria spots a figure lurking in the shadows, but it runs off before they can see who it is. As they discuss the Doctor's future, the Intelligence speaks to them through a speaker on the wall, insisting on their cooperation and non-interference. Travers wrings his hands at having brought this onto the world thanks to his curiosity.

As the main party is guarded on the Piccadilly platform, the Doctor explains to Jamie about the controlled Yeti. He gives Jamie a microphone to use to call the controlled Yeti to him — hopefully, it will be the right one.
A frightened Harold Chorley finds Arnold and tells him his stories of the surface, the Yeti, fear, and the strange machine at Piccadilly station, including the Yeti and their two prisoners, for it was he that Victoria saw lurking in the shadows. A suspicious Arnold wonders how he could possibly have survived all this time and tells Chorley to come with him.
Anne suggests the Doctor use his control box in order to escape, but the Doctor tells Anne there's no point in trying to escape now as he must meet the Intelligence face to face. The Colonel says that the Yetis have not noticed Jamie's disappearance and asks the Doctor if he's going to give himself up, for the good of everyone, including his friends. Before he answers, Evans is brought in. The Colonel tries to reprimand Evans for abandonment, but Evans says he was trying to save Travers and Victoria. Two Yeti start to move the Doctor away towards the Booking Hall, and he insists that his friends don't struggle or resist. As they leave, Jamie pops his head out from a large metal bin.
In a passageway, a Yeti approaches the Doctor carrying some kind of headset, and as it begins to lower it onto his head, he switches on his control box and the two Yeti become motionless. He takes the headset from the Yeti, makes some rapid adjustments to the circuits, and puts it on his head. He turns off the control box and the Yeti lead him away.
Anne is reunited with her father and the inner sanctum of the Great Intelligence. A worried Victoria asks about the Doctor and Jamie.
Back on the platform, Jamie is speaking into the microphone, attempting to bring the controlled Yeti to him. A Yeti appears, but though Jamie is unable to make it follow further commands, it does not harm him, but moves off back into the tunnels. As Jamie turns to leave, a Yeti is behind him.
Most of the group are now gathered in the Booking Hall, as the Doctor is ushered in, wearing the headset. As the Doctor again warns his friends away from interference, the Intelligence is heard thanking him for his cooperation. The Colonel yells out at the Intelligence to show itself, but it says that will happen soon enough. Chorley emerges, and the entire assembly gasps, thinking him to be the Great Intelligence. He desperately protests his innocence, exclaiming the identity of the real "traitor," Staff Sergeant Arnold.
The possessed Arnold appears now wearing a metallic headset, stating that it, the Great Intelligence, has manifested itself in his lifeless body. The Great Intelligence informs the Doctor's friends that it has no intention of letting them leave unscathed. Jamie is brought in by a Yeti, and all the survivors are present. Arnold orders Jamie to stand by the Doctor when, suddenly, a Yeti grabs Jamie by the throat. The Doctor protests and refuses further cooperation until Jamie is released, and Arnold orders the Yeti to release him with the threat that if the Doctor doesn't comply Jamie will be killed.
The Doctor is instructed to submit to the Intelligence, and he does so willingly and sits in the pyramid. The Great Intelligence connects a lead inside the pyramid to the Doctor's headset. As the Great Intelligence announces the beginning of the transfer, Jamie yells out for the controlled Yeti to attack. First, it attacks its comrades — in the ensuing confusion the other Yeti attack each other and the Colonel, who is knocked to the floor. The controlled Yeti then proceeds to throttle Arnold at the order of Jamie. As the transfer continues, the Doctor vociferously resists Jamie's attempts to rescue him. Anne and Prof. Travers assist Jamie as he pulls the Doctor, who is yelling and pleading to leave him in the pyramid, and soon the Doctor is free. Jamie pulls the wiring out of the pyramid, which explodes.
The Yetis are disabled, and Arnold is killed. As the smoke clears and congratulations are exchanged, the Doctor is furious and despondent at Jamie and the others. Becoming calmer, the Doctor explains that he had altered the circuits so that instead of the Intelligence draining his mind, he would have drained the Intelligence. Thus, instead of them putting an end to its evil, the Intelligence has simply been repelled into space and is free once more. They find Arnold's blackened husk of a body. Despite this, the Colonel and Anne are calling the Doctor a hero, and Chorley wants to make him a household name on his television programme. That's all he needs to hear: he gathers Jamie and Victoria and, after hasty goodbyes, heads to Covent Garden and the TARDIS.
The Doctor and his friends are lost in the tunnel. Jamie says there is no real rush, but the Doctor says they need to be safe before the trains start running again.
Cast[[edit] | [edit source]]
- Dr. Who - Patrick Troughton
- Jamie McCrimmon - Frazer Hines
- Victoria Waterfield - Deborah Watling
- Professor Edward Travers - Jack Watling
- Colonel Lethbridge-Stewart - Nicholas Courtney
- Anne Travers - Tina Packer
- Julius Silverstein - Frederick Schrecker
- Corporal Lane - Rod Beacham
- Corporal Blake - Richardson Morgan
- Captain Knight - Ralph Watson
- Harold Chorley - Jon Rollason
- Staff Sgt. Arnold - Jack Woolgar
- Craftsman Weams - Stephen Whittaker
- Soldier - Bernard G. High
- Yeti - John Levene, John Lord, Gordon Stothard, Colin Warman, Jeremy King, Roger Jacombs
- Soldier - Joseph O'Connell
- Driver Evans - Derek Pollitt
Uncredited cast[[edit] | [edit source]]
- Corpse of Newspaper Seller - Bert Sims
- Soldiers - Maurice Brooks, James Jordan, David Hacquet, Peter Adams
- Feet of Colonel Lethbridge-Stewart - Maurice Brooks
- Soldiers at Covent Garden - Terry Walsh, Derek Martin, Douglas Kirk, Philip Ryan, Tim Condren
- Great Intelligence Voice - Jack Woolgar (all DWM 235)
Crew[[edit] | [edit source]]
- Assistant Floor Manager - Roselyn Parker
- Costumes - Martin Baugh
- Designer - David Myerscough-Jones
- Fight Arranger - Derek Ware
- Film Cameraman - Alan Jonas
- Film Cameraman - Jimmy Court
- Film Editor - Philip Barnikel
- Film Editor - Colin Hobson
- Lighting - Clive Leighton
- Make-Up - Sylvia James
- Producer - Peter Bryant
- Production Assistant - Gareth Gwenlan
- Script Editor - Derrick Sherwin
- Sound - Ray Angel
- Special Sounds - Brian Hodgson
- Theme Arrangement - Delia Derbyshire
- Title Music - Ron Grainer
- Visual Effects - Ron Oates
Animation Team[[edit] | [edit source]]
- Animation by Shapeshifter
- Head of Studio Production - David Devjak
- Pipeline TD and IT development - Conor Hodder
- Technical Artist - Andrés Romero
- Asset Development and Animation - Chris Downey
- Track Read - Ian Spruce
- Animators
- Art Director - Selina Fenech
- Concept Art by AE Media, Singapore
- Compositing and Grading by Thaumaturgy
- Script Supervisor - Mark B. Oliver
- Sound Restoration and Mastering - Mark Ayres
- With Thanks to
- Opening Titles - Rob Ritchie
- Special Thanks to
- Richard Bignell
- Lee Binding
- David Butler
- Joshua Campbell
- Peter Crocker
- Persephone Devjak
- Martin Geraghty
- Toby Hadoke
- Paul Hembury
- Clayton Hickman
- Mark Humphries
- Sue Malden
- Luke Marcatili
- Pete McTighe
- Julia Mercer
- Philip Morris
- Richard Narramore
- Conor O'Reilly
- Andrew Pixley
- Joshua Reh
- Frank Reuter
- Adrian Salmon
- Peter Ware
- QAR - The Ark
- Business and Legal Affairs - Linda Duncan
- Production Finance - Aisha Bhatti
- Consumer Products
- Associate Producer - Damian Shanahan
- Line Producer - Chloe Grech
- Motion Capture Artist and Director - Adam Boys
- Executive Producers for Big Finish Creative
- Executive Producer for BBC Studios - Russell Minton
Worldbuilding[[edit] | [edit source]]
- Temple tube station and Liverpool Street tube station are two of the locations that have fallen to the Yeti.
- Colonel Lethbridge-Stewart replaces Colonel Pemberton as leader of the operation.
- The Doctor plays "The Skye Boat Song" on the recorder.
- Langley is one of the soldiers killed.
- Corporal Blake refers to the army in the Underground as "a right old Fred Karno's Army". Fred Karno was a music hall performer and "Fred Karno's Army" was a term for the volunteer brigades in World War I, impyling they were chaotic and disorganised.
Story notes[[edit] | [edit source]]
- This story directly follows on from The Enemy of the World. The Doctor is seen to have first a plaster, then a scar on his left cheek in episode one, from a wound he sustained in that story.
- Only episodes one, two, four, five and six of this six-part story exist in the BBC Archives as 16mm black & white film telerecordings.
- Episode three is the only missing episode known definitively to have an existing copy, but not in the BBC Archives. It was recovered along with the other episodes in Nigeria, but was apparently stolen by a station employee and sold to a private collector — likely due to its high value as the first appearance of the Brigadier. [3]
- This story acts as a sequel to The Abominable Snowmen, which also featured Yeti, the Great Intelligence, and Professor Travers.
- Patrick Troughton appears only in the reprise of episode two, as he was on holiday during the week it was recorded. As a result, the first meeting between the Doctor and Lethbridge-Stewart happens off-screen before episode three.
- Nicholas Courtney was originally cast in the role of Captain Knight while David Langton was cast as Colonel Lethbridge-Stewart. However, Langton gave up the role to accept another more attractive offer of work, and so Courtney was given the role of Lethbridge-Stewart and Ralph Watson was cast as Knight.
- To promote this story, a specially shot trailer featuring the Doctor in the London Underground talking to the audience about the upcoming Yeti adventure was featured at the end of The Enemy of the World episode six. The trailer is included on the BBC Audio release of that story, and is currently known to exist only as an audio recording. The trailer was later animated and featured on the animated release of this story.
- This is Peter Bryant's first story as full-time producer.
- Desmond Cullum-Jones was supposed to play a commissionaire, but the part was dropped in rewrites. (DWM 235)
- It is stated that this story takes place approximately 40 years after The Abominable Snowmen adventure in Tibet, which it states took place in 1935.
- Professor Travers is once again portrayed by Deborah Watling's father, Jack Watling. Deborah recalled that the sight of her dad in old-age makeup made her blow several takes by laughing.
- The original plan was to film in the London Undergrond, specifically in Aldwych and Covent Garden stations, but London Transport demanded and exorbitant fee and indicated that filming would be restricted to just a handful of overnight hours. It was decided to recreate London Underground on studio sets. The recreations were so realistic, the BBC apparently received a letter of complaint from London Transport, claiming filming had been done on their property without permission.
- The scene in Julius Silverstein's house originally took place in the Natural History Museum, but they declined permission for the BBC to film there.
- The closing credits for each episode except episode six were rolled against an image of the pulsing web.
- Once again, the scripts did not describe the Yeti in any great detail so costume designer Martin Baugh kept the same basic design that he created for the creatures in The Abominable Snowmen but altered them slightly so they would not look the exact same for two consecutive stories.
- During the interview between Harold Chorley and Captain Knight in episode one, it is mentioned that the army task force's commanding officer, who has been killed in an earlier Yeti attack, was Colonel Pemberton. This was an in-joke referring to former story editor Victor Pemberton, who worked with Mervyn Haisman and Henry Lincoln on The Abominable Snowmen.
- Another in-joke features in the official BBC reconstruction and animated version of episode three, when Driver Evans takes a chocolate bar from a platform vending machine. The bar's wrapper is shown to read "Camfield's Fairy Milk Chocolate" — a reference to director Douglas Camfield and to comply with the BBC's policy of not displaying brand named products on screen. As episode three has yet to be recovered, it remains unknown as to whether the wrapper was shown in detail on-screen and what name it bore. Bearing in mind the vending machine was unbranded, it is likely the wrapper was likewise.
- Episode one, then the only episode of the story known to exist, was shown, along with The Abominable Snowmen episode two, as part of BSB's Doctor Who Weekend in September 1990, under the banner of The Yeti Rarities.
- The surviving episode one (at the time the only episode known to exist) was repeated on BBC Four on 26 June 2004 as part of a night about cult television of the 1960s. Other programmes that night included a documentary about the BBC Radiophonic Workshop, and an episode of Verity Lambert's series Adam Adamant Lives.
- Episode one was also repeated on BBC Four as part of the BBC's London Underground night on 18 March 2007.
- Episodes two and four to six were revealed to have been returned to the BBC on 11 October 2013.[4]
- The year in which The Web of Fear takes place is not directly stated in the story. The most information given on the matter is in part two, when Edward Travers says that it has been about 40 years since he met the Doctor in 1935. A number of Doctor Who stories in other media have placed the event of the story to an exact year.
- The novel Who Killed Kennedy states that this story takes place in August 1966, one month after the events of The War Machines and The Faceless Ones.
- The novelisation of Downtime, the novel Revolution Man, and the mockumentary Global Conspiracy? all contain minor references to the events of The Web of Fear occurring in 1968.
- It is a central fact in the Lethbridge-Stewart series of novels that The Web of Fear took place in February 1969.
- The short story The Enfolded Time offers a date which is most accurate to the actual story: March 1975. It also states that both February 1969 and March 1975 are accurate, depending on the individual, a result of twenty years of history being condensed into ten due to the Doctor's frequent visits to Earth.
- A UNIT Chronology article in the 1991 Doctor Who Magazine Winter Special, written in an in-universe style, dates the events to 1971, seemingly taking its cue from the fact that The Invasion, said to occur four years later, was placed in 1975 by contemporary publicity material.
- The Yeti appear again briefly in the television story The Five Doctors and the novel Downtime.
- The Great Intelligence next appears in The Snowmen, which is a prequel to this story. In it, the Eleventh Doctor shows the Great Intelligence a lunchbox with a map of the London Underground in 1967, and calls the Underground "a key strategic weakness in metropolitan living".
- The attack at Holborn, and events that lead to the Doctor and Lethbridge-Stewart meeting, are dramatised in the short story The Ambush!, which serves as a prelude to the Lethbridge-Stewart series of novels that take place only weeks after The Web of Fear.
- Ralph Watson, who played Knight, kept one of the Yeti models from this story.
- A poster for the film In the Heat of the Night is seen on the wall of one of the tube stations in episode six, though to avoid "product placement," the title Block-Busters was substituted.
- Deborah Watling was fond of recalling one of the many pranks that befell her. One scene required the Doctor, Jamie and Travers to search for her and Jamie was supposed to find Victoria's handkerchief. For one take, Frazer Hines picked up a pair of knickers and said, "These are Victoria's, she must have gone this way!" Patrick Troughton took them and said, "Yes, they are, aren't they? Yes, she must". Then Jack Watling took them and said, "How do you know they're hers?" This prompted the crew to burst out laughing.
- This would be the final serial in which 35mm film would be used for location filming. Starting with the next story, 16mm film would be used instead.
- Several props were reused from The Abominable Snowmen, including control spheres and model Yeti.
- Harold Chorley was originally a Member of Parliament who was accompanying Colonel Lethbridge-Stewart on a fact-finding mission.
- At one stage, Arnold survived the climax and it was revealed that he was actually a museum commissionaire who had been attacked by the first of the revived Yeti and then dominated by the Great Intelligence.
- This was originally meant to be the finale to season five, but it was pushed back when Fury from the Deep needed re-writes.
- Nicholas Selby was sought for the role of Col. Lethbridge-Stewart.
- The Yeti were re-designed for their re-appearance, partially because the original costumes had deteriorated in storage and partially because Douglas Camfield felt that they lacked menace. They now sported long claws and large glowing eyes, and were more compact than their predecessors. Brian Hodgson developed a roar for the once silent creatures. One original Yeti appears as a model in Silverstein's collection.
- In Col. Lethbridge-Stewart's first scene, Maurice Brooks doubled for Nicholas Courtney to avoid having to hire the actor for an extra week.
Ratings[[edit] | [edit source]]
- Episode 1 - 7.2 million viewers
- Episode 2 - 6.8 million viewers
- Episode 3 - 7.0 million viewers
- Episode 4 - 8.4 million viewers
- Episode 5 - 8.0 million viewers
- Episode 6 - 8.3 million viewers
Myths[[edit] | [edit source]]
- One of the sound effects the Radiophonic Workshop recorded to create the Yeti's roar was the sound of a toilet flushing. (Brian Hodgson confirmed on the documentary, Going Underground, that this was "the figment of someone's imagination".)
Filming locations[[edit] | [edit source]]
- Old Brewer's Yard, Shelton Street, London (UNIT hide in warehouses)
- Shelton Street, Covent Garden, London (Yeti attack UNIT)
- BBC Television Centre (Puppet Theatre)
- Ealing Television Film Studios, Ealing Green, Ealing
- Lime Grove Studios (Studio D), Lime Grove, London
Production errors[[edit] | [edit source]]
Original Production[[edit] | [edit source]]
- In episode one, right before the Doctor activates his device for escaping from the web, he pushes a lever on the TARDIS console up; as soon as he lets go, gravity pulls it back down again.
- When the Doctor shines his torch on the "Covent Garden" sign on the wall of the station, he first shines it on the "o" of 'Covent', missing the "C", but still reads it as "Covent".
- In episode two, when the soldiers are shooting at the advancing Yeti, there is a moment where the tunnel is completely dark and then it suddenly becomes lighter.
- As Captain Knight flirts with Anne Travers in episode one, a pencil (or something) is heard falling to the floor.
- The credits of episode two misspells script editor Derrick Sherwin's first name as "Derek".
- Whenever the Colonel fires his pistol in episode four, sometimes there is a flash from the barrel and sometimes there isn't.
- When Travers appears at the end of episode four, he stands a little behind the two Yeti so that only his head is visible, his arms are by his side and no one else says anything. But in the reprise at the beginning of episode five, he steps further forward, his left hand is pointing forward and the Doctor, Victoria, Anne and the Colonel all make different exclamations.
- After Victoria is taken hostage in episode five, Jamie tries to go after her. When he opens and closes the door, the wall shakes visibly.
- When the Doctor is tinkering with the wires inside the helmet, the Yeti's hand on his shoulder briefly moves; even though the Yeti is supposed to have been switched off due to the control box.
- At several moments during the final battle in episode six, the zips are visible on the Yeti's backs.
Animated Version[[edit] | [edit source]]
- Just after Travers places the detonator on the table, his hand and the Doctor's hand pass through each other.
- In the scene where Chorley is talking to Victoria, there are a few moments where the animation and soundtrack are not synchronized together properly — e.g. when Chorley sits down, his chair is heard moving just after he has sat down.
Continuity[[edit] | [edit source]]
- An Archibald Hamish Lethbridge-Stewart was previously encountered by the First Doctor who, just prior to his regeneration, assured him that he would check up on his family. At that point, the Doctor was in the company of a future incarnation, who was well aware that he would make good on that promise. (TV: Twice Upon a Time)
- The Doctor next sees Colonel Lethbridge-Stewart as Brigadier Lethbridge-Stewart. The events of the Underground were the catalyst behind the creation of UNIT. (TV: The Invasion)
- The Seventh Doctor later tells Ace about the Yeti incursion in the London Underground. (TV: Remembrance of the Daleks)
- These events were explained by the government's cover story that there had been a major nerve gas leak. (PROSE: Who Killed Kennedy) It was also explained that bears had escaped from London Zoo, to account for the Yeti presence. (PROSE: The Forgotten Son; AUDIO: Time of the Intelligence)
- The Doctor and companions go to London in search of Professor Travers, only to find that he has gone to America with daughter Anne. (TV: The Invasion)
- Following its encounters with the Eleventh Doctor, the Intelligence travelled back in time and makes use of the leftover Yeti and technology two weeks after this story. (TV: The Name of the Doctor, PROSE: The Forgotten Son)
- An alternate reality existed in which Britain was a fascist state known as the Republic of Great Britain. The Great Intelligence's takeover attempt was thwarted by Koschei, a benevolent version of the Master, who sacrificed his TARDIS to destroy the web. (PROSE: The Face of the Enemy)
- In an alternative reality, Lethbridge-Stewart died and the Intelligence won. In this timeline, it subsumed Anne Travers and spread its influence throughout Southern England. (PROSE: Legacies)
- The Third Doctor later had his own London Underground adventure with the Brigadier. (COMIC: Secret of the Tower)
- Anne Travers was a protégée of Professor Rachel Jensen at the University of Cambridge. (PROSE: The Scales of Injustice)
- The Brigadier was unaware that Jamie was from 1746 until he was told as much by Polly Wright in 2009. (AUDIO: The Three Companions)
- Sir Toby Kinsella coordinated the government response the Yeti invasion and as such became connected to the Great Intelligence in a similar manner to Travers. (AUDIO: Time of the Intelligence)
- A control sphere was later retrieved by the Ninth Doctor from Mornington Crescent tube station in 1999. (PROSE: Have You Seen This Man?)
Home video and audio releases[[edit] | [edit source]]
DVD release[[edit] | [edit source]]
Episode one, the only episode of the story then known to exist, was released on the Lost in Time DVD box set on 1 November 2004, along with what was then the only surviving footage from episodes two, four and five.
Lost in Time (Region 2)
Lost in Time (Region 4)

Lost in Time (Region 1) Full Set
Lost in Time (Region 1) - Troughton Box
Lost in Time (Region 4) (re release)


Released:
- Region 2 - 1 November 2004
- PAL - BBC DVD BBCDVD1353
- Region 4 - 2 December 2004
- Region 1 - 2 November 2004
- NTSC - Warner Video E2082 (Troughton 2 disc set) / E2083 (Box set)
A Standard Edition DVD was released in the UK on 24 February 2014 and in the US on 22 April 2014[5]. It featured a reconstruction of the missing episode three, which comprised of John Cura's tele-snaps linked up to the original soundtrack recording. Unlike previous Doctor Who DVDs, this release contained no commentaries, information text or other special features, merely the restored episodes and a trailer for The Enemy of the World. It was also released in a limited edition slipcase that came with a t-shirt which was available from the BBC Shop UK.

Region 2 cover

Region 2 Limited Edition slipcase cover

Region 1 cover

Region 4 cover


The story was released as a Special Edition on DVD, Blu-ray and as an exclusive Steelbook in the UK on 16 August 2021 and on Special Edition DVD in the US on 1 February 2022, with the missing episode three represented with animation in colour and black-and-white, with the tele-snap reconstruction as a bonus feature.
Special Features[[edit] | [edit source]]
- Commentary (moderated by Toby Hadoke except where noted):
- Episode 1 - Actors Ralph Walton (Captain Knight), Frazer Hines (Jamie) and Tina Packer (Anne Travers)
- Episode 1 - Actor Deborah Watling (Victoria) and story editor Derrick Sherwin moderated by Gary Russell in 2004
- Episode 2 - Studio cameraman Roger Bunce and special sound designer Brian Hodgson
- Episode 3 - Motion Capture artist and director Adam Boys and head of studio production (Shapeshifter) David Devjak
- Episode 4 - Actors Ralph Watson, John Levene (Yeti) and stuntman Derek Martin (Soldier)
- Episode 5 - Frazer Hines and Tina Packer.
- Episode 6 - Frazer Hines, make-up designer Sylvia James and Tim Woolgar, son of actor Jack Woolgar (Staff Sgt Arnold)
- The Missing Years - A 1998 documentary concerning the loss and recovery of episodes of 'Doctor Who' presented by Frazer Hines and Deborah Watling and featuring film collectors Gordon Hendry, David Stead and Ian Levine, former BBC archive selector Sue Malden, film researcher Damian Shanahan and journalist Jan Vincent-Rudzki. A 2004 update also features film collector Bruce Grenville with Paul Scoones and Neil Lambess who were involved in the recovery of the 1965 episode 'The Lion'.
- The Web of Fear: A reconstruction of Episode 3 from off-screen Tele-snaps and soundtrack recordings.
- Photo Gallery - Images from the BBC Photo Library and on-set photographs taken by design assistant Tony Cornell, stuntman Tim Condren and others, accompanied by sound effects and music for the serial by Brian Hidgson.
- Going Underground: Making 'The Web of Fear' - Actors Frazer Hines (Jamie), John Levine (Yeti), Derek Martin (Soldier), Tina Packer (Anne Travers) and Ralph Watson (Captain Knight) with radiophonic sound designer Brian Hodgson, make-up designer Sylvia James and Tim Woolgar (son of actor Jack Woolgar (Staff Sgt Arnold)) recall the production of this serial.
- Shapeshifter Animation Process - The pitch video for 'The Web of Fear' in which Shapeshifter Managing Director David Devjak discusses the motion capture technique and its potential for recreating missing episodes.
- Trailer - An animated recreation of the specially-made section of a trailer for the serial as aired on BBC-1 on 27th January 1968.
- The Many Voices of Jack Woolgar - Jack Woolgar's recording's of his own experiments with different voices for the Intelligence's dialogue and his accent as Staff Sgt Arnold.
- Scripts - A full set of camera scripts and 'Radio Times' cuttings for 'The Web of Fear' in PDF format accessible via a computer DVD or Blu-Ray ROM drive.

Special Edition Region 2 cover
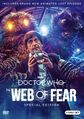
Special Edition Region 1 cover

Special Edition Region 4 cover

Region B Blu-ray cover

Region B Blu-ray Steelbook


Digital releases[[edit] | [edit source]]
- On Friday, 11 October 2013, following a press announcement the day before, the previously existing episode one and all the newly discovered in Nigeria episodes of this story were released in iTunes stores (Australia, Canada, France, Germany, UK and US) as Doctor Who: The Classic Series collection Lost Episodes: Doctor Who: The Web of Fear with the still missing episode three reconstructed using stills and the original soundtrack.
- It has also been added to Amazon Video (UK) as Season 41 of Doctor Who (Classic) series.
- The Web of Fear is available for streaming through BritBox (US) as part of Season 5 of Classic Doctor Who.

Lost Episodes: The Web of Fear original iTunes cover

Lost Episodes: The Web of Fear second iTunes cover


VHS releases[[edit] | [edit source]]
Episode one, the only episode of the story then known to exist at the time, was released alongside The Faceless Ones episodes one and three and the remaining episodes of The Reign of Terror as part of a two-cassette release entitled Doctor Who: The Reign of Terror. This release marked the final time any of the show's material was made available on the VHS format.
Released:
- PAL - BBC Video BBCV7335
- NTSC - Warner Video E1853
Notes: The US release was also located in The End of the Universe Collection.
- Editing of the surviving episodes for VHS and DVD release was completed by the Doctor Who Restoration Team.

Reign of Terror Boxed Set (UK release)

Web of Fear VHS cover - inside Reign of Terror Boxed Set (UK release)
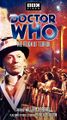
Reign of Terror (US release)
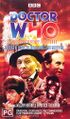
AUS VHS Cover


Audio releases[[edit] | [edit source]]
- The soundtrack was released on CD, with linking narration by Frazer Hines, on 6 March 2000. It has been re-released in two box sets, first in the Yeti Attack set (with The Abominable Snowmen, released 7 July 2003), and second as part of the Doctor Who: The Lost TV Episodes - Collection Five set (released 2 August 2012).

CD release

Yeti Attack box set

The Lost TV Episodes - Collection Five
.jpg)


Commentary[[edit] | [edit source]]
- An unofficial commentary to the story, moderated by Toby Hadoke, was released by Fantom Films in November 2015 under the title Who Talk, on CD and download. The commentary brought together Deborah Watling, Ralph Watson, Derek Martin, John Levene, Sylvia James and Roger Bunce, with a commentary for the third episode provided by Sue Malden.
Footnotes[[edit] | [edit source]]
- ↑ Other sources disagree on the precise date of this story. See: Dating protocol and UNIT dating controversy for more information
- ↑ https://www.doctorwho.tv/news/?article=the-web-of-fear-new-animation#_
- ↑ https://www.doctorwhonews.net/2015/09/whatever-happened-to-web-of-fear-3.html
- ↑ http://www.mirror.co.uk/tv/tv-news/doctor-who-nine-lost-episodes-2358386
- ↑ http://www.tvshowsondvd.com/news/Doctor-Web-of-Fear/19389
External links[[edit] | [edit source]]
- The Web of Fear at the BBC's official site
- The Web of Fear at RadioTimes
- The Web of Fear at BroaDWcast
- The Web of Fear at the Doctor Who Reference Guide
- The Web of Fear at Shannon Sullivan's A Brief History of Time (Travel)
- The Web of Fear at The Locations Guide
Footnotes[[edit] | [edit source]]
| ||||||||||||||||||||||