The War Games (TV story): Difference between revisions
(Undo revision 1664913 by Shambala108 (talk)it's a fact) |
m (Bot: Cosmetic changes) |
||
| (392 intermediate revisions by more than 100 users not shown) | |||
| Line 1: | Line 1: | ||
{{title dab away}} | |||
{{real world}} | {{real world}} | ||
{{ | {{ImageLinkTV}} | ||
{{Infobox Story | {{Infobox Story SMW | ||
|image = Kill the doctor.JPG | |||
|image= Kill the doctor.JPG | |series = [[Doctor Who television stories|''Doctor Who'' television stories]] | ||
|series=[[Doctor Who television stories|''Doctor Who'' television stories]] | |season number = Season 6 (Doctor Who 1963)| | ||
|season number= | |season serial number = 7 | ||
|story number= 50 | |story number = 50 | ||
|doctor=Second Doctor | |doctor = Second Doctor | ||
|companions= [[Jamie McCrimmon|Jamie]], [[Zoe Heriot|Zoe]] | |companions = [[Jamie McCrimmon|Jamie]], [[Zoe Heriot|Zoe]] | ||
|featuring= | |featuring = Jeremy Carstairs{{!}}Carstairs | ||
|enemy= [[The War | |featuring2 = Jennifer Buckingham | ||
|setting= [[ | |featuring3 = the War Chief{{!}}the War Chief | ||
|writer= | |featuring4 = First Time Lord (The War Games){{!}}First Time Lord | ||
|director= [[David Maloney]] | |featuring5 = Adelphi | ||
|producer= [[Derrick Sherwin]] | |featuring6 = Socra | ||
|novelisation= Doctor Who and the War Games | |enemy = [[The War Lord]] | ||
|epcount=10 | |setting = [[War World]], [[Gallifrey]] | ||
|broadcast date= | |writer = Terrance Dicks, Malcolm Hulke | ||
|network= | |director = [[David Maloney]] | ||
|format= 10x25-minute episodes | |producer = [[Derrick Sherwin]] | ||
|production code= [[List of production codes|ZZ]] | |music = [[Dudley Simpson]] | ||
|prev=The Space Pirates (TV story) | |novelisation = Doctor Who and the War Games (novelisation) | ||
|next= Spearhead from Space (TV story) | |adapted into = War World (short story) | ||
|trailer = Doctor Who Season 6 The War Games | |epcount = 10 | ||
|clip=The Doctor Summons the Time Lords - The War Games - Doctor Who - BBC | |broadcast date = 19 April - 21 June 1969 | ||
|clip2=Second Doctor regenerates - Patrick Troughton to Jon Pertwee | |network = BBC1 | ||
}} | |format = 10x25-minute episodes | ||
{{dab page|War Games (disambiguation)}} | |thwr = 60 | ||
'''''The War Games''''' was the seventh and | |thwr2 = 74 | ||
|thwr3 = 192 | |||
|thwr4 = 200 | |||
|thwr5 = 201 | |||
|serial production code = [[List of production codes|ZZ]] | |||
|prev = The Space Pirates (TV story) | |||
|next = Spearhead from Space (TV story) | |||
|trailer = Doctor Who Season 6 The War Games | |||
|clip = The Doctor Summons the Time Lords - The War Games - Doctor Who - BBC | |||
|clip2 = Second Doctor regenerates - Patrick Troughton to Jon Pertwee | |||
}}{{dab page|War Games (disambiguation)}} | |||
'''''The War Games''''' was the seventh and final serial of [[Season 6 (Doctor Who 1963)|season 6]] of ''[[Doctor Who]]''. It was the final story of the 1960s and the last produced in monochrome. It was notable for introducing the [[Time Lord]]s and for being the first time that the Doctor's [[Gallifrey|home planet]] was seen. It was also the first story in which [[Derrick Sherwin]] was credited as [[producer]]. Discounting ''[[Season 23 (Doctor Who 1963)|The Trial of a Time Lord]]'' as four narratively linked stories, it was the longest ''Doctor Who'' story to survive the [[Missing episodes|purging of the BBC's videotape archive]] and currently marks the earliest point in the series where first-time viewers may begin watching ''Doctor Who'' in chronological order without encountering any missing episodes. It was also the first story to have a large gap of time between it and the next one. | |||
The final episode saw the departure of [[Patrick Troughton]] as the [[Second Doctor]] and [[Frazer Hines]] and [[Wendy Padbury]] as [[companion]]s [[Jamie McCrimmon]] and [[Zoe Heriot]]. It was the first time in the history of ''Doctor Who'' that either a companion or an incarnation of [[the Doctor]] made their last regular appearance in the concluding episode of a season. It was also the first time that an incarnation of the Doctor and all his companions were written out of the program in the same story. | |||
Also, unlike most [[regeneration]] (or, as it was named here, "[[change of appearance]]") stories, the [[Jon Pertwee|new lead actor]] and the Doctor's [[Third Doctor|next incarnation]] did not appear in the final moments of the tenth part, in fact the [[Second Doctor's change of appearance]] isn't fully shown on screen, although his face is shown contorting as he's shown spinning away at the very end of the story. This marks the first and so far only time in the show's history that a story featured the last regular appearance of one of the Doctor's incumbent incarnations without revealing the succeeding incarnation at the end, with viewers having to wait six months until they would be able to get their first glimpse of the next Doctor. Because of the six month gap between the end of this story and the first story of [[Season 7 (Doctor Who 1963)|Season 7]] [[Polystyle Publications, Ltd.|Polystyle Publications]], the official ''[[Doctor Who]]'' comic licensees at the time, opted to continue publishing stories starring the Second Doctor ''after'' his last regular TV appearance rather than before, given the ambiguous ending of this story. The last comic story to have the Second Doctor as the leading incarnation, [[The Night Walkers (comic story)|The Night Walkers]], shows the start of the Second Doctor's change of appearance, beginning the Doctor's sentence and exile on Earth, and leading directly into the [[Spearhead from Space (TV story)|next TV story]]. The fan theory of [[Season 6B]] later also developed from the serial's ambiguous ending. | |||
The | The story also featured a father and son playing roles on screen: [[David Troughton]], the son of Patrick Troughton, appeared in this story. | ||
== Synopsis == | == Synopsis == | ||
[[Second Doctor|The Doctor]], [[Jamie McCrimmon|Jamie]] and [[Zoe Heriot|Zoe]] arrive on an unnamed planet. At first believing themselves in the midst of [[World War I]], they realise it | [[Second Doctor|The Doctor]], [[Jamie McCrimmon|Jamie]] and [[Zoe Heriot|Zoe]] arrive on an [[War World|unnamed planet]]. At first believing themselves to be in the midst of [[World War I]], they realise it is one of many [[War Game|War Zones]] overseen by the [[War Lord]]s, who have kidnapped large numbers of human soldiers in order to create an army to conquer the galaxy. Infiltrating the control base, the Doctor discovers that [[the War Chief]] is also a member of [[Time Lord|his own race]]. The creeping realisation sets in that the Doctor cannot solve this problem alone, and that his days of wandering may be at an end... | ||
== Plot == | == Plot == | ||
=== Episode one === | === Episode one === | ||
[[File:Doctor & zoe & jamie.JPG|thumb|[[Second Doctor|The Doctor]], [[Zoe Heriot|Zoe]] and [[Jamie McCrimmon|Jamie]] realise where they are]] | [[File:Doctor & zoe & jamie.JPG|thumb|[[Second Doctor|The Doctor]], [[Zoe Heriot|Zoe]] and [[Jamie McCrimmon|Jamie]] realise where they are]] | ||
The TARDIS lands in a desolate wasteland on Earth. The crew laugh as Jamie leaves the TARDIS and treads directly into a puddle. As they explore, they see [[barbed wire]], and the discovery of a pith helmet allows the Doctor to place them in history. Bombs start to fall, and the crew duck for cover. They are surprised when they are confronted by a woman who says that they need to get to safety. She is heading to [[Ypres]]. They encounter enemy soldiers who lead them away. | |||
The | The woman is driving the soldiers, the Doctor and Jamie across No Man's Land in an [[ambulance]] when they are met by a British lieutenant named [[Jeremy Carstairs|Carstairs]]. He asks to be taken back to base. | ||
In a trench, a major is told that an ambulance is coming in. He orders protective fire. The passengers clamber into the trench. The lieutenant, by the name of Carstairs, tells the major about the civilians found in No Man's Land, which shocks the major. | |||
Outside, the Doctor is explaining trench warfare to Jamie. They decide to escape but are stopped by Carstairs. They are summoned to see the major. | |||
Major Barrington gets word from General Smythe that they are to go over the top tomorrow. The Doctor, Jamie and Zoe enter alongside the ambulance driver who introduces herself to Barrington as Lady Jennifer Buckingham. The major casts his eye over the civilians. He suspects Jamie to be from the Highlander regiment and says that war is no place for a young woman like Zoe. He starts to suspect they may be [[spy|spies]] and contacts General Smythe. | |||
Smythe asks for the civilians to be sent to him. He moves into an adjoining room and begins to pull back a picture. He is interrupted by a soldier who he shouts out. When alone he pulls back the picture to reveal a communications device. He states that the "reinforcements are acting quiet" and that there are "at least 5000 specimens". | |||
Barrington orders the Doctor, Jamie and Zoe to go. Jamie loses his temper and shouts at him, and guns are drawn. The Doctor states they had better go. Barrington says they will fix Jennifer's ambulance. Carstairs says he does not hold much hope for the Doctor, Jamie and Zoe as Smythe has the nickname of "the Butcher". | |||
The Doctor, Jamie and Zoe are marched into Smythe's room. Jamie is still complaining. Captain Ransom goes to get Smythe but finds him not in his room. Ransom, flustered, orders them to be taken to the cells. | |||
Jennifer and Carstairs talk. They both are experiencing memory issues. They put this down to the ravages of war. Barrington tells them that they are all wanted at headquarters. | |||
Jamie and Zoe inspect the cell. There is no way out. Smythe emerges from his room. Confused, Ransom tells him that the civilians are here and that he came to tell him but he wasn't there. Smythe puts on his glasses and says that he was sleeping and that Ransom didn't want to disturb him. Blindly, Ransom agrees. Barrington, Jennifer and Carstairs enter. Smythe insists that Carstairs and Ransom know each other. They seem unsure. Smythe puts the glasses on and says they went to school together. They both instantly agree. | |||
Later that day the Doctor, Jamie and Zoe are brought into Smythe's room. He reads the crimes alleged against them. He states they waylaid the ambulance to get into the trenches and that they were attempting to escape back to the Germans with information. Jamie is charged with [[desertion]] while Zoe and the Doctor are charged with [[espionage]], all crimes that carry the punishment of death. The Doctor asks if he can cross examine Carstairs and Jennifer. Smythe agrees but closes down all lines of questioning. They are marched away. Barrington and Ransom both seem to think there is not enough evidence to convict them. Smythe puts on his glasses and says they are obviously guilty. They concur. | |||
The Doctor, Jamie and Zoe are marched back in and told they are guilty. Jamie is to be taken to a military prison to await [[court martial]], Zoe is sentenced to ten years penal servitude and the Doctor is to be executed at dawn. The Doctor rails against the unfairness of the system. Jamie protests and is manhandled away. Jennifer pleads with Ransom to allow some clemency for Zoe. It is agreed she will stay with Jennifer tonight. The Doctor heads off to the cells. | |||
Once in the cells, the Doctor questions the soldier as to how long he has been at the front. He cannot remember and gets angry at the Doctor. Ransom comes to Smythe's quarters with the key to the Doctor's cell. He puts it under his pillow and goes to sleep. In the middle of the night, Zoe sneaks into Smythe's quarters. He is not there. She looks for the key and in the process of doing so finds the screen behind the picture. She eventually finds the key and sneaks away. Hearing someone approaching, the Doctor hides behind the prison door. He is overjoyed to find it is Zoe. They decide to find Jamie. As they leave, they are met by Ransom and the firing squad. Outside the Doctor is put up against the wall. Zoe struggles to break free. Orders are given. A gunshot ring out and the Doctor grimaces. | |||
=== Episode two === | === Episode two === | ||
The | The shot that rang out was from a window. A soldier has been wounded. The soldiers return fire. In the chaos, Zoe unties the Doctor and they escape. | ||
Smythe reports to his video screen that he is leaving for the conference. A unit materialises behind him. As the door opens, Ransom enters. Smythe puts on his glasses and says he is leaving for an important meeting. He climbs into the machine, and it dematerialises. Ransom does not bat an eyelash. | |||
A [[Redcoat (The War Games)|Redcoat]] is thrust into [[prison]] with Jamie. He is scared and doesn't know how he got there. He thinks it is [[1745]]. | |||
The Doctor is spying on the military prison through a [[telescope]]. He commandeers a military vehicle and acts like it was sent for him. A bemused soldier drives him into the prison. | |||
Jamie questions the Redcoat. The Redcoat remembers stumbling into some mist and then, when it cleared, finding himself flanked by big guns and horseless carts. He was then brought to the prison. He is distrustful of Jamie. | |||
Commandant Norton is disturbed from his [[tea]] by the Doctor, who pretends he is from the War Office and has been sent to inspect the prison. Zoe is his secretary. When Norton asks for ID, the Doctor pretends to be outraged at his impertinence. | |||
Ransom is concerned that they have lost the Doctor and Zoe. He and Carstairs go to look for him whilst Jennifer stays at headquarters. | |||
The Redcoat and Jamie are fighting. When the soldiers come in to break them up, they turn on them and escape. | |||
Carstairs returns, having found nothing. Jennifer says she has started to remember getting lost in some mist before finding herself here. Carstairs wonders if it is a new gas. | |||
Norton is showing the Doctor the plans of the prison. He asks to talk to a prisoner. Norton receives a phone call to say that a Scotsman and a Redcoat have escaped. Jamie and the Redcoat run into some soldiers. A shot is fired. | |||
Norton is informed that the prisoners have been caught and that the Redcoat has been shot in the leg. The Doctor demands an interview with the other prisoner. Jamie is manhandled to the main building. | |||
Before Jamie can give the game away, the Doctor continues the farce. Norton has had enough of the Doctor and goes to ring Smythe. Zoe smashes a vase over his head. As they make to leave, they are caught by Ransom. | |||
Jennifer and Carstairs recall the court martial and think that Smythe is corrupt. Ransom returns and explains the recapture of the civilians. Carstairs questions Ransom about the court martial, and he shrugs it off. Carstairs decides to speak to the prisoners. | |||
The Doctor, Jamie and Zoe are questioning the anachronisms of their surroundings. They are seemingly in [[1917]] but with a Redcoat and a video communication system from the distant future. Carstairs enters. | |||
Jennifer questions Ransom as to whether Smythe often disappears at the drop of a hat. Ransom shrugs it off and is about to go and inspect the prisoners, before Jennifer engages him in conversation to stall him. | |||
The Doctor, Jamie and Zoe have explained the existence of the video screen to Carstairs. He says he will accompany them to Smythe's quarters and they can show him. | |||
Ransom is still talking when the phone rings. Carstairs tells Jennifer to decoy Ransom. Jennifer says that the phone call was from Smythe and that he wants Ransom to meet him in the furthest sector. Ransom leaves just as Carstairs' party arrives. They go into Smythe's room, and Zoe swings back the picture to show them the screen. Carstairs and Jennifer can't see it. The Doctor implores them to concentrate and it emerges. | |||
In another location, Smythe is watching them uncover his secret. | |||
The Doctor realises that the control is receiving and they all need to run. Carstairs and Jennifer relent eventually. Jennifer goes to get the ambulance. Jamie wants to go back to the TARDIS but the Doctor and Zoe overrule him. They are about to leave when Ransom emerges. Carstairs says that Smythe has asked the prisoners to be moved. Ransom queries the order due to the fact he was sent on a wild goose chase, but he eventually relents, fearful of the wrath of Smythe. | |||
They all clamber into the back of the ambulance and move off. | |||
In Smythe's quarters, the unit materialises, and Smythe emerges. Smythe questions Ransom as to the location of the prisoners and is furious when Ransom says he has let them go. Ransom sees that the ambulance has gone, and Smythe issues a general order for it to be located. | |||
Later, the ambulance has been spotted, and Smythe orders for artillery to be used on it. Ransom questions if they should be killing two women and a member of their own army. Smythe puts his glasses on and orders it. Ransom agrees. | |||
Carstairs takes cover in the ambulance as shells land around them. The Doctor joins Jennifer in the front of the ambulance, and they drive off into some mist. The ambulance disappears. Jennifer becomes scared as the mist encroaches. The ambulance emerges. The Doctor thinks the mist is some kind of [[force field]] as they are no longer surrounded by war or guns. The Doctor, Jamie and Zoe climb atop a hill. They see a [[Roman]] [[chariot]] and a group of soldiers approaching them. They run back to the ambulance. Carstairs desperately tries to restart the ambulance as the chariot approaches. | |||
=== Episode three === | === Episode three === | ||
[[File:A quick getaway.JPG|left|thumb|A quick getaway]] | [[File:A quick getaway.JPG|left|thumb|A quick getaway]] | ||
As the Romans approach, Carstairs gets the ambulance going, and they reverse back into the mist and disappear, leaving the Romans dumbfounded. | |||
The ambulance re-emerges back in 1917. The Doctor theorises that the mists act as barriers between different time zones and further theorises that there must be a map setting these out. They head back to Smythe's headquarters to uncover the map. | |||
Carstairs returns as if he has the rest of the group prisoner. Ransom doesn't fall for it, and Carstairs pulls his gun on him. Jamie removes Ransom's gun. He is trussed up with bandages. The Doctor sets about looking for the map. In Smythe's room, he finds a safe. He attempts to pick the lock whilst Carstairs seeks explosives to blow it open. Carstairs returns with a Mills Bomb — a type of [[grenade]]. Seeing that the whole bomb would destroy the room but not the safe, the Doctor takes the explosive out of the bomb and places it in the lock, extending the fuse with a candle wick. Ransom frees his mouth from the gag and calls for help. Carstairs goes out to address this, and once he has silenced him, a soldier, drawn by the noise, comes with Zoe and Jennifer in tow, looking for Ransom. | |||
In Smythe's room Jamie and the Doctor light the fuse and take cover. | |||
Carstairs is trying to get rid of the soldier but he is happy to wait for Ransom. He questions Carstairs as to who he is and where he has come from. | |||
The Doctor and Jamie hear the conversation outside and start to panic. | |||
The soldier is convinced and starts to leave but takes his time. | |||
The Doctor wants to put the fuse out but it's too late. | |||
As the soldier closes the door, the explosion rings out around the headquarters. He returns and rushes into Smythe's room. Carstairs pulls a gun on him, and Jamie trusses him up. The Doctor has found the map. In the centre is a blank space. That is where they should go. | |||
They head off in the ambulance but are soon surrounded by German soldiers. They board the ambulance and make the Doctor drive to their trenches. | |||
Later, Zoe and Jamie wait patiently while the Doctor is interrogated. | |||
A German soldier will not accept the Doctor's name. The Doctor relents and says he is Doctor [[Aliases of the Doctor#John Smith|John Smith]]. He says they are lost behind enemy lines. The soldier is very suspicious and thinks they're spies. He asks where they came from and pulls a gun, demanding the truth. | |||
Outside, Zoe and Jamie are given helmets. They discuss how barbaric war is. | |||
The Doctor has told the German soldier the whole truth about him and his friends being time travellers. He doesn't believe them. The Doctor implores him to ask Jamie and Zoe. He brings them in. He asks Zoe where she met the Doctor. The Doctor orders her to tell the truth. She says she met him at a [[space station]]. He asks Jamie when he met the Doctor, and he responds by saying he met him in [[1745]]. The soldier is still unconvinced. The Doctor shows him [[the Doctor's sonic screwdriver|the sonic screwdriver]]. He removes a screw from the soldier's gun and returns it. The soldier is starting to be convinced. A superior by the name of [[von Weich]] enters. The soldier tells him what he has discovered. Von Weich and the soldier withdraw. Von Weich puts on a [[monocle]] and tells the soldier that they are not time travellers, they are spies and should be shot. The soldier returns and tells the Doctor, Jamie and Zoe that they are spies and should be shot. | |||
The ambulance | Von Weich pulls back a picture in his quarters to reveal a communications screen. He reports the capture of the Doctor, Jamie and Zoe. | ||
The Doctor protests with the German soldier. He reminds him of the sonic screwdriver and displays it again. The soldier starts to remember, but as he does the Doctor steals his gun and holds him up. He orders that they be taken back to their ambulance. | |||
In a central HQ, an alarm sounds. Smythe is reporting to a mysterious man known only as [[the War Chief]]. He is pleased with how things are progressing. Smythe reports the prisoners and their story of time travel to the War Chief. He is contemplative and orders that they be brought here. Von Weich reports their escape to Smythe and the War Chief. Smythe is furious. The War Chief orders that Smythe organise a pursuit and put out a general alert. He is adamant that they must be captured alive. The War Chief wonders to himself if he knows these time travellers. | |||
The Doctor and his colleagues have arrived in [[1862]] [[America]] — the [[American Civil War|Civil War]]. Their ambulance is beset by gun shots. Carstairs returns the fire, and they move off. The Doctor is pleased. He believes that if they are in the American Civil War zone, they are on the right track to the blank space. The ambulance is stopped by a felled tree. Carstairs gets out to investigate and calls for Jamie to help move it. As they start, they are ambushed by soldiers. Carstairs starts firing at the soldiers as the Doctor, Jamie and Zoe move the tree. Carstairs engages in hand-to-hand battle with a soldier as Jamie comes to help him. The Doctor and Zoe have moved the tree, but reinforcements are arriving on horseback. Carstairs remains and holds off the reinforcements as the ambulance moves off, but he is captured off-screen. | |||
Shortly afterwards the ambulance stops. They are out of petrol. They have to go on by foot. | |||
Smythe and von Weich plan their strategy of how to capture the escaped party. They receive a report of the capture of Carstairs. They marvel at the bravery of "these humans". Carstairs is to be brought to the central headquarters for reprocessing. | |||
Jamie checks out a barn. When he realises it is safe, he calls for the others. Soon enough they hear the noise of materialisation. They hide. A unit materialises. The door opens, and a whole troop of soldiers emerge. When they are gone, Zoe says that the unit must be bigger on the inside like the TARDIS. The Doctor looks inside. Outside there are gunshots. Jennifer goes to look. Zoe calls for the Doctor and goes in after him. Jamie goes to help Jennifer. The unit dematerialises, leaving the group separated. | |||
=== Episode four === | === Episode four === | ||
[[File:The doctor and zoe.JPG|left|thumb|The Doctor and Zoe inside the [[SIDRAT]]]] | [[File:The doctor and zoe.JPG|left|thumb|The Doctor and Zoe inside the [[SIDRAT]]]] | ||
Jamie and Jennifer are soon surrounded by soldiers. | |||
The Doctor and Zoe look around the ship. Zoe notes it looks exactly like the TARDIS. She asks the Doctor who else could possess a ship like that. The Doctor has one idea but hopes he is not right. Zoe finds some goggles on the side. They begin to explore. They find a room filled with stationary dormant German soldiers in some kind of trance. In another room, there is a fleet of Romans in the same state. The ship starts to land. The door opens, and the Romans leave. Zoe wants to escape, but the Doctor says they will just end up in another war zone. They must wait until it returns to its base. | |||
The Doctor and Zoe | The soldiers question Jamie and Jennifer. When they realise that they are English, they assume they are spies from the South and tie them up. As soon as they are tied up, there is an attack. In the battle, the soldiers retreat from the barn, and Jamie and Jennifer are liberated by Northern forces. One of the soldiers reports to their general. It is Von Weich. He puts his monocle on and says that they are spies and should be tied up. | ||
The War Chief berates a scientist on the 5% of their soldiers who are breaking their processing and causing pockets of [[Resistance (The War Games)|resistance]]. He is fearful that they will form a rebellion. The scientist says they have already come up with a stronger form of processing. An alarm sounds. Von Weich reports via video screen that Jamie and Jennifer have been found, but the Doctor and Zoe are still loose. The War Chief states they will be excellent specimens for re-processing. | |||
The machine is landing. The ship is empty, so the Doctor states that it must be back in its base. He notes that the ship is powered by remote control but also has some kind of manual controls. As the doors open, they see the controller wearing the glasses Zoe found in the ship. They put the glasses on and set off to explore. | |||
Jamie asks how long they are going to be kept here. The soldier states that as soon as they find their friends they will all be shot together. A soldier sneaks up behind the captives and liberates them. As they sneak out, the other soldiers spot them. A firefight ensues. The soldier tells Jamie and Jennifer to head north. Von Weich enters. The other soldiers tell him what happens. Von Weich puts his monocle on and tries to brainwash the soldier, but it doesn't work on him. The soldier tries to turn his fellow soldiers, but to no avail. | |||
Jamie has been separated from Jennifer. A soldier attacks Jamie on horseback with a sword. He dives out of the way at the last moment. When the soldier returns, Jamie dismounts him and steals his horse. The soldier tries to shoot him as he rides away. | |||
The Doctor and Zoe are exploring. The building has a reception area, living quarters and lecture rooms. They reckon it is some kind of training school. They are ushered into a hall, being told they're late for the lecture. The scientist explains how for years soldiers have been removed from their real world and time, processed to forget their previous life and placed in false wars made to look like their home time. Of late, specimens have been breaking their processing and forming resistance groups, but they have come up with a better form of processing and will prove it on a difficult specimen. Carstairs is brought out. He sees the Doctor, but he tells him to keep quiet. The scientist prepares the equipment. Zoe wants to help, but the Doctor says they will help later. Carstairs is brainwashed into thinking the lecture hall is the officer's mess in the trenches. He spots the Doctor and Zoe again and says they are German spies. | |||
Jennifer is pursued by a soldier. She falls, and he dismounts. As he looms over her, Jamie rides up and fights the soldier. Before they can escape, they are captured, yet again, by soldiers. | |||
Carstairs is restrained as he rages about the German spies and the court martial. The Doctor feigns sympathy with the scientist for the failure of his machine. The scientist doesn't consider it a failure. The Doctor suggests that the issue was probably that Carstairs should have been fully deprocessed before attempting the reprocessing. The Doctor doubts that the scientist's machine could do that. The scientist puts him right and shows him how he would do that. | |||
Jamie, Jennifer and Harper, the soldier that liberated them, are returned to the barn and tied up. The soldier explains the resistance to Jamie and Jennifer. Von Weich questions them as to where their friends are. Jamie recognises him. There is an attack. A fight ensues. The soldiers free Jamie, Jennifer and the resistance fighter. Harper goes to kill Von Weich, but Jamie says they need him to find the Doctor. He says he will kill Jamie to get to Von Weich. | |||
The lecture is finished. An alarm goes off, and some soldiers rush in with the War Chief. He demands to know if the experiment was successful. The scientist says it was partly successful and points the Doctor out as someone who has helped him refine the process. The Doctor turns and the two recognise each other. The Doctor orders Zoe to run while the War Chief bellows that they must be stopped. In the chaos, Carstairs escapes. The War Chief raises an emergency alert to close all section areas and detain the resistance members. | |||
Zoe and the Doctor have been separated. Carstairs finds Zoe and grabs her. She is initially pleased to see him, but he draws a gun on her. She is a German spy, and it is his duty to kill her. He begins to pull the trigger. | |||
=== Episode five === | === Episode five === | ||
[[File:jamie.JPG|thumb|Jamie gets shot]] | [[File:jamie.JPG|thumb|Jamie gets shot]] | ||
Carstairs is called off by the scientist. He refuses, insistent that Zoe is a German spy. He fires, but his gun is not armed. Zoe is taken away by guards whilst the scientist takes Carstairs. | |||
Von Weich is a prisoner to the Resistance. Jamie is informed that they are waiting for their leader, Russell. Harper, the soldier that has been helping Jamie and Jennifer, questions Von Weich as to where the tunnel is that new recruits emerge from. Jamie tells him that it is not a tunnel but instead a craft. Harper doesn't believe him. Another soldier wants to leave and move on. He wants to shoot Von Weich. He and Harper get into a fight that is broken up by the arrival of Russell. As Russell brings order to the barn, Jamie sees Von Weich unveiling a monitor. Jamie grabs him and exposes the monitor, saying it backs up what he was saying. | |||
Zoe is brought into a room where she is interrogated by the Security Chief. He puts a helmet on and aims an eyepiece at Zoe. This causes her to instantly tell the truth. When she cannot answer when she joined the Resistance and when she gives the answer that she is from the [[21st century]], the Security Chief is confused. He asks her how she got here, and she explains all about the TARDIS and the Doctor. The Security Chief beams photos into her head, looking for her to identify the Doctor. | |||
The Doctor stumbles into the scientist who has Carstairs tied up. When the scientist begins to question why the Doctor is here when there is a security alert out for him, the Doctor convinces him that it was Zoe who the alert was out for and not him. The scientist is about to begin the deprocessing, and the Doctor asks if he can stay and watch. He enquires if Carstairs will remember everything. The scientist confirms he will. The scientist asks the Doctor to strap Carstairs in. The Doctor only pretends to. Once the deprocessing has taken place, Carstairs remembers the Doctor. Seeing this, the scientist tries to grab the Doctor. The Doctor forces the scientist into the deprocessing machine and turns it on. The Doctor explains to Carstairs what has been going on before they escape, turning the machine down before they go to allow the scientist to simmer. | |||
Jamie and Jennifer explain the situation to Russell. As they do, Von Weich lurches forward and sets off an alarm. | |||
In headquarters the alarm resonates and there is no response. | |||
The Security Chief reports to the War Chief that Zoe cannot recognise any of the Resistance members. Zoe is unconscious. The Security Chief lies and says that Zoe is from 1917 and omits anything to do with the TARDIS. The War Chief is informed of the alarm. The War Chief and the Security Chief go to investigate, narrowly missing the Doctor and Carstairs in the corridor. The Doctor bursts in, taking the armed guard by surprise. As the Doctor distracts him, Carstairs knocks him out. Zoe wakes up and informs the Doctor of what has happened. The Doctor tries the helmet on and sees all the Resistance members. He speculates that if they could mobilise all of them at the same time, they could form an army to rise up against their controllers. When Carstairs asks how they get back, the Doctor responds by saying they will leave by the same way they came. | |||
There is still no response from the American Civil War Zone. The Security Chief decides to send guards. | |||
An alarm goes off as the Doctor, Zoe and Carstairs move through the corridor. They hide and wait until the guards move off before following them to the landing bay. They see the machine land. | |||
Back at the barn, everyone is speculating as to what the alarm portends. Jamie thinks they will send a machine. No sooner has he said this then the sound of dematerialisation rings out. They all hide. As the guards emerge, the soldiers spring an attack on them. They are captured, but Harper is killed. Russell is dumbfounded by the futuristic guns used by the guards. They all study the machine. | |||
Back at headquarters, the War Chief is cross at the Security Chief for his continual mistakes. The Security Chief questions as to how the War Chief recognised the Doctor. The War Chief reacts furiously to being questioned. He states that when he came to the Security Chief's people, he was promised safety and organisation. He reminds the Security Chief that without his knowledge none of this would be possible. The Security Chief says that if the War Chief has any complaints, he should go to the War Lord. The War Chief says he will and sends the Security Chief away to continue the interrogation of Zoe. The Security Chief returns to find the soldier prostrate on the floor and Zoe escaped. | |||
Jamie is still trying to convince Russell as to the value of the machine. Russell asks Von Weich, but he refuses to answer. Jamie gives up and decides to get into the machine without anyone's help. Jennifer initially says she will go with him but is convinced against this by Russell, who says that he has many sick soldiers she can tend to. Russell and some of his men will go instead. The door is closing, and they hurry in. As the machine dematerialises, Von Weich seems very happy. | |||
The Security Chief finds the scientist and liberates him from the deprocessing machine. The scientist explains what happened and says he must report it to the War Chief. The Security Chief stops him and confides with him that Zoe and the Doctor are time travellers. The scientist states that only the War Chief and his people know of time travel. The Security Chief states that the War Chief is a traitor to his own people — how can they be sure he is not a traitor to them? | |||
The War Chief is told that the transport is returning but hasn't radioed in as per protocol. The War Chief decides to deal with this himself and sends guards down to the landing bay. | |||
The Doctor, Zoe and Carstairs are still in hiding in the landing bay, waiting for the return of a machine. They hear the alarm go off. At the same time, the light that signals the arrival of the machine flashes. Many guards pile into the landing bay. As the machine lands, Jamie and the soldiers emerge. They are all shot by the guards. | |||
=== Episode six === | === Episode six === | ||
[[File:Bodies are removed.JPG|thumb|The bodies are taken to the Chief Scientist]] | [[File:Bodies are removed.JPG|thumb|The bodies are taken to the Chief Scientist]] | ||
The | Zoe is fearful for Jamie, but the Doctor states that there is nothing that they can do. They run off, heading to the processing room. | ||
The Security Chief and the scientist talk about how the Doctor and Zoe are different to the resistance fighters and that they were not brought from their own time but instead came of their own accord. The Security Chief is worried that the War Chief is either bringing his own people, the [[Time Lord]]s, there or they are coming of their own free will. The scientist says that the Security Chief should tell the War Lord, but the Security Chief needs proof. He implores the scientist to bring him any unusual specimens he finds amongst the resistance fighters. | |||
The Doctor, Zoe and Carstairs find the way to the processing room heavily guarded. The Doctor tries to find another way. He discovers that the walls are embedded with metal and are held together using a force field. He sets about reversing it with tape. | |||
On the other side of the wall, the scientist is examining the resistance fighters they ambushed in the landing bay. | |||
The Doctor uses his sonic screwdriver for power to operate his force field reverser. Initially it seems as if it has had no effect, but the Doctor approaches a lane and just lifts it away. They see Jamie being lifted onto the reprocessing machine. The scientist analyses Jamie's brain and finds the pattern different to the other resistance fighters. He sends him away to the Security Chief but is interrupted by the War Chief, who questions him as to why he is being taken away. The scientist tries to lie, but the War Chief scares the truth out of him. He allows it to go ahead. This is all watched by the Doctor, Zoe and Carstairs. Once the War Chief has left, Carstairs enters the room and silently disables a guard. The Doctor surprises the scientist as he tries to help him with the machine. | |||
Back in the barn in 1917, Von Weich is being guarded by a young soldier called Moor. He asks for some water. As Moor fetches it, Von Weich tries to escape. Moor stops him just in time. | |||
The Security Chief is questioning Jamie with the helmet on. He asks who sent the travellers here — Jamie says no one. He asks why they decided to come here — Jamie explains the TARDIS' malfunctioning controls. He asks if they were summoned — Jamie replies in the negative. The interrogation is interrupted by the War Chief. They argue. The Security Chief makes it clear he mistrusts the War Chief. The War Chief says if he has a problem he should go to the War Lord, but if he gets his facts wrong he will crush him. | |||
The Doctor has resurrected the resistance fighters. A guard comes across the room, and Carstairs kills him. They flee through the hole in the wall. The Doctor endeavours to take the reprocessing unit with him but is forced to abandon it when more guards arrive. The Doctor fills Russell in. The plan from here is to return to their time zones and bring the resistance fighters together to form one big army. They head off to the landing bay... but need a disguise first. | |||
The Security Chief is | Von Weich asks Moor if he could put his monocle in. When he obliges, Von Weich brainwashes him into thinking it is 1871 and that he is Moor's commanding officer. He orders himself untied. | ||
The Security Chief brings the War Chief to the processing room and discovers his prisoners gone. He says this is proof positive that they have a space/time machine. The War Chief finds the hole in the wall and dismissively sends the guards to the landing bay. | |||
Jamie wakes up and is shocked to see a gas mask in front of his face. It is the Doctor. He and the resistance fighters are all dressed as [[World War I]] soldiers. They dress Jamie up and march through the compound. They disable the guard controlling the computer in the landing bay. The Doctor begins to operate the controls. Some guards come, and the Doctor puts up a force field around the landing bay. The guards that got through are disabled by the resistance fighters. The Doctor summons up a machine to return to 1917. The Doctor, Jamie and Carstairs stay to get the reprocessing unit. They release the guards and hide. | |||
Von Weich has brainwashed Moor. He orders him to give him his gun. The machine lands, and Russell gets out. Von Weich orders Moor to shoot. Russell tries to convince him not to, but Moor goes to shoot. A fight breaks out, and Moor is knocked out. Russell wheels around to see Von Weich armed. He tells Russell they are to go back in the machine and return to the headquarters. Russell refuses. Von Weich says he will kill him. Russell still refuses. A gun shot rings out. Von Weich falls to the ground. Russell turns to see Moor with the shot gun in his hand. | |||
The Doctor, Jamie and Carstairs have made it back to the processing room. | |||
The War Chief and the Security Chief are still at loggerheads. The Security Chief thinks that the Doctor's ability to operate the machinery seems to imply he is a Time Lord. | |||
The Doctor has removed the reprocessing unit. As they leave, they find some gas-filled valves. As they make their way into the processing room, the guards attack them. The Doctor throws the valves on the floor, releasing the noxious gas. They make it to the machine and begin to dematerialise. Their joy is short lived as the machine soon stops. The Doctor operates the emergency lock and sets about trying to override the master control. The Security Chief orders the Doctor's surrender. The machine is surrounded. The Doctor reassures his friends that the machine is impregnable. The Security Chief intends to wait, but the War Chief has other ideas. He activates the dimensional controls of the machine. Inside, the walls begin drawing in. The War Chief says they have thirty seconds to surrender or they will be crushed. | |||
=== Episode seven === | === Episode seven === | ||
[[File:Jamie & Carstairs.JPG|left|thumb|Jamie and [[Jeremy Carstairs|Carstairs]]]] | [[File:Jamie & Carstairs.JPG|left|thumb|Jamie and [[Jeremy Carstairs|Carstairs]]]] | ||
The | As the machine's dimensions contract, the Doctor says they have to do as the War Chief says. | ||
The War Chief goes to reduce the dimensions further when the door opens. The Doctor crawls out. The War Chief orders the others to come out too. The Doctor throws one of the gas valves on the ground and, as everyone else is coughing and blinded, covers his mouth and rearranges the controls. He returns to the machine, which dematerialises. Once the gas has cleared, the War Chief realises that the Doctor has locked the remote control. The Security Chief puts an alert out on all time zones. The War Chief says he reckons they will be returning to 1917. | |||
The Doctor states that they should not return to 1917 as it is where they would expect them to go. He decides to go to a nearby zone and cross by foot. | |||
The Security Chief asks the War Chief if he has tracked the machine. He says he will only be able to pinpoint it once it has landed. An alarm goes off. The War Lord has arrived. The pair squabble about who is to go and greet him. The War Chief goes. | |||
Inside the machine, the travellers think it is taking its time. The Doctor says that he has no control over the machine. Jamie makes a dig at the Doctor, saying it is just like the TARDIS. The machine starts to materialise. | |||
The Doctor now | The landing of the machine is registered in the headquarters. The Security Chief alerts everyone in the Roman era. They are to be captured or destroyed. The War Lord enters and questions the Security Chief about the issues they have been facing and the War Chief about the issues regarding processing. The War Chief reports the theft of the processing machine. The Security Chief is forced to take the blame. | ||
The Doctor, Jamie and Carstairs make their way through the countryside. They undergo an attack by a fleet of Romans. They run towards the time zone barrier. | |||
At headquarters, their escape is tracked. The Security Chief wants to send guards. The War Chief argues against this as the repeated sighting of guards will further affect the processing of the subjects. The War Chief suggests they form an assault around the TARDIS where they will be heading. Their argument becomes more heated. The Security Chief alludes that the Doctor is a Time Lord and is working in collusion with the War Chief. The War Lord breaks up their argument, saying they will either cooperate or be replaced. | |||
The Doctor, Jamie and Carstairs have crossed the time zone barrier into 1917. They consult their map and move off but not before they have been spotted and reported to Smythe. Smythe plots their position and sees they are near a machine gun emplacement. | |||
The Doctor, Jamie and Carstairs make their way through the trenches and drop to the ground as they hear a barrage of machine gun fire. They are pinned down. The machine gunners are knocked out by the emergence of the resistance fighters and Zoe. They see that their friends are surrounded by armed soldiers. They decide to follow them. | |||
The Doctor, Jamie and Carstairs have been brought to Smythe. Smythe says that the Doctor's court martial still stands, and he is to be killed. Jamie and Carstairs are to be sent away. Carstairs tells Smythe that he knows of the charade in which they live now. He tries to convince the other soldiers around him, but Smythe puts on his glasses and counteracts Carstair's dissension. He orders for a firing squad to be prepared. The Doctor states that Smythe is making a big mistake and that his alien superiors will want to question him. Smythe sends him to the firing squad and disappears into his quarters. He reports the capture of the three to the War Chief but says that the Doctor was killed in the process. The War Chief asks if Smythe has got possession of the reprocessing machine and says that the recapture of it is of the highest priority. Smythe questions Jamie and Carstairs. Seeing the opportunity, they say that the Doctor is the only one that knows where it is. Carstairs stops the firing squad just in time. No sooner has the words come out of his mouth than the resistance fighters storm the chateau. A fight breaks out. The Doctor and Zoe return to the chateau in the chaos. Smythe has locked himself in his quarters and is reporting the storming of the chateau and pleas for help to be sent. The resistance fighters are breaking down the door. The War Chief orders Smythe to deactivate the area control, destroying the entirety of the time zone. Before he can do it, the resistance fighters enter and kill Smythe. | |||
In headquarters, they can see that the resistance fighters have taken over the chateau and that the Doctor is still alive and in possession of the processing machine. They note that all the resistance fighters are all in the same place. The Security Chief wants to send more guards and the War Chief wants to destroy with an artillery barrage. The War Lord overrules them both and says they should order their forces to destroy them. | |||
Jamie reports that all forces are surrounding the chateau and there is no escape. The Doctor asks Carstairs and Russell to hold the fort for as long as possible while he works on something. He and Zoe start to dismantle the area control to figure out how it works. | |||
In the headquarters, they monitor the chateau but are shocked to see the resistance fighters putting up a fight. The Security Chief notes that the Doctor seems to be living a blessed life and suggests that the War Chief may have a hand in this. The War Chief vows that the Doctor will die. | |||
During the fire fight at the chateau the resistance fighters take a hostage. Carstairs, seeing the situation is desperate, suggests that the Doctor and Zoe should escape. The Doctor says that that won't be necessary and flicks a switch. All the gun fire stops. He has placed a time zone barrier around the chateau, making a secure base which cannot be penetrated. Seeing the hostage, he says he will now try the next step of his plan. | |||
The Security Chief and the War Chief blame each other for the failings. The War Lord blames them both and says he will now take charge. | |||
The Doctor is using the processing machine on the hostage. It works and returns the French soldier back to his normal state. The Doctor states that this means they can convert everyone into a resistance fighter and, if Russell's men can get the right equipment, he can expand the equipment so he can reprocess dozens at a time. They hear the materialisation of a machine and hide. Two guards exit alongside the Security Chief. They gun down several of the resistance fighters. The guards capture the Doctor and the Security Chief takes the processing machine. They enter the machine with the Doctor and it dematerialises. | |||
=== Episode eight === | === Episode eight === | ||
[[File:Second doctor taken.JPG|left|thumb|The Doctor is taken to central control]] | [[File:Second doctor taken.JPG|left|thumb|The Doctor is taken to central control]] | ||
The Doctor is | The machine materialises at headquarters. The Doctor is marched out followed by the War Lord, now in possession of the reprocessing machine. | ||
Carstairs is regretting the fact that they weren't prepared for such an ambush. Jamie enquirers with Zoe if she could control the telescreen and summon one of the machines so they can return to headquarters. She says it is possible. Russell goes to get some machine guns to ambush the guards. | |||
The War Lord gives the processor to someone to return home to have it mass-produced. The War Chief assures the War Lord that the Doctor will have to undergo a special interrogation. | |||
The Security Chief is using the truth helmet on the Doctor. He is trying to get the Doctor to admit that the War Chief brought him here, but the Doctor is resilient. The Security Chief warns him that he will answer or be destroyed. | |||
The machine guns have been set up. Zoe tells Russell that she remembers all the resistance fighters and their location so they can still act out the Doctor's plan. They hear the materialising of the machine and rush to the machine gun. As soon as the guards exit, the soldiers fire. The guards quickly retreat. The door opens again, and the guards stick their guns out and fire, killing the two machine gunners. Carstairs sneaks up and throws a grenade into the machine. The door closes and the machine dematerialises. Russell demands more machine gunners to be brought in and then sets out to arrange a meeting with all the Resistance leaders. Jamie is left in charge of the chateau. | |||
The Security Chief is still interrogating the Doctor and warns him that his mind will only last fifteen minutes at this level; thirty if he's lucky. The War Chief interrupts him. The Security Chief yet again implies how the War Chief is always around to save the Doctor. The War Chief admits that the Doctor is one of his people and resilient to the truth helmet. The War Chief orders that the Doctor be released so they can talk alone in the War Room. The Security Chief argues about this, but the War Chief is insistent. As soon as the War Chief leaves, the Security Chief contacts the War Lord. | |||
When the War Chief is alone with the Doctor, he tells him that he recognises him even though he has changed his appearance. The Doctor says that he had every right to leave his home planet. The War Chief questions the morality of stealing a TARDIS and goes on to say that he and the Doctor are very similar, an accusation the Doctor strenuously denies. The War Chief asks the Doctor if he knows the final objective of the war games; when he replies in the negative, the War Chief tells him that the aim is to whittle the best soldiers from the most aggressive planet into a super army whose objective is to enforce peace to the Galaxy. The War Chief tries to convince the Doctor that his intentions are pure. | |||
It is all quiet in the chateau... until one guard is knocked out and one is held up. A sleeping Zoe is awoken by a soldier from the [[Mexican Civil War]]. He is looking for Russell. When Zoe questions who he is, he states he is Arturo Villar, one of the resistance fighters. He is sceptical about the meeting and has the chateau surrounded. Zoe hurries off to find Jamie. Jamie wants to argue with him, but Zoe is concerned that he will leave and end the chances of their plan coming together. Zoe has a plan and rushes away with Jamie. Soon Zoe reappears to Arturo and tells him that Russell is not around but the second in command, Jamie, is present. Jamie has been dressed up to look like a Highlander again and confidently walks up to greet Arturo. Jamie tries to convince Arturo to stay but does not have the communication skills. Zoe tries feeding him lines but, soon enough, is persuading Arturo herself. Arturo thinks small groups of guerrilla fighters are better, but Zoe insists a united force will destroy their alien masters. When Zoe informs Arturo that she knows how to get to the alien's stronghold, Arturo is convinced and stays. | |||
The War Chief informs the Doctor that the war games are an attempt to solidify a United Galactic Empire. The War Chief is about to offer the Doctor a role in this empire when he is interrupted by the War Lord and the Security Chief. The War Lord cross examines the Doctor. The War Chief says the Doctor has agreed to cooperate, but the Security Chief says that the Doctor should be killed. The War Lord decides that the Doctor will be spared if he cooperates, but if he doesn't, both he and the War Chief will be killed. Once they have left, the War Chief confides to the Doctor that he has a plan to take over as the Supreme Galactic Ruler. | |||
The meeting of resistance fighters is in full swing with Arturo and Ivan Petrov, a Russian soldier from the [[Crimean War]], being the most vocal. Arturo is still sceptical. Russell explains that they can go to the machine, climb aboard as an army and destroy the headquarters. They decide to use the landing place in the barn in the American Civil War Zone to stage their attack however before that there is another part of their plan to put into place. | |||
Later, some resistance fighters storm a Roman military camp and destroy their communication unit. This registers with the Security Chief, who sends a guard. Carstairs is also informed. He says the Crimean War Zone is next. | |||
A soldier in the Crimean War Zone is attacked by resistance fighters, and the communications unit is destroyed with dynamite. | |||
Again, this registers with the Security Chief who sends a squad of guards. | |||
At the chateau, Russell is informed of the number and location of all guards sent by the Security Chief, and Jamie and Zoe place it on a map. Soon enough the map is peppered with numerous guards. Russell informs them it is now time for phase two: the attack on the barn. They are to leave one by one so as not to arouse suspicion. | |||
In the barn, a wounded soldier goes for the telescreen, but Arturo's men shoot him just in time. | |||
The Security Chief has noticed the pattern, but it is too late. There are few guards left at headquarters and none have returned that he sent out. The War Lord and War Chief are critical of the Security Chief. The Security Chief says that the resistance fighters have to be in the American Civil War Zone as it is the last place yet to be attacked. He suggests they use a [[neutron bomb]], which will wipe out all people in that zone, processed and unprocessed. The War Lord overrules this and says there is a more subtle plan in which the Doctor can prove his loyalty and save his life. | |||
All the resistance fighters are assembled at the barn. Carstairs goes to destroy the telescreen, sending the guards, when the Doctor appears on it. He says he has gained control of the machines and that he is to send a machine. He demands that only the resistance fighters get into it. Jamie argues but the Doctor shuts him down. The resistance fighters discuss if it is a trap. The machine materialises, and the men hide in case guards emerge. They discover it is empty. All but one of the leaders of the resistance enter. | |||
When the machine materialises, the Doctor greets them all. Once they are out in the open, they are surrounded by guards. The Doctor orders them not to move. The War Chief thanks the Doctor for giving them a “nice, neat little package for us to dispose of“. | |||
=== Episode nine === | === Episode nine === | ||
[[File:prisoners.JPG|thumb|Zoe, Jamie and the other prisoners]] | [[File:prisoners.JPG|thumb|Zoe, Jamie and the other prisoners]] | ||
The | Russell threatens the Doctor. The Security Chief wants the Doctor disposed of too, but the War Chief blocks it. The Security Chief says that the War Lord will decide. When left alone, the Doctor says he doesn't understand why the War Chief wants him to remain alive. The Doctor flatters the War Chief as to the technological advances of his machines. He states that in his day such machines with pinpoint accuracy would be at the expense of a terribly short lifespan. When the Doctor asks how he did that, the War Chief brushes the question off. The Doctor realises that the War Chief hasn't fixed the problem and that he needs the Doctor's TARDIS to escape. The War Chief says that if they two escape in his TARDIS, they can rule over the galaxy together. The Doctor realises that he has the power over the War Chief, but the War Chief says that if the Doctor tries anything, he will turn the Security Chief on him. | ||
Imprisoned Russell and Arturo threaten death to the Doctor. Jamie and Zoe stick up for him. | |||
The War Lord praises the Doctor but is concerned as to why he has swapped sides. The Doctor flatters the War Lord and says he likes to be on the winning side. The War Lord asks how the Doctor can help his cause. The Doctor says he can reengineer the processing machines to work on the resistance fighters. The War Lord relents and says the test will be on his friends. The Doctor insists that they are not his friends anymore. The Security Chief accompanies the Doctor to the processing room. The War Chief and the War Lord plan the destruction of the rest of the resistance fighters. The War Chief asks if the War Lord is returning to his home planet. The War Lord icily says that he is going nowhere until the situation is resolved. | |||
The resistance leaders discuss what is going to happen to them. The Security Chief arrives with the Doctor and informs them that the Doctor is to reprocess them, but he is not affording him any security. He leaves the Doctor unprotected with the resistance leaders. Arturo approaches the Doctor, threatening death. | |||
The Security Chief questions how the War Chief is doing away with the resistance fighters. The War Chief says that, without their leaders, they have plunged into disorder. The War Chief questions where the Doctor is and rushes off to look for him. The Security Chief listens to some recordings he has made in the War Room. | |||
Jamie pulls the resistance leaders off the Doctor. The Doctor says that they were going to have a neutron bomb dropped on them, and he was forced to bring them here. They don't believe him, and Arturo breaks free of Carstairs and strangles the Doctor. The War Chief enters and saves the Doctor. | |||
The Security Chief listens back to all the conversations that the War Chief has had with the Doctor. | |||
The Doctor is reprocessing Jamie. He has convinced Jamie he is back fighting the Redcoats. The War Chief is pleased and leaves. The Doctor calls Zoe over. Zoe resists, but when she is in the machine the Doctor whispers that it is a ruse. | |||
The Doctor | The War Chief returns to the War Room and orders the arrest of the Security Chief for allowing the Doctor to die. The guards ignore him. The Security Chief plays back the recordings and orders the arrest of the War Chief. The guards drag him away and the Security Chief orders the Doctor's arrest. | ||
The Doctor is "reprocessing" Arturo but he doesn't realise that it is a trick and tries to kill the Doctor. Jamie pulls him off and explains it to him. They discuss what they should do now. Zoe sees the guards coming. The resistance leaders overpower them and liberate the War Chief. The War Chief tells the Doctor they have been discovered, but the guards at the Landing Bay do not know yet, so they should go there and redirect the returning guards. Before they do that the resistance leaders insist they get their weapons back, and the Doctor insists they take the War Room. | |||
The Security Chief broadcasts to all time zones that the guards are to return but is interrupted by the resistance leaders storming the War Room. The alarm is raised, and many are killed. As the Security Chief tries to escape, the War Chief kills him before he himself is disarmed by Carstairs. The alarm is switched off. Zoe asks how they are going to return everyone to their own time. The War Chief says they can't use the machines as there are only two left. The Doctor is faced with only one option. The War Chief, seeing what the Doctor is thinking, begs the Doctor to reconsider. He forces the War Chief to contact all time zones and stop the fighting. Zoe questions the Doctor as to what the War Chief was so scared of. The Doctor says he is going to have to contact the Time Lords. When Jamie says that there is no danger from his own people, the Doctor contradicts him, but he has no choice. He sits on the floor and lays out six cards in a circle. He goes into a trance. The War Chief tries to stop him but is restrained. The cards form a cube. The Doctor wakes and explains that the cube consists of all the information about the War Games and a plea for help for the Time Lords. They realise that the War Chief has gone. They race to the Landing Bay to cut him off. | |||
In the Landing Bay, the War Chief summons a machine. Just as he is about to board, some guards stop him. The War Lord has arrived. The War Chief reports the revolt and says they have to return to their home planet. The War Lord asks where the Security Chief is. The War Chief says the resistance leaders killed him. The War Lord says that he knows that that isn't true and that he has heard the recordings. The War Chief tries to bluster and then runs. Some guards come out of nowhere. The War Chief is killed. | |||
The Doctor hears the screams but says they must push on to the Landing Bay. | |||
The War Lord wants to return home and summon an army to quell the revolt. The Resistance Leaders arrive and overpower the guards. Arturo wants to kill the War Lord, but the Doctor orders that he should be left for the Time Lords. The Doctor says goodbye to Jamie and Zoe. He says that the Time Lords will return them to their own times too. When they ask why they can't carry on travelling with him, the Doctor says he doesn't have time to explain. They insist that they will come with him. The Doctor says that he has to return to the 1917 zone and the TARDIS. Carstairs asks to come with them to see if he can be reunited with Jennifer. The Doctor summons the machine before returning into his trance and sending the cube. Arturo doesn't believe that anyone is coming for them. He holds the Doctor up. Russell joins him. The Doctor begs to be let go. He pushes past Arturo. Russell has to stop Arturo from shooting the Doctor in the back. As the machine dematerialises, the War Lord says that the Doctor will wish he had have been killed when the Time Lords get their hands on him. | |||
Back in 1917, the fighting has stopped. The Doctor quickly says goodbye to Carstairs before sprinting to the TARDIS. The travellers turn to look back and see Carstairs disappearing into the mist. As they run they are struck down by the mist. The Doctor crawls towards his TARDIS as the mists consume him. He gets the key in the door before falling unconscious. | |||
=== Episode ten === | === Episode ten === | ||
The | The Doctor identifies the thing slowing him down as a force field employed by the Time Lords. The Doctor, Jamie and Zoe work as a team and open the door. They crawl in, but the force field is affecting the inside of the TARDIS too. The Doctor suggests that if he dematerialises it might break through the force field. He does so and it proves true. | ||
His companions ask him why he is running away from his own people. The Doctor explains that Time Lords have the ability to live forever barring accidents and the power of travel through space and time, but they never use it for [[good]]. They just gather knowledge of events. The Time Lord code is to never interfere or help. | |||
He has set the TARDIS for a planet on the outermost fringes of the galaxy, but the TARDIS begins landing prematurely. The Doctor rushes to the scanner to see the TARDIS land on the sea. Zoe says that the TARDIS has landed on the sea before and has been fine, but this time the scanner shows that they have continued to go underwater. The Doctor promises Jamie and Zoe that they are completely safe, but water begins to drip onto the console. The Time Lords are breaking down the defence mechanism. | |||
The Doctor takes them to the one place where they might be safe. He moves the TARDIS into the middle of outer space, hoping they won't be detected. A voice comes from nowhere, saying there is no escape and the Doctor needs to return the TARDIS to his home planet immediately. Reluctantly, the Doctor seems to agree before quickly attempting a transference jump somewhere safe. He fleetingly ends up in [[crocodile]]-infested waters before they are on the move again. The scanner doesn't show anything until it zooms in on a corridor. The voice confirms the Doctor has returned to his home planet. Disconsolate, the Doctor emerges. | |||
They are met by a Time Lord, whom Jamie tries to challenge; the Doctor calls him off. The Time Lord leads the Doctor, Jamie and Zoe into a courtroom where they are ruling on the War Lord. The Time Lord in charge says that all surviving soldiers have been returned to their own time, but many have died and many more would have died if the War Lord's plan had been brought to bear. The Time Lords accuse the War Lord of breaking all galactic laws. The Doctor tells Jamie and Zoe that this is a rare thing to see as the Time Lords rarely hold court. Zoe asks if they can escape. The Doctor confides that his companions might, but it is unlikely he will. The Doctor is called as a witness. He states that all the knowledge possessed in the cube is truthful. The Time Lords call on the War Lord to speak, but he refuses. The Time Lord in charge fixes him with a stare that causes a blinding pain in his head. The War Lord begs the noise to stop. The War Lord denies the court the authority to prosecute him and states that the soldiers would have killed themselves anyway. He also says that the Time Lords are complicit with him as both the War Chief and the Doctor were working alongside him. The Doctor denies this. | |||
Some Time Lord scientists are observing the TARDIS when they hear the sound of dematerialisation outside. They emerge to see one of the machines. Some guards come out and kill the scientists. | |||
The Time Lords have found the War Lord guilty and say that his accusations towards the Doctor are fraud. The guards rush in and seize the Doctor, Jamie and Zoe as hostages. The Time Lords let them go. The War Lord insists the Doctor is to help them and forces them into the TARDIS. Jamie insists that the Doctor has no control over the TARDIS, but the War Lord doesn't believe this. He says that the Doctor will make him many TARDISes, ordering the Doctor to take him to his home planet or Zoe will be killed. | |||
The Doctor approaches the console and shouts for Jamie and Zoe to cover their eyes. A blinding light cripples the War Lord and his guards, and they run outside to the Time Lords. A force field is placed around the TARDIS, trapping the War Lord and his guards. The Time Lords say a similar force field has been placed around their home planet, cutting it off from the Universe forever, to protect the galaxy from their kind. The War Lord and his guards are to be dematerialised so it will be as if they never existed. The sentence of dematerialisation is carried out, and the War Lord and his guards vanish forever. Jamie thinks this is the end of the ordeal and walks towards the TARDIS, thinking they can all continue their adventures. The Doctor tells him that they will not be allowed to go, and is led away to his own trial, whilst Zoe and Jamie are trapped inside a force field. | |||
At [[the Doctor's trial (The War Games)|the Doctor's trial]], the Time Lords accuse the Doctor of breaking their laws of non-interference. The Doctor admits doing so and is proud of it. He is proud of having fought [[evil]] and not merely observed it. He asks for a thought channel to show the Time Lords on a large viewing screen the evil he has fought. He shows the Time Lords the [[Quark]]s and the [[Robot Yeti|Yeti]]. They are not impressed, so the Doctor goes on to show them the [[Ice Warrior]]s, the [[Cyberman|Cybermen]] and the [[Dalek]]s. He ends by saying that he may be guilty of interference, but they themselves are guilty of passivity against such evil. The Time Lords say they need time to think and that the Doctor will be recalled when they have made their decision. | |||
[[File:zoe & jamie.JPG|thumb|"Goodbye Zoe... Goodbye Jamie"]] | [[File:zoe & jamie.JPG|thumb|"Goodbye Zoe... Goodbye Jamie"]] | ||
[[File:The_War_Games_15.jpg|thumb| | Jamie and Zoe are still calling to be freed from their force field. A Time Lord arrives, drops the force field and tells them he is there to return them home. They beg to see the Doctor, and the Time Lord relents. | ||
The | |||
The Doctor is playing cards inside a force field. The Time Lord switches it off to allow Jamie and Zoe in and leaves them to say goodbye. Zoe asks what punishment he is likely to get. The Doctor suspects he might just get a boring speech. Jamie and Zoe try to convince the Doctor to escape. He is reluctant but relents. They discover that the force field has been let down. They make their way back to the TARDIS but are intercepted by a group of Time Lords and a force field. The Doctor says there is no escape. He bids goodbye to Jamie and Zoe, and they make their way into another [[TARDIS]], which dematerialises. A Time Lord explains that Jamie and Zoe will each be returned to their own time at the exact moment before they went away with the Doctor, therefore erasing their memories of all but their first adventure with him. | |||
[[File:The_War_Games_15.jpg|thumb|left|The Doctor's exile begins...]] | |||
Later in the court, the Doctor watches Zoe as she returns to the Wheel at the exact moment she left, where she meets up with [[Tanya Lernov]]. Tanya asks if the Doctor and Jamie have left, and Zoe says she has just seen them off. Everything is fine, except for Zoe having a vague feeling she has forgotten something important, but she then dismisses this as nothing and goes off with Tanya to work on getting the Wheel back to normal. | |||
The Doctor then asks to see Jamie, who wakes up in the Scottish Highlands and immediately is shot at by a Redcoat. Jamie draws his sword, and the Redcoat flees into the glens with Jamie in pursuit. The Doctor chuckles and turns to his people. He asks what fate has in store for him. They have accepted his plea that [[evil]] has to be fought and that he has his part to play in that. He asks if he is to go free. The Time Lords says he is to be exiled on the planet Earth in the [[20th century]] — as it is there that he has shown the most affinity. Also, the secret of the TARDIS is to be taken away from him. | |||
The Doctor is appalled by this. He says that he is known on Earth, and it could cause him some difficulties. The Time Lords say they will [[change of appearance|change his appearance]] again, noting [[First Doctor|he]] has [[First Doctor's renewal|done so before]]. The Doctor is furious at this, but is placated when he is told that he can choose what his [[Third Doctor|next incarnation]] looks like. Five sketches of faces appear on the viewing screen, which the Doctor successively adjudges to be too old, too fat, too thin, too young, and "it won't do at all". The Time Lords tell the Doctor the decision of what he will look like will therefore be taken for him. The Doctor wheels around and begins to shout at the Time Lords, but starts to lose function and the ability to talk before he fades and vanishes from the courtroom, reappearing on the viewing screen. He is still protesting against his punishment as he begins to spin away through a dark void to begin his exile on 20th century Earth. | |||
== Cast == | == Cast == | ||
* [[Second Doctor|Dr. Who]] - [[Patrick Troughton]] | * [[Second Doctor|Dr. Who]] - [[Patrick Troughton]] | ||
* [[Jamie McCrimmon]] - [[Frazer Hines]] | * [[Jamie McCrimmon|Jamie]] - [[Frazer Hines]] | ||
* [[Zoe Heriot]] - [[Wendy Padbury]] | * [[Zoe Heriot|Zoe]] - [[Wendy Padbury]] | ||
* Lady [[Jennifer Buckingham]] - [[Jane Sherwin]] | * Lady [[Jennifer Buckingham|Jennifer]] - [[Jane Sherwin]] | ||
* German | * [[German soldier (The War Games, episode 1)|German Soldier]] - [[John Livesey]] | ||
* | * [[Jeremy Carstairs|Carstairs]] - [[David Savile]] | ||
* Major [[Barrington]] - [[Terence Bayler]] | * Major [[Barrington]] - [[Terence Bayler]] | ||
* Sergeant [[Willis (The War Games)|Willis]] - [[Brian Forster]] | * Sergeant [[Willis (The War Games)|Willis]] - [[Brian Forster]] | ||
* General [[Smythe]] - [[Noel Coleman]] | * General [[Smythe (The War Games)|Smythe]] - [[Noel Coleman]] | ||
* Captain [[Ransom]] - [[Hubert Rees]] | * Captain [[Ransom (The War Games)|Ransom]] - [[Hubert Rees]] | ||
* Sgt. Major [[Burns]] - [[Esmond Webb]] | * Sgt. Major [[Burns (The War Games)|Burns]] - [[Esmond Webb]] | ||
* [[ | * [[Redcoat (The War Games)|Redcoat]] - [[Tony McEwan]] | ||
* Commandant [[Gorton]] - [[Richard Steele]] | * Commandant [[Gorton]] - [[Richard Steele (actor)|Richard Steele]] | ||
* Military Chauffeur - [[Peter Stanton]] | * [[Military chauffeur (The War Games)|Military Chauffeur]] - [[Peter Stanton]] | ||
* Military Policeman - [[Pat Gorman]] | * [[Military policeman|Military Policeman]] - [[Pat Gorman]] | ||
* Lieut. [[Crane (The War Games)|Crane]] - [[David Valla]] | * Lieut. [[Crane (The War Games)|Crane]] - [[David Valla]] | ||
* [[German soldier (The War Games, episode 3)|German Soldier]] - [[Bernard Davies]] | |||
* Lieut. [[Lucke]] - [[Gregg Palmer]] | * Lieut. [[Lucke]] - [[Gregg Palmer]] | ||
* [[von Weich]] - [[David Garfield]] | * [[von Weich]] - [[David Garfield]] | ||
* [[The War Chief|War Chief]] - [[Edward Brayshaw]] | * [[The War Chief|War Chief]] - [[Edward Brayshaw]] | ||
* Sgt. [[Thompson (The War Games)|Thompson]] - [[Bill Hutchinson]] | * Sgt. [[Thompson (The War Games)|Thompson]] - [[Bill Hutchinson]] | ||
* Corporal [[Riley]] - [[Terry Adams]] | * Corporal [[Riley (The War Games)|Riley]] - [[Terry Adams]] | ||
* [[Leroy]] - [[Leslie Schofield]] | * [[Leroy]] - [[Leslie Schofield]] | ||
* Scientist - [[Vernon Dobtcheff]] | * [[Scientist (The War Games)|Scientist]] - [[Vernon Dobtcheff]] | ||
* [[Harper (The War Games)|Harper]] - [[Rudolph Walker]] | * [[Harper (The War Games)|Harper]] - [[Rudolph Walker]] | ||
* Alien Guard - [[John Atterbury]] | * [[Alien guard (The War Games)|Alien Guard]] - [[John Atterbury]] | ||
* [[Spencer (The War Games)|Spencer]] - [[Michael Lynch]] | * [[Spencer (The War Games)|Spencer]] - [[Michael Lynch]] | ||
* [[Russell (The War Games)|Russell]] - [[Graham Weston]] | * [[Russell (The War Games)|Russell]] - [[Graham Weston]] | ||
* [[Security Chief]] - [[James Bree]] | * [[Security Chief (The War Games)|Security Chief]] - [[James Bree]] | ||
* Alien Technician - [[Charles Pemberton]] | * [[Alien technician (The War Games)|Alien Technician]] - [[Charles Pemberton]] | ||
* [[Moor (The War Games)|Moor]] - [[David Troughton]] | * [[Moor (The War Games)|Moor]] - [[David Troughton]] | ||
* [[The War Lord|War Lord]] - [[Philip Madoc]] | * [[The War Lord|War Lord]] - [[Philip Madoc]] | ||
* [[Du Pont]] - [[Peter Craze]] | * [[Du Pont]] - [[Peter Craze]] | ||
* [[Arturo Villar]] - [[Michael Napier-Brown]] | * [[Arturo Villar]] - [[Michael Napier-Brown]] | ||
* [[Petrov]] - [[Stephen Hubay]] | * [[Ivan Petrov|Petrov]] - [[Stephen Hubay]] | ||
* [[ | * [[First Time Lord (The War Games)|First Time Lord]] - [[Bernard Horsfall]] | ||
* [[ | * [[Adelphi|Second Time Lord]] - [[Trevor Martin]] | ||
* [[ | * [[Socra|Third Time Lord]] - [[Clyde Pollitt]] | ||
* [[Tanya Lernov|Tanya]] - [[Clare Jenkins]] | * [[Tanya Lernov|Tanya]] - [[Clare Jenkins]] | ||
=== Uncredited cast === | |||
* German Soldiers - [[David Billa]], [[Gary Dean]], [[Andrew Andreas]], [[Dennis Balcombe|Denis Balcolmbe]], [[Tom O'Leary]], [[Phil Lumgren|Phil Lundgren]], [[Ron Conrad]], [[George Howse]], [[Neville Simons]], [[Louis Berkman]], [[Bob Wilyman]], [[Barry Kennington]], [[Patrick Milner]] | |||
* British Soldiers in No Man's Land - [[David Melbourne]], [[Derek Hunt]] | |||
* British Soldiers in trench - [[Alistair Meldrum]], [[Allan Travell]] | |||
* Machine Gunners - [[Patrick Scott]], [[Eden Fox]] | |||
* Batman - [[Ken Frazer]] | |||
* Guards - [[Alistair Meldrum]], [[Allan Travell]] | |||
* Sentries - [[Patrick Scott]], [[Ken Frazer]] | |||
* Firing Squad - [[Eden Fox]], [[Tom O'Leary]], [[George Curtis]], [[Alex Hood]], [[Roy Brent]], [[Keith Ashley]] | |||
* Sniper - [[Clive Rogers]] | |||
* Military Policemen - [[Douglas Roe]], [[Jack Silk]] | |||
* Sergeant at Prison - [[Tom O'Leary]] | |||
* Prison Sentries - [[Roy Brent]], [[Alex Hood]], [[James Haswell]] | |||
* Prison Guards - [[Bill Hughes]], [[Paul Phillips]] | |||
* Prisoners - [[Bill Hughes]], [[Paul Phillips]], [[Alex Hood]], [[James Haswell]] | |||
* Alien Technicians - [[Derek Crick]], [[Steve Pokol]], [[Alf Cossir]], [[Lee Fenton]], [[Paul St. Clair]], [[Terry Sartain]], [[Ian Munro]], [[David Billa]], [[Richard King]], [[Derek Calder]], [[Terence Denville]], [[John Spradbury]] | |||
* Stunt Driver - [[Reg Dent]] | |||
* [[Ninth Legion|Roman Soldiers]] - [[Emmett Hennessy]], [[Roger Howton]], [[Crawford Lyall]], [[Tom Laird]], [[Royston Farrell]], [[Patrick Scott]], [[Ray Carnell]], [[David Billa]], [[Dennis Balcombe|Denis Balcombe]], [[Tom O'Leary]], [[Phil Lumgren]], [[Ron Conrad]], [[George Howse]], [[Neville Simons]], [[Louis Berkman]], [[Bob Wilyman]], [[Barry Kennington]] | |||
* Alien Guards - [[Bruce Wells]], [[Terry Munro]], [[Bill Richards]], [[Bud Castlenau]], [[Dennis Balcombe|Denis Balcombe]], [[Les Conrad]], [[Bill Richards]], [[Martin Lyder]], [[Bill Strange]], [[Raoul Skinner]], [[Ron Conrad]] | |||
* [[1862]] Soldier - [[Leslie Bates]] | |||
* Foot Soldiers - [[Johnny Scripps]], [[David Cannon]], [[Patrick Milner]], [[Martin Lyder]], [[John Spradbury]], [[Peter Kaukus]], [[Leslie Bates]], [[Terence Denville]] | |||
* Confederate Horsemen - [[Peter Diamond]], [[Reg Dent]], [[Gerry Wain]], [[Arthur Howell]] | |||
* Americans Soldiers - [[Bruce Wells]], [[Terry Munro]], [[Bill Richards]], [[Bud Castlenau]], [[Steve Pokol]], [[Alf Cossir]], [[Lee Fenton]], [[Paul St. Clair]], [[Terry Sartain]], [[Ian Munro]] | |||
* Northern American Soldiers - [[Les Conrad]], [[Bill Richards]] | |||
* Confederate Soldiers - [[Jim Delaney]], [[Leslie Bates]], [[Brian Nolan|Bryan Nolan]] | |||
* Austro-Hungarian - [[Tom O'Leary]] | |||
* Alien Students - [[Phil Lumgren|Phil Lundgren]], [[Ron Conrad]], [[George Howse]], [[Neville Simons]], [[Louis Berkman]], [[Bob Wilyman]], [[Barry Kennington]] | |||
* Resistance Men - [[Allan Travell]], [[Harry Tierney]], [[David Melbourne]], [[Clive Rogers|Clive Rodgers]], [[Roger Graham]], [[Cy Wallis]], [[Terry Munro]], [[Brian Nolan|Bryan Nolan]], [[Barry Kennington]], [[Robin Scott]], [[Patrick Milner]], [[Jim Delaney]], [[Derek Crick]], [[Joe Santo]], [[Steve Emerson]], [[Stan Simmons]] | |||
* Stuntmen/Alien Guards - [[Gerry Wain]], [[Del Watson]], [[Peter Diamond]] | |||
* British Soldiers - [[Roger Graham]], [[Bob Wilyman]], [[Tony Starr]], [[Derek Calder]], [[Derek Hunt]], [[David Melbourne]], [[Alistair Meldrum]], [[Alex Hood]], [[Roger Charles]] | |||
* Machine Gunners - [[Roger Charles]], [[Hein Viljoen]] | |||
* Voice of Firning Squad Officer - [[Patrick Troughton]] | |||
* Mexican Resistance Men - [[John de Marco]], [[Chris Achilles]] | |||
* North American Soldier - [[Jim Delaney]] | |||
* Roman Officer - [[Derek Calder]] | |||
* Crimenan Soldier - [[Del Watson]] | |||
* Confederate - [[Derek Calder]] | |||
* [[Time Lord technician 1 (The War Games)|Time Lord technician]] - [[Derek Calder]] | |||
* [[Time Lord technician 2 (The War Games)|Time Lord technician]] - [[David Billa]] | |||
* Redcoat - [[Dennis Balcombe|Denis Balcombe]] (all [[DWM 232]]) | |||
== Crew == | == Crew == | ||
* [[ | * [[Writer]]s - [[Terrance Dicks]] and [[Malcolm Hulke]] | ||
* [[Costumes]] - [[Nicholas Bullen]] | * [[Doctor Who theme|Title Music]] - [[Ron Grainer]] and the [[BBC Radiophonic Workshop]] | ||
* [[Incidental Music]] - [[Dudley Simpson]] | |||
* [[Special Sounds|Special Sound]] by [[Brian Hodgson]], [[BBC Radiophonic Workshop]] | |||
* [[Special effects|Special Effects]] - [[Michaeljohn Harris]] | |||
* [[Costumes]] - [[Nicholas Bullen|Nick Bullen]] | |||
* [[Make-up]] - [[Sylvia James]] | |||
* [[Studio lighting|Lighting]] - [[Howard King]] | |||
* [[Studio sound|Sound]] - [[John Staple]] | |||
* [[Film cameraman|Film Cameraman]] - [[Alan Jonas]] | |||
* [[Film editor|Film Editor]] - [[Chris Hayden]] | |||
* [[Designer (crew)|Designer]] - [[Roger Cheveley]] | * [[Designer (crew)|Designer]] - [[Roger Cheveley]] | ||
* [[Producer]] - [[Derrick Sherwin]] | * [[Producer]] - [[Derrick Sherwin]] | ||
* [[ | * [[Director (crew)|Director]] - [[David Maloney]] | ||
* [[Fight arranger|Fight Arranger]] - [[Peter Diamond]] | |||
* [[ | |||
== | === Uncredited crew === | ||
* [[Visual effects assistant|Visual Effects Assistant]] - [[Len Hutton]] ([[INFO]]: ''The War Games'') | |||
* [[Grams operator|Grams Operator]] - [[Ron Arnett]] ([[INFO]]: ''The War Games'') | |||
* [[Vision Mixer]] -[[David Langford]] ([[INFO]]: ''The War Games'') | |||
* [[Film camera assistant|Film Camera Assistant]] - [[John Walker]] ([[INFO]]: ''The War Games'') | |||
* [[Film sound|Film Sound Recordist]] - [[Bill Meekums]] ([[INFO]]: ''The War Games'') | |||
* [[Assistant sound recordist|Assistant Sound Recordist]] - [[Alan Cooper (crew)|Alan Cooper]] ([[INFO]]: ''The War Games'') | |||
* [[Graphic Designer]] - [[Alan Jeapes]] ([[INFO]]: ''The War Games'') | |||
* [[Visual effects assistant|Effects Assistant]] - [[Dave Havard]] ([[INFO]]: ''The War Games'') | |||
* [[Technical manager|Technical Managers]] - [[Fred Wright]], [[David Hare|Dave Hare]] ([[INFO]]: ''The War Games'') | |||
* [[Director's assistant|Director's Assistant]] - [[Carole Bisset]]t ([[INFO]]: ''The War Games'') | |||
* [[Floor assistant|Floor Assistant]] - [[Don Ross]] ([[INFO]]: ''The War Games'') | |||
=== | == Worldbuilding == | ||
* The Doctor uses [[ | * The War Lords abducted [[Marcus Octavius]]. | ||
=== The Doctor's items === | |||
* The Doctor again uses his [[recorder]] as a telescope. | |||
=== Locations === | === Locations === | ||
* The time | * The [[time zone]]s are divided into the following wars or periods in Earth's history: [[Roman]], [[Greek]], [[Crimean War]], [[First World War]], [[Peninsular War]], [[American Civil War]], [[Mexican Civil War]], [[English Civil War]], [[Thirty-Years War]], [[Boer War]], [[Russo-Japanese War]]. | ||
=== Species === | === Species === | ||
* | * The Doctor recalls that the [[Quark]]s were [[robot]]ic servants of the [[Dominator]]s who tried to en[[slave]] a [[Dulcian|peace loving race]]. | ||
* The Doctor is identified as a [[Time Lord]]. | |||
* The Doctor notes that various forces have tried to conquer the [[planet]] [[Earth]]: [[Robot Yeti]] controlled by an [[Great Intelligence|alien intelligence]], the [[Martian]] [[Ice Warrior]]s, and the half-[[Mondasian|creature]] half-[[cyborg|machine]] [[Cyberman|Cybermen]]. | |||
* The Doctor believes the [[Dalek]]s to be the worst of the [[evil]]s he has fought, describing them as "a pitiless race of conquerors exterminating all who came up against them." | |||
=== | === Technology === | ||
* | * Via a [[Thought Channel]], the Doctor recalls examples of evils he has fought to justify his interference. | ||
=== Time | === Time machines === | ||
* | * The SIDRAT is provided with [[dimensional control]], which can make change its relative dimensions. | ||
=== | === Law === | ||
* | * Due to Smythe simply using hypnosis on the other members of court to force a guilty verdict, rather than giving the Doctor, Jamie, and Zoe a fair trial, the resulting court martial is stated to not follow [[King's regulations]]. | ||
== Story notes == | == Story notes == | ||
* Clips were used in episode ten from ''[[The Web of Fear]]'' (the TARDIS in space), ''[[Fury from the Deep]]'' (the TARDIS landing in the sea) and ''[[The Wheel in Space]]'' (a Wheel exterior). | * The four faces proposed to the Doctor for his change of appearance were drawn by the story's designer [[Roger Cheveley]]. The script of the episode confirms, as the episode's dialogue indicates, that five faces are proposed to him. The one deemed "too young" by the Doctor is not shown. None of the faces shown resemble the actual [[Third Doctor]], as [[Jon Pertwee]] was not cast in the role until production of this serial had concluded. | ||
* Clips were used in episode ten from ''[[The Web of Fear (TV story)|The Web of Fear]]'' (the TARDIS in space), ''[[Fury from the Deep (TV story)|Fury from the Deep]]'' (the TARDIS landing in the sea) and ''[[The Wheel in Space (TV story)|The Wheel in Space]]'' (a Wheel exterior). | |||
* The same clips of attacking Roman soldiers were used in different episodes despite being at two different times and with different party members (The Doctor, Zoe, Jamie, Jennifer and Carstairs in episodes two and three, The Doctor, Jamie and Carstairs in episode seven) | |||
* The story title, episode number and writers' name credits for each episode are shown over a stock footage montage of explosions and gunfire. | * The story title, episode number and writers' name credits for each episode are shown over a stock footage montage of explosions and gunfire. | ||
* The space/time machines that the War Chief provides for the games are only named SIDRAT once (in episode seven, when it's pronounced | * The German soldiers in the 1917 War Zone are seen wearing spiked helmets despite such helmets being put out of use in 1916. | ||
* Producer [[Derrick Sherwin]]'s then wife Jane appears in the role of Lady Jennifer Buckingham. | * The space/time machines that the War Chief provides for the games are only named SIDRAT once (in episode seven, when it's pronounced "side rat"). The acronym is never explained on-screen, but [[Malcolm Hulke]]'s [[Doctor Who and the War Games (novelisation)|novelisation]] of the story reveals it to stand for Space and Inter-time Directional Robot All-purpose Transporter. SIDRAT is TARDIS spelled backwards. | ||
* Jane Sherwin (Lady Jennifer Buckingham) is credited as | * Producer [[Derrick Sherwin]]'s then wife [[Jane Sherwin]] appears in the role of Lady Jennifer Buckingham. She was cast at the suggestion of [[David Maloney]]. | ||
* David Savile (Lieutenant Carstairs) is credited as | * [[Jane Sherwin]] (Lady Jennifer Buckingham) is credited as "Lady Jennifer Buckingham" for episode one, "Lady Jennifer" for episodes two to four, and "Jennifer" for episode five. | ||
* Freddie Wilson (Quark), John Levene (Yeti), Tony Harwood (Ice Warrior), Roy Pearce (Cyberman) and Robert Jewell (Dalek) were uncredited on-screen for their appearances as the various monsters seen on the | * [[David Savile]] (Lieutenant Carstairs) is credited as "Lieutenant Carstairs" for episode one, "Lieut. Carstairs" for episodes two and three, and "Carstairs" for episodes four to nine. He is billed as "Lieutenant Carstairs" in ''Radio Times'' for episodes one to three. | ||
* The ''Radio Times'' programme listing for episode one was accompanied by a black and white head-and-shoulders shot of the Doctor, bearing the title ''Who on earth'', with the accompanying caption "At 5.15 in the first episode of his new adventure, Dr. Who returns to the twentieth century and this planet" | * [[Michael Napier-Brown]] is credited as "Arturo Villar" for episode eight and "Arture Villar" for episode nine. | ||
* Philip Madoc (War Lord) is credited on-screen for episode ten, but not in ''Radio Times''. | * [[Freddie Wilson]] (Quark), [[John Levene]] (Yeti), [[Tony Harwood]] (Ice Warrior), [[Roy Pearce]] (Cyberman) and [[Robert Jewell]] (Dalek) were uncredited on-screen for their appearances as the various monsters seen on the viewing screen in the courtroom in episode ten, though they were credited in ''Radio Times''. | ||
* | * The Dalek model is of the type used since [[TV]]: ''[[The Chase (TV story)|The Chase]]'' while the Cyberman is from their then recent return in [[TV]]: ''[[The Invasion (TV story)|The Invasion]]''. | ||
* The final episode of this serial was the last to feature scrolling end credits until | * The ''Radio Times'' programme listing for episode one was accompanied by a black and white head-and-shoulders shot of the Doctor, bearing the title ''Who on earth'', with the accompanying caption, "At 5.15 in the first episode of his new adventure, Dr. Who returns to the twentieth century and this planet." That for episode seven bore another different black and white head-and-shoulders shot of the Doctor, bearing the title ''Adventures in time'', with the accompanying caption, "At 5.15 Dr. Who and his friends face fresh opposition as they continue their journey through the centuries." | ||
* | * [[Philip Madoc]] (War Lord) is credited on-screen for episode ten, but not in ''[[Radio Times]]''. | ||
* This was the only TV story to feature [[Philip Madoc]], that wasn't written by [[Robert Holmes]]. | |||
* The final episode of this serial was the last to feature scrolling end credits until part four of the Fifth Doctor serial ''[[Earthshock (TV story)|Earthshock]]''. (This would later be seen in the revived series.) | |||
* According to the DVD Production Notes commentary, ''The War Games'' was allotted ten episodes when a planned storyline entitled ''Doctor Who and the Impersonators'' was rejected as unworkable. | |||
* In the DVD commentary, [[Terrance Dicks]] claims that the reason this story came to be written was that, after ''[[The Space Pirates (TV story)|The Space Pirates]]'', there was supposed to be a four-part story and a six-part story to finish the season but both of these projects "collapsed". So Derrick Sherwin instead decided to close the season with a ten-part story and he asked Dicks to write it. However, Dicks knew he wasn't experienced enough to do it by himself so he asked Malcom Hulke, who was a long time friend and mentor of Dicks, to write it with him. | |||
* Ironically, episode eight, the least-watched ''Doctor Who'' episode of all time up until 1989, was also arguably the most important episode in the show's history, as it was the one in which the Doctor is first described as being a fugitive from his people, the Time Lords. | * Ironically, episode eight, the least-watched ''Doctor Who'' episode of all time up until 1989, was also arguably the most important episode in the show's history, as it was the one in which the Doctor is first described as being a fugitive from his people, the Time Lords. | ||
* When aired in the US by [[PBS]], all ten episodes were edited together into a single omnibus-format edition with a running time, commercial-free, of about four hours. However, at least one station (WHRM in Wausaw, WI) aired this story in two parts | * When aired in the US by [[PBS]], all ten episodes were edited together into a single omnibus-format edition with a running time, commercial-free, of about four hours. However, at least one station (WHRM in Wausaw, WI) aired this story in two parts — the first part lacking closing credits, and the second part lacking opening titles. | ||
* The scene where the Doctor argues with the Time Lords was filmed approximately three weeks after [[Jon Pertwee]] had been contracted to take over from [[Patrick Troughton]], but the scene where the Doctor's exile sequence (the ending of episode ten) begins was filmed several weeks earlier when the next actor to play the Doctor was still under negotiation so no complete transformation was seen. | |||
* Episode three features a rare moment of inner dialogue, when the War Chief can be heard thinking, "Time travellers. I wonder..." | * Episode three features a rare moment of inner dialogue, when the War Chief can be heard thinking, "Time travellers. I wonder..." | ||
* In episode one, the Doctor kisses Zoe. This marks the first time the Doctor kisses a companion | * In episode one, the Doctor kisses Zoe. This marks the first time the Doctor kisses a companion, albeit in a platonic manner. | ||
* [[Tanya Lernov]], a character from Zoe's debut story, ''[[The Wheel in Space]]'', appears in episode ten's sequence of Zoe's return to the Wheel. | * [[Tanya Lernov]], a character from Zoe's debut story, ''[[The Wheel in Space (TV story)|The Wheel in Space]]'', appears in episode ten's sequence of Zoe's return to the Wheel. | ||
* This is one of the stories chosen to be shown as part of [[BSB | * This is one of the stories chosen to be shown as part of BSB's [[Doctor Who Weekend (BSB)|Doctor Who Weekend]] in September 1990. | ||
* The German dialogue between Captain von Weich and Lieutenant Lucke in the German dugout in episode three is translated as follows: | * The German dialogue between Captain von Weich and Lieutenant Lucke in the German dugout in episode three is translated as follows: | ||
:: von Weich: "Who are these people? What's going on here?" | :: von Weich: "Who are these people? What's going on here?" | ||
:: Lucke: "We have here three English civilians, Captain... They told me they come from another time in a spaceship called TARDIS." | :: Lucke: "We have here three English civilians, Captain... They told me they come from another time in a spaceship called TARDIS." | ||
:: von Weich: "They are English spies. We must detain them. I'll speak with the General about it." | :: von Weich: "They are English spies. We must detain them. I'll speak with the General about it." | ||
* A [[Kroton]] was originally going to be one of the foes the Doctor brings up on the projection screen in the courtroom, and a copyright payment made to Robert Holmes. However, neither of the two Kroton costumes was in usable condition, according to the DVD Production Information subtitles. | * A [[Kroton (species)|Kroton]] was originally going to be one of the foes the Doctor brings up on the projection screen in the courtroom, and a copyright payment made to [[Robert Holmes]]. However, neither of the two Kroton costumes was in usable condition, according to the DVD Production Information subtitles. | ||
* The Doctor's [[Gallifrey|home planet]] appears for the first time — but it wouldn't be named until [[Barry Letts]] pre-empted its on-screen debut in ''[[The Time Warrior (TV story)|The Time Warrior]]'' by revealing the name in the letters column of an issue of ''[[TV Comic]]''. | * The Doctor's [[Gallifrey|home planet]] appears for the first time — but it wouldn't be named until [[Barry Letts]] pre-empted its on-screen debut in ''[[The Time Warrior (TV story)|The Time Warrior]]'' by revealing the name in the letters column of an issue of ''[[TV Comic]]''. | ||
* A real First World War ambulance | * A real First World War ambulance was used in the location scenes and [[Jane Sherwin]] remarked in the DVD commentary that she drove it herself. | ||
* [[Michaeljohn Harris]]' name is spelt as Michaeljohn in episode one and Michael John in episode ten. | |||
* The sonic screwdriver is actually used to perform the function of a regular screwdriver in this serial. | |||
* Though the regeneration itself is arguably not shown, this is the longest regeneration story in the series, with a total run time of four hours and ten minutes across ten episodes. | |||
* Of the three ''Doctor Who'' stories to extend beyond seven episodes (''[[The Trial of a Time Lord]]'' is conventionally split up into four serials), this is the only one that was not directed by [[Douglas Camfield]]. Effectively, this is the only 10-part serial in the show's history, and is the only serial that exceeds seven parts during the black and white era to not contain missing episodes. | |||
* One scene called for the regulars to hear an explosion and then dive down. [[Patrick Troughton]] wanted to know how big the explosion was and insisted on a demonstration — and a huge boulder landed right where they were to be standing. Troughton then said, "That's why I wanted to see what it was like." | |||
* The First World War battleground was actually a rubbish dump in Brighton that had previously been used for {{wi|Oh! What a Lovely War}} | |||
* In addition rain and snow, the World War One set was overrun with rats. This upset [[Patrick Troughton]] so much that he threatened to quit on the spot if he saw one more. It was later revealed that it brought back unpleasant memories of his wartime experience where he had rat-shooting duties. | |||
* As scripted, the Doctor was to say that the Time Lords were the rulers of his people. Instead, he simply says that they are his people — giving rise to decades of arguments in fandom about whether all Gallifreyans are Time Lords, or only some. | |||
* Spencer and other, unnamed resistance fighters were intended to die in the alien attack in part five. | |||
* Zoe originally misidentified the meaning of TARDIS as “Time And Relative Dimensional Intergalactic Ship”. | |||
* Von Weich was to have been shot trying to escape at the end of part five. | |||
* Jennifer Buckingham was originally present when Jamie and the others were ambushed. By the time part six was delivered, however, it had already been decided that Jennifer would not be included in the second half of the story. | |||
* In episode seven, Smythe's aide was initially a new character called Sergeant Wilkins; only latterly was the decision made to bring back Sergeant Major Burns from the first instalment. | |||
* The script for part eight implied that the alien race controlling the Zones was collectively called the War Lords — an identification not made in the completed programme — and also included a line of dialogue in which the Doctor asserts that there are multiple time-travelling civilisations | |||
* Episode ten originally included a prominent role for an unseen Time Lord judge, most of whose dialogue was later allocated to the First Time Lord. | |||
* In the original script, the Doctor and Jamie took advantage of a weakening of the barrier near the floor to push Zoe through, enabling her to turn off the field. Malcolm Hulke reinstated this scene for the novelisation. | |||
* [[Terrance Dicks]] and [[Malcolm Hulke]] had originally conceived the aliens as speaking in a cold “alien voice” when exercising the mind control. It was [[David Maloney]] who came up with the hypnotising spectacles. | |||
* [[Philip Madoc]] grew a beard to play the War Lord so that viewers wouldn't recognise him from his guest role in ''[[The Krotons (TV story)|The Krotons]]''. | |||
* [[David Maloney]] came up with the sequence in which the Doctor sent his plea to the Time Lords in a small box. He also suggested war settings which would be interesting to the viewers based on advice from his young son. | |||
* Since the story was first released on VHS in 1990, additional 16mm film prints were at some point located at the BFI. Although copies of already existing episodes are usually considered redundant (episode three of ''[[The Enemy of the World (TV story)|The Enemy of the World]]'' and episode one of ''[[The Web of Fear (TV story)|The Web of Fear]]''), these prints of ''The War Games'' were of significantly higher quality than those that already existed in the BBC Archives. They were used for the story's DVD release in 2009. | |||
* This story was ranked as ''[[Doctor Who Magazine]]'' readers' favourite [[Second Doctor]] story in their [[2014]] and [[2023]] polls, replacing the previous title holder, ''[[The Evil of the Daleks (TV story)|The Evil of the Daleks]]''. ([[DWM 589]]) | |||
* [[Patrick Troughton]]'s son [[David Troughton]] appears as Private Moor. | |||
* [[Malcolm Hulke]] named the unseen Major Ellis on [[David Ellis]], who he co-wrote ''[[The Faceless Ones (TV story)|The Faceless Ones]]'' with. | |||
* [[Terrance Dicks]] felt that [[Edward Brayshaw]] was "[[pantomime]] menace", while [[Philip Madoc]] was genuine menace. | |||
* Unusually, episode ten made use of clips from past serials - the TARDIS materialising on the sea was from ''[[Fury from the Deep (TV story)|Fury from the Deep]]'', the TARDIS hanging in space is from ''[[The Web of Fear (TV story)|The Web of Fear]]'' and an establishing shot of [[Space Station W3]] from [[The Wheel in Space (TV story)|''The Wheel in Space'']] was used when Zoe is sent back to her own time. This tactic later proved to have the unintended benefit of preserving clips from the first episodes of ''Fury from the Deep'' and ''The Wheel in Space'', which are both otherwise [[missing episode]]s. | |||
=== Ratings === | === Ratings === | ||
* Episode | * Episode one - 5.5 million viewers | ||
* Episode | * Episode two - 6.3 million viewers | ||
* Episode | * Episode three - 5.1 million viewers | ||
* Episode | * Episode four - 5.7 million viewers | ||
* Episode | * Episode five - 5.1 million viewers | ||
* Episode | * Episode six - 4.2 million viewers | ||
* Episode | * Episode seven - 4.9 million viewers | ||
* Episode | * Episode eight - 3.5 million viewers | ||
* Episode | * Episode nine - 4.1 million viewers | ||
* Episode | * Episode ten - 5.0 million viewers | ||
Episode eight has the dubious distinction of being the lowest-rated ''Doctor Who'' episode until part one of ''[[Battlefield]]'' more than 20 years later. | Episode eight has the dubious distinction of being the lowest-rated ''Doctor Who'' episode until part one of ''[[Battlefield (TV story)|Battlefield]]'' more than 20 years later. | ||
=== Myths === | === Myths === | ||
* ''Doctor Who'' was under serious threat of being cancelled at the end of this season. ''(Although this is [[Terrance Dicks]] | * ''Doctor Who'' was under serious threat of being cancelled at the end of this season. ''(Although this is [[Terrance Dicks]]{{'}}s recollection, it has been denied by both [[Peter Bryant]] and [[Derrick Sherwin]] and is not borne out by contemporary evidence, although the viewership numbers were considerably lower than they would be at the time of the original series' cancellation in 1989. The series would, however, face the threat of cancellation at the end of the [[Season 7 (Doctor Who 1963)|following season]].)'' | ||
* At his trial, the Doctor is charged with having stolen the TARDIS. ''(This occurs in [[Doctor Who and the War Games|this story's novelisation]], in the prologue to ''[[Doctor Who and the Auton Invasion]]'' and in an account in the 1972 book ''The Making of Doctor Who'', but not in the televised version, although the Doctor and the War Chief do discuss the said theft in episode eight.)'' | * At his trial, the Doctor is charged with having stolen the TARDIS. ''(This occurs in [[Doctor Who and the War Games (novelisation)|this story's novelisation]], in the prologue to ''[[Doctor Who and the Auton Invasion (novelisation)|Doctor Who and the Auton Invasion]]'' and in an account in the 1972 book ''The Making of Doctor Who'', but not in the televised version, although the Doctor and the War Chief do discuss the said theft in episode eight.)'' | ||
* In episode seven, the voice of the officer ordering the Doctor's second firing squad to fire was none other than Patrick Troughton himself. ''(This is claimed by the DVD | * In episode seven, the voice of the officer ordering the Doctor's second firing squad to fire was none other than Patrick Troughton himself. ''(This is claimed by the DVD release's Production Subtitles, but even a casual listener can hear that this is [[Esmond Webb]] as Sergeant Major Burns giving the order.)'' | ||
* This was the lowest rated story in the show's history until after the 1986 hiatus. ''(Despite the exceptionally poor ratings for episode eight, the story was never the lowest rated overall. That distinction fell to ''[[The Smugglers]]'', which had the lowest average rating of any story prior to ''[[The Mysterious Planet]]''. It was, however, the lowest rated of Patrick Troughton's stories.)'' | * This was the lowest rated story in the show's history until after the 1986 hiatus. ''(Despite the exceptionally poor ratings for episode eight, the story was never the lowest rated overall. That distinction fell to ''[[The Smugglers (TV story)|The Smugglers]]'', which had the lowest average rating of any story prior to ''[[The Mysterious Planet (TV story)|The Mysterious Planet]]''. It was, however, the lowest rated of Patrick Troughton's stories.)'' | ||
* The Doctor and the War Chief have not encountered each other since leaving Gallifrey. ''( | * The Doctor and the War Chief have not encountered each other since leaving Gallifrey. ''(The War Chief specifically states that he knows the Doctor from before.)'' | ||
* The alien race featured in the story are called the War Lords. ''(The Aliens are never referred to by this or any other name - apart from 'the Aliens' - on-screen. Although they are identified collectively as 'the War Lords' in the script for episode eight, this name was never used in the finished programme, perhaps to avoid confusion with the character played by Philip Madoc, who first appears in episode seven.)'' | * The alien race featured in the story are called the War Lords. ''(The Aliens are never referred to by this or any other name - apart from 'the Aliens' - on-screen. Although they are identified collectively as 'the War Lords' in the script for episode eight, this name was never used in the finished programme, perhaps to avoid confusion with the character played by [[Philip Madoc]], who first appears in episode seven.)'' | ||
* Jamie and Zoe's memories are completely wiped of the Doctor. ''(Only their memories of ''travelling'' with the Doctor are erased. They both still remember their first adventure with him, namely ''[[The Highlanders (TV story)|The Highlanders]]'' and ''[[The Wheel in Space (TV story)|The Wheel in Space]]''. Zoe is even seen, returned to the Wheel, and remarking on how the Doctor and Jamie have just left.)'' | |||
* The War Chief doesn't have a TARDIS. ''(While we never actually see it, in episode eight, the War Chief says to the Doctor, "Stealing a TARDIS? Oh, I'm not criticising you. We are two of a kind.")'' | |||
* The fight between Jamie and a Redcoat at the end of episode ten is a clip taken from ''[[The Highlanders (TV story)|The Highlanders]]'', and it is effectively one of few surviving clips from the story. (''This brief fight was specifically shot for'' The War Games'', although it has been used in some compilations by [[Stuart Humphryes|Babelcolour]] to represent the story''.) | |||
=== Filming locations === | === Filming locations === | ||
* [[Ealing Television Film Studios]] (Stage 3), Ealing Green, Ealing | * [[Ealing Television Film Studios]] (Stage 3), Ealing Green, Ealing | ||
* [[BBC Television Centre]] (Studio 4), (Studio 8), (Studio 1), (Studio 6) | * [[BBC Television Centre]] (Studio 4), (Studio 8), (Studio 1), (Studio 6) | ||
* Sheepcote Valley, Brighton (1917 zone) | |||
* Birling Farm Manor, Brighton (Military prison, Doctor in front of firing squad) | |||
* Eastbourne Waterboard Road, Brighton (Ambulance runs out petrol) | |||
* The Lane, Brighton (Doctor and Zoe ambush car to visit prison / American Civil War zone) | |||
* Seven Sisters Country Park, Brighton (Roman zone) | |||
* Underhill Lane, Brighton (Ambulance ambush / Jamie arrives back in Scotland) | |||
* High Park Farm, Brighton (Ambulance waits for riders to pass when out of petrol) | |||
* Botony Bay, Kent (reused footage from ''[[Fury from the Deep (TV story)|Fury from the Deep]]'') (TARDIS escapes ocean) | |||
=== Production errors === | === Production errors === | ||
{{discontinuity}} | {{discontinuity}} | ||
* The | * The zone map, first seen in episode three, clearly does not align with the physical layout - according to the map, one would have to pass through both the American Civil War and Crimean War zones to reach the Roman Zone from the First World War zone, but the ambulance travels directly between the First World War and Roman zones in episodes two and seven. | ||
* The Redcoat that Jamie encounters in prison states he comes from 1745, though there is no time zone to take place in that period, at least what is stated on the map of the zones. | |||
* Some of the punches clearly fail to hit the intended person. | * Some of the punches clearly fail to hit the intended person. | ||
* When the Chief Scientist unfolds his | * Between the SIDRAT first appearing in the barn and it dematerialising with the Doctor and Zoe inside, the capsule rotates 180 degrees. | ||
* When the Chief Scientist unfolds his processing machine, a piece can be seen breaking off. | |||
* When he first appears, the Chief Scientist has a bald chin, but by episode six, he has inexplicably grown a short beard. | * When he first appears, the Chief Scientist has a bald chin, but by episode six, he has inexplicably grown a short beard. | ||
* In episode five, when Zoe is in the interrogation room, her head becomes transparent. | * In episode five, when Zoe is in the interrogation room, her head becomes transparent. The same happened later on with the Security Chief when his stomach is transparent. | ||
* When Smythe is shot dead by Russell in episode seven, the gun is visibly firing into the floor by accident as actor Graham Weston unintentionally stumbles over. | |||
* When Smythe is shot dead by Russell in episode seven, the gun is visibly firing into the floor by accident. | * In episode eight, a resistance soldier killed by the guard exiting a SIDRAT into the chateau can later be seen alive and well in the barn, as a member of the group entering the SIDRAT that the Doctor sends to transport them to the control room. Graham Weston draws attention to this in the DVD commentary. | ||
* In the American barn of episode eight, the alien communicator screen has been installed upside down. | * In the American barn of episode eight, the alien communicator screen has been installed upside down. | ||
* In episode ten, the | * In episode nine, [[Patrick Troughton]] fluffs one of the Doctor's lines, saying "Did you really think I'd take part in your disgusting steam... scheme?" | ||
* In episode | * In episode ten, when the Doctor points out to the Time Lords the monsters that he has fought and a Dalek is shown, one of the lights on its dome is missing. | ||
* In episode ten, when the TARDIS materialises in space, the shot is clearly taken from ''[[The Web of Fear (TV story)|The Web of Fear]] ''as the Great Intelligence's web appears around it. | |||
* In episode ten, when the TARDIS scanner displays a blank image prior to showing the hallways of Gallifrey, the studio lights are reflected on the screen. | |||
== Continuity == | == Continuity == | ||
* The | * The Doctor is [[The Doctor's trial (The War Games)|put on trial]] for his interference in other cultures, as he would be [[The Doctor's trial (The Mysterious Planet)|again]] in his [[Sixth Doctor|sixth incarnation]]. ([[TV]]: ''[[The Trial of a Time Lord]]'') | ||
* Listing the [[evil]]s he has fought, the Doctor recalls the [[Quark]]s, ([[TV]]: ''[[The Dominators (TV story)|The Dominators]]'') the [[Robot Yeti]], ([[TV]]: ''[[The Abominable Snowmen (TV story)|The Abominable Snowmen]]'', ''[[The Web of Fear (TV story)|The Web of Fear]]'') the [[Ice Warrior]]s, ([[TV]]: ''[[The Ice Warriors (TV story)|The Ice Warriors]]'', ''[[The Seeds of Death (TV story)|The Seeds of Death]]'') the [[Cyberman|Cybermen]], ([[TV]]: ''[[The Tenth Planet (TV story)|The Tenth Planet]]'' et al.) and the [[Dalek]]s. ([[TV]]: ''[[The Daleks (TV story)|The Daleks]]'' et al.) | |||
* | * Both the War Chief and the Time Lord tribunal state the Doctor's appearance has changed. ([[TV]]: ''[[The Tenth Planet (TV story)|The Tenth Planet]]'') | ||
* The Doctor's face is seen starting to change here, leading directly into his appearance on Earth with a new face and post-regenerative coma | * The Doctor's face is seen starting to change here, leading directly into his appearance on Earth with a new face and post-regenerative coma. ([[TV]]: ''[[Spearhead from Space (TV story)|Spearhead from Space]]'') | ||
* The War Chief reappears in [[PROSE]]: ''[[Timewyrm: Exodus (novel)|Timewyrm: Exodus]]''. | |||
* The War Chief reappears in [[PROSE]]: ''[[Timewyrm: Exodus]]''. | * In a [[Inferno Earth|parallel universe]], the Doctor chose one of the faces here suggested to him on this trial and became [[The Leader|the President of the Republic of Great Britain]]. ([[PROSE]]: ''[[Timewyrm: Revelation (novel)|Timewyrm: Revelation]]'') | ||
* | * Details of the War Chief's past are seen in a flashback in [[PROSE]]: ''[[Divided Loyalties (novel)|Divided Loyalties]]''. | ||
* Details of the War Chief's past are seen in a flashback in [[PROSE]]: ''[[Divided Loyalties]]'' | * The Second Doctor meets Lady Jennifer and Lieutenant Carstairs again in the flashback scene in [[PROSE]]: ''[[Players (novel)|Players]]''- this meeting is also briefly depicted in [[PROSE]]: ''[[World Game (novel)|World Game]]''- after they have been returned to November 1915, and the [[Sixth Doctor]] meets them both again in 1936 in a latter part of ''Players''. | ||
* The Second Doctor meets Lady Jennifer and Lieutenant Carstairs again in the flashback scene in [[PROSE]]: ''[[Players (novel)|Players]]'' | * Outfits worn here by the Time Lords are similar to those worn by the Master as a boy ([[TV]]: ''[[The Sound of Drums (TV story)|The Sound of Drums]]'') and other Time Lords. ([[TV]]: ''[[The Three Doctors (TV story)|The Three Doctors]]'') Rassilon once wore a golden variant ([[TV]]: ''[[The Five Doctors (TV story)|The Five Doctors]]'') | ||
* | * Jamie jokingly suggests opening General Smythe's safe with a tuning fork. ([[TV]]: ''[[The Space Pirates (TV story)|The Space Pirates]]'') | ||
* | * The Doctor notes that the [[SIDRAT|SIDRATs']] remote control and dimensional flexibility halves the lifespan of their time control units. When on his mission to [[Space Station Camera]], he protests most strongly at the [[teleport control]] installed in his TARDIS, which includes a [[Stattenheim remote control]]. ([[TV]]: ''[[The Two Doctors (TV story)|The Two Doctors]]'') | ||
* | * The Doctor later receives a [[hypercube]] message from another Time Lord. ([[TV]]: ''[[The Doctor's Wife (TV story)|The Doctor's Wife]]'') | ||
* [[PROSE]]: ''[[The Eight Doctors (novel)|The Eight Doctors]]'' takes place during episode | * [[PROSE]]: ''[[The Eight Doctors (novel)|The Eight Doctors]]'' takes place during episode nine of this story, with the [[Eighth Doctor]] having a brief encounter with a Roman legion and Lieutenant [[Lucke]] before being retrieved by one of the Aliens' forces, subsequently meeting his second incarnation just as the War Chief has been forced to declare the War Games over (a moment of temporal stasis as the two incarnations meet prevents anyone else registering that the Eighth Doctor is present). | ||
* [[PROSE]]: ''[[War Crimes (short story)|War Crimes]]'' takes place during episode | * [[PROSE]]: ''[[War Crimes (short story)|War Crimes]]'' takes place during episode ten of this story. | ||
* | * In an [[alternate timeline|alternative timeline]] created by {{Delgado}} in which the Doctor never left [[Gallifrey]], the War Lords' armies spread across the universe. ([[AUDIO]]: ''[[The Light at the End (audio story)|The Light at the End]]'') | ||
* | * Zoe encounters [[Tanya Lernov]] when she is returned to the Wheel by the Time Lords. ([[TV]]: ''[[The Wheel in Space (TV story)|The Wheel in Space]]'') | ||
* As part of a plan to regenerate himself, [[the Valeyard]] later stages a recreation of the Doctor's trial, with the [[Sixth Doctor]]'s companion [[Flip Jackson]] forced to act as Zoe. ([[AUDIO]]: ''[[Stage Fright (audio story)|Stage Fright]]'') | |||
* By the end of the serial, both Jamie and Zoë have lost their memories of their adventures with the Doctor; the [[Tenth Doctor]] will be forced to subject his companion [[Donna Noble]] to a similar fate, and the [[Twelfth Doctor]] will inflict such an amnesia on himself to erase his memories of his companion [[Clara Oswald]]. ([[TV]]: ''[[Journey's End (TV story)|Journey's End]]'', ''[[Hell Bent (TV story)|Hell Bent]]'') | |||
* Ironically, several of the Doctor's later incarnations would resemble the objections he makes to his possible faces in this story: | |||
** Both [[Clara Oswald]] and the [[Eleventh Doctor]] would imply the Twelfth was "too old", the former misunderstanding the function of regeneration while the latter bemoaned "going grey". ([[TV]]: ''[[Deep Breath (TV story)|Deep Breath]]'') | |||
** [[Melanie Bush]] believed that the [[Sixth Doctor]] was too overweight and once tried to put him on a fitness program. ([[TV]]: ''[[Terror of the Vervoids (TV story)|Terror of the Vervoids]]'') | |||
** The [[Twelfth Doctor]] once noted the particularly youthful appearances of his [[Fifth Doctor|fifth]] and eleventh incarnations. ([[PROSE]]: ''[[Silhouette (novel)|Silhouette]]'') | |||
** [[Donna Noble]] and the Eleventh Doctor would poke fun at how skinny the [[Tenth Doctor]] was, the latter labeling it a "special effect". ([[TV]]: ''[[The Poison Sky (TV story)|The Poison Sky]]'', ''[[The Day of the Doctor (TV story)|The Day of the Doctor]]'') | |||
== Home video and audio releases == | == Home video and audio releases == | ||
VHS | === DVD release === | ||
* This was released on video in episodic format in 1990. | * A three-disc DVD release occurred in the UK on [[6 July (releases)|6 July]] [[2009 (releases)|2009]]. A North American release followed on [[3 November (releases)|3 November]] 2009. | ||
* Remastering for the DVD release was completed by the [[Doctor Who Restoration Team]]. | |||
==== Special Features ==== | |||
* Commentary by [[Frazer Hines]] ([[Jamie McCrimmon|Jamie]]), [[Wendy Padbury]] ([[Zoe Heriot|Zoe]]), [[Philip Madoc]] ([[The War Lord]]), [[Jane Sherwin]] ([[Jennifer Buckingham|Lady Jennifer]]), [[Graham Weston]] ([[Russell (The War Games)|Russell]]), writer [[Terrance Dicks]] and producer [[Derrick Sherwin]] | |||
* ''[[War Zone: The End of an Era (documentary)|War Zone: The End of an Era]]'' - The making of ''The War Games'' | |||
* ''[[Shades of Grey (documentary)|Shades of Grey]]'' - A look back at the black and white era of ''[[Doctor Who]]'' | |||
* ''[[Now & Then: The Locations of The War Games (documentary)|Now and Then]]'' - The locations of ''The War Games'', forty years on | |||
* ''[[The Doctor's Composer (documentary)|The Doctor's Composer]]'' - [[Dudley Simpson]] discusses his first five years on ''Doctor Who'' | |||
* ''[[Sylvia James: In Conversation (documentary)|Sylvia James: In Conversation]]'' - Make-up designer [[Sylvia James]] talks about her work on ''Doctor Who'' | |||
* ''[[Talking about Regeneration (documentary)|Talking About Regeneration]]'' - The Doctor's many lives discussed | |||
* ''[[Time Zones: The Truth behind "The War Games" (documentary)|Time Zones]]'' - Historians discuss the reality behind the various conflicts featured in ''The War Games'' | |||
* ''[[Stripped for Action: The Second Doctor (documentary)|Stripped for Action]]'' - A look at the comic strip adventures of the [[Second Doctor]] | |||
* ''[[On Target: Malcolm Hulke (documentary)|On Target - Malcolm Hulke]]'' - A profile of the popular ''Doctor Who'' author and his novelisations | |||
* ''[[Devious (home video)|Devious]]'' - A 12-minute excerpt from the legendary unfinished fan film set between ''The War Games'' and ''[[Spearhead from Space (TV story)|Spearhead from Space]]'', and featuring the final performance of [[Jon Pertwee]] as the [[Third Doctor]]. This is the first fan-made ''Who'' spinoff production to be released to DVD by the BBC. | |||
* Photo Gallery | |||
* Coming Soon Trailer - ''[[The Black Guardian Trilogy]]'' | |||
* PDF Material - ''[[Radio Times]]'' listings, [[BBC Worldwide|BBC Enterprises]] sales brochure and reproduction of the original design plans for the [[SIDRAT]] prop | |||
* Production Information Subtitles | |||
* [[Easter Egg]]s: | |||
** Location filming audio recording. To access this hidden feature, press left at Subtitles on Disc One's Main Menu to illuminate the ''Doctor Who'' logo. | |||
** "{{w|The Scottish Falsetto Sock Puppet Theatre}} Presents The Trial Of Doctor Who". To access this hidden feature, press right at Info Text On on Disc Two's Subtitles menu to reveal a hidden ''Doctor Who'' logo. | |||
** Time Lord force field film insert. To access this hidden feature, press left at Subtitles on Disc Three's Main Menu to illuminate the ''Doctor Who'' logo. | |||
<gallery position="center" captionalign="center" hideaddbutton="true"> | |||
The war games.jpg|US DVD Cover | |||
The War Games DVD Australian cover.jpg|Australian DVD Cover | |||
TheWarGamesDVD.jpg|UK DVD Cover | |||
</gallery> | |||
=== BritBox streaming availability === | |||
This story is available for streaming through [[BritBox]] ([[US]]) as part of Season 6 of ''Classic Doctor Who''. | |||
=== VHS releases === | |||
* This was released on video in episodic format in [[1990 (releases)|1990]]. | |||
<gallery position="center" captionalign="center" hideaddbutton="true"> | <gallery position="center" captionalign="center" hideaddbutton="true"> | ||
File:The War Games VHS US cover.jpg|US VHS cover | File:The War Games VHS US cover.jpg|US VHS cover | ||
| Line 304: | Line 718: | ||
File:The War Games Part 2 VHS UK cover.jpg|UK VHS Part 2 cover | File:The War Games Part 2 VHS UK cover.jpg|UK VHS Part 2 cover | ||
</gallery> | </gallery> | ||
* It was also released for the [[W H Smith]] exclusive ''[[The Time Lord Collection]]'' in 2002. | * It was also released for the [[W H Smith]] exclusive ''[[The Time Lord Collection]]'' in [[2002 (releases)|2002]]. | ||
<gallery position="center" captionalign="center" hideaddbutton="true"> | <gallery position="center" captionalign="center" hideaddbutton="true"> | ||
File:Time Lord Collection VHS Australian box set cover.jpg|The Time Lord Collection Australian cover | File:Time Lord Collection VHS Australian box set cover.jpg|The Time Lord Collection Australian cover | ||
File:The War Games 40thanniv VHS Australian cover.jpg|The War Games Australian VHS cover | File:The War Games 40thanniv VHS Australian cover.jpg|The War Games Australian VHS cover | ||
</gallery> | </gallery> | ||
=== Audio release === | === Audio release === | ||
This story was also released on audio formats. | This story was also released on audio formats. | ||
<gallery position="center" captionalign="center" hideaddbutton="true"> | <gallery position="center" captionalign="center" hideaddbutton="true"> | ||
Bbcaudio117.jpg|CD release | Bbcaudio117.jpg|CD release | ||
</gallery> | </gallery> | ||
== External links == | == External links == | ||
* {{bbcepguideclassic|wargames/|The War Games}} | * {{bbcepguideclassic|wargames/|The War Games}} | ||
* {{radiotimes|2009-09-06/the-war-games|The War Games}} | |||
{{dwcast}} | {{dwcast}} | ||
{{dwrefguide|who_2z.htm|The War Games}} | |||
* {{briefhistory|serials/zz.html|The War Games}} | * {{briefhistory|serials/zz.html|The War Games}} | ||
* {{locguide|wargames|The War Games}} | * {{locguide|wargames|The War Games}} | ||
{{DWTV}} | {{DWTV}} | ||
{{Master stories}} | |||
{{Dalek stories}} | {{Dalek stories}} | ||
{{TitleSort}} | {{TitleSort}} | ||
[[de:050 - The War Games]] | |||
[[es:The War Games]] | |||
[[fr:The War Games]] | |||
[[ru:Военные игры]] | |||
[[Category:Articles that were originally Wikipedia forks]] | [[Category:Articles that were originally Wikipedia forks]] | ||
[[Category:Doctor Who (1963) television stories]] | [[Category:Doctor Who (1963) television stories]] | ||
[[Category:Time Lord television stories]] | [[Category:Time Lord television stories]] | ||
[[Category:1969 television stories]] | [[Category:1969 television stories]] | ||
[[Category:Season 6 stories]] | [[Category:Season 6 stories]] | ||
[[Category: | [[Category:Television stories set on Gallifrey]] | ||
[[Category:Stories set in the Rassilon Era]] | [[Category:Stories set in the Rassilon Era]] | ||
[[Category:New Beginnings television stories]] | |||
[[Category:An Introduction To The Second Doctor television stories]] | |||
Latest revision as of 20:03, 3 November 2024
- You may wish to consult
War Games (disambiguation)for other, similarly-named pages.
The War Games was the seventh and final serial of season 6 of Doctor Who. It was the final story of the 1960s and the last produced in monochrome. It was notable for introducing the Time Lords and for being the first time that the Doctor's home planet was seen. It was also the first story in which Derrick Sherwin was credited as producer. Discounting The Trial of a Time Lord as four narratively linked stories, it was the longest Doctor Who story to survive the purging of the BBC's videotape archive and currently marks the earliest point in the series where first-time viewers may begin watching Doctor Who in chronological order without encountering any missing episodes. It was also the first story to have a large gap of time between it and the next one.
The final episode saw the departure of Patrick Troughton as the Second Doctor and Frazer Hines and Wendy Padbury as companions Jamie McCrimmon and Zoe Heriot. It was the first time in the history of Doctor Who that either a companion or an incarnation of the Doctor made their last regular appearance in the concluding episode of a season. It was also the first time that an incarnation of the Doctor and all his companions were written out of the program in the same story.
Also, unlike most regeneration (or, as it was named here, "change of appearance") stories, the new lead actor and the Doctor's next incarnation did not appear in the final moments of the tenth part, in fact the Second Doctor's change of appearance isn't fully shown on screen, although his face is shown contorting as he's shown spinning away at the very end of the story. This marks the first and so far only time in the show's history that a story featured the last regular appearance of one of the Doctor's incumbent incarnations without revealing the succeeding incarnation at the end, with viewers having to wait six months until they would be able to get their first glimpse of the next Doctor. Because of the six month gap between the end of this story and the first story of Season 7 Polystyle Publications, the official Doctor Who comic licensees at the time, opted to continue publishing stories starring the Second Doctor after his last regular TV appearance rather than before, given the ambiguous ending of this story. The last comic story to have the Second Doctor as the leading incarnation, The Night Walkers, shows the start of the Second Doctor's change of appearance, beginning the Doctor's sentence and exile on Earth, and leading directly into the next TV story. The fan theory of Season 6B later also developed from the serial's ambiguous ending.
The story also featured a father and son playing roles on screen: David Troughton, the son of Patrick Troughton, appeared in this story.
Synopsis[[edit] | [edit source]]
The Doctor, Jamie and Zoe arrive on an unnamed planet. At first believing themselves to be in the midst of World War I, they realise it is one of many War Zones overseen by the War Lords, who have kidnapped large numbers of human soldiers in order to create an army to conquer the galaxy. Infiltrating the control base, the Doctor discovers that the War Chief is also a member of his own race. The creeping realisation sets in that the Doctor cannot solve this problem alone, and that his days of wandering may be at an end...
Plot[[edit] | [edit source]]
Episode one[[edit] | [edit source]]

The TARDIS lands in a desolate wasteland on Earth. The crew laugh as Jamie leaves the TARDIS and treads directly into a puddle. As they explore, they see barbed wire, and the discovery of a pith helmet allows the Doctor to place them in history. Bombs start to fall, and the crew duck for cover. They are surprised when they are confronted by a woman who says that they need to get to safety. She is heading to Ypres. They encounter enemy soldiers who lead them away.
The woman is driving the soldiers, the Doctor and Jamie across No Man's Land in an ambulance when they are met by a British lieutenant named Carstairs. He asks to be taken back to base.
In a trench, a major is told that an ambulance is coming in. He orders protective fire. The passengers clamber into the trench. The lieutenant, by the name of Carstairs, tells the major about the civilians found in No Man's Land, which shocks the major.
Outside, the Doctor is explaining trench warfare to Jamie. They decide to escape but are stopped by Carstairs. They are summoned to see the major.
Major Barrington gets word from General Smythe that they are to go over the top tomorrow. The Doctor, Jamie and Zoe enter alongside the ambulance driver who introduces herself to Barrington as Lady Jennifer Buckingham. The major casts his eye over the civilians. He suspects Jamie to be from the Highlander regiment and says that war is no place for a young woman like Zoe. He starts to suspect they may be spies and contacts General Smythe.
Smythe asks for the civilians to be sent to him. He moves into an adjoining room and begins to pull back a picture. He is interrupted by a soldier who he shouts out. When alone he pulls back the picture to reveal a communications device. He states that the "reinforcements are acting quiet" and that there are "at least 5000 specimens".
Barrington orders the Doctor, Jamie and Zoe to go. Jamie loses his temper and shouts at him, and guns are drawn. The Doctor states they had better go. Barrington says they will fix Jennifer's ambulance. Carstairs says he does not hold much hope for the Doctor, Jamie and Zoe as Smythe has the nickname of "the Butcher".
The Doctor, Jamie and Zoe are marched into Smythe's room. Jamie is still complaining. Captain Ransom goes to get Smythe but finds him not in his room. Ransom, flustered, orders them to be taken to the cells.
Jennifer and Carstairs talk. They both are experiencing memory issues. They put this down to the ravages of war. Barrington tells them that they are all wanted at headquarters.
Jamie and Zoe inspect the cell. There is no way out. Smythe emerges from his room. Confused, Ransom tells him that the civilians are here and that he came to tell him but he wasn't there. Smythe puts on his glasses and says that he was sleeping and that Ransom didn't want to disturb him. Blindly, Ransom agrees. Barrington, Jennifer and Carstairs enter. Smythe insists that Carstairs and Ransom know each other. They seem unsure. Smythe puts the glasses on and says they went to school together. They both instantly agree.
Later that day the Doctor, Jamie and Zoe are brought into Smythe's room. He reads the crimes alleged against them. He states they waylaid the ambulance to get into the trenches and that they were attempting to escape back to the Germans with information. Jamie is charged with desertion while Zoe and the Doctor are charged with espionage, all crimes that carry the punishment of death. The Doctor asks if he can cross examine Carstairs and Jennifer. Smythe agrees but closes down all lines of questioning. They are marched away. Barrington and Ransom both seem to think there is not enough evidence to convict them. Smythe puts on his glasses and says they are obviously guilty. They concur.
The Doctor, Jamie and Zoe are marched back in and told they are guilty. Jamie is to be taken to a military prison to await court martial, Zoe is sentenced to ten years penal servitude and the Doctor is to be executed at dawn. The Doctor rails against the unfairness of the system. Jamie protests and is manhandled away. Jennifer pleads with Ransom to allow some clemency for Zoe. It is agreed she will stay with Jennifer tonight. The Doctor heads off to the cells.
Once in the cells, the Doctor questions the soldier as to how long he has been at the front. He cannot remember and gets angry at the Doctor. Ransom comes to Smythe's quarters with the key to the Doctor's cell. He puts it under his pillow and goes to sleep. In the middle of the night, Zoe sneaks into Smythe's quarters. He is not there. She looks for the key and in the process of doing so finds the screen behind the picture. She eventually finds the key and sneaks away. Hearing someone approaching, the Doctor hides behind the prison door. He is overjoyed to find it is Zoe. They decide to find Jamie. As they leave, they are met by Ransom and the firing squad. Outside the Doctor is put up against the wall. Zoe struggles to break free. Orders are given. A gunshot ring out and the Doctor grimaces.
Episode two[[edit] | [edit source]]
The shot that rang out was from a window. A soldier has been wounded. The soldiers return fire. In the chaos, Zoe unties the Doctor and they escape.
Smythe reports to his video screen that he is leaving for the conference. A unit materialises behind him. As the door opens, Ransom enters. Smythe puts on his glasses and says he is leaving for an important meeting. He climbs into the machine, and it dematerialises. Ransom does not bat an eyelash.
A Redcoat is thrust into prison with Jamie. He is scared and doesn't know how he got there. He thinks it is 1745.
The Doctor is spying on the military prison through a telescope. He commandeers a military vehicle and acts like it was sent for him. A bemused soldier drives him into the prison.
Jamie questions the Redcoat. The Redcoat remembers stumbling into some mist and then, when it cleared, finding himself flanked by big guns and horseless carts. He was then brought to the prison. He is distrustful of Jamie.
Commandant Norton is disturbed from his tea by the Doctor, who pretends he is from the War Office and has been sent to inspect the prison. Zoe is his secretary. When Norton asks for ID, the Doctor pretends to be outraged at his impertinence.
Ransom is concerned that they have lost the Doctor and Zoe. He and Carstairs go to look for him whilst Jennifer stays at headquarters.
The Redcoat and Jamie are fighting. When the soldiers come in to break them up, they turn on them and escape.
Carstairs returns, having found nothing. Jennifer says she has started to remember getting lost in some mist before finding herself here. Carstairs wonders if it is a new gas.
Norton is showing the Doctor the plans of the prison. He asks to talk to a prisoner. Norton receives a phone call to say that a Scotsman and a Redcoat have escaped. Jamie and the Redcoat run into some soldiers. A shot is fired.
Norton is informed that the prisoners have been caught and that the Redcoat has been shot in the leg. The Doctor demands an interview with the other prisoner. Jamie is manhandled to the main building.
Before Jamie can give the game away, the Doctor continues the farce. Norton has had enough of the Doctor and goes to ring Smythe. Zoe smashes a vase over his head. As they make to leave, they are caught by Ransom.
Jennifer and Carstairs recall the court martial and think that Smythe is corrupt. Ransom returns and explains the recapture of the civilians. Carstairs questions Ransom about the court martial, and he shrugs it off. Carstairs decides to speak to the prisoners.
The Doctor, Jamie and Zoe are questioning the anachronisms of their surroundings. They are seemingly in 1917 but with a Redcoat and a video communication system from the distant future. Carstairs enters.
Jennifer questions Ransom as to whether Smythe often disappears at the drop of a hat. Ransom shrugs it off and is about to go and inspect the prisoners, before Jennifer engages him in conversation to stall him.
The Doctor, Jamie and Zoe have explained the existence of the video screen to Carstairs. He says he will accompany them to Smythe's quarters and they can show him.
Ransom is still talking when the phone rings. Carstairs tells Jennifer to decoy Ransom. Jennifer says that the phone call was from Smythe and that he wants Ransom to meet him in the furthest sector. Ransom leaves just as Carstairs' party arrives. They go into Smythe's room, and Zoe swings back the picture to show them the screen. Carstairs and Jennifer can't see it. The Doctor implores them to concentrate and it emerges.
In another location, Smythe is watching them uncover his secret.
The Doctor realises that the control is receiving and they all need to run. Carstairs and Jennifer relent eventually. Jennifer goes to get the ambulance. Jamie wants to go back to the TARDIS but the Doctor and Zoe overrule him. They are about to leave when Ransom emerges. Carstairs says that Smythe has asked the prisoners to be moved. Ransom queries the order due to the fact he was sent on a wild goose chase, but he eventually relents, fearful of the wrath of Smythe.
They all clamber into the back of the ambulance and move off.
In Smythe's quarters, the unit materialises, and Smythe emerges. Smythe questions Ransom as to the location of the prisoners and is furious when Ransom says he has let them go. Ransom sees that the ambulance has gone, and Smythe issues a general order for it to be located.
Later, the ambulance has been spotted, and Smythe orders for artillery to be used on it. Ransom questions if they should be killing two women and a member of their own army. Smythe puts his glasses on and orders it. Ransom agrees.
Carstairs takes cover in the ambulance as shells land around them. The Doctor joins Jennifer in the front of the ambulance, and they drive off into some mist. The ambulance disappears. Jennifer becomes scared as the mist encroaches. The ambulance emerges. The Doctor thinks the mist is some kind of force field as they are no longer surrounded by war or guns. The Doctor, Jamie and Zoe climb atop a hill. They see a Roman chariot and a group of soldiers approaching them. They run back to the ambulance. Carstairs desperately tries to restart the ambulance as the chariot approaches.
Episode three[[edit] | [edit source]]

As the Romans approach, Carstairs gets the ambulance going, and they reverse back into the mist and disappear, leaving the Romans dumbfounded.
The ambulance re-emerges back in 1917. The Doctor theorises that the mists act as barriers between different time zones and further theorises that there must be a map setting these out. They head back to Smythe's headquarters to uncover the map.
Carstairs returns as if he has the rest of the group prisoner. Ransom doesn't fall for it, and Carstairs pulls his gun on him. Jamie removes Ransom's gun. He is trussed up with bandages. The Doctor sets about looking for the map. In Smythe's room, he finds a safe. He attempts to pick the lock whilst Carstairs seeks explosives to blow it open. Carstairs returns with a Mills Bomb — a type of grenade. Seeing that the whole bomb would destroy the room but not the safe, the Doctor takes the explosive out of the bomb and places it in the lock, extending the fuse with a candle wick. Ransom frees his mouth from the gag and calls for help. Carstairs goes out to address this, and once he has silenced him, a soldier, drawn by the noise, comes with Zoe and Jennifer in tow, looking for Ransom.
In Smythe's room Jamie and the Doctor light the fuse and take cover.
Carstairs is trying to get rid of the soldier but he is happy to wait for Ransom. He questions Carstairs as to who he is and where he has come from.
The Doctor and Jamie hear the conversation outside and start to panic.
The soldier is convinced and starts to leave but takes his time.
The Doctor wants to put the fuse out but it's too late.
As the soldier closes the door, the explosion rings out around the headquarters. He returns and rushes into Smythe's room. Carstairs pulls a gun on him, and Jamie trusses him up. The Doctor has found the map. In the centre is a blank space. That is where they should go.
They head off in the ambulance but are soon surrounded by German soldiers. They board the ambulance and make the Doctor drive to their trenches.
Later, Zoe and Jamie wait patiently while the Doctor is interrogated.
A German soldier will not accept the Doctor's name. The Doctor relents and says he is Doctor John Smith. He says they are lost behind enemy lines. The soldier is very suspicious and thinks they're spies. He asks where they came from and pulls a gun, demanding the truth.
Outside, Zoe and Jamie are given helmets. They discuss how barbaric war is.
The Doctor has told the German soldier the whole truth about him and his friends being time travellers. He doesn't believe them. The Doctor implores him to ask Jamie and Zoe. He brings them in. He asks Zoe where she met the Doctor. The Doctor orders her to tell the truth. She says she met him at a space station. He asks Jamie when he met the Doctor, and he responds by saying he met him in 1745. The soldier is still unconvinced. The Doctor shows him the sonic screwdriver. He removes a screw from the soldier's gun and returns it. The soldier is starting to be convinced. A superior by the name of von Weich enters. The soldier tells him what he has discovered. Von Weich and the soldier withdraw. Von Weich puts on a monocle and tells the soldier that they are not time travellers, they are spies and should be shot. The soldier returns and tells the Doctor, Jamie and Zoe that they are spies and should be shot.
Von Weich pulls back a picture in his quarters to reveal a communications screen. He reports the capture of the Doctor, Jamie and Zoe.
The Doctor protests with the German soldier. He reminds him of the sonic screwdriver and displays it again. The soldier starts to remember, but as he does the Doctor steals his gun and holds him up. He orders that they be taken back to their ambulance.
In a central HQ, an alarm sounds. Smythe is reporting to a mysterious man known only as the War Chief. He is pleased with how things are progressing. Smythe reports the prisoners and their story of time travel to the War Chief. He is contemplative and orders that they be brought here. Von Weich reports their escape to Smythe and the War Chief. Smythe is furious. The War Chief orders that Smythe organise a pursuit and put out a general alert. He is adamant that they must be captured alive. The War Chief wonders to himself if he knows these time travellers.
The Doctor and his colleagues have arrived in 1862 America — the Civil War. Their ambulance is beset by gun shots. Carstairs returns the fire, and they move off. The Doctor is pleased. He believes that if they are in the American Civil War zone, they are on the right track to the blank space. The ambulance is stopped by a felled tree. Carstairs gets out to investigate and calls for Jamie to help move it. As they start, they are ambushed by soldiers. Carstairs starts firing at the soldiers as the Doctor, Jamie and Zoe move the tree. Carstairs engages in hand-to-hand battle with a soldier as Jamie comes to help him. The Doctor and Zoe have moved the tree, but reinforcements are arriving on horseback. Carstairs remains and holds off the reinforcements as the ambulance moves off, but he is captured off-screen.
Shortly afterwards the ambulance stops. They are out of petrol. They have to go on by foot.
Smythe and von Weich plan their strategy of how to capture the escaped party. They receive a report of the capture of Carstairs. They marvel at the bravery of "these humans". Carstairs is to be brought to the central headquarters for reprocessing.
Jamie checks out a barn. When he realises it is safe, he calls for the others. Soon enough they hear the noise of materialisation. They hide. A unit materialises. The door opens, and a whole troop of soldiers emerge. When they are gone, Zoe says that the unit must be bigger on the inside like the TARDIS. The Doctor looks inside. Outside there are gunshots. Jennifer goes to look. Zoe calls for the Doctor and goes in after him. Jamie goes to help Jennifer. The unit dematerialises, leaving the group separated.
Episode four[[edit] | [edit source]]

Jamie and Jennifer are soon surrounded by soldiers.
The Doctor and Zoe look around the ship. Zoe notes it looks exactly like the TARDIS. She asks the Doctor who else could possess a ship like that. The Doctor has one idea but hopes he is not right. Zoe finds some goggles on the side. They begin to explore. They find a room filled with stationary dormant German soldiers in some kind of trance. In another room, there is a fleet of Romans in the same state. The ship starts to land. The door opens, and the Romans leave. Zoe wants to escape, but the Doctor says they will just end up in another war zone. They must wait until it returns to its base.
The soldiers question Jamie and Jennifer. When they realise that they are English, they assume they are spies from the South and tie them up. As soon as they are tied up, there is an attack. In the battle, the soldiers retreat from the barn, and Jamie and Jennifer are liberated by Northern forces. One of the soldiers reports to their general. It is Von Weich. He puts his monocle on and says that they are spies and should be tied up.
The War Chief berates a scientist on the 5% of their soldiers who are breaking their processing and causing pockets of resistance. He is fearful that they will form a rebellion. The scientist says they have already come up with a stronger form of processing. An alarm sounds. Von Weich reports via video screen that Jamie and Jennifer have been found, but the Doctor and Zoe are still loose. The War Chief states they will be excellent specimens for re-processing.
The machine is landing. The ship is empty, so the Doctor states that it must be back in its base. He notes that the ship is powered by remote control but also has some kind of manual controls. As the doors open, they see the controller wearing the glasses Zoe found in the ship. They put the glasses on and set off to explore.
Jamie asks how long they are going to be kept here. The soldier states that as soon as they find their friends they will all be shot together. A soldier sneaks up behind the captives and liberates them. As they sneak out, the other soldiers spot them. A firefight ensues. The soldier tells Jamie and Jennifer to head north. Von Weich enters. The other soldiers tell him what happens. Von Weich puts his monocle on and tries to brainwash the soldier, but it doesn't work on him. The soldier tries to turn his fellow soldiers, but to no avail.
Jamie has been separated from Jennifer. A soldier attacks Jamie on horseback with a sword. He dives out of the way at the last moment. When the soldier returns, Jamie dismounts him and steals his horse. The soldier tries to shoot him as he rides away.
The Doctor and Zoe are exploring. The building has a reception area, living quarters and lecture rooms. They reckon it is some kind of training school. They are ushered into a hall, being told they're late for the lecture. The scientist explains how for years soldiers have been removed from their real world and time, processed to forget their previous life and placed in false wars made to look like their home time. Of late, specimens have been breaking their processing and forming resistance groups, but they have come up with a better form of processing and will prove it on a difficult specimen. Carstairs is brought out. He sees the Doctor, but he tells him to keep quiet. The scientist prepares the equipment. Zoe wants to help, but the Doctor says they will help later. Carstairs is brainwashed into thinking the lecture hall is the officer's mess in the trenches. He spots the Doctor and Zoe again and says they are German spies.
Jennifer is pursued by a soldier. She falls, and he dismounts. As he looms over her, Jamie rides up and fights the soldier. Before they can escape, they are captured, yet again, by soldiers.
Carstairs is restrained as he rages about the German spies and the court martial. The Doctor feigns sympathy with the scientist for the failure of his machine. The scientist doesn't consider it a failure. The Doctor suggests that the issue was probably that Carstairs should have been fully deprocessed before attempting the reprocessing. The Doctor doubts that the scientist's machine could do that. The scientist puts him right and shows him how he would do that.
Jamie, Jennifer and Harper, the soldier that liberated them, are returned to the barn and tied up. The soldier explains the resistance to Jamie and Jennifer. Von Weich questions them as to where their friends are. Jamie recognises him. There is an attack. A fight ensues. The soldiers free Jamie, Jennifer and the resistance fighter. Harper goes to kill Von Weich, but Jamie says they need him to find the Doctor. He says he will kill Jamie to get to Von Weich.
The lecture is finished. An alarm goes off, and some soldiers rush in with the War Chief. He demands to know if the experiment was successful. The scientist says it was partly successful and points the Doctor out as someone who has helped him refine the process. The Doctor turns and the two recognise each other. The Doctor orders Zoe to run while the War Chief bellows that they must be stopped. In the chaos, Carstairs escapes. The War Chief raises an emergency alert to close all section areas and detain the resistance members.
Zoe and the Doctor have been separated. Carstairs finds Zoe and grabs her. She is initially pleased to see him, but he draws a gun on her. She is a German spy, and it is his duty to kill her. He begins to pull the trigger.
Episode five[[edit] | [edit source]]

Carstairs is called off by the scientist. He refuses, insistent that Zoe is a German spy. He fires, but his gun is not armed. Zoe is taken away by guards whilst the scientist takes Carstairs.
Von Weich is a prisoner to the Resistance. Jamie is informed that they are waiting for their leader, Russell. Harper, the soldier that has been helping Jamie and Jennifer, questions Von Weich as to where the tunnel is that new recruits emerge from. Jamie tells him that it is not a tunnel but instead a craft. Harper doesn't believe him. Another soldier wants to leave and move on. He wants to shoot Von Weich. He and Harper get into a fight that is broken up by the arrival of Russell. As Russell brings order to the barn, Jamie sees Von Weich unveiling a monitor. Jamie grabs him and exposes the monitor, saying it backs up what he was saying.
Zoe is brought into a room where she is interrogated by the Security Chief. He puts a helmet on and aims an eyepiece at Zoe. This causes her to instantly tell the truth. When she cannot answer when she joined the Resistance and when she gives the answer that she is from the 21st century, the Security Chief is confused. He asks her how she got here, and she explains all about the TARDIS and the Doctor. The Security Chief beams photos into her head, looking for her to identify the Doctor.
The Doctor stumbles into the scientist who has Carstairs tied up. When the scientist begins to question why the Doctor is here when there is a security alert out for him, the Doctor convinces him that it was Zoe who the alert was out for and not him. The scientist is about to begin the deprocessing, and the Doctor asks if he can stay and watch. He enquires if Carstairs will remember everything. The scientist confirms he will. The scientist asks the Doctor to strap Carstairs in. The Doctor only pretends to. Once the deprocessing has taken place, Carstairs remembers the Doctor. Seeing this, the scientist tries to grab the Doctor. The Doctor forces the scientist into the deprocessing machine and turns it on. The Doctor explains to Carstairs what has been going on before they escape, turning the machine down before they go to allow the scientist to simmer.
Jamie and Jennifer explain the situation to Russell. As they do, Von Weich lurches forward and sets off an alarm.
In headquarters the alarm resonates and there is no response.
The Security Chief reports to the War Chief that Zoe cannot recognise any of the Resistance members. Zoe is unconscious. The Security Chief lies and says that Zoe is from 1917 and omits anything to do with the TARDIS. The War Chief is informed of the alarm. The War Chief and the Security Chief go to investigate, narrowly missing the Doctor and Carstairs in the corridor. The Doctor bursts in, taking the armed guard by surprise. As the Doctor distracts him, Carstairs knocks him out. Zoe wakes up and informs the Doctor of what has happened. The Doctor tries the helmet on and sees all the Resistance members. He speculates that if they could mobilise all of them at the same time, they could form an army to rise up against their controllers. When Carstairs asks how they get back, the Doctor responds by saying they will leave by the same way they came.
There is still no response from the American Civil War Zone. The Security Chief decides to send guards.
An alarm goes off as the Doctor, Zoe and Carstairs move through the corridor. They hide and wait until the guards move off before following them to the landing bay. They see the machine land.
Back at the barn, everyone is speculating as to what the alarm portends. Jamie thinks they will send a machine. No sooner has he said this then the sound of dematerialisation rings out. They all hide. As the guards emerge, the soldiers spring an attack on them. They are captured, but Harper is killed. Russell is dumbfounded by the futuristic guns used by the guards. They all study the machine.
Back at headquarters, the War Chief is cross at the Security Chief for his continual mistakes. The Security Chief questions as to how the War Chief recognised the Doctor. The War Chief reacts furiously to being questioned. He states that when he came to the Security Chief's people, he was promised safety and organisation. He reminds the Security Chief that without his knowledge none of this would be possible. The Security Chief says that if the War Chief has any complaints, he should go to the War Lord. The War Chief says he will and sends the Security Chief away to continue the interrogation of Zoe. The Security Chief returns to find the soldier prostrate on the floor and Zoe escaped.
Jamie is still trying to convince Russell as to the value of the machine. Russell asks Von Weich, but he refuses to answer. Jamie gives up and decides to get into the machine without anyone's help. Jennifer initially says she will go with him but is convinced against this by Russell, who says that he has many sick soldiers she can tend to. Russell and some of his men will go instead. The door is closing, and they hurry in. As the machine dematerialises, Von Weich seems very happy.
The Security Chief finds the scientist and liberates him from the deprocessing machine. The scientist explains what happened and says he must report it to the War Chief. The Security Chief stops him and confides with him that Zoe and the Doctor are time travellers. The scientist states that only the War Chief and his people know of time travel. The Security Chief states that the War Chief is a traitor to his own people — how can they be sure he is not a traitor to them?
The War Chief is told that the transport is returning but hasn't radioed in as per protocol. The War Chief decides to deal with this himself and sends guards down to the landing bay.
The Doctor, Zoe and Carstairs are still in hiding in the landing bay, waiting for the return of a machine. They hear the alarm go off. At the same time, the light that signals the arrival of the machine flashes. Many guards pile into the landing bay. As the machine lands, Jamie and the soldiers emerge. They are all shot by the guards.
Episode six[[edit] | [edit source]]

Zoe is fearful for Jamie, but the Doctor states that there is nothing that they can do. They run off, heading to the processing room.
The Security Chief and the scientist talk about how the Doctor and Zoe are different to the resistance fighters and that they were not brought from their own time but instead came of their own accord. The Security Chief is worried that the War Chief is either bringing his own people, the Time Lords, there or they are coming of their own free will. The scientist says that the Security Chief should tell the War Lord, but the Security Chief needs proof. He implores the scientist to bring him any unusual specimens he finds amongst the resistance fighters.
The Doctor, Zoe and Carstairs find the way to the processing room heavily guarded. The Doctor tries to find another way. He discovers that the walls are embedded with metal and are held together using a force field. He sets about reversing it with tape.
On the other side of the wall, the scientist is examining the resistance fighters they ambushed in the landing bay.
The Doctor uses his sonic screwdriver for power to operate his force field reverser. Initially it seems as if it has had no effect, but the Doctor approaches a lane and just lifts it away. They see Jamie being lifted onto the reprocessing machine. The scientist analyses Jamie's brain and finds the pattern different to the other resistance fighters. He sends him away to the Security Chief but is interrupted by the War Chief, who questions him as to why he is being taken away. The scientist tries to lie, but the War Chief scares the truth out of him. He allows it to go ahead. This is all watched by the Doctor, Zoe and Carstairs. Once the War Chief has left, Carstairs enters the room and silently disables a guard. The Doctor surprises the scientist as he tries to help him with the machine.
Back in the barn in 1917, Von Weich is being guarded by a young soldier called Moor. He asks for some water. As Moor fetches it, Von Weich tries to escape. Moor stops him just in time.
The Security Chief is questioning Jamie with the helmet on. He asks who sent the travellers here — Jamie says no one. He asks why they decided to come here — Jamie explains the TARDIS' malfunctioning controls. He asks if they were summoned — Jamie replies in the negative. The interrogation is interrupted by the War Chief. They argue. The Security Chief makes it clear he mistrusts the War Chief. The War Chief says if he has a problem he should go to the War Lord, but if he gets his facts wrong he will crush him.
The Doctor has resurrected the resistance fighters. A guard comes across the room, and Carstairs kills him. They flee through the hole in the wall. The Doctor endeavours to take the reprocessing unit with him but is forced to abandon it when more guards arrive. The Doctor fills Russell in. The plan from here is to return to their time zones and bring the resistance fighters together to form one big army. They head off to the landing bay... but need a disguise first.
Von Weich asks Moor if he could put his monocle in. When he obliges, Von Weich brainwashes him into thinking it is 1871 and that he is Moor's commanding officer. He orders himself untied.
The Security Chief brings the War Chief to the processing room and discovers his prisoners gone. He says this is proof positive that they have a space/time machine. The War Chief finds the hole in the wall and dismissively sends the guards to the landing bay.
Jamie wakes up and is shocked to see a gas mask in front of his face. It is the Doctor. He and the resistance fighters are all dressed as World War I soldiers. They dress Jamie up and march through the compound. They disable the guard controlling the computer in the landing bay. The Doctor begins to operate the controls. Some guards come, and the Doctor puts up a force field around the landing bay. The guards that got through are disabled by the resistance fighters. The Doctor summons up a machine to return to 1917. The Doctor, Jamie and Carstairs stay to get the reprocessing unit. They release the guards and hide.
Von Weich has brainwashed Moor. He orders him to give him his gun. The machine lands, and Russell gets out. Von Weich orders Moor to shoot. Russell tries to convince him not to, but Moor goes to shoot. A fight breaks out, and Moor is knocked out. Russell wheels around to see Von Weich armed. He tells Russell they are to go back in the machine and return to the headquarters. Russell refuses. Von Weich says he will kill him. Russell still refuses. A gun shot rings out. Von Weich falls to the ground. Russell turns to see Moor with the shot gun in his hand.
The Doctor, Jamie and Carstairs have made it back to the processing room.
The War Chief and the Security Chief are still at loggerheads. The Security Chief thinks that the Doctor's ability to operate the machinery seems to imply he is a Time Lord.
The Doctor has removed the reprocessing unit. As they leave, they find some gas-filled valves. As they make their way into the processing room, the guards attack them. The Doctor throws the valves on the floor, releasing the noxious gas. They make it to the machine and begin to dematerialise. Their joy is short lived as the machine soon stops. The Doctor operates the emergency lock and sets about trying to override the master control. The Security Chief orders the Doctor's surrender. The machine is surrounded. The Doctor reassures his friends that the machine is impregnable. The Security Chief intends to wait, but the War Chief has other ideas. He activates the dimensional controls of the machine. Inside, the walls begin drawing in. The War Chief says they have thirty seconds to surrender or they will be crushed.
Episode seven[[edit] | [edit source]]

As the machine's dimensions contract, the Doctor says they have to do as the War Chief says.
The War Chief goes to reduce the dimensions further when the door opens. The Doctor crawls out. The War Chief orders the others to come out too. The Doctor throws one of the gas valves on the ground and, as everyone else is coughing and blinded, covers his mouth and rearranges the controls. He returns to the machine, which dematerialises. Once the gas has cleared, the War Chief realises that the Doctor has locked the remote control. The Security Chief puts an alert out on all time zones. The War Chief says he reckons they will be returning to 1917.
The Doctor states that they should not return to 1917 as it is where they would expect them to go. He decides to go to a nearby zone and cross by foot.
The Security Chief asks the War Chief if he has tracked the machine. He says he will only be able to pinpoint it once it has landed. An alarm goes off. The War Lord has arrived. The pair squabble about who is to go and greet him. The War Chief goes.
Inside the machine, the travellers think it is taking its time. The Doctor says that he has no control over the machine. Jamie makes a dig at the Doctor, saying it is just like the TARDIS. The machine starts to materialise.
The landing of the machine is registered in the headquarters. The Security Chief alerts everyone in the Roman era. They are to be captured or destroyed. The War Lord enters and questions the Security Chief about the issues they have been facing and the War Chief about the issues regarding processing. The War Chief reports the theft of the processing machine. The Security Chief is forced to take the blame.
The Doctor, Jamie and Carstairs make their way through the countryside. They undergo an attack by a fleet of Romans. They run towards the time zone barrier.
At headquarters, their escape is tracked. The Security Chief wants to send guards. The War Chief argues against this as the repeated sighting of guards will further affect the processing of the subjects. The War Chief suggests they form an assault around the TARDIS where they will be heading. Their argument becomes more heated. The Security Chief alludes that the Doctor is a Time Lord and is working in collusion with the War Chief. The War Lord breaks up their argument, saying they will either cooperate or be replaced.
The Doctor, Jamie and Carstairs have crossed the time zone barrier into 1917. They consult their map and move off but not before they have been spotted and reported to Smythe. Smythe plots their position and sees they are near a machine gun emplacement.
The Doctor, Jamie and Carstairs make their way through the trenches and drop to the ground as they hear a barrage of machine gun fire. They are pinned down. The machine gunners are knocked out by the emergence of the resistance fighters and Zoe. They see that their friends are surrounded by armed soldiers. They decide to follow them.
The Doctor, Jamie and Carstairs have been brought to Smythe. Smythe says that the Doctor's court martial still stands, and he is to be killed. Jamie and Carstairs are to be sent away. Carstairs tells Smythe that he knows of the charade in which they live now. He tries to convince the other soldiers around him, but Smythe puts on his glasses and counteracts Carstair's dissension. He orders for a firing squad to be prepared. The Doctor states that Smythe is making a big mistake and that his alien superiors will want to question him. Smythe sends him to the firing squad and disappears into his quarters. He reports the capture of the three to the War Chief but says that the Doctor was killed in the process. The War Chief asks if Smythe has got possession of the reprocessing machine and says that the recapture of it is of the highest priority. Smythe questions Jamie and Carstairs. Seeing the opportunity, they say that the Doctor is the only one that knows where it is. Carstairs stops the firing squad just in time. No sooner has the words come out of his mouth than the resistance fighters storm the chateau. A fight breaks out. The Doctor and Zoe return to the chateau in the chaos. Smythe has locked himself in his quarters and is reporting the storming of the chateau and pleas for help to be sent. The resistance fighters are breaking down the door. The War Chief orders Smythe to deactivate the area control, destroying the entirety of the time zone. Before he can do it, the resistance fighters enter and kill Smythe.
In headquarters, they can see that the resistance fighters have taken over the chateau and that the Doctor is still alive and in possession of the processing machine. They note that all the resistance fighters are all in the same place. The Security Chief wants to send more guards and the War Chief wants to destroy with an artillery barrage. The War Lord overrules them both and says they should order their forces to destroy them.
Jamie reports that all forces are surrounding the chateau and there is no escape. The Doctor asks Carstairs and Russell to hold the fort for as long as possible while he works on something. He and Zoe start to dismantle the area control to figure out how it works.
In the headquarters, they monitor the chateau but are shocked to see the resistance fighters putting up a fight. The Security Chief notes that the Doctor seems to be living a blessed life and suggests that the War Chief may have a hand in this. The War Chief vows that the Doctor will die.
During the fire fight at the chateau the resistance fighters take a hostage. Carstairs, seeing the situation is desperate, suggests that the Doctor and Zoe should escape. The Doctor says that that won't be necessary and flicks a switch. All the gun fire stops. He has placed a time zone barrier around the chateau, making a secure base which cannot be penetrated. Seeing the hostage, he says he will now try the next step of his plan.
The Security Chief and the War Chief blame each other for the failings. The War Lord blames them both and says he will now take charge.
The Doctor is using the processing machine on the hostage. It works and returns the French soldier back to his normal state. The Doctor states that this means they can convert everyone into a resistance fighter and, if Russell's men can get the right equipment, he can expand the equipment so he can reprocess dozens at a time. They hear the materialisation of a machine and hide. Two guards exit alongside the Security Chief. They gun down several of the resistance fighters. The guards capture the Doctor and the Security Chief takes the processing machine. They enter the machine with the Doctor and it dematerialises.
Episode eight[[edit] | [edit source]]

The machine materialises at headquarters. The Doctor is marched out followed by the War Lord, now in possession of the reprocessing machine.
Carstairs is regretting the fact that they weren't prepared for such an ambush. Jamie enquirers with Zoe if she could control the telescreen and summon one of the machines so they can return to headquarters. She says it is possible. Russell goes to get some machine guns to ambush the guards.
The War Lord gives the processor to someone to return home to have it mass-produced. The War Chief assures the War Lord that the Doctor will have to undergo a special interrogation.
The Security Chief is using the truth helmet on the Doctor. He is trying to get the Doctor to admit that the War Chief brought him here, but the Doctor is resilient. The Security Chief warns him that he will answer or be destroyed.
The machine guns have been set up. Zoe tells Russell that she remembers all the resistance fighters and their location so they can still act out the Doctor's plan. They hear the materialising of the machine and rush to the machine gun. As soon as the guards exit, the soldiers fire. The guards quickly retreat. The door opens again, and the guards stick their guns out and fire, killing the two machine gunners. Carstairs sneaks up and throws a grenade into the machine. The door closes and the machine dematerialises. Russell demands more machine gunners to be brought in and then sets out to arrange a meeting with all the Resistance leaders. Jamie is left in charge of the chateau.
The Security Chief is still interrogating the Doctor and warns him that his mind will only last fifteen minutes at this level; thirty if he's lucky. The War Chief interrupts him. The Security Chief yet again implies how the War Chief is always around to save the Doctor. The War Chief admits that the Doctor is one of his people and resilient to the truth helmet. The War Chief orders that the Doctor be released so they can talk alone in the War Room. The Security Chief argues about this, but the War Chief is insistent. As soon as the War Chief leaves, the Security Chief contacts the War Lord.
When the War Chief is alone with the Doctor, he tells him that he recognises him even though he has changed his appearance. The Doctor says that he had every right to leave his home planet. The War Chief questions the morality of stealing a TARDIS and goes on to say that he and the Doctor are very similar, an accusation the Doctor strenuously denies. The War Chief asks the Doctor if he knows the final objective of the war games; when he replies in the negative, the War Chief tells him that the aim is to whittle the best soldiers from the most aggressive planet into a super army whose objective is to enforce peace to the Galaxy. The War Chief tries to convince the Doctor that his intentions are pure.
It is all quiet in the chateau... until one guard is knocked out and one is held up. A sleeping Zoe is awoken by a soldier from the Mexican Civil War. He is looking for Russell. When Zoe questions who he is, he states he is Arturo Villar, one of the resistance fighters. He is sceptical about the meeting and has the chateau surrounded. Zoe hurries off to find Jamie. Jamie wants to argue with him, but Zoe is concerned that he will leave and end the chances of their plan coming together. Zoe has a plan and rushes away with Jamie. Soon Zoe reappears to Arturo and tells him that Russell is not around but the second in command, Jamie, is present. Jamie has been dressed up to look like a Highlander again and confidently walks up to greet Arturo. Jamie tries to convince Arturo to stay but does not have the communication skills. Zoe tries feeding him lines but, soon enough, is persuading Arturo herself. Arturo thinks small groups of guerrilla fighters are better, but Zoe insists a united force will destroy their alien masters. When Zoe informs Arturo that she knows how to get to the alien's stronghold, Arturo is convinced and stays.
The War Chief informs the Doctor that the war games are an attempt to solidify a United Galactic Empire. The War Chief is about to offer the Doctor a role in this empire when he is interrupted by the War Lord and the Security Chief. The War Lord cross examines the Doctor. The War Chief says the Doctor has agreed to cooperate, but the Security Chief says that the Doctor should be killed. The War Lord decides that the Doctor will be spared if he cooperates, but if he doesn't, both he and the War Chief will be killed. Once they have left, the War Chief confides to the Doctor that he has a plan to take over as the Supreme Galactic Ruler.
The meeting of resistance fighters is in full swing with Arturo and Ivan Petrov, a Russian soldier from the Crimean War, being the most vocal. Arturo is still sceptical. Russell explains that they can go to the machine, climb aboard as an army and destroy the headquarters. They decide to use the landing place in the barn in the American Civil War Zone to stage their attack however before that there is another part of their plan to put into place.
Later, some resistance fighters storm a Roman military camp and destroy their communication unit. This registers with the Security Chief, who sends a guard. Carstairs is also informed. He says the Crimean War Zone is next.
A soldier in the Crimean War Zone is attacked by resistance fighters, and the communications unit is destroyed with dynamite.
Again, this registers with the Security Chief who sends a squad of guards.
At the chateau, Russell is informed of the number and location of all guards sent by the Security Chief, and Jamie and Zoe place it on a map. Soon enough the map is peppered with numerous guards. Russell informs them it is now time for phase two: the attack on the barn. They are to leave one by one so as not to arouse suspicion.
In the barn, a wounded soldier goes for the telescreen, but Arturo's men shoot him just in time.
The Security Chief has noticed the pattern, but it is too late. There are few guards left at headquarters and none have returned that he sent out. The War Lord and War Chief are critical of the Security Chief. The Security Chief says that the resistance fighters have to be in the American Civil War Zone as it is the last place yet to be attacked. He suggests they use a neutron bomb, which will wipe out all people in that zone, processed and unprocessed. The War Lord overrules this and says there is a more subtle plan in which the Doctor can prove his loyalty and save his life.
All the resistance fighters are assembled at the barn. Carstairs goes to destroy the telescreen, sending the guards, when the Doctor appears on it. He says he has gained control of the machines and that he is to send a machine. He demands that only the resistance fighters get into it. Jamie argues but the Doctor shuts him down. The resistance fighters discuss if it is a trap. The machine materialises, and the men hide in case guards emerge. They discover it is empty. All but one of the leaders of the resistance enter.
When the machine materialises, the Doctor greets them all. Once they are out in the open, they are surrounded by guards. The Doctor orders them not to move. The War Chief thanks the Doctor for giving them a “nice, neat little package for us to dispose of“.
Episode nine[[edit] | [edit source]]

Russell threatens the Doctor. The Security Chief wants the Doctor disposed of too, but the War Chief blocks it. The Security Chief says that the War Lord will decide. When left alone, the Doctor says he doesn't understand why the War Chief wants him to remain alive. The Doctor flatters the War Chief as to the technological advances of his machines. He states that in his day such machines with pinpoint accuracy would be at the expense of a terribly short lifespan. When the Doctor asks how he did that, the War Chief brushes the question off. The Doctor realises that the War Chief hasn't fixed the problem and that he needs the Doctor's TARDIS to escape. The War Chief says that if they two escape in his TARDIS, they can rule over the galaxy together. The Doctor realises that he has the power over the War Chief, but the War Chief says that if the Doctor tries anything, he will turn the Security Chief on him.
Imprisoned Russell and Arturo threaten death to the Doctor. Jamie and Zoe stick up for him.
The War Lord praises the Doctor but is concerned as to why he has swapped sides. The Doctor flatters the War Lord and says he likes to be on the winning side. The War Lord asks how the Doctor can help his cause. The Doctor says he can reengineer the processing machines to work on the resistance fighters. The War Lord relents and says the test will be on his friends. The Doctor insists that they are not his friends anymore. The Security Chief accompanies the Doctor to the processing room. The War Chief and the War Lord plan the destruction of the rest of the resistance fighters. The War Chief asks if the War Lord is returning to his home planet. The War Lord icily says that he is going nowhere until the situation is resolved.
The resistance leaders discuss what is going to happen to them. The Security Chief arrives with the Doctor and informs them that the Doctor is to reprocess them, but he is not affording him any security. He leaves the Doctor unprotected with the resistance leaders. Arturo approaches the Doctor, threatening death.
The Security Chief questions how the War Chief is doing away with the resistance fighters. The War Chief says that, without their leaders, they have plunged into disorder. The War Chief questions where the Doctor is and rushes off to look for him. The Security Chief listens to some recordings he has made in the War Room.
Jamie pulls the resistance leaders off the Doctor. The Doctor says that they were going to have a neutron bomb dropped on them, and he was forced to bring them here. They don't believe him, and Arturo breaks free of Carstairs and strangles the Doctor. The War Chief enters and saves the Doctor.
The Security Chief listens back to all the conversations that the War Chief has had with the Doctor.
The Doctor is reprocessing Jamie. He has convinced Jamie he is back fighting the Redcoats. The War Chief is pleased and leaves. The Doctor calls Zoe over. Zoe resists, but when she is in the machine the Doctor whispers that it is a ruse.
The War Chief returns to the War Room and orders the arrest of the Security Chief for allowing the Doctor to die. The guards ignore him. The Security Chief plays back the recordings and orders the arrest of the War Chief. The guards drag him away and the Security Chief orders the Doctor's arrest.
The Doctor is "reprocessing" Arturo but he doesn't realise that it is a trick and tries to kill the Doctor. Jamie pulls him off and explains it to him. They discuss what they should do now. Zoe sees the guards coming. The resistance leaders overpower them and liberate the War Chief. The War Chief tells the Doctor they have been discovered, but the guards at the Landing Bay do not know yet, so they should go there and redirect the returning guards. Before they do that the resistance leaders insist they get their weapons back, and the Doctor insists they take the War Room.
The Security Chief broadcasts to all time zones that the guards are to return but is interrupted by the resistance leaders storming the War Room. The alarm is raised, and many are killed. As the Security Chief tries to escape, the War Chief kills him before he himself is disarmed by Carstairs. The alarm is switched off. Zoe asks how they are going to return everyone to their own time. The War Chief says they can't use the machines as there are only two left. The Doctor is faced with only one option. The War Chief, seeing what the Doctor is thinking, begs the Doctor to reconsider. He forces the War Chief to contact all time zones and stop the fighting. Zoe questions the Doctor as to what the War Chief was so scared of. The Doctor says he is going to have to contact the Time Lords. When Jamie says that there is no danger from his own people, the Doctor contradicts him, but he has no choice. He sits on the floor and lays out six cards in a circle. He goes into a trance. The War Chief tries to stop him but is restrained. The cards form a cube. The Doctor wakes and explains that the cube consists of all the information about the War Games and a plea for help for the Time Lords. They realise that the War Chief has gone. They race to the Landing Bay to cut him off.
In the Landing Bay, the War Chief summons a machine. Just as he is about to board, some guards stop him. The War Lord has arrived. The War Chief reports the revolt and says they have to return to their home planet. The War Lord asks where the Security Chief is. The War Chief says the resistance leaders killed him. The War Lord says that he knows that that isn't true and that he has heard the recordings. The War Chief tries to bluster and then runs. Some guards come out of nowhere. The War Chief is killed.
The Doctor hears the screams but says they must push on to the Landing Bay.
The War Lord wants to return home and summon an army to quell the revolt. The Resistance Leaders arrive and overpower the guards. Arturo wants to kill the War Lord, but the Doctor orders that he should be left for the Time Lords. The Doctor says goodbye to Jamie and Zoe. He says that the Time Lords will return them to their own times too. When they ask why they can't carry on travelling with him, the Doctor says he doesn't have time to explain. They insist that they will come with him. The Doctor says that he has to return to the 1917 zone and the TARDIS. Carstairs asks to come with them to see if he can be reunited with Jennifer. The Doctor summons the machine before returning into his trance and sending the cube. Arturo doesn't believe that anyone is coming for them. He holds the Doctor up. Russell joins him. The Doctor begs to be let go. He pushes past Arturo. Russell has to stop Arturo from shooting the Doctor in the back. As the machine dematerialises, the War Lord says that the Doctor will wish he had have been killed when the Time Lords get their hands on him.
Back in 1917, the fighting has stopped. The Doctor quickly says goodbye to Carstairs before sprinting to the TARDIS. The travellers turn to look back and see Carstairs disappearing into the mist. As they run they are struck down by the mist. The Doctor crawls towards his TARDIS as the mists consume him. He gets the key in the door before falling unconscious.
Episode ten[[edit] | [edit source]]
The Doctor identifies the thing slowing him down as a force field employed by the Time Lords. The Doctor, Jamie and Zoe work as a team and open the door. They crawl in, but the force field is affecting the inside of the TARDIS too. The Doctor suggests that if he dematerialises it might break through the force field. He does so and it proves true.
His companions ask him why he is running away from his own people. The Doctor explains that Time Lords have the ability to live forever barring accidents and the power of travel through space and time, but they never use it for good. They just gather knowledge of events. The Time Lord code is to never interfere or help.
He has set the TARDIS for a planet on the outermost fringes of the galaxy, but the TARDIS begins landing prematurely. The Doctor rushes to the scanner to see the TARDIS land on the sea. Zoe says that the TARDIS has landed on the sea before and has been fine, but this time the scanner shows that they have continued to go underwater. The Doctor promises Jamie and Zoe that they are completely safe, but water begins to drip onto the console. The Time Lords are breaking down the defence mechanism.
The Doctor takes them to the one place where they might be safe. He moves the TARDIS into the middle of outer space, hoping they won't be detected. A voice comes from nowhere, saying there is no escape and the Doctor needs to return the TARDIS to his home planet immediately. Reluctantly, the Doctor seems to agree before quickly attempting a transference jump somewhere safe. He fleetingly ends up in crocodile-infested waters before they are on the move again. The scanner doesn't show anything until it zooms in on a corridor. The voice confirms the Doctor has returned to his home planet. Disconsolate, the Doctor emerges.
They are met by a Time Lord, whom Jamie tries to challenge; the Doctor calls him off. The Time Lord leads the Doctor, Jamie and Zoe into a courtroom where they are ruling on the War Lord. The Time Lord in charge says that all surviving soldiers have been returned to their own time, but many have died and many more would have died if the War Lord's plan had been brought to bear. The Time Lords accuse the War Lord of breaking all galactic laws. The Doctor tells Jamie and Zoe that this is a rare thing to see as the Time Lords rarely hold court. Zoe asks if they can escape. The Doctor confides that his companions might, but it is unlikely he will. The Doctor is called as a witness. He states that all the knowledge possessed in the cube is truthful. The Time Lords call on the War Lord to speak, but he refuses. The Time Lord in charge fixes him with a stare that causes a blinding pain in his head. The War Lord begs the noise to stop. The War Lord denies the court the authority to prosecute him and states that the soldiers would have killed themselves anyway. He also says that the Time Lords are complicit with him as both the War Chief and the Doctor were working alongside him. The Doctor denies this.
Some Time Lord scientists are observing the TARDIS when they hear the sound of dematerialisation outside. They emerge to see one of the machines. Some guards come out and kill the scientists.
The Time Lords have found the War Lord guilty and say that his accusations towards the Doctor are fraud. The guards rush in and seize the Doctor, Jamie and Zoe as hostages. The Time Lords let them go. The War Lord insists the Doctor is to help them and forces them into the TARDIS. Jamie insists that the Doctor has no control over the TARDIS, but the War Lord doesn't believe this. He says that the Doctor will make him many TARDISes, ordering the Doctor to take him to his home planet or Zoe will be killed.
The Doctor approaches the console and shouts for Jamie and Zoe to cover their eyes. A blinding light cripples the War Lord and his guards, and they run outside to the Time Lords. A force field is placed around the TARDIS, trapping the War Lord and his guards. The Time Lords say a similar force field has been placed around their home planet, cutting it off from the Universe forever, to protect the galaxy from their kind. The War Lord and his guards are to be dematerialised so it will be as if they never existed. The sentence of dematerialisation is carried out, and the War Lord and his guards vanish forever. Jamie thinks this is the end of the ordeal and walks towards the TARDIS, thinking they can all continue their adventures. The Doctor tells him that they will not be allowed to go, and is led away to his own trial, whilst Zoe and Jamie are trapped inside a force field.
At the Doctor's trial, the Time Lords accuse the Doctor of breaking their laws of non-interference. The Doctor admits doing so and is proud of it. He is proud of having fought evil and not merely observed it. He asks for a thought channel to show the Time Lords on a large viewing screen the evil he has fought. He shows the Time Lords the Quarks and the Yeti. They are not impressed, so the Doctor goes on to show them the Ice Warriors, the Cybermen and the Daleks. He ends by saying that he may be guilty of interference, but they themselves are guilty of passivity against such evil. The Time Lords say they need time to think and that the Doctor will be recalled when they have made their decision.

Jamie and Zoe are still calling to be freed from their force field. A Time Lord arrives, drops the force field and tells them he is there to return them home. They beg to see the Doctor, and the Time Lord relents.
The Doctor is playing cards inside a force field. The Time Lord switches it off to allow Jamie and Zoe in and leaves them to say goodbye. Zoe asks what punishment he is likely to get. The Doctor suspects he might just get a boring speech. Jamie and Zoe try to convince the Doctor to escape. He is reluctant but relents. They discover that the force field has been let down. They make their way back to the TARDIS but are intercepted by a group of Time Lords and a force field. The Doctor says there is no escape. He bids goodbye to Jamie and Zoe, and they make their way into another TARDIS, which dematerialises. A Time Lord explains that Jamie and Zoe will each be returned to their own time at the exact moment before they went away with the Doctor, therefore erasing their memories of all but their first adventure with him.

Later in the court, the Doctor watches Zoe as she returns to the Wheel at the exact moment she left, where she meets up with Tanya Lernov. Tanya asks if the Doctor and Jamie have left, and Zoe says she has just seen them off. Everything is fine, except for Zoe having a vague feeling she has forgotten something important, but she then dismisses this as nothing and goes off with Tanya to work on getting the Wheel back to normal.
The Doctor then asks to see Jamie, who wakes up in the Scottish Highlands and immediately is shot at by a Redcoat. Jamie draws his sword, and the Redcoat flees into the glens with Jamie in pursuit. The Doctor chuckles and turns to his people. He asks what fate has in store for him. They have accepted his plea that evil has to be fought and that he has his part to play in that. He asks if he is to go free. The Time Lords says he is to be exiled on the planet Earth in the 20th century — as it is there that he has shown the most affinity. Also, the secret of the TARDIS is to be taken away from him.
The Doctor is appalled by this. He says that he is known on Earth, and it could cause him some difficulties. The Time Lords say they will change his appearance again, noting he has done so before. The Doctor is furious at this, but is placated when he is told that he can choose what his next incarnation looks like. Five sketches of faces appear on the viewing screen, which the Doctor successively adjudges to be too old, too fat, too thin, too young, and "it won't do at all". The Time Lords tell the Doctor the decision of what he will look like will therefore be taken for him. The Doctor wheels around and begins to shout at the Time Lords, but starts to lose function and the ability to talk before he fades and vanishes from the courtroom, reappearing on the viewing screen. He is still protesting against his punishment as he begins to spin away through a dark void to begin his exile on 20th century Earth.
Cast[[edit] | [edit source]]
- Dr. Who - Patrick Troughton
- Jamie - Frazer Hines
- Zoe - Wendy Padbury
- Lady Jennifer - Jane Sherwin
- German Soldier - John Livesey
- Carstairs - David Savile
- Major Barrington - Terence Bayler
- Sergeant Willis - Brian Forster
- General Smythe - Noel Coleman
- Captain Ransom - Hubert Rees
- Sgt. Major Burns - Esmond Webb
- Redcoat - Tony McEwan
- Commandant Gorton - Richard Steele
- Military Chauffeur - Peter Stanton
- Military Policeman - Pat Gorman
- Lieut. Crane - David Valla
- German Soldier - Bernard Davies
- Lieut. Lucke - Gregg Palmer
- von Weich - David Garfield
- War Chief - Edward Brayshaw
- Sgt. Thompson - Bill Hutchinson
- Corporal Riley - Terry Adams
- Leroy - Leslie Schofield
- Scientist - Vernon Dobtcheff
- Harper - Rudolph Walker
- Alien Guard - John Atterbury
- Spencer - Michael Lynch
- Russell - Graham Weston
- Security Chief - James Bree
- Alien Technician - Charles Pemberton
- Moor - David Troughton
- War Lord - Philip Madoc
- Du Pont - Peter Craze
- Arturo Villar - Michael Napier-Brown
- Petrov - Stephen Hubay
- First Time Lord - Bernard Horsfall
- Second Time Lord - Trevor Martin
- Third Time Lord - Clyde Pollitt
- Tanya - Clare Jenkins
Uncredited cast[[edit] | [edit source]]
- German Soldiers - David Billa, Gary Dean, Andrew Andreas, Denis Balcolmbe, Tom O'Leary, Phil Lundgren, Ron Conrad, George Howse, Neville Simons, Louis Berkman, Bob Wilyman, Barry Kennington, Patrick Milner
- British Soldiers in No Man's Land - David Melbourne, Derek Hunt
- British Soldiers in trench - Alistair Meldrum, Allan Travell
- Machine Gunners - Patrick Scott, Eden Fox
- Batman - Ken Frazer
- Guards - Alistair Meldrum, Allan Travell
- Sentries - Patrick Scott, Ken Frazer
- Firing Squad - Eden Fox, Tom O'Leary, George Curtis, Alex Hood, Roy Brent, Keith Ashley
- Sniper - Clive Rogers
- Military Policemen - Douglas Roe, Jack Silk
- Sergeant at Prison - Tom O'Leary
- Prison Sentries - Roy Brent, Alex Hood, James Haswell
- Prison Guards - Bill Hughes, Paul Phillips
- Prisoners - Bill Hughes, Paul Phillips, Alex Hood, James Haswell
- Alien Technicians - Derek Crick, Steve Pokol, Alf Cossir, Lee Fenton, Paul St. Clair, Terry Sartain, Ian Munro, David Billa, Richard King, Derek Calder, Terence Denville, John Spradbury
- Stunt Driver - Reg Dent
- Roman Soldiers - Emmett Hennessy, Roger Howton, Crawford Lyall, Tom Laird, Royston Farrell, Patrick Scott, Ray Carnell, David Billa, Denis Balcombe, Tom O'Leary, Phil Lumgren, Ron Conrad, George Howse, Neville Simons, Louis Berkman, Bob Wilyman, Barry Kennington
- Alien Guards - Bruce Wells, Terry Munro, Bill Richards, Bud Castlenau, Denis Balcombe, Les Conrad, Bill Richards, Martin Lyder, Bill Strange, Raoul Skinner, Ron Conrad
- 1862 Soldier - Leslie Bates
- Foot Soldiers - Johnny Scripps, David Cannon, Patrick Milner, Martin Lyder, John Spradbury, Peter Kaukus, Leslie Bates, Terence Denville
- Confederate Horsemen - Peter Diamond, Reg Dent, Gerry Wain, Arthur Howell
- Americans Soldiers - Bruce Wells, Terry Munro, Bill Richards, Bud Castlenau, Steve Pokol, Alf Cossir, Lee Fenton, Paul St. Clair, Terry Sartain, Ian Munro
- Northern American Soldiers - Les Conrad, Bill Richards
- Confederate Soldiers - Jim Delaney, Leslie Bates, Bryan Nolan
- Austro-Hungarian - Tom O'Leary
- Alien Students - Phil Lundgren, Ron Conrad, George Howse, Neville Simons, Louis Berkman, Bob Wilyman, Barry Kennington
- Resistance Men - Allan Travell, Harry Tierney, David Melbourne, Clive Rodgers, Roger Graham, Cy Wallis, Terry Munro, Bryan Nolan, Barry Kennington, Robin Scott, Patrick Milner, Jim Delaney, Derek Crick, Joe Santo, Steve Emerson, Stan Simmons
- Stuntmen/Alien Guards - Gerry Wain, Del Watson, Peter Diamond
- British Soldiers - Roger Graham, Bob Wilyman, Tony Starr, Derek Calder, Derek Hunt, David Melbourne, Alistair Meldrum, Alex Hood, Roger Charles
- Machine Gunners - Roger Charles, Hein Viljoen
- Voice of Firning Squad Officer - Patrick Troughton
- Mexican Resistance Men - John de Marco, Chris Achilles
- North American Soldier - Jim Delaney
- Roman Officer - Derek Calder
- Crimenan Soldier - Del Watson
- Confederate - Derek Calder
- Time Lord technician - Derek Calder
- Time Lord technician - David Billa
- Redcoat - Denis Balcombe (all DWM 232)
Crew[[edit] | [edit source]]
- Writers - Terrance Dicks and Malcolm Hulke
- Title Music - Ron Grainer and the BBC Radiophonic Workshop
- Incidental Music - Dudley Simpson
- Special Sound by Brian Hodgson, BBC Radiophonic Workshop
- Special Effects - Michaeljohn Harris
- Costumes - Nick Bullen
- Make-up - Sylvia James
- Lighting - Howard King
- Sound - John Staple
- Film Cameraman - Alan Jonas
- Film Editor - Chris Hayden
- Designer - Roger Cheveley
- Producer - Derrick Sherwin
- Director - David Maloney
- Fight Arranger - Peter Diamond
Uncredited crew[[edit] | [edit source]]
- Visual Effects Assistant - Len Hutton (INFO: The War Games)
- Grams Operator - Ron Arnett (INFO: The War Games)
- Vision Mixer -David Langford (INFO: The War Games)
- Film Camera Assistant - John Walker (INFO: The War Games)
- Film Sound Recordist - Bill Meekums (INFO: The War Games)
- Assistant Sound Recordist - Alan Cooper (INFO: The War Games)
- Graphic Designer - Alan Jeapes (INFO: The War Games)
- Effects Assistant - Dave Havard (INFO: The War Games)
- Technical Managers - Fred Wright, Dave Hare (INFO: The War Games)
- Director's Assistant - Carole Bissett (INFO: The War Games)
- Floor Assistant - Don Ross (INFO: The War Games)
Worldbuilding[[edit] | [edit source]]
- The War Lords abducted Marcus Octavius.
The Doctor's items[[edit] | [edit source]]
- The Doctor again uses his recorder as a telescope.
Locations[[edit] | [edit source]]
- The time zones are divided into the following wars or periods in Earth's history: Roman, Greek, Crimean War, First World War, Peninsular War, American Civil War, Mexican Civil War, English Civil War, Thirty-Years War, Boer War, Russo-Japanese War.
Species[[edit] | [edit source]]
- The Doctor recalls that the Quarks were robotic servants of the Dominators who tried to enslave a peace loving race.
- The Doctor is identified as a Time Lord.
- The Doctor notes that various forces have tried to conquer the planet Earth: Robot Yeti controlled by an alien intelligence, the Martian Ice Warriors, and the half-creature half-machine Cybermen.
- The Doctor believes the Daleks to be the worst of the evils he has fought, describing them as "a pitiless race of conquerors exterminating all who came up against them."
Technology[[edit] | [edit source]]
- Via a Thought Channel, the Doctor recalls examples of evils he has fought to justify his interference.
Time machines[[edit] | [edit source]]
- The SIDRAT is provided with dimensional control, which can make change its relative dimensions.
Law[[edit] | [edit source]]
- Due to Smythe simply using hypnosis on the other members of court to force a guilty verdict, rather than giving the Doctor, Jamie, and Zoe a fair trial, the resulting court martial is stated to not follow King's regulations.
Story notes[[edit] | [edit source]]
- The four faces proposed to the Doctor for his change of appearance were drawn by the story's designer Roger Cheveley. The script of the episode confirms, as the episode's dialogue indicates, that five faces are proposed to him. The one deemed "too young" by the Doctor is not shown. None of the faces shown resemble the actual Third Doctor, as Jon Pertwee was not cast in the role until production of this serial had concluded.
- Clips were used in episode ten from The Web of Fear (the TARDIS in space), Fury from the Deep (the TARDIS landing in the sea) and The Wheel in Space (a Wheel exterior).
- The same clips of attacking Roman soldiers were used in different episodes despite being at two different times and with different party members (The Doctor, Zoe, Jamie, Jennifer and Carstairs in episodes two and three, The Doctor, Jamie and Carstairs in episode seven)
- The story title, episode number and writers' name credits for each episode are shown over a stock footage montage of explosions and gunfire.
- The German soldiers in the 1917 War Zone are seen wearing spiked helmets despite such helmets being put out of use in 1916.
- The space/time machines that the War Chief provides for the games are only named SIDRAT once (in episode seven, when it's pronounced "side rat"). The acronym is never explained on-screen, but Malcolm Hulke's novelisation of the story reveals it to stand for Space and Inter-time Directional Robot All-purpose Transporter. SIDRAT is TARDIS spelled backwards.
- Producer Derrick Sherwin's then wife Jane Sherwin appears in the role of Lady Jennifer Buckingham. She was cast at the suggestion of David Maloney.
- Jane Sherwin (Lady Jennifer Buckingham) is credited as "Lady Jennifer Buckingham" for episode one, "Lady Jennifer" for episodes two to four, and "Jennifer" for episode five.
- David Savile (Lieutenant Carstairs) is credited as "Lieutenant Carstairs" for episode one, "Lieut. Carstairs" for episodes two and three, and "Carstairs" for episodes four to nine. He is billed as "Lieutenant Carstairs" in Radio Times for episodes one to three.
- Michael Napier-Brown is credited as "Arturo Villar" for episode eight and "Arture Villar" for episode nine.
- Freddie Wilson (Quark), John Levene (Yeti), Tony Harwood (Ice Warrior), Roy Pearce (Cyberman) and Robert Jewell (Dalek) were uncredited on-screen for their appearances as the various monsters seen on the viewing screen in the courtroom in episode ten, though they were credited in Radio Times.
- The Dalek model is of the type used since TV: The Chase while the Cyberman is from their then recent return in TV: The Invasion.
- The Radio Times programme listing for episode one was accompanied by a black and white head-and-shoulders shot of the Doctor, bearing the title Who on earth, with the accompanying caption, "At 5.15 in the first episode of his new adventure, Dr. Who returns to the twentieth century and this planet." That for episode seven bore another different black and white head-and-shoulders shot of the Doctor, bearing the title Adventures in time, with the accompanying caption, "At 5.15 Dr. Who and his friends face fresh opposition as they continue their journey through the centuries."
- Philip Madoc (War Lord) is credited on-screen for episode ten, but not in Radio Times.
- This was the only TV story to feature Philip Madoc, that wasn't written by Robert Holmes.
- The final episode of this serial was the last to feature scrolling end credits until part four of the Fifth Doctor serial Earthshock. (This would later be seen in the revived series.)
- According to the DVD Production Notes commentary, The War Games was allotted ten episodes when a planned storyline entitled Doctor Who and the Impersonators was rejected as unworkable.
- In the DVD commentary, Terrance Dicks claims that the reason this story came to be written was that, after The Space Pirates, there was supposed to be a four-part story and a six-part story to finish the season but both of these projects "collapsed". So Derrick Sherwin instead decided to close the season with a ten-part story and he asked Dicks to write it. However, Dicks knew he wasn't experienced enough to do it by himself so he asked Malcom Hulke, who was a long time friend and mentor of Dicks, to write it with him.
- Ironically, episode eight, the least-watched Doctor Who episode of all time up until 1989, was also arguably the most important episode in the show's history, as it was the one in which the Doctor is first described as being a fugitive from his people, the Time Lords.
- When aired in the US by PBS, all ten episodes were edited together into a single omnibus-format edition with a running time, commercial-free, of about four hours. However, at least one station (WHRM in Wausaw, WI) aired this story in two parts — the first part lacking closing credits, and the second part lacking opening titles.
- The scene where the Doctor argues with the Time Lords was filmed approximately three weeks after Jon Pertwee had been contracted to take over from Patrick Troughton, but the scene where the Doctor's exile sequence (the ending of episode ten) begins was filmed several weeks earlier when the next actor to play the Doctor was still under negotiation so no complete transformation was seen.
- Episode three features a rare moment of inner dialogue, when the War Chief can be heard thinking, "Time travellers. I wonder..."
- In episode one, the Doctor kisses Zoe. This marks the first time the Doctor kisses a companion, albeit in a platonic manner.
- Tanya Lernov, a character from Zoe's debut story, The Wheel in Space, appears in episode ten's sequence of Zoe's return to the Wheel.
- This is one of the stories chosen to be shown as part of BSB's Doctor Who Weekend in September 1990.
- The German dialogue between Captain von Weich and Lieutenant Lucke in the German dugout in episode three is translated as follows:
- von Weich: "Who are these people? What's going on here?"
- Lucke: "We have here three English civilians, Captain... They told me they come from another time in a spaceship called TARDIS."
- von Weich: "They are English spies. We must detain them. I'll speak with the General about it."
- A Kroton was originally going to be one of the foes the Doctor brings up on the projection screen in the courtroom, and a copyright payment made to Robert Holmes. However, neither of the two Kroton costumes was in usable condition, according to the DVD Production Information subtitles.
- The Doctor's home planet appears for the first time — but it wouldn't be named until Barry Letts pre-empted its on-screen debut in The Time Warrior by revealing the name in the letters column of an issue of TV Comic.
- A real First World War ambulance was used in the location scenes and Jane Sherwin remarked in the DVD commentary that she drove it herself.
- Michaeljohn Harris' name is spelt as Michaeljohn in episode one and Michael John in episode ten.
- The sonic screwdriver is actually used to perform the function of a regular screwdriver in this serial.
- Though the regeneration itself is arguably not shown, this is the longest regeneration story in the series, with a total run time of four hours and ten minutes across ten episodes.
- Of the three Doctor Who stories to extend beyond seven episodes (The Trial of a Time Lord is conventionally split up into four serials), this is the only one that was not directed by Douglas Camfield. Effectively, this is the only 10-part serial in the show's history, and is the only serial that exceeds seven parts during the black and white era to not contain missing episodes.
- One scene called for the regulars to hear an explosion and then dive down. Patrick Troughton wanted to know how big the explosion was and insisted on a demonstration — and a huge boulder landed right where they were to be standing. Troughton then said, "That's why I wanted to see what it was like."
- The First World War battleground was actually a rubbish dump in Brighton that had previously been used for Oh! What a Lovely War
- In addition rain and snow, the World War One set was overrun with rats. This upset Patrick Troughton so much that he threatened to quit on the spot if he saw one more. It was later revealed that it brought back unpleasant memories of his wartime experience where he had rat-shooting duties.
- As scripted, the Doctor was to say that the Time Lords were the rulers of his people. Instead, he simply says that they are his people — giving rise to decades of arguments in fandom about whether all Gallifreyans are Time Lords, or only some.
- Spencer and other, unnamed resistance fighters were intended to die in the alien attack in part five.
- Zoe originally misidentified the meaning of TARDIS as “Time And Relative Dimensional Intergalactic Ship”.
- Von Weich was to have been shot trying to escape at the end of part five.
- Jennifer Buckingham was originally present when Jamie and the others were ambushed. By the time part six was delivered, however, it had already been decided that Jennifer would not be included in the second half of the story.
- In episode seven, Smythe's aide was initially a new character called Sergeant Wilkins; only latterly was the decision made to bring back Sergeant Major Burns from the first instalment.
- The script for part eight implied that the alien race controlling the Zones was collectively called the War Lords — an identification not made in the completed programme — and also included a line of dialogue in which the Doctor asserts that there are multiple time-travelling civilisations
- Episode ten originally included a prominent role for an unseen Time Lord judge, most of whose dialogue was later allocated to the First Time Lord.
- In the original script, the Doctor and Jamie took advantage of a weakening of the barrier near the floor to push Zoe through, enabling her to turn off the field. Malcolm Hulke reinstated this scene for the novelisation.
- Terrance Dicks and Malcolm Hulke had originally conceived the aliens as speaking in a cold “alien voice” when exercising the mind control. It was David Maloney who came up with the hypnotising spectacles.
- Philip Madoc grew a beard to play the War Lord so that viewers wouldn't recognise him from his guest role in The Krotons.
- David Maloney came up with the sequence in which the Doctor sent his plea to the Time Lords in a small box. He also suggested war settings which would be interesting to the viewers based on advice from his young son.
- Since the story was first released on VHS in 1990, additional 16mm film prints were at some point located at the BFI. Although copies of already existing episodes are usually considered redundant (episode three of The Enemy of the World and episode one of The Web of Fear), these prints of The War Games were of significantly higher quality than those that already existed in the BBC Archives. They were used for the story's DVD release in 2009.
- This story was ranked as Doctor Who Magazine readers' favourite Second Doctor story in their 2014 and 2023 polls, replacing the previous title holder, The Evil of the Daleks. (DWM 589)
- Patrick Troughton's son David Troughton appears as Private Moor.
- Malcolm Hulke named the unseen Major Ellis on David Ellis, who he co-wrote The Faceless Ones with.
- Terrance Dicks felt that Edward Brayshaw was "pantomime menace", while Philip Madoc was genuine menace.
- Unusually, episode ten made use of clips from past serials - the TARDIS materialising on the sea was from Fury from the Deep, the TARDIS hanging in space is from The Web of Fear and an establishing shot of Space Station W3 from The Wheel in Space was used when Zoe is sent back to her own time. This tactic later proved to have the unintended benefit of preserving clips from the first episodes of Fury from the Deep and The Wheel in Space, which are both otherwise missing episodes.
Ratings[[edit] | [edit source]]
- Episode one - 5.5 million viewers
- Episode two - 6.3 million viewers
- Episode three - 5.1 million viewers
- Episode four - 5.7 million viewers
- Episode five - 5.1 million viewers
- Episode six - 4.2 million viewers
- Episode seven - 4.9 million viewers
- Episode eight - 3.5 million viewers
- Episode nine - 4.1 million viewers
- Episode ten - 5.0 million viewers
Episode eight has the dubious distinction of being the lowest-rated Doctor Who episode until part one of Battlefield more than 20 years later.
Myths[[edit] | [edit source]]
- Doctor Who was under serious threat of being cancelled at the end of this season. (Although this is Terrance Dicks's recollection, it has been denied by both Peter Bryant and Derrick Sherwin and is not borne out by contemporary evidence, although the viewership numbers were considerably lower than they would be at the time of the original series' cancellation in 1989. The series would, however, face the threat of cancellation at the end of the following season.)
- At his trial, the Doctor is charged with having stolen the TARDIS. (This occurs in this story's novelisation, in the prologue to Doctor Who and the Auton Invasion and in an account in the 1972 book The Making of Doctor Who, but not in the televised version, although the Doctor and the War Chief do discuss the said theft in episode eight.)
- In episode seven, the voice of the officer ordering the Doctor's second firing squad to fire was none other than Patrick Troughton himself. (This is claimed by the DVD release's Production Subtitles, but even a casual listener can hear that this is Esmond Webb as Sergeant Major Burns giving the order.)
- This was the lowest rated story in the show's history until after the 1986 hiatus. (Despite the exceptionally poor ratings for episode eight, the story was never the lowest rated overall. That distinction fell to The Smugglers, which had the lowest average rating of any story prior to The Mysterious Planet. It was, however, the lowest rated of Patrick Troughton's stories.)
- The Doctor and the War Chief have not encountered each other since leaving Gallifrey. (The War Chief specifically states that he knows the Doctor from before.)
- The alien race featured in the story are called the War Lords. (The Aliens are never referred to by this or any other name - apart from 'the Aliens' - on-screen. Although they are identified collectively as 'the War Lords' in the script for episode eight, this name was never used in the finished programme, perhaps to avoid confusion with the character played by Philip Madoc, who first appears in episode seven.)
- Jamie and Zoe's memories are completely wiped of the Doctor. (Only their memories of travelling with the Doctor are erased. They both still remember their first adventure with him, namely The Highlanders and The Wheel in Space. Zoe is even seen, returned to the Wheel, and remarking on how the Doctor and Jamie have just left.)
- The War Chief doesn't have a TARDIS. (While we never actually see it, in episode eight, the War Chief says to the Doctor, "Stealing a TARDIS? Oh, I'm not criticising you. We are two of a kind.")
- The fight between Jamie and a Redcoat at the end of episode ten is a clip taken from The Highlanders, and it is effectively one of few surviving clips from the story. (This brief fight was specifically shot for The War Games, although it has been used in some compilations by Babelcolour to represent the story.)
Filming locations[[edit] | [edit source]]
- Ealing Television Film Studios (Stage 3), Ealing Green, Ealing
- BBC Television Centre (Studio 4), (Studio 8), (Studio 1), (Studio 6)
- Sheepcote Valley, Brighton (1917 zone)
- Birling Farm Manor, Brighton (Military prison, Doctor in front of firing squad)
- Eastbourne Waterboard Road, Brighton (Ambulance runs out petrol)
- The Lane, Brighton (Doctor and Zoe ambush car to visit prison / American Civil War zone)
- Seven Sisters Country Park, Brighton (Roman zone)
- Underhill Lane, Brighton (Ambulance ambush / Jamie arrives back in Scotland)
- High Park Farm, Brighton (Ambulance waits for riders to pass when out of petrol)
- Botony Bay, Kent (reused footage from Fury from the Deep) (TARDIS escapes ocean)
Production errors[[edit] | [edit source]]
- The zone map, first seen in episode three, clearly does not align with the physical layout - according to the map, one would have to pass through both the American Civil War and Crimean War zones to reach the Roman Zone from the First World War zone, but the ambulance travels directly between the First World War and Roman zones in episodes two and seven.
- The Redcoat that Jamie encounters in prison states he comes from 1745, though there is no time zone to take place in that period, at least what is stated on the map of the zones.
- Some of the punches clearly fail to hit the intended person.
- Between the SIDRAT first appearing in the barn and it dematerialising with the Doctor and Zoe inside, the capsule rotates 180 degrees.
- When the Chief Scientist unfolds his processing machine, a piece can be seen breaking off.
- When he first appears, the Chief Scientist has a bald chin, but by episode six, he has inexplicably grown a short beard.
- In episode five, when Zoe is in the interrogation room, her head becomes transparent. The same happened later on with the Security Chief when his stomach is transparent.
- When Smythe is shot dead by Russell in episode seven, the gun is visibly firing into the floor by accident as actor Graham Weston unintentionally stumbles over.
- In episode eight, a resistance soldier killed by the guard exiting a SIDRAT into the chateau can later be seen alive and well in the barn, as a member of the group entering the SIDRAT that the Doctor sends to transport them to the control room. Graham Weston draws attention to this in the DVD commentary.
- In the American barn of episode eight, the alien communicator screen has been installed upside down.
- In episode nine, Patrick Troughton fluffs one of the Doctor's lines, saying "Did you really think I'd take part in your disgusting steam... scheme?"
- In episode ten, when the Doctor points out to the Time Lords the monsters that he has fought and a Dalek is shown, one of the lights on its dome is missing.
- In episode ten, when the TARDIS materialises in space, the shot is clearly taken from The Web of Fear as the Great Intelligence's web appears around it.
- In episode ten, when the TARDIS scanner displays a blank image prior to showing the hallways of Gallifrey, the studio lights are reflected on the screen.
Continuity[[edit] | [edit source]]
- The Doctor is put on trial for his interference in other cultures, as he would be again in his sixth incarnation. (TV: The Trial of a Time Lord)
- Listing the evils he has fought, the Doctor recalls the Quarks, (TV: The Dominators) the Robot Yeti, (TV: The Abominable Snowmen, The Web of Fear) the Ice Warriors, (TV: The Ice Warriors, The Seeds of Death) the Cybermen, (TV: The Tenth Planet et al.) and the Daleks. (TV: The Daleks et al.)
- Both the War Chief and the Time Lord tribunal state the Doctor's appearance has changed. (TV: The Tenth Planet)
- The Doctor's face is seen starting to change here, leading directly into his appearance on Earth with a new face and post-regenerative coma. (TV: Spearhead from Space)
- The War Chief reappears in PROSE: Timewyrm: Exodus.
- In a parallel universe, the Doctor chose one of the faces here suggested to him on this trial and became the President of the Republic of Great Britain. (PROSE: Timewyrm: Revelation)
- Details of the War Chief's past are seen in a flashback in PROSE: Divided Loyalties.
- The Second Doctor meets Lady Jennifer and Lieutenant Carstairs again in the flashback scene in PROSE: Players- this meeting is also briefly depicted in PROSE: World Game- after they have been returned to November 1915, and the Sixth Doctor meets them both again in 1936 in a latter part of Players.
- Outfits worn here by the Time Lords are similar to those worn by the Master as a boy (TV: The Sound of Drums) and other Time Lords. (TV: The Three Doctors) Rassilon once wore a golden variant (TV: The Five Doctors)
- Jamie jokingly suggests opening General Smythe's safe with a tuning fork. (TV: The Space Pirates)
- The Doctor notes that the SIDRATs' remote control and dimensional flexibility halves the lifespan of their time control units. When on his mission to Space Station Camera, he protests most strongly at the teleport control installed in his TARDIS, which includes a Stattenheim remote control. (TV: The Two Doctors)
- The Doctor later receives a hypercube message from another Time Lord. (TV: The Doctor's Wife)
- PROSE: The Eight Doctors takes place during episode nine of this story, with the Eighth Doctor having a brief encounter with a Roman legion and Lieutenant Lucke before being retrieved by one of the Aliens' forces, subsequently meeting his second incarnation just as the War Chief has been forced to declare the War Games over (a moment of temporal stasis as the two incarnations meet prevents anyone else registering that the Eighth Doctor is present).
- PROSE: War Crimes takes place during episode ten of this story.
- In an alternative timeline created by the Master in which the Doctor never left Gallifrey, the War Lords' armies spread across the universe. (AUDIO: The Light at the End)
- Zoe encounters Tanya Lernov when she is returned to the Wheel by the Time Lords. (TV: The Wheel in Space)
- As part of a plan to regenerate himself, the Valeyard later stages a recreation of the Doctor's trial, with the Sixth Doctor's companion Flip Jackson forced to act as Zoe. (AUDIO: Stage Fright)
- By the end of the serial, both Jamie and Zoë have lost their memories of their adventures with the Doctor; the Tenth Doctor will be forced to subject his companion Donna Noble to a similar fate, and the Twelfth Doctor will inflict such an amnesia on himself to erase his memories of his companion Clara Oswald. (TV: Journey's End, Hell Bent)
- Ironically, several of the Doctor's later incarnations would resemble the objections he makes to his possible faces in this story:
- Both Clara Oswald and the Eleventh Doctor would imply the Twelfth was "too old", the former misunderstanding the function of regeneration while the latter bemoaned "going grey". (TV: Deep Breath)
- Melanie Bush believed that the Sixth Doctor was too overweight and once tried to put him on a fitness program. (TV: Terror of the Vervoids)
- The Twelfth Doctor once noted the particularly youthful appearances of his fifth and eleventh incarnations. (PROSE: Silhouette)
- Donna Noble and the Eleventh Doctor would poke fun at how skinny the Tenth Doctor was, the latter labeling it a "special effect". (TV: The Poison Sky, The Day of the Doctor)
Home video and audio releases[[edit] | [edit source]]
DVD release[[edit] | [edit source]]
- A three-disc DVD release occurred in the UK on 6 July 2009. A North American release followed on 3 November 2009.
- Remastering for the DVD release was completed by the Doctor Who Restoration Team.
Special Features[[edit] | [edit source]]
- Commentary by Frazer Hines (Jamie), Wendy Padbury (Zoe), Philip Madoc (The War Lord), Jane Sherwin (Lady Jennifer), Graham Weston (Russell), writer Terrance Dicks and producer Derrick Sherwin
- War Zone: The End of an Era - The making of The War Games
- Shades of Grey - A look back at the black and white era of Doctor Who
- Now and Then - The locations of The War Games, forty years on
- The Doctor's Composer - Dudley Simpson discusses his first five years on Doctor Who
- Sylvia James: In Conversation - Make-up designer Sylvia James talks about her work on Doctor Who
- Talking About Regeneration - The Doctor's many lives discussed
- Time Zones - Historians discuss the reality behind the various conflicts featured in The War Games
- Stripped for Action - A look at the comic strip adventures of the Second Doctor
- On Target - Malcolm Hulke - A profile of the popular Doctor Who author and his novelisations
- Devious - A 12-minute excerpt from the legendary unfinished fan film set between The War Games and Spearhead from Space, and featuring the final performance of Jon Pertwee as the Third Doctor. This is the first fan-made Who spinoff production to be released to DVD by the BBC.
- Photo Gallery
- Coming Soon Trailer - The Black Guardian Trilogy
- PDF Material - Radio Times listings, BBC Enterprises sales brochure and reproduction of the original design plans for the SIDRAT prop
- Production Information Subtitles
- Easter Eggs:
- Location filming audio recording. To access this hidden feature, press left at Subtitles on Disc One's Main Menu to illuminate the Doctor Who logo.
- "The Scottish Falsetto Sock Puppet Theatre Presents The Trial Of Doctor Who". To access this hidden feature, press right at Info Text On on Disc Two's Subtitles menu to reveal a hidden Doctor Who logo.
- Time Lord force field film insert. To access this hidden feature, press left at Subtitles on Disc Three's Main Menu to illuminate the Doctor Who logo.

US DVD Cover
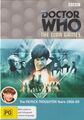
Australian DVD Cover

UK DVD Cover


BritBox streaming availability[[edit] | [edit source]]
This story is available for streaming through BritBox (US) as part of Season 6 of Classic Doctor Who.
VHS releases[[edit] | [edit source]]
- This was released on video in episodic format in 1990.
US VHS cover
Australian VHS Part 1 cover
Australian VHS Part 2 cover

UK VHS Part 1 cover
UK VHS Part 2 cover


- It was also released for the W H Smith exclusive The Time Lord Collection in 2002.

The Time Lord Collection Australian cover
The War Games Australian VHS cover


Audio release[[edit] | [edit source]]
This story was also released on audio formats.
CD release

External links[[edit] | [edit source]]
- The War Games at the BBC's official site
- The War Games at RadioTimes
- The War Games at BroaDWcast
- The War Games at the Doctor Who Reference Guide
- The War Games at Shannon Sullivan's A Brief History of Time (Travel)
- The War Games at The Locations Guide
| ||||||||||||||||||||||||||||||||||||||||||||||||||||||||||||||||||||||||||||||||||||||||||||||||||||||||||||||||||||||||||||||||||||||||||||||||||||||||
| |||||||||||||||||||||||||||||||||||||||||||||||||||||||||||